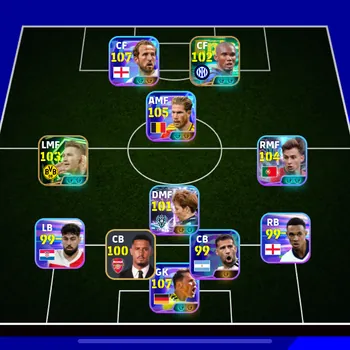
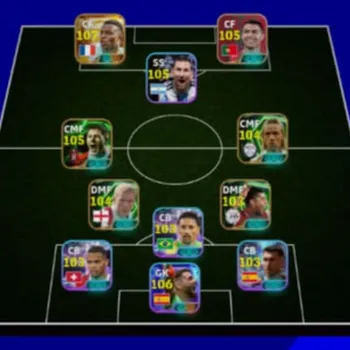
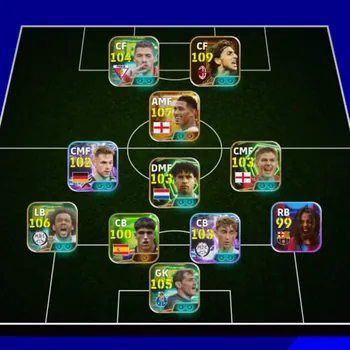
eFootball Team Playstyles Explained: How Each Tactic Works
By John Ganang
A Team Playstyle in eFootball is the tactical identity your manager hands to the entire squad (Possession Game, Quick Counter, Long Ball Counter, Out Wide or Long Ball), and it decides how your ten AI teammates move the moment you win the ball back. Your squad is not what your players can do; it is what your manager tells them to do. Two managers can field the same eleven names and produce two completely different teams, because the playstyle rewires every off-the-ball run on the pitch. This guide walks newcomers through what each playstyle actually changes, and gives returning players the proficiency and squad-building detail that decides whether a tactic works or quietly underperforms. There is a fuller breakdown in EFootball Position Training Explained.
⚽ What is a Team Playstyle in eFootball?
A Team Playstyle is a manager-owned attacking blueprint that controls how your teammates position themselves and run when your side has possession. Every manager card carries exactly one, and swapping managers swaps the blueprint for the whole squad instantly.
The important thing to understand early is that the playstyle lives on the manager, not on the formation and not on your star striker. When you sign a new manager in Dream Team, you are really signing a set of movement rules: which players push forward, how quickly they do it, how far the full-backs advance, and whether the first pass out of defence goes short and sideways or long and vertical. Konami's in-game manager screens list this alongside the formation and the manager's proficiency ratings, which is why experienced players read the playstyle line before they read the manager's name.
Because the playstyle governs teammate behaviour rather than your own controls, it shapes the game you are allowed to play. You can dribble through a defence under any tactic, but you can only pass into a runner if the tactic told someone to run. That single fact explains most of the frustration new players feel when a highly rated squad still looks static in attack.
Sitting on top of all this is Team Playstyle Level, a proficiency value that rises as your squad fills with players whose individual Playing Styles suit the tactic. It feeds into Team Spirit, the number that quietly scales how sharply your side executes, so a lower-rated squad built around one coherent idea often outplays a collection of higher-rated names pulling in different directions.
🎯 How does Possession Game work?
Possession Game asks your team to build patiently through short passes. Midfielders offer close support angles, full-backs step into advanced positions, and the attack develops through overlapping triangles instead of a single vertical ball, so the tempo is deliberate and the shape stays compact.
Under this tactic your teammates rarely sprint into space behind the defensive line. They come towards the ball instead, which means the passing options that appear on screen are almost always safe, sideways or backwards. That is a feature rather than a fault, because possession play is designed to move the opponent's block sideways until a gap opens between their lines. The reward is control of the match clock; the cost is that you must create the killer pass yourself rather than receiving one from a scripted run.
Squad-building follows directly from that. You want midfielders with genuinely high passing and ball control, and Playing Styles that pull play through the centre: an Orchestrator or Build Up player as the deepest passer, a Box-to-Box or Hole Player ahead of him, and a forward comfortable dropping in rather than running away from the ball. A Deep-Lying Forward suits this far better than a pure Goal Poacher, because the poacher spends the whole build-up phase standing offside-adjacent with nobody able to reach him.
The weakness is the mirror image of the strength. Because your full-backs are high and your midfield is narrow, losing the ball in the opposition half leaves a wide, unguarded corridor behind you. Possession sides concede to fast breaks more often than they concede to sustained pressure, which is exactly why the next tactic exists.
⚡ How does Quick Counter work?
Quick Counter flips the priority from control to speed. The instant your team regains the ball, forwards and wide players break upfield in numbers and your midfield looks for the fastest forward pass available, turning a defensive clearance into a shooting chance in a handful of touches.
That urgency is what makes the tactic feel so different to play. Where Possession Game gives you three safe options, Quick Counter gives you one risky option that is already moving away from a defender. You are effectively trading the number of chances for the quality of each one, so a Quick Counter side can dominate a scoreline while holding barely a third of the ball.
Pace is the entry requirement, not a bonus. Speed and Acceleration matter more here than in any other blueprint, because the whole tactic is a race between your runner and the recovering centre-back. Playing Styles that suit it include the Goal Poacher and Dummy Runner up front and the Prolific Winger out wide, all of which are coded to attack the space behind rather than come short. Pair them with a midfielder who can hit a long, accurate first pass, since a brilliant run wastes itself if the ball arrives two seconds late.
Quick Counter also changes how you should defend, because the tactic only pays out if you win the ball in a position worth countering from. Sitting deep and inviting pressure gives your runners more grass to attack, whereas pressing high wins the ball closer to goal but leaves less space for the break. Neither is wrong; they simply produce different kinds of chances, and the choice should match the players you actually own.
🛡️ How does Long Ball Counter differ from Quick Counter?
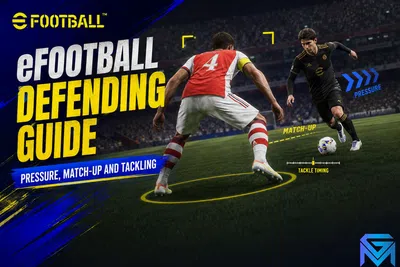
Long Ball Counter shares the counter-attacking intent but skips the build-up entirely. Instead of carrying the ball forward through short vertical passes, your defenders and holding midfielders look immediately for a lofted through-ball to one or two runners, keeping the rest of the side at home. For the detail behind that, see Defending Guide Pressure, Match-Up and Tackling.
That structural difference is the whole point. Quick Counter commits bodies forward, so a failed break leaves you stretched; Long Ball Counter commits two or three players and keeps a settled block behind the ball, which makes it the more conservative of the two despite looking like the more aggressive one on paper. If you lose possession from a long ball you are usually already well organised, because nobody left their post to support it.
The squad requirement shifts backwards. You need a defender or deep midfielder with a genuinely good lofted pass, since the tactic is only as good as the ball that starts it, and you need a striker whose first touch can survive a dropping ball while a centre-back leans on him. Physical Contact and Ball Control on the forward matter almost as much as pace here, because the pass arrives in the air rather than along the ground.
It is also the friendliest counter-attacking option for players on unstable connections or shorter match sessions. Fewer passes means fewer moments where input delay can break the move, so the tactic converts a technical constraint into a tactical identity rather than fighting it. For the detail behind that, see how Chance Deals and Nominating Contracts differ.
🏟️ When should you use Out Wide?
Out Wide pushes the attack towards the touchlines. Wingers hold width instead of drifting inside, full-backs overlap into crossing positions, and the team's default answer to a packed central defence becomes a delivery into the box rather than a pass through the middle.
This is the tactic that best solves a specific problem: opponents who park two banks of four in front of goal. Central play stalls against that shape because there is simply no lane to thread, but the flanks stay comparatively empty, and Out Wide instructs your side to attack the space that is actually available. The trade-off is predictability, since a defender who knows a cross is coming can set his back line accordingly.
Build the squad around delivery and finishing rather than dribbling. A Cross Specialist or Roaming Flank on the wing supplies the ball, an Offensive Full-back or Full-back Finisher gives you the overlap, and the box needs someone who genuinely wins headers: a Target Man for aerial duels, or a Fox in the Box for the loose ball that drops after the first contact. Two attackers in the area beats one, because crosses are a volume mechanic and a single striker is easy to mark out of the game.
Out Wide struggles most against tall, physical centre-backs, and it struggles quietly rather than obviously. You will still create chances and still see promising crosses, but the conversion rate sits far below what the chance count suggests, so judge this tactic by goals scored rather than by how busy the final third looks.
🥅 Is Long Ball still worth running?
Long Ball remains viable, but only for squads built deliberately around it. The tactic sends direct, high passes towards a target forward whose job is to hold the ball up, bring runners into play, and win the second contact rather than sprint into open space.
It is the least fashionable blueprint and the most misunderstood. Played badly it is simply hoofing the ball away, because a lone striker with average physicality loses every duel and possession changes hands within seconds. Played properly it is a legitimate route to goal, since the target forward acts as a wall pass under pressure and the knock-down creates a shooting chance for the runner arriving behind him.
The non-negotiable piece is the forward himself. High Physical Contact, Heading and Ball Control on a Target Man are what convert the tactic from desperation into structure, and a second attacker positioned close enough to collect the knock-down is what turns held-up possession into an actual attempt. Without both, Long Ball gives away the ball on repeat.
Where it genuinely shines is against high defensive lines. Teams that press aggressively leave their centre-backs isolated in one-on-one aerial duels, and a good target forward turns each of those duels into a fifty-fifty in your favour, which is a far better return than trying to pass through the press that beat you in the first place.
🔗 How do Playing Styles raise your Team Playstyle level?
Every player card carries an individual Playing Style, and when that style suits the manager's Team Playstyle, the squad's proficiency in that tactic rises. Higher proficiency feeds Team Spirit, which sharpens how reliably your side executes the movement the tactic is asking for.
This is the mechanic that separates a squad that looks good on the ratings screen from a squad that plays well. Team Spirit is built from several ingredients, including how long players have been together and how well each one fits his assigned position, but Playing Style alignment is the ingredient you control most directly through signings. Because it compounds across eleven slots, replacing three mismatched players with three matched ones often produces a bigger jump than signing one expensive card. Our guide breaks down how ratings, playing styles and skills are read.
The practical rule is to sign for the tactic, not for the name. A ninety-rated Goal Poacher in a Possession Game side spends the match standing still, whereas a substantially cheaper Deep-Lying Forward touches the ball constantly and drags a centre-back out of shape doing it. Position familiarity works the same way: a winger played at full-back keeps his card rating but loses the sharpness that made him worth signing.
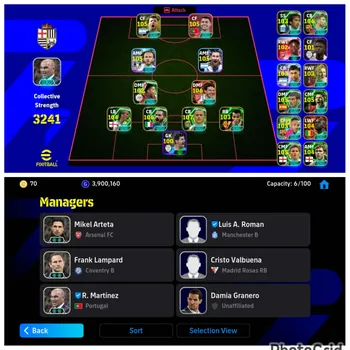
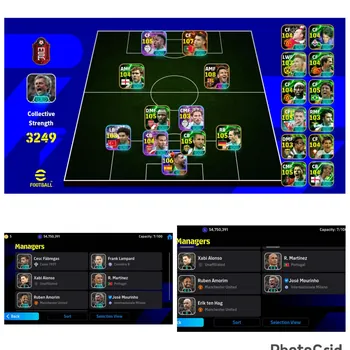
Managers also carry their own proficiency ratings for the tactics and formations they run, so the cleanest way to raise your ceiling is to align three layers at once: a manager who is strong in the playstyle, a formation he is comfortable with, and players whose styles match the roles that formation creates. Get those three pointing the same direction and the squad starts executing the runs you were previously trying to force by hand.
🧩 How do formation and Team Instructions change your playstyle?
Formation sets where players start, the Team Playstyle sets how they move in attack, and Team Instructions layer situational behaviour on top. They are three separate controls, and a tactic only clicks when all three describe the same idea rather than arguing with each other.
Formation is the part most players over-value. Shifting between a 4-2-1-3 and a 4-3-3 changes the starting geometry, but it does not change whether your forwards run in behind, because that instruction comes from the playstyle. What formation genuinely decides is how many bodies arrive in each zone, so it matters most when it either supports the tactic (two wide attackers under Out Wide) or starves it (a lone striker under Long Ball).
Team Instructions sit closer to the moment-to-moment game. Options such as Frontline Pressure and a Deep Defensive Line change where you try to win the ball, which in turn changes what your attacking tactic has to work with. Frontline Pressure suits Possession Game because winning the ball high keeps your already-advanced full-backs relevant, whereas a Deep Defensive Line suits both counter tactics because it manufactures the empty grass they need.
Advanced Instructions are the final, situational layer, firing only in specific phases rather than shaping the whole match. Treat them as adjustments once the core three are settled, since adding aggressive instructions to a tactic your squad is not built for tends to amplify the mismatch instead of fixing it.
🧠 Which Team Playstyle should you run?
Pick the playstyle your current squad already suits, not the one that theoretically ranks highest. The best tactic in eFootball is the one your existing Playing Styles support, because proficiency and Team Spirit reward commitment far more than they reward chasing whichever blueprint looks strongest this season. Tactical metas shift with each eFootball version update too, not just week to week — GameMarket's eFootball seasons explained guide covers what actually changes at each version boundary.
- ✅ Run Possession Game if your best cards are central midfielders with high passing, you enjoy controlling tempo, and you are comfortable creating the final pass yourself.
- ✅ Run Quick Counter if your forwards are genuinely fast, you defend patiently, and you would rather have four excellent chances than fifteen half-chances.
- ✅ Run Long Ball Counter if you want counter-attacking output without the defensive exposure, and you own a defender or holding midfielder with a strong lofted pass.
- ✅ Run Out Wide if you keep meeting deep, compact defences and you have both a real crosser and a real aerial threat in the box.
- ✅ Run Long Ball if you own a physically dominant target forward, a runner to feed off him, and you regularly face high defensive lines.
- 🟡 Wait before switching if you have only just built proficiency in your current tactic, because a mid-season change resets the squad coherence you spent weeks accumulating.
The mistakes that cost the most are all versions of the same error: treating the tactic as cosmetic. Changing managers every few days keeps Team Playstyle Level permanently low, signing high-rated players whose styles contradict the blueprint fills the pitch with passengers, and copying a tournament squad without copying its manager gives you the names without the movement that made them work. Commit to one identity, sign into it deliberately, and let proficiency do the rest.
❓ eFootball Team Playstyle FAQ
Can I change my Team Playstyle without changing managers? No. The playstyle is attached to the manager card, so switching tactics means fielding a different manager. You can adjust formation and instructions freely, but the underlying attacking blueprint travels with the manager.
Does a higher-rated manager always mean a better tactic? Not necessarily. A manager's usefulness depends on whether his playstyle and formation suit the players you already own, so a lower-rated manager whose blueprint matches your squad usually produces better results than a higher-rated one who does not.
Do Playing Styles matter for defenders too? Yes. Styles such as Offensive Full-back, Defensive Full-back and Build Up change how your back line behaves in possession, which directly affects whether tactics like Possession Game or Long Ball Counter can start at all.
How long does it take to build proficiency in a new tactic? It builds gradually as matched players accumulate time together in the same setup, so treat a tactical switch as a multi-week project rather than a single-match experiment.
If you would rather spend your sessions on the tactical side than on grinding division points to test a new blueprint, the eFootball boosting listings on GameMarket.gg cover ranked climbing and progression work handled by experienced players, and the eFootball hourly service options are there when you only need a set block of playtime rather than a full package.
GameMarket.gg is a trusted digital marketplace for everything gaming-related. We serve the gaming community by providing secure access that enhances every gaming journey.