
News
Honkai Star Rail
HSR 4.5 Preview — Robin & Aventurine Summer SP Variants Coming Aug 25
The HSR 4.5 preview every Trailblazer is circling arrives with a summer coat of paint over a genuinely serious...
Mobile Legends: Bang Bang
MLBB x Jujutsu Kaisen Resale: Coming August 2026
One of Mobile Legends: Bang Bang's most in-demand crossovers looks set to return. Community dataminers have spotted...
Genshin Impact
Genshin 7.0 Reruns — Arlecchino, Flins & Ineffa: Who to Pull (Aug 12)
The Genshin Impact 7.0 rerun banners are the quiet decision hiding behind Odette when Snezhnaya opens on August 12,...
Umamusume: Pretty Derby
Umamusume Wings of Iron — Narita Taishin & Winning Ticket Guide
The Umamusume: Pretty Derby "Wings of Iron: Hazy Tales" story event is live now, running from July 26 to August 8,...
Arknights: Endfield
Arknights: Endfield Echoes of War Guide: Best Team Comps
Conquer Arknights: Endfield's Echoes of War mode with the ultimate "Lightning Wheelchair" team comp! Learn how Zhuang...
Mobile Legends: Bang Bang
From Single Pick-Off to AoE Flying Nightmare: MLBB Kaja Revamp
The Nazar King takes flight! Discover everything about the MLBB Kaja revamp arriving August 5, 2026. Explore his new...

Black Desert Online
BDO Agent Class: Release Date, Skills, and Everything We Know
Black Desert Online's newest class has arrived. Revealed at the 2026 Heidel Ball, the Agent is a revolver-wielding...
Mobile Legends: Bang Bang
MLBB August Exquisite Collection: Balmond Vulcan Lionheart
MLBB August Exquisite Collection: Balmond Vulcan Lionheart Mobile Legends: Bang Bang is opening August with a new...
Honkai Star Rail
Honkai: Star Rail Meta Comparison: Elation vs Remembrance Guide
Compare the Elation and Remembrance archetypes in Honkai: Star Rail Patch 4.4! Uncover endgame performance across...
Honor of Kings
Supernatural Clash: Honor of Kings x Dandadan Release Guide
Unleash occult power on the Gorge! The Honor of Kings x Dandadan crossover brings Okarun, Momo Ayase, and Jiji skins,...
Goddess of Victory: Nikke
Goddess of Victory NIKKE Maxwell Ordinary Mechanic Build Guide
Master Missilis' lead engineer! Goddess of Victory NIKKE introduces SSR Wind Burst II Supporter Maxwell: Ordinary...
Genshin Impact
Genshin Odette Pull or Save? First Snezhnaya Cryo 7.0 Analysis
The Genshin Impact Odette banner headlines Version 7.0 when Snezhnaya opens on August 12, 2026, and the honest way to...
Zenless Zone Zero
ZZZ Aria Build: Best W-Engines, Drive Discs, and Teams
Aria is back. The S-Rank idol carry returns on her Neon Angel rerun banner for Zenless Zone Zero's second anniversary,...

Roblox
Roblox Egg Hunt 2026: The Grand Eggspress Worlds & Rewards Guide
Roblox Egg Hunt 2026: The Grand Eggspress goes live today, July 29, 2026, and it is not the kind of limited item drop...
Mobile Legends: Bang Bang
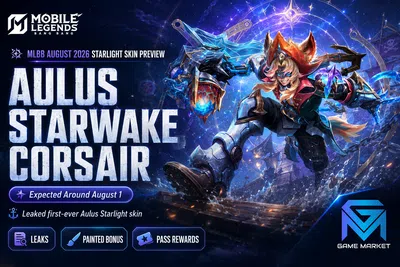
MLBB Aulus Starwake Corsair: August 2026 Starlight Skin Preview
Aulus is reportedly the hero headlining Mobile Legends: Bang Bang's August 2026 Starlight Pass, and the leaked skin — a...
Showing 1 of 15 from 910 Results