Blood Strike Strikers Explained: Abilities, Roles & How to Unlock
By John Ganang 25 August 2026, 06:00 WIB
A Striker is the playable operator you pick before a Blood Strike match, and each one carries an active skill you trigger and a passive that runs on its own. Your gun decides how fights end; your Striker decides which fights you get to start. To see which Strikers are actually worth picking in the current balance patch, check the Blood Strike tier list.
That distinction is the whole reason the Striker menu matters. Two players can hold the same rifle with the same attachments and still play completely different games, because one of them can see a wounded enemy through a wall and the other cannot. Gearing that rifle is its own progression system — our weapon mastery guide covers how attachments and camos unlock level by level. Blood Strike is a fast battle royale where information and repositioning usually decide the round before anyone lands a burst, and Strikers are the system that hands out both. This guide covers what the abilities actually do, how the roster splits into roles, which operators are free and which sit behind an unlock, and what changes when a Striker hits Level 3 and Level 5.
What are Strikers in Blood Strike?
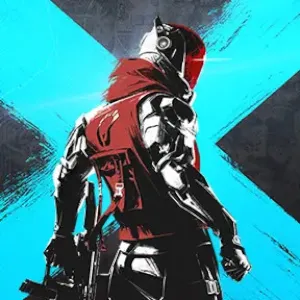
Strikers are the game's operator characters. You equip exactly one per match, and it brings two abilities with it: an active skill on a cooldown that you fire manually, and a passive that applies for the whole match without any input. Weapons stay fully interchangeable, so the Striker is the only permanent variable in your loadout.
Because the passive is always live, it shapes far more of a match than the active does. Val's Ferret quietly marks a downed player's squadmate on the minimap every time you knock someone, which means you are constantly gathering follow-up information without ever pressing the skill button. Spike's Charm hides him from UAVs, satellites and other radar scans permanently. The active skill is the moment you spend; the passive is the rate you earn at.
The roster has grown steadily since the global launch, and NetEase keeps adding operators through seasonal updates, so any fixed count is a snapshot rather than a fact. What has stayed stable is the structure: one active, one passive, one Striker per loadout, and a skill that gets stronger as that specific Striker levels up. Learn the structure and a new release is just a new set of numbers to slot into it.
How do Striker abilities actually work in a match?
Actives run on cooldowns and, in most cases, place something into the world rather than buffing you directly. Walls, turrets, scanners, gas clouds and barriers all persist for a stated duration, so the skill is really a timer you drop on the map and then fight around.
Reading the numbers makes the difference obvious. Ethan's Protection Matrix creates a one-way bulletproof barrier with 400 HP that lasts 30 seconds, but it does not stop throwables and its generator can be shot out, so it buys a window rather than a safe room. Ran's Ice Barrier is a 1000 HP wall for 25 seconds and is genuinely impenetrable, which makes it a revive tool rather than a peeking tool. Both are "a wall", and they solve opposite problems, because one is meant to be shot through and the other is meant to stop the fight entirely.
Damage actives follow the same logic. Jet's Missile Bombardment calls in seven missiles at 150 damage each, with the first three landing accurately and the rest scattering across a 25-metre radius, so it is an area-denial tool for a rooftop or a revive attempt rather than a reliable kill. Nova's Toxic Grenade ticks 20 damage a second for 12 seconds inside a 7-metre radius while blocking vision, which does the same job with pressure instead of burst. Neither is designed to finish a healthy player, and treating them as finishers is the most common way new players waste a cooldown.
A few actives spend a resource instead of, or alongside, a cooldown. Spike's Assassination State drains energy the whole time it is running, and drains it faster the more you move, so sprinting through stealth burns the ability in seconds while a slow crouch-walk stretches it across a whole rotation. Zero's Shadowstrike charges in three stages of 1.2, 1.8 and 2.4 seconds, moving at 8, 16 and 30 metres per second respectively, which means the full-charge dash is roughly four times the distance of the quick one for double the wind-up.
What are the main Striker roles, and what do they do?
The roster splits into four practical roles: attackers who create damage or force movement, assassins who reposition unseen, supports who heal, shield or protect, and vision Strikers who generate information. Blood Strike does not lock you into a role, but each Striker is clearly built for one job.
Attackers cover Jet, Blast, Nova, Hank and Volt. Blast's Drill Bomb punches through walls under 5.5 metres thick and detonates a Graffiti Bomb for up to 125 damage inside 8 metres, which turns a building campers think is cover into a liability. Hank's Defensive Turret has 100 HP and deals 15 damage a second inside 20 metres, so its real value is that it forces enemies to look at it while you shoot them. Volt's Electromagnetic Pulse strips 40 armour damage and blocks enemy skills and nametags for six seconds, which is closer to a shutdown than a damage tool.
Assassins are Spike and Zero, and both trade safety for angle control. Spike gets into a compound; Zero gets across open ground. Zero's Sword Master passive lets a katana deflect incoming bullets, though not shots aimed at his legs, and turns every third attack into a wide knock-back strike. That is an unusual amount of melee identity for a shooter, and it only pays off at ranges most players never fight at. For the detail behind that, see Lucky Draw Explained Crates, Odds & Duplicates.
Supports are E.M.T, Ran and Nacho. E.M.T's Healing Beacon restores 10 HP a second to teammates inside 5 metres for 20 seconds, and the Virtuoso Medic passive speeds up teammate revives by 75%, which is the single most valuable passive in squad play because a revive is worth more than any burst of healing. Nacho sits between support and control: Hellfire raises a 30-metre-long, 4-metre-high wall that blocks vision for 20 seconds and blinds anyone walking through it for 1.5 seconds, so it is used to cut a fight in half rather than to heal anyone.
Vision belongs to Val and Kraken, and they approach it from opposite ends. Val's Satellite Scan pings enemies within 150 metres every 6 seconds for 20 seconds, giving your squad information. Kraken's Vortex removes information from the enemy, conjuring crows that obstruct vision out to 33 metres while one crow auto-tracks a target inside 8 metres. Nacho's The Penitent Eyes passive is a third flavour again, detecting any enemy within 66 metres who has dropped below 40% HP, which is how you find the survivors of a fight two squads away.
Which Strikers are free, and which have to be unlocked?
Blood Strike gives you a starting group for free, gates one behind account progression, sells several for either of two currencies, and reserves the rest for Strike Pass seasons. That last category is the one that permanently divides accounts, because a seasonal Striker cannot be bought back once the season ends.
The free group covers Kraken, E.M.T, Val, Jet and Ethan, which is deliberately one operator per role so a new player can try each style without spending anything. Hank unlocks at Character Level 4, early enough that most players get him during their first evening. Blast, Spike, Nova, Nacho and Zero are each purchasable for 8,000 Reputation or 800 Gold as of this writing, and the two-currency structure is the important part: Reputation accumulates from playing, so every purchasable Striker on that list is reachable without spending, just slowly.
Strike Pass Strikers work differently. Volt arrived at level 20 of the Season 3 Strike Pass, and Ran came with the Strike Pass: The Tao of Forest. Once a season closes, that route closes with it. NetEase has brought seasonal content back through reruns before, so nothing is guaranteed to be gone permanently, but nothing is guaranteed to return either, which is exactly why long-running accounts carry rosters that newer ones cannot rebuild. The same logic drives the collab Striker skins you see listed on established accounts, and it is worth reading our Blood Strike rare skin and collab rarity guide if you want the detail on how those limited releases work.
What changes when a Striker reaches Level 3 and Level 5?
Every Striker has two fixed skill upgrades, one at Level 3 and one at Level 5, and they apply only to that Striker. Levelling Val does nothing for Kraken. The Level 3 upgrade is usually a numbers increase; the Level 5 upgrade usually adds a new behaviour the ability did not have at all.
That pattern is consistent enough to plan around. Nacho's Hellfire gains 10 seconds of duration at Level 3, then starts slowing anyone who walks through the wall at Level 5, which converts a vision blocker into a soft trap. Hank's turret gains 5 damage at Level 3, then upgrades into a machine gun turret at Level 5 with more damage and 33% faster attack speed. Kraken adds 50% obstruction duration at Level 3, then gains two extra auto-tracking crows and a tracking range extended to 25 metres at Level 5.
A few Level 5 upgrades change the role outright rather than sharpening it. Spike's Level 5 adds Invisibility Camo on top of Assassination State, with concealment that improves the slower he moves, so a Level 5 Spike is doing something a Level 1 Spike simply cannot. Ran's Level 5 grants 25 extra armour to anyone standing within 5 metres of her Ice Wall, which turns a defensive object into a team buff. E.M.T's Level 5 adds 5 armour recovery per second through the drone, on top of the 5 extra HP per second from Level 3.
The practical takeaway is that Striker level, not Striker count, is what separates a deep account from a wide one. Five operators at Level 5 will out-perform fifteen at Level 1 in almost every scenario, because you are always playing exactly one of them. If you are weighing up how account depth is normally described, our breakdown of Blood Strike account tiers from starter to high-end covers where levelled rosters usually sit.
How do you choose the right Striker for the mode you play?
Match the Striker to how the mode ends, not to how it starts. Battle royale rewards information and repositioning because most of the match is spent avoiding fights, while respawn modes reward abilities that recharge into repeated engagements over the same small area.
In battle royale that pushes you toward Val, Kraken, Spike or E.M.T. Knowing where the next squad is prevents more damage than any wall absorbs, and Virtuoso Medic's 75% faster revives matter enormously in a format where a downed teammate is usually the moment a squad loses the round. Spike earns his place differently, because the ability to enter a held building without a sound converts a losing third-party position into a winning one.
Modes with respawns and a fixed objective invert the priority. Here Hank's turret, Nacho's firewall, Ethan's barrier and Volt's pulse all get to work repeatedly against the same choke point, and cooldown reduction becomes the strongest stat in the game. Kraken's Scythe passive is built exactly for this: kills and assists permanently cut his skill cooldown by 5% up to a 50% cap, and in squad fights and Hot Zone matches every four kills grants an extra skill charge. A Striker whose value compounds across a long match is a different proposition from one that gets two good uses.
Squad composition matters more than individual strength once you play with a regular team. Two vision Strikers overlap and waste a slot, whereas a vision Striker plus a support plus an attacker covers finding the fight, surviving it and closing it. Where personal skill points you in a direction, follow it, because a comfortable Striker you understand beats a theoretically better one you forget to use.
Do Striker skins or collab versions change how a Striker plays?
No. Striker skins, including collaboration versions, are cosmetic. A collab Ethan has exactly the same 400 HP one-way barrier and the same movement passive as the default Ethan, so nothing about the skin affects the outcome of a fight.
What they do change is availability. Collaboration Strikers and skins run for a limited window tied to the crossover event, and while some cosmetics have returned through reruns, there is no guarantee any particular one will. That scarcity is why account listings so often lead with collab Striker names rather than rank or level, and it is a cosmetic claim rather than a performance one. Read those listings accordingly: a rare skin says something about when an account was played, not about what it can do in a match.
One genuine caveat is visual clarity. Some skins read differently at distance or against certain map backgrounds, and a handful of players deliberately prefer default models for that reason. It is a small effect and it cuts both ways, but it is the only mechanical argument that exists around Striker cosmetics.
Which Strikers should a new player build around first?
Start with two: one vision Striker and one support, both taken to Level 5 before you unlock anything else. Val and E.M.T are the natural pair because both are free, both are useful in every mode, and neither depends on precise aim to deliver value.
Val teaches map reading. Running a scan every cooldown and rotating on what it shows builds the habit that separates mid-tier players from good ones, and the Level 3 and Level 5 upgrades that add 50 metres of range and 12 seconds of duration make that habit cheaper to maintain. E.M.T teaches the other half, which is that most rounds are lost at the revive rather than in the gunfight, and a 75% revive speed increase is the most direct fix available to a new player.
After those two, spend Reputation rather than Gold. Blast, Spike, Nova, Nacho and Zero all cost 8,000 Reputation or 800 Gold, and since Reputation only comes from playing, using it on a Striker you already want costs you nothing but time. Save Gold for the Strike Pass instead, because that is the only route to seasonal Strikers and it closes permanently when the season does. If you want the wider progression picture first, our Blood Strike beginner's guide to ranks, Strikers and Strike Gold sets out how the currencies fit together.
Numbers in this guide reflect NetEase's in-game Striker menu and skill descriptions along with the official Blood Strike version update announcements, and NetEase adjusts ability values between seasons, so treat specific figures as a snapshot and check the in-game description before committing Reputation to an unlock.
If you would rather start from a roster that already has the seasonal Strikers and levelled skills on it, browse the current Blood Strike accounts available on GameMarket.gg, where listings are grouped by starter, mid-tier and high-end so you can see what a given roster depth looks like. You can also check the wider Blood Strike marketplace hub for everything listed for the game, or the Blood Strike top up options if you only need Gold for the current Strike Pass.
GameMarket.gg is a trusted digital marketplace for everything gaming-related. We serve the gaming community by providing secure access that enhances every gaming journey.