7DS Grand Cross Draw Guide: Banners, Pity Bars & Hero Coins
By John Ganang 26 August 2026, 08:00 WIB
In The Seven Deadly Sins: Grand Cross, a draw costs Diamonds, but the thing you are actually buying is progress on a pity bar. Every banner fills that bar by the Diamonds you spend on it, and the milestones along the way — not the featured hero's raw rate — are what decide whether a rotation ends well. For the detail behind that, see How to Check Equipment Grade, Stats and Sets in 7DS Grand Cross.
That single idea reframes the whole system. Most players read the rate screen, see a small percentage next to the hero they want, and conclude that drawing is pure luck. It is not, because Grand Cross pays out guaranteed rewards at fixed spending checkpoints, and it converts every duplicate you pull into a currency that buys heroes outright. Understanding both mechanics turns an unpredictable gamble into a budget you can plan around, which is exactly what this guide is for. The rates matter least; the bar, the banner type, and the coins matter most.
What is a draw in Grand Cross, and what does one cost?
A draw is a single summon from a banner that pulls one hero from that banner's pool. The standard unit of spending is the multi, which gives 10 draws plus 1 bonus draw for 30 Diamonds. Singles exist, but they cost proportionally more per hero, so multis are the sensible unit.
Thinking in multis rather than Diamonds makes every other number in the game readable. A 30-Diamond multi is one "tick" of a rotation, so a stockpile of 300 Diamonds is ten ticks, and 900 Diamonds is thirty. Once you internalise that conversion you can look at any banner's pity milestones and immediately know how many multis stand between you and the guaranteed reward, which is the only calculation that reliably predicts how a rotation will end.
Diamonds are not the only key into the draw screen. The game hands out a free draw each day in exchange for watching a single advertisement, and it grants a guaranteed SSR hero during the tutorial so that no account starts empty. Banner-specific draw tickets also circulate through events and missions, and because those tickets are tied to one banner they behave like pre-committed Diamonds: they advance that banner's pity bar without touching your savings. There are also Race Draw tickets sold cheaply in the Silver Coin Shop, but the community consensus, reflected in the Grand Cross community wiki, is that their odds of producing the SSR you actually want are low enough that the coins are better spent elsewhere.
None of that spending means much until you know where it lands, and it lands on the pity bar.
How does the pity bar work on a Grand Cross banner?
Every featured banner carries its own pity bar that fills by the number of Diamonds you spend on that specific banner, not by the number of draws you make. When the bar crosses a milestone, the banner pays out a guaranteed reward: usually a random SSR, sometimes the featured unit, and on some banners a hero of your choosing.
The distinction between Diamonds spent and draws made is the part players most often get wrong, and it matters because it removes the ambiguity from ticket rewards and discounted steps. A step priced at 1 Diamond advances the bar by 1, not by a full multi's worth, so a cheap step is a cheap draw rather than a cheap milestone. Free tickets behave the same way. If you are chasing a milestone, only Diamonds move you toward it at the posted rate.
Because the bar is per-banner, it also resets when the banner ends. Diamonds poured into a banner you abandon halfway do not carry over to the next one, so a half-finished rotation is genuinely wasted progress rather than a deposit toward a future hero. That is why experienced players decide their milestone target before the first multi rather than pulling until the Diamonds run out.
Milestone positions differ by banner type, which is where the banner categories stop being cosmetic labels and start being budget decisions.
What banner types does Grand Cross run?
Grand Cross runs five recognisable banner families: Regular banners (including Ragnarok units), Festival banners, Step-up banners, the Starter Rush banner for new and returning accounts, and time-limited Collaboration banners. Each has its own pity ceiling, its own milestone spacing, and its own reason to exist.
Regular banners are the default rotation. They can feature a seasonal unit, an ordinary roster addition, or a Ragnarok hero, and their pity bar caps at 600 Diamonds with a milestone at 300 that typically awards a random SSR. Twenty multis empties the bar; ten reaches the checkpoint. Ragnarok banners sit inside this family but punch above it, because Ragnarok units are built for endgame content and PvP and therefore hold value long after the banner rotates out.
Festival banners raise the ceiling to 900 Diamonds and place two milestones along the way, at 300 and at 600, each awarding a random SSR. The higher cap looks worse at a glance, yet the doubled checkpoints mean a Festival rotation returns guaranteed heroes twice before it runs dry. Festival units such as Traitor Meliodas and Light "The One" Ultimate Escanor are also designed as long-horizon investments: they perform across PvP, Demonic Beast battles, and general PvE rather than solving one narrow problem, so they stay in teams for years. That combination of two guaranteed payouts and durable units is why the standard advice is to hold Diamonds through Regular banners and commit them to Festivals.
Ragnarok and Festival units share a practical trait worth naming: both are usually strong enough that the milestone SSR you pick up along the way is rarely a wasted slot, because even an off-target SSR feeds the coin economy discussed further down.
Two banner families break the standard maths entirely, and both reward players who recognise them on sight.
How do Step-up and Starter Rush banners change the maths?
Step-up banners let you secure the featured unit for roughly 240 Diamonds by working through a fixed sequence of steps, and one or two of those steps are usually priced at 1 Diamond instead of the usual 30. Starter Rush gives new and returning accounts a free multi every day for fifteen days plus a guaranteed choice of units. For the detail behind that, see how event currency and exchange shops actually pay out.
Step-up banners are uncommon, but when one appears the discounted steps are the best-value draws in the game by a wide margin. Pulling the two cheap steps costs 31 Diamonds and yields two multis' worth of heroes, which is roughly half price. Even a player with no interest in the featured unit should take those steps, because the heroes and coins that fall out of them cost almost nothing. Whether to complete the full 240-Diamond ladder is a separate question and depends entirely on whether the featured hero fills a real gap in your roster.
Starter Rush is the single largest free draw allocation in the game, and it is deliberately front-loaded. Fifteen daily multis cost nothing, the banner lets you select two units outright, and performing five multis unlocks a choice between two Festival units. For a fresh account that is a Festival-tier hero without a Diamond spent, which is why abandoning an account before finishing Starter Rush throws away more value than most players realise. It is also why account listings frequently mention whether Starter Rush was completed.
Whatever banner produced them, the heroes you draw will eventually start repeating, and Grand Cross has an unusually generous answer for that.
What happens to duplicate heroes you draw?
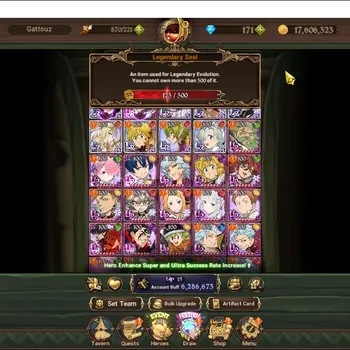
Duplicates are never wasted. Pulling a hero you already own raises that hero's Ultimate Move level toward its 6/6 maximum, and once you have unlocked a hero, further copies also generate hero-specific Coins that can be spent in the Coin Shop on heroes you never drew at all.
Ultimate Move level is the reason duplicates are worth chasing rather than tolerating. The difference between a 1/6 and a 6/6 unit is substantial enough that the community rule of thumb is unambiguous: one hero at 6/6 beats two heroes at 1/6, because Grand Cross rewards depth on a few units far more than breadth across many. Collaboration heroes make this especially sharp, since several of them need a high Ultimate Move level before their kit performs as advertised, which in practice means multiple rotations on a two-week banner. We cover 7DS Grand Cross Diamond Spending Priority separately.
Coins are the second half of the payout, and they are tiered by the rarity and category of the hero that produced them. Ordinary duplicates feed the Silver, Gold, and Platinum Coin Shops; Festival units produce Festival Coins; collaboration units produce Collab Coins. Because Festival and Collab coins come only from banners that run occasionally, they accumulate far more slowly than regular SSR coins, which is what makes them worth spending carefully.
Having the coins is straightforward. Knowing which shop to burn them in is where accounts diverge.
How should you spend the coins duplicates leave behind?
Spend Gold Coins on Super Awakening first, because that is where they convert into account strength at the best ratio. Buy heroes from the Coin Shop only when the Event Shop's weekly limited-time sale discounts them, and never spend a hero's coins while that hero is still below 6/6.
The 6/6 rule deserves the emphasis it gets. When you open a hero's entry in the Coin Shop the game shows you which of your units are already maxed, and spending coins generated by a unit you have not finished means trading away the cheapest possible path to that unit's full Ultimate Move level. The coins are not lost, but the opportunity is, so treating 6/6 as the unlock condition for spending keeps your strongest units strongest. Our guide breaks down where diamonds come from and what they are worth spending on.
The Event Coin Shop is where the actual bargains live. Its limited-time sale section rotates weekly and repeatedly discounts genuinely useful heroes — members of the Seven Deadly Sins have appeared for around five SSR coins and Ten Commandments members for around seven, against much steeper standing prices elsewhere. During a Festival the same shop stocks Festival units for Festival Coins, and during a collaboration it stocks that collaboration's units for Collab Coins, which is often the only realistic route to a collab hero you missed on the banner itself.
By contrast the Platinum Coin Shop is generally poor value, because its exchange ratios are high and its roster skews toward older units. The Gold Coin Shop is worth visiting only for Holy Relic materials such as Brokkr's Strength and Eitri's Meticulousness when your Demonic Beast farming has fallen behind. The Friendship and Silver shops are best treated as utility stores for Stamina Recovery Potions, Event Dungeon Keys, and Fight Festival entry tickets rather than as hero sources.
Collaborations sit slightly outside all of this, and they carry the one genuine deadline in the draw system.
How do collaboration banners differ from the rest?
Collaboration banners bring crossover heroes into Grand Cross for a limited window, typically around two weeks, then remove them from the pool. Past collaborations include Re:Zero, King of Fighters '98, That Time I Got Reincarnated as a Slime, Stranger Things, and Attack on Titan, and several of those have returned as reruns.
The scarcity is real but it is not absolute, and the difference matters when you are deciding how hard to commit. Collab heroes are removed from the standing pool when the event closes, so you cannot draw them on a Regular banner afterwards. Reruns have happened repeatedly, which means missing a collaboration is a setback rather than a permanent loss — but a rerun is never announced in advance and never guaranteed for any specific collaboration, so treating a live collab banner as your only reliable chance is the safer planning assumption.
Two further quirks separate collabs from ordinary banners. First, collaboration units frequently need a high Ultimate Move level to reach the performance their kits suggest, so a single copy often underdelivers. Second, collaboration cosmetics are sold for money only and do not later appear for Diamonds in the Sacred Treasure Shop, which means a free-to-play account will not extract a collab unit's full Combat Class contribution. Neither fact makes collabs a trap; both mean a collab rotation should be planned as a multi-copy commitment rather than a single hopeful multi.
All of which leaves one question that every rotation eventually comes down to.
How should you plan a draw rotation?
Decide the milestone you are aiming at before you spend anything, convert it into multis, and only pull if you already hold that many. Pull when the banner is a Festival or a discounted Step-up step. Pass when you cannot reach the first milestone. Wait when a Festival is close and your stockpile is short. It is worth knowing how cooking buffs and tavern income work.
Start by opening the banner's own rate screen. Grand Cross publishes the exact per-rarity and per-hero percentages for every banner, and those figures shift from banner to banner depending on how many units share the pool, so reading them takes ten seconds and prevents the most common misjudgement — assuming a featured unit's rate on one banner applies to the next. Read the milestone positions on the same screen, since those are the numbers your budget is actually targeting.
Then convert. A 300-Diamond milestone is ten multis. A 600-Diamond Regular ceiling is twenty. A 900-Diamond Festival ceiling is thirty, with guaranteed SSRs waiting at ten and twenty along the way. If your stockpile clears the first milestone you have a floor under the rotation and the draw becomes a reasonable investment; if it does not, you are buying raw percentages with no safety net, which is precisely the situation the pity system exists to let you avoid.
Where the Diamonds come from shapes the answer as much as the banner does. Subscription bundles meter out a handful of Diamonds daily rather than delivering a lump sum, so an account funded that way should bank between banners rather than spend on arrival. Step-up ladders reset monthly and cap what they provide. A player who wants a specific Festival unit and cannot reach a milestone this cycle is usually better served waiting for the next one than half-committing to this one, because a half-finished bar disappears with the banner.
The common mistakes cluster in one place: spending reactively. Pulling on a Regular banner because it is there, chasing a collab with three multis, or emptying a stockpile the week before a Festival all cost the same thing, which is milestone progress you could have guaranteed. Budget first, read the rates second, and let the bar do the work.
Common questions about drawing in Grand Cross
Does the pity bar carry over between banners? No. Each featured banner tracks its own bar and it disappears when the banner ends, so unfinished progress is not banked toward the next rotation. We cover what reaching UR grade actually costs separately.
Do free draw tickets fill the pity bar? Banner-specific tickets let you draw without spending Diamonds, but the bar advances by Diamonds spent, so tickets are best treated as free heroes rather than as progress toward a milestone.
Is a single draw ever better than a multi? Rarely. The multi's 10+1 structure makes it the better rate per Diamond, and the only reason to pull singles is a specific step or event that prices them below the usual cost.
What happens to a duplicate of a hero already at 6/6? It converts into that hero's Coins, which can then be spent in the Coin Shop or, in the case of Gold Coins, funnelled into Super Awakening for a better conversion rate.
Can I still get a collaboration hero after the banner ends? Only through a rerun, or by spending Collab Coins in the Event Shop while that collaboration is running. Once the event closes, the units leave the standing draw pool.
Where to Find 7DS Grand Cross Accounts, Top Up and Marketplace Listings
If you want to see what a finished roster looks like, browse 7DS Grand Cross account listings; if you would rather add hero coins or Diamonds to your own account, check the 7DS Grand Cross top-up listings; and for everything else offered for the game, start from the 7DS Grand Cross marketplace hub.
If a rotation did not land the Festival or Ragnarok unit your teams were built around, look at endgame rosters for accounts already deep into Ultimate Move levels and see how a finished roster is put together.
GameMarket.gg is a trusted digital marketplace for everything gaming-related. We serve the gaming community by providing secure access that enhances every gaming journey.