eFootball Player Card Comparison Guide: Levels, Styles and Roles
By John Ganang 16 September 2026, 12:00 WIB
Comparing two eFootball player cards means checking five things in a fixed order: the Playing Style, the position proficiency, the Player Skills, the level cap the card can be trained to, and only then the Overall Rating. The big number is a summary of the first layer, not a verdict on the card.
Most squads are built the other way round. A card with a higher Overall arrives, walks straight into the eleven, and then spends ninety minutes standing in the wrong half of the pitch while the player it replaced would have been in the box. That is not bad luck. Overall Rating answers "how good are this player's numbers for his registered position", and almost every comparison you actually care about is answered somewhere else on the card. This guide walks through each of those layers in the order that decides matches, so you can put two unfamiliar cards side by side and know which one your squad will feel.
What actually separates two eFootball player cards?
Two cards differ in behaviour before they differ in quality. The Playing Style sets where the player positions himself when the AI has control, position proficiency sets how much of his ability survives being placed in a slot, and Player Skills add actions the raw attributes cannot produce on their own. Ratings only rank what is left.
It helps to think of a card as four stacked layers. The bottom layer is the attribute spread, roughly forty rated values covering technique, physique and awareness. Above it sits the Playing Style, a single tag such as Goal Poacher or Deep-Lying Forward that tells the game how this player should move off the ball. Above that sit Player Skills, discrete unlocks like First-time Shot, Chip Shot Control or Interception, each of which changes what animations and outcomes are available to him. On top sits the progression layer: the card's level, its max level, and the Progression Points and Skill Points you can invest.
Overall Rating compresses only the bottom layer into one number, and it does so through a positional filter. The same attribute spread produces a different Overall on a centre-back and on a defensive midfielder, because Konami weights the attributes that matter for the registered position. That single fact explains most confusing comparisons: when a 91-rated winger and a 91-rated centre-back sit next to each other, the number is telling you they are equally good at two completely different jobs, not that they are interchangeable.
The practical consequence is a rule of order. Compare like against like, same position and same intended role, then start at the Playing Style, not the corner of the card.
How much does Overall Rating really tell you?
Overall Rating tells you the weighted quality of a card's attributes for its registered position, and nothing else. It ignores Playing Style, Player Skills, weak-foot behaviour, condition, and how far the card can still be trained. Between two cards within a few points of each other, it carries almost no information.
The gap size is what decides whether the number is worth reading. A ten-point difference between two strikers is a real difference in raw ability and will show up in duels and finishing. A two- or three-point difference is inside the noise of everything the rating does not measure, and it is regularly overturned by a better Playing Style match or one relevant Player Skill.
There is a second trap in how the number moves. Because Overall is position-weighted, converting a card to a new position through Position Training can change the displayed Overall even though not a single attribute changed. A full-back retrained as a centre-back is the same player; the game is simply re-scoring him against a different job description. Reading that shift as "the card got worse" is one of the most common misreadings in squad building.
Use Overall as a shortlist filter, since it is genuinely useful for sorting a long list of unfamiliar names down to a handful worth inspecting, then close the summary and open the card.
How do Playing Styles decide which card fits your squad?
A Playing Style is the movement instruction the AI follows when you are not directly controlling that player, so it decides where he will be when the ball arrives. Two strikers with identical attributes and different styles produce completely different chances, which is why style match beats rating in most direct comparisons.
Take the forward line as the clearest example. A Goal Poacher lives on the shoulder of the last defender and attacks the six-yard box; he needs service into space and rewards through-balls. A Deep-Lying Forward drops between the lines to receive, which creates a passing option but leaves nobody occupying the centre-backs. A Target Man holds position and asks for the ball into his feet or his head. Give a Goal Poacher a squad that plays possession football through midfield and he spends the match offside or isolated, no matter how high his Finishing is.
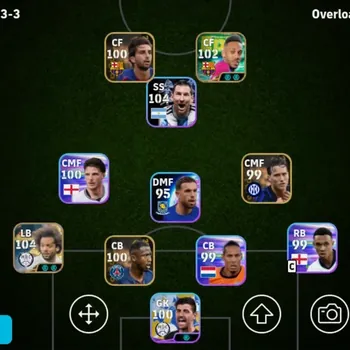
The same logic runs through every band of the pitch. In midfield, an Orchestrator sits deep and dictates, a Box-to-Box runs the whole channel, a Hole Player pushes into the pocket behind the striker, and an Anchor Man screens the defence. At full-back, an Offensive Full-back overlaps by default while a Defensive Full-back tucks in, which changes whether your winger has space to cut inside or is running into his own team-mate.
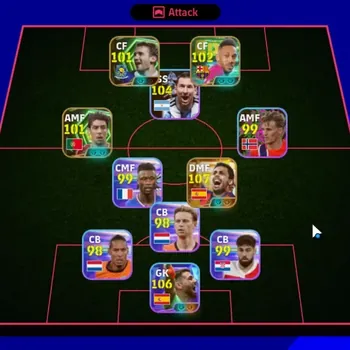
The comparison question is therefore never "which style is best". It is "which of these two styles is missing from the shape I already play". A squad with three players who all drop deep to receive has no one making the run that turns possession into a shot, and adding a fourth deep receiver with a higher rating makes the problem worse, not better.
Team Playstyle interacts with this directly. A side set up for Quick Counter wants runners who attack depth; a Possession Game wants receivers who are comfortable under pressure. When the individual style and the team instruction pull in opposite directions, the player looks slow and disengaged even when his numbers are excellent.
Why do Player Skills change a comparison more than attributes?
Player Skills are binary unlocks that grant actions the attribute spread cannot generate by itself. A card either has First-time Shot or it does not, and no amount of Finishing substitutes for it. That makes one relevant skill worth more than several rating points in almost every practical comparison.
The skills that most often decide a like-for-like comparison cluster around the moments that repeat every match. In attack, First-time Shot changes what happens to a cut-back, Chip Shot Control turns a one-on-one into a finish, Acrobatic Finishing rescues awkward service, and Long Range Shooting makes a deep midfielder a genuine threat rather than a wasted possession. Trickster and the dribbling skills widen what a wide player can do against a set defence.
Defensively, Interception and Blocker change how much ground a midfielder covers passively, Man Marking matters against a specific dangerous opponent, and Aerial Superiority decides who wins the ball that arrives from a corner. Track Back is quietly one of the most valuable, because it makes an attacking player recover shape instead of leaving your full-back exposed for the entire second half.
Two structural skills deserve their own note. Captaincy raises the whole squad's condition ceiling, so its value is squad-wide rather than personal, and Super-sub gives a boost after coming off the bench, which makes a card a better sixty-minute answer than a starter. Neither shows up in Overall Rating at all.
Since the ability progression system arrived, skills also became partly buildable: Skill Points can unlock additional skills on a card as it progresses. That turns "which card has the better skill list today" into "which card has the better skill list once both are fully invested", and those can be different answers.
How does position proficiency change the comparison?
Position proficiency is a per-position grade on every card showing how effectively the player performs in that slot. Playing a card outside its proficient positions degrades its real output well below what the displayed rating suggests, so proficiency should be checked before any rating is compared.
A card typically has one native position, one or two it handles competently, and a long list where it is simply out of place. The penalty is not cosmetic: awareness, positioning and decision-making all suffer, which is precisely the part of the game you cannot compensate for with manual control. A brilliant attacking midfielder shoved onto the wing will still beat a defender when you run at him, but he will not be in the right place when the ball is played to where a winger should have been.
Position Training exists to fix this, converting a card toward a new position over time and letting the proficiency grow. That changes the shape of a comparison: a card that is currently wrong for your slot but convertible is not the same as a card that is permanently wrong for it. If you already know you are short at centre-back, a full-back with a convertible profile may be a better answer than a higher-rated player you cannot fit.
Squad-wide, this is why the eleven with the highest total rating is rarely the eleven with the highest Team Strength. Team Strength accounts for how well each player suits the position and the shape he is placed in, so a slightly weaker card in his correct slot lifts the number that actually reflects on-pitch performance.
What does a card's level cap tell you about its ceiling?
A card's max level is the ceiling on how far training can push its attributes, so it is the difference between what a card is now and what it becomes. Two cards showing the same Overall today can end far apart once both are fully trained, which is why the cap belongs in every comparison.
Progression works through levels, Progression Points and training programmes. Levelling adds attribute points according to the card's growth profile, so two cards with the same starting spread do not necessarily gain the same things: one may pour its progression into pace and finishing while another spreads it into physique. Boosters and training items push specific areas further, and Skill Points sit alongside, unlocking additional Player Skills as described above.
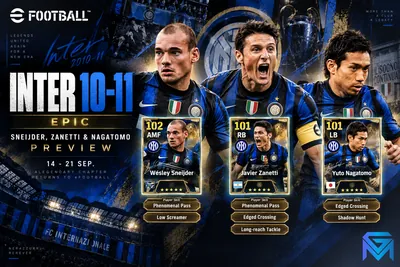
Special cards, meaning the weekly and event releases such as Player of the Week, Highlight, Show Time, Big Time and Epic variants, generally arrive with stronger spreads and a higher ceiling than the same footballer's standard card, and they are tied to the period in which they release. Availability windows close, and while Konami has rerun card types and events before, no specific card is guaranteed to return. Treat a card's current availability as a fact about timing, not a promise about the future.
The comparison rule that follows is simple: compare cards at the same stage of investment. A fully trained standard card genuinely can outperform an untrained special card today, and lose to it badly three weeks later. If you are deciding where to spend limited Progression Points, the card with the higher ceiling and the correct Playing Style is the one that deserves them.
Contracts are the quiet cost attached to all of this. Cards consume contract renewals over time and GP to keep them registered, so a squad packed with high-end cards carries an upkeep that a squad built around a stable core does not. That does not change which card is better; it changes how many of them you can realistically maintain.
How much should condition and stamina affect the choice?
Condition is a per-match form rating shown as an arrow on the card, and it temporarily raises or lowers performance. It is reassigned regularly rather than fixed, so it should never decide which card you invest in, but it absolutely should decide which of two similar cards starts a given match.
The arrows sit on a scale from clearly poor form to clearly excellent form, and the swing is large enough to be felt. A card on a strong arrow plays noticeably sharper than the same card on a weak one, so the sensible habit is to check arrows in the squad screen before kickoff and shuffle between two comparable options rather than starting the "better" card on a bad day.
Stamina interacts with this over the ninety minutes. A midfielder with low Stamina fades in exactly the window where matches are decided, which means his effective rating in the last twenty minutes is well below the number on his card. When two midfielders look level, the one who is still arriving in the box at eighty minutes is the better card, and that is a Stamina question rather than a rating question.
Condition also connects back to skills: Captaincy raises the squad's condition ceiling, and Super-sub cards are built for the second half. Comparing a starter against a substitute on raw rating alone misses what each is designed to do.
What is a repeatable checklist for comparing two cards?
Run the same seven checks every time, in order, and stop as soon as one of them separates the cards decisively. The order matters because the early checks eliminate cards that will never work in your shape, which is faster and more accurate than weighing forty attributes.
- Slot and proficiency. Which of the two is actually proficient in the position you need filled, and is the other convertible through Position Training?
- Playing Style against your shape. Does the style supply something your current eleven lacks, or duplicate what you already have three of?
- Player Skills. Does either card hold a skill that fires in the moments your matches are decided — First-time Shot, Interception, Track Back, Aerial Superiority?
- Role-defining attributes. Check the two or three attributes that define the role, not all forty. Acceleration and Ball Control for a winger, Defensive Awareness and Jumping for a centre-back, Stamina and Low Pass for a central midfielder.
- Weak foot. Read usage and accuracy together. A wide player who will never use his other foot is readable to any opponent who has watched ten minutes of your play.
- Ceiling. Compare max level and growth direction, and compare both cards at the same level of investment rather than as they stand today.
- Overall Rating, last. Use it as the tie-breaker it is. If the first six checks came out level and one card is eight points higher, take the higher card.
One habit sharpens all seven: test rather than assume. A card's behaviour in a live match tells you more in one half than the card screen tells you in an hour, and eFootball gives you low-stakes modes to find that out before a card is locked into a competitive squad.
Which comparison mistakes cost the most matches?
The costly mistakes are all the same mistake wearing different clothes: trusting the summary number over the behaviour. Squads collapse from stacking duplicate Playing Styles, ignoring proficiency, chasing famous names, and comparing an untrained card against a fully trained one as though the snapshot were the ceiling.
Stacking styles is the most common. Three creative receivers in the same third produce endless sideways possession and no shots, because nobody is making the run that stretches the defence. The fix is a squad audit rather than another signing: list the Playing Styles you already field and identify the movement pattern that is missing.
Reputation is the second. A famous footballer's standard card is still a standard card, with a standard spread and a standard ceiling, and it will lose to a well-built special card of a player you have never heard of. The card is the unit of comparison, not the name printed on it.
The third is treating a squad as a collection of individual comparisons. Team Strength, position fit and Team Playstyle mean the eleven is a system, and the right question is which card makes the system better rather than which card wins a one-on-one on paper. A slightly weaker card that completes a shape beats a stronger card that duplicates one.
If you want to go a layer deeper on any of these, the companion guides cover them individually: what each attribute on a player card measures, how the card types differ from standard cards, and how Chance Deals and nominating contracts decide which cards you can target. Newer players are better served starting at the eFootball beginner's guide to player cards, coins and squads, and the currency side is covered in the breakdown of how eFootball Coins and GP differ.
Where to Find eFootball Accounts and Top Up
On GameMarket.gg you can browse eFootball accounts on GameMarket, the eFootball market hub.
Once you know which card your squad is missing, the currency to chase it is the last piece of the puzzle; you can see current eFootball top up options on GameMarket.gg and fund the contracts you have already decided are worth targeting.
GameMarket.gg is a trusted digital marketplace for everything gaming-related. We serve the gaming community by providing secure access that enhances every gaming journey.