
Arknights: Endfield
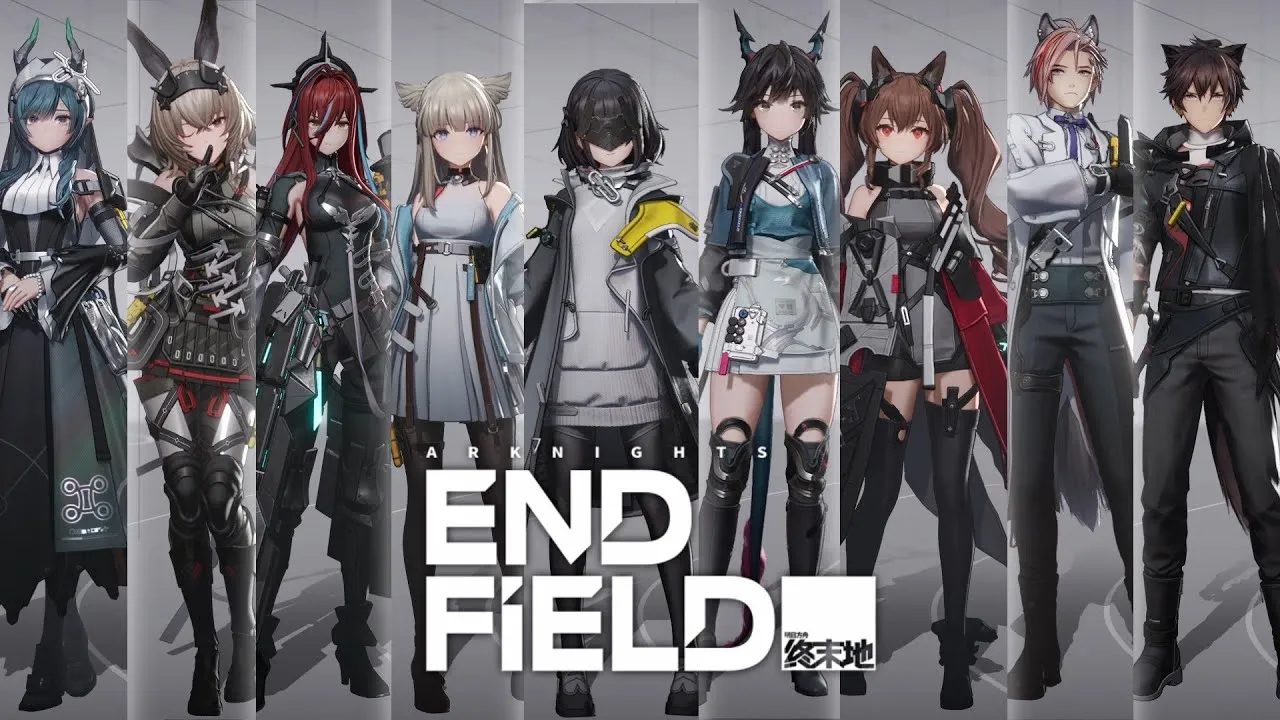
Best Arknights Endfield Build Picks: Gear Sets + Weapons for Every Unit
Endfield Build Guide: The Fastest Way to Power Up in Version 1.0 If you’re trying to grow your account fast, this Endfield Build guide is the difference between “I’m clearing content” and “I’m clearing content clean.” The game’s progression doesn’t reward random upgrades — it rewards tight, role-based builds where your Operator’s gear set, weapon, and stats all point in the same direction. This is one of those release-era metas where smart building doesn’t just increase damage — it unlocks smoother rotations, faster clears, and more consistent survivability, even before you have perfect rolls or top-tier weapons. ✅ The Core Build Rule That Makes Everything Easier Before you copy any “best-in-slot” list, lock this in: A good build = Main Stat match + correct Set Bonus + role-appropriate weapon skill. If even one of those three is wrong, your Operator will feel weaker than they should — even if the rarity looks “high.” Your Build Priority Order (Simple + Reliable) Main Stat first (Strength / Agility / Intellect / Will) 3-piece set bonus that matches the kit Weapon that supports their damage type + rotation Only then worry about min-max pieces and perfect alternatives 🧠 How to Choose Gear Sets the “Right” Way (No Guessing) 1) Match the Operator’s Main Stat (Always) Operators have four attributes: Strength Agility Intellect Will Each Operator has a Main + Secondary attribute — and gear that boosts the Main Stat almost always gives the cleanest power spike. Why it matters: Main Stat increases don’t just “add stats.” They help the Operator scale properly so your damage, breakpoints, and combat rhythm stop feeling sluggish. 2) Your Set Bonus Is Your Real Build Engine Gear sets aren’t decoration — they define your combat identity. A set can: push burst damage reward reactions/status uptime enhance survivability smooth rotation tempo Rule: If your set bonus doesn’t match what your Operator is doing most of the time, you’re wasting value. 🔥 Best Gear Sets for Each Operator (Meta-Ready Picks) Below are the most consistent builds that fit the current release meta. This isn’t “theoretical perfect world” — it’s the practical version that works across real progression. ⚔️ Endministrator — Swordmancer Best Gear Set: SwordmancerWhy it works: Strong all-around scaling and stable performance for general clearing. Recommended Pieces Swordmancer Heavy Armor Swordmancer TAC Gauntlets Swordmancer Flint Bonekrusha Mask ⚡ Perlica — Pulser Labs Best Gear Set: Pulser LabsWhy it works: Fits Perlica’s role as a utility-driven damage enabler and keeps her output consistent. Recommended Pieces Pulser Labs Disruptor Suit Pulser Labs Gloves Pulser Labs Calibrator Pulser Labs Calibrator 🥋 Chen Qianyu — Swordmancer Best Gear Set: SwordmancerWhy it works: Gives her stable scaling and keeps her damage/support pressure online without weird gaps. Recommended Pieces Swordmancer Heavy Armor Swordmancer TAC Gauntlets Swordmancer Flint Bonekrusha Mask 🔥 Wulfgard — Hot Work Best Gear Set: Hot WorkWhy it works: Great synergy for Heat-focused pressure and keeps him strong inside meta teams. Recommended Pieces Hot Work Exoskeleton MI Security Gloves Hot Work Pyrometer Hot Work Pyrometer 🧨 Da Pan — Aethertech Best Gear Set: AethertechWhy it works: Clean stat focus and strong set value that supports consistent performance. Recommended Pieces Aethertech Plating Swordmancer TAC Gauntlets Aethertech Analysis Band Aethertech Analysis Band ❤️ Ember — LYNX Best Gear Set: LYNXWhy it works: Strong defensive stability and utility value while still staying relevant in team output. Recommended Pieces LYNX Heavy Armor LYNX Gloves LYNX Aegis Injector Eternal Xiranite Power Core ⚡ Avywenna — Bonekrusha Best Gear Set: BonekrushaWhy it works: Fits her pressure profile and gives strong value for Electric performance setups. Recommended Pieces Bonekrusha Poncho T1 Type 50 Yinglung Gloves T1 Bonekrusha Figurine Bonekrusha Figurine ❄️ Xaihi — Eternal Xiranite Best Gear Set: Eternal XiraniteWhy it works: Extremely stable and fits into multiple team archetypes cleanly. Recommended Pieces Eternal Xiranite Armor Eternal Xiranite Gloves T1 Eternal Xiranite Auxiliary Arm Eternal Xiranite Auxiliary Arm 🌙 Gilberta — Eternal Xiranite Best Gear Set: Eternal XiraniteWhy it works: High consistency, good scaling, and stays strong without demanding perfect gear luck. Recommended Pieces Eternal Xiranite Armor Eternal Xiranite Gloves T1 Eternal Xiranite Auxiliary Arm MI Security Push Knife 🐻 Lifeng — Bonekrusha Best Gear Set: BonekrushaWhy it works: Keeps Lifeng durable and dangerous — great for teams that want strong physical pressure. Recommended Pieces Bonekrusha Heavy Armor T1 Swordmancer TAC Gauntlets Bonekrusha Mask Bonekrusha Mask ✨ Snowshine — LYNX Best Gear Set: LYNXWhy it works: A safe, reliable set that supports consistent combat performance. Recommended Pieces LYNX Heavy Armor LYNX Gloves LYNX Aegis Injector LYNX Aegis Injector 🔥 Laevatain — Hot Work Best Gear Set: Hot WorkWhy it works: Perfect match for her Heat damage profile and burst windows. Recommended Pieces Tide Fall Light Armor Hot Work Gauntlets Hot Work Pyrometer Hot Work Pyrometer ❄️ Yvonne — MI Security Best Gear Set: MI SecurityWhy it works: Strong practical value that fits her performance needs and keeps her scaling smooth. Recommended Pieces MI Security Overalls Pulser Labs Gloves MI Security Toolkit MI Security Toolkit ⚙️ Arclight — Frontiers Best Gear Set: FrontiersWhy it works: Clean synergy for her role and keeps her effective without needing rare swaps. Recommended Pieces Frontiers Armor T2 Type 50 Yinglung Gloves Frontiers Comm Frontiers Comm 🌿 Ardelia — Eternal Xiranite Best Gear Set: Eternal XiraniteWhy it works: One of the most flexible “plug-in” sets that stays strong in many teams. Recommended Pieces Eternal Xiranite Armor Eternal Xiranite Gloves T1 Eternal Xiranite Auxiliary Arm Eternal Xiranite Auxiliary Arm 🕯️ Last Rite — Tide Surge Best Gear Set: Tide SurgeWhy it works: Fits her kit direction and keeps her output stable in harder content. Recommended Pieces Type 50 Yinglung Light Armor Tide Surge Gauntlets Hanging River O2 Tube Hanging River O2 Tube 🧊 Pogranichnik — Frontiers Best Gear Set: FrontiersWhy it works: Strong team utility value and consistent scaling for progression. Recommended Pieces Frontiers Armor T3 LYNX Gloves Frontiers Extra O2 Tube Frontiers Extra O2 Tube 🛡️ Alesh — Armored MSGR Best Gear Set: Armored MSGRWhy it works: Strong functional build that stays effective while your account is still developing. Recommended Pieces Mordvolt Insulation Vest Armored MSGR Gloves Armored MSGR Flashlight Armored MSGR Gyro ⚡ Antal — Eternal Xiranite Best Gear Set: Eternal XiraniteWhy it works: Flexible scaling and clean synergy with teams that want consistent pressure. Recommended Pieces Tide Fall Light Armor Eternal Xiranite Gloves Eternal Xiranite Power Core Eternal Xiranite Power Core 💎 Fluorite — MI Security Best Gear Set: MI SecurityWhy it works: Stable performance and clean build flow for early-to-mid progression. Recommended Pieces MI Security Overalls T1 MI Security Hands PPE T1 MI Security Toolkit MI Security Toolkit 🧊 Estella — Type 50 Yinglung Best Gear Set: Type 50 YinglungWhy it works: Strong synergy with her combat identity and stays consistent in real play. Recommended Pieces Type 50 Yinglung Light Armor Swordmancer TAC Gauntlets Type 50 Yinglung Radar Type 50 Yinglung Radar 🎯 Catcher — Armored MSGR Best Gear Set: Armored MSGRWhy it works: Clean build direction that supports stable combat value. Recommended Pieces Armored MSGR Jacket T1 Armored MSGR Gloves Armored MSGR Gyro T1 Armored MSGR Gyro T1 ⚡ Akekuri — Frontiers Best Gear Set: FrontiersWhy it works: Great for her role and keeps her reliable across many teams. Recommended Pieces Frontiers Armor Eternal Xiranite Gloves T1 Frontiers Extra O2 Tube Frontiers Extra O2 Tube 🗡️ Best Weapons for Each Operator (Quick Picks That Actually Matter) Weapons in Endfield aren’t just stat sticks — they’re build multipliers. The best weapon is usually the one that: matches the Operator’s Main Stat scaling supports their kit’s damage window fits their rotation speed and team role Top Weapon Picks (Per Operator) Endministrator Best: Eminent Repute Alternatives: Grand Vision / Sundering Steel Perlica Best: Detonation Unit Alternatives: Stanza of Memorials / Wild Wanderer / Hypernova Auto Chen Qianyu Best: Rapid Ascent Alternatives: Sundering Steel / Aspirant Wulfgard Best: Clannibal Alternatives: Wedge / Rational Farewell / Long Road Da Pan Best: Exemplar Alternatives: Sundered Prince / Ancient Canal / Industry 0.1 Ember Best: Thunderberge Alternatives: Former Finery / Finishing Call / Quencher Avywenna Best: JET Alternatives: Cohesive Traction / Aggeloslayer Xaihi Best: Chivalric Virtues Alternatives: Detonation Unit / Monaihe / Freedom to Proselytize Gilberta Best: Delivery Guaranteed Alternatives: Opus: Etch Figure / Stanza of Memorials Lifeng Best: Mountain Bearer Alternatives: Valiant / Chimeric Justice / Pathfinder’s Beacon Snowshine Best: Former Finery Alternatives: Thunderberge / Finishing Call / Quencher Laevatain Best: Forgeborn Scathe Alternatives: Umbral Torch / Fortmaker / Wave Tide Yvonne Best: Artzy Tyrannical Alternatives: Navigator / Wedge / Howling Guard Arclight Best: Thermite Cutter Alternatives: OBJ Edge of Lightness / Twelve Questions / Contingent Measure Ardelia Best: Dreams of the Starry Beach Alternatives: Stanza of Memorials / Monaihe / Fluorescent Roc Last Rite Best: Khravengger Alternatives: Sundered Prince / Seeker of Dark Lung / Industry 0.1 Pogranichnik Best: Never Rest Alternatives: Thermite Cutter / Eminent Repute / Rapid Ascent Alesh Best: Fortmaker Alternatives: Wave Tide Antal Best: OBJ Arts Identifier Alternatives: Hypernova Auto / Jiminy 12 Fluorite Best: Wedge Alternatives: Navigator / OBJ Velocitous / Howling Guard Estella Best: OBJ Razorhorn Alternatives: Valiant / Aggeloslayer Catcher Best: OBJ Heavy Burden Alternatives: Seeker of Dark Lung / Quencher Akekuri Best: Thermite Cutter Alternatives: OBJ Edge of Lightness / Fortmaker ⚡ The “Fast Progression” Build Path (What to Upgrade First) If you’re not sure what to invest in first, this is the cleanest upgrade flow: Step 1: Build 1 Main DPS Properly Pick your main carry and fully stabilize them: correct 3-piece set correct main-stat weapon consistent survivability A single strong DPS makes everything else easier: story clears, farming, materials, exploration. Step 2: Add One SP Generator (Rotation Stability) A good SP generator makes your team feel “unlocked.”Your DPS becomes smoother, your skills come online faster, and fights stop dragging. Step 3: Add a Support Who Buffs Your DPS’s Damage Type Supports aren’t optional long-term — they’re what turns “good damage” into “delete the room.” Step 4: Upgrade Gear Sets Before Chasing Fancy Swaps Flex pieces are real, but early on:3-piece set bonus > random high-rarity piece. 🧩 Copy This Build Template (Use It For Any Operator) If you want a fast way to build without thinking too hard: 1) Main Stat Match→ Always prioritize the Operator’s Main attribute 2) 3-Piece Set Bonus→ Pick the set that matches their kit rhythm 3) Weapon That Fits Their Damage Window→ Burst DPS wants burst weapon value→ Utility wants utility uptime→ Supports want clean scaling, not “highest rarity” 4) Team Slot Logic→ DPS + SP Gen + Support + Sustain/2nd Support This template works for basically every team you’ll run in 1.0. If you’re building your first real account foundation, this is exactly the kind of Endfield progression where clean upgrades matter more than “perfect luck,” and a correct build setup will carry you through harder content long before your roster is complete. Looking to speed up your account progress even more? You can check out Accounts for fresh starts, optimized starters, or stacked inventories, then use Hourly Services for targeted farming help, and finish your setup with Boosting when you want fast clears, faster resources, and smoother progression without the grind. GameMarket.gg is a trusted digital marketplace for everything gaming-related. We serve the gaming community by providing secure access that enhances every gaming journey.
Arknights: Endfield
Arknights: Endfield Guide: How to Farm Stock Bills Fast + Stock Market Profit Tips
💰 Arknights: Endfield Guide — Stock Bills Are Your Real Midgame Power Currency Stock Bills aren’t just “extra money” in Arknights: Endfield—they’re the currency that quietly decides how fast your account grows once you hit the part of the game where upgrades stop being free. Between Outpost trading, Stock Redistribution, and Depot Node functions, Stock Bills become the glue that connects your economy, your AIC expansion pace, and your ability to convert materials into consistent long-term progress. This is where the game shifts from “fight stronger enemies” into “build a system that feeds you upgrades,” because the players who understand Stock Bills early will always scale faster than players who only farm combat drops. ⭐ The Best Ways to Farm Stock Bills (Ranked by Real Value) Game8’s rating system is accurate—but what matters most is why each method works, and when it becomes worth your time. 🥇 1) Outpost Orders (★★★★★) — The Most Consistent Stock Bill Engine Outpost Orders are the best Stock Bill method because they turn “extra items you don’t need” into currency you always need. Why it’s so strong: You trade items directly for Stock Bills The better the item exchange rate, the bigger the payout Your Operator Liaison can give bonus returns It scales naturally as your AIC production improves The key advantage:Outpost Orders let you convert AIC overflow into Stock Bills efficiently, which is why this method stays relevant for the entire game. How to play it efficiently: Don’t trade your “core bottleneck materials” unless you’re sure Trade your surplus production outputs instead Keep trades flowing so your Outpost Prosperity levels up (more on that below) 🥈 2) Elastic Goods (★★★★☆) — High Profit Potential Through Stock Redistribution Elastic Goods are the “stock market” style method: huge gains if you play it right, wasted time if you don’t. How it works: Elastic Goods prices fluctuate You buy low and sell high The profit is based on timing, not grinding The clean rule set (no guessing): Buying: If Recommended Price is lower than Total Cost → buy Buying: If Recommended Price is higher than Total Cost → skip Selling: If Recommended Price is higher than Total Cost → sell Selling: If Recommended Price is lower than Total Cost → hold Why it’s worth learning:Elastic Goods can create “free Stock Bills” without extra farming—especially if you already have stable production and can afford to wait for good prices. Extra profit trick:You can also sell to friends and compare prices, meaning more friends = more chances to find a better deal. 🥉 3) Delivery Jobs (★★★☆☆) — Big Payout Bursts (Once You Unlock Them) Delivery Jobs are a strong “chunk reward” method, but they depend on your Depot Node progress. What you do: Accept the request from your Depot Go to the Pick-Up Point Deliver to the Delivery Point Collect a large Stock Bill payout Why it’s not #1:It’s slower per minute than Outpost Orders, but it’s still one of the best “when available” sources—especially if you’re already traveling across the map. 🟦 4) Enemy Drops (★★☆☆☆) — Passive, Easy, Low Impact Enemies can drop small amounts of Stock Bills in the open world. The right mindset: Nice bonus while exploring Not a real farming strategy Never worth targeting over trading or market profit 🏪 What Stock Bills Are Actually Used For (And What to Prioritize) Stock Bills aren’t just for one shop—they feed multiple systems that matter long-term. 1) 🛒 Buy Staple Goods in Stock Redistribution (Best Daily Value) Staple Goods are the “fixed shop” side of Stock Redistribution. What you can buy: Discounted Headhunting Permits Upgrade materials T-Creds Weapon/upgrade materials (like Protodisk, Cast Die) Operator Gifts (important: this is the only reliable source) Important restock rules: Some goods refresh daily Other items sell out permanently until you upgrade the terminal Upgrading increases your supply and unlocks more options Best habit:Check Staple Goods regularly, because it’s one of the cleanest ways to turn Stock Bills into direct account power. 2) ⚔️ Purchase Weapons From Region Weapon Stores Stock Bills can also buy weapons tied to specific regions. Key detail: Weapons have limited stock Costs vary You must use the correct region’s Stock Bills If you’re missing a usable weapon option early, this is a strong “economy solves combat” shortcut. 3) 🧰 Upgrade Depot Nodes (Unlock Storage + Delivery Jobs) Depot Nodes are one of the most important Stock Bill sinks, because they unlock functions—not just stats. Upgrading your Depot Node: Increases storage capacity Lets you hold more supplies Unlocks more features Enables Delivery Jobs progression If your storage is constantly capped, your economy becomes unstable because you can’t hold enough items to trade or deliver efficiently. 4) 🛠️ Assemble Gear (Stock Bills as Crafting Material) Valley Stock Bills can be used directly as crafting materials for gear. That means Stock Bills are not only a currency—they’re also part of your gearing pipeline, so spending them blindly can slow your gear progression later. 🌍 Outpost Management: Why Prosperity Levels = Faster Stock Bills Outposts aren’t just travel points—they’re your economy multipliers. 🛰️ How You Establish Outposts Outposts are unlocked through missions and prerequisites. Once established: You deploy a Sub-PAC It becomes a TP Point for fast travel It supplies power in the area It creates a new Core AIC Area to build production near it That’s why Outposts aren’t just “optional”—they expand your automation footprint. 📈 How to Level Up Outpost Prosperity (The Snowball Effect) To level Outpost Prosperity, you must trade with the Outpost. What you gain from trading: Prosperity EXP Stock Bills More upgrades and rewards over time Outpost level-up perks include: More Outpost rewards Expanded Core AIC area (more factory space) Higher area status unlocks Visual upgrades to the Outpost (more developed look) Increased Stock Bill savings potential 🧑💼 Operator Liaison: The Hidden “More Stock Bills” Button Assigning an Operator as Liaison can increase your profits through traits tied to: Faction Hobbies Expertise Some traits can grant bonus Stock Bills or bonus Prosperity outcomes, and some Operators can trigger multiple boosts. Simple rule:Always assign a Liaison once the system is available—free bonus value is free bonus value. 📊 Stock Redistribution (Stock Market): Unlock, Upgrade, and Profit Stock Redistribution is where Stock Bills turn into real purchasing power—and where Elastic Goods profit happens. ✅ How to Unlock Stock Redistribution You need to: Reach Level 15 Do node tasks + spend Sanity in Protocol Spaces to level faster Finish the Restart Area Stock Redistribution I quest Talk to Lucky Carrot near The Hub to complete the unlock This is why early progression speed matters—Stock Redistribution is a major midgame economy unlock. 🔼 How to Upgrade the Stock Terminal (And Why You Should) You upgrade by interacting with the Stock Redistribution Terminal and using Stock Bills. Upgrades can unlock: Staple Goods restocks Elastic Goods access Elastic Goods restocks Higher daily purchase limits Higher daily replenishment limits Important:Upgrade only when you have enough Stock Bills to spare—don’t upgrade and then go broke when you still need shop essentials. 📍 Stock Terminal Locations (Quick Reference) The Hub (Valley IV) — Worker Dorms area (main one, can’t miss) Originium Science Park (Valley IV) — Mountain Path Slope subarea OMV Dijiang — Kernel Sector (trade only, no upgrades) 🚚 Delivery Jobs: How to Deliver Goods Fast (No Wasted Time) Delivery Jobs are simple, but players waste time by doing them inefficiently. 1) Let the System Auto-Select Goods (Unless You’re Min-Maxing) The game can choose what to deliver automatically.If you have surplus items, letting the system handle it saves time. 2) Track the Delivery Location Immediately After accepting the mission: Open map Track the recipient Plan the shortest route from Point A → Point B 3) Follow Special Restrictions Some deliveries have rules for how you travel.Breaking them causes deductions, so always check conditions first. 4) Use Ziplines as Much as Possible Zipline Pylons are the biggest delivery speed multiplier.If you’ve built your network properly, deliveries become fast and painless. 🔓 How to Unlock Delivery Jobs Delivery requires Depot Node progression. Requirement: Complete Depot Node II Upgrade Depot Node level using Valley Stock Bills 🧠 Best “Fast Stock Bills” Routine (The Real Economy Loop) If you want the cleanest loop that scales: Daily Core (Stable Income) Trade with Outposts using surplus AIC items Spend Stock Bills on high-value Staple Goods Collect and re-route AIC production so nothing clogs Profit Layer (High Ceiling) Check Elastic Goods prices Buy low / sell high using the Recommended Price rule Compare friend prices when selling Burst Income (When Available) Run Delivery Jobs using ziplines Avoid restriction penalties Track routes instantly Passive Bonus (Never Your Main Plan) Treat enemy drops as “free change,” not farming Players who want to speed up progression can start strong with verified Accounts, get expert planning through Hourly Services for economy routing and outpost optimization, or use trusted Boosting to unlock Stock Redistribution, Depot upgrades, and midgame systems faster while avoiding grind traps. Once you understand Stock Bills, the game stops feeling like a resource drought—and starts feeling like you’re building an economy that funds everything you want to do next.GameMarket.gg is a trusted digital marketplace for everything gaming-related. We serve the gaming community by providing secure access that enhances every gaming journey.
Arknights: Endfield
Endfield Early Game Progression Guide: Manuals, Protocol Space, AIC
🚀 Arknights: Endfield Early Game Guide — Progress Faster Without Wasting Time Arknights: Endfield can feel overwhelming at the start, but the early game is actually very forgiving if you focus on the right progression loops. Instead of trying to “do everything,” your best results come from building a simple rhythm: raise your level caps, farm only what you need, and unlock systems like gear sets and factory automation as soon as the story allows. This early phase quietly teaches you how Endfield wants you to play long-term—steady upgrades, repeatable resource loops, and account growth that comes from planning instead of brute forcing fights. 📈 The Core Loop: Level Caps Decide Your Progress Speed 🔥 Level Up Characters and Weapons First (Then Repeat Forever) Your first big power spikes come from leveling both: Operators Weapons Early on, both are capped at Lv. 20, but the cap increases as you progress the story. Best early-game routine: Level up characters + weapons Push story until you hit a cap wall Farm materials to raise the cap Level up again immediately Repeat Why it matters: every time you delay leveling after a cap increase, you slow your story clears and make overworld enemies feel harder than they should. 📘 Operational Manual = Your “Free Rewards” Engine Once unlocked, the Operational Manual becomes one of the highest value early-game systems because it pays you for doing normal gameplay. ✅ What You Get From Manual Progress The manual missions reward: Oroberyl T-Creds Operational EXP Level-up materials And it’s split into categories like: Daily Index Training Simulation How to play it: don’t treat this like optional side content. In the early game, the manual is basically your “account growth checklist,” and finishing it early makes every other system easier. 🧪 Spend Sanity Points Smart: Protocol Space Comes First 🧭 Why Protocol Space Farming Is Mandatory Early When you start needing more power, you’ll hit the point where overworld enemies stop falling over. That’s where Protocol Space becomes your most efficient Sanity sink. Protocol Spaces give you: Character upgrade materials Weapon upgrade materials Operational EXP Once you interact with a Protocol Space on Talos-II, it becomes permanently accessible through the Operational Manual Index menu, so you can farm it without traveling back manually. How to play it: when you’re stuck, don’t brute-force fights—farm Protocol Space to raise your caps and keep momentum. 🛡️ Gear and Gear Sets: The “Difficulty Fix” Button If combat starts feeling too slow or risky, the fastest fix isn’t always more levels—it’s better gear. ⚙️ What Gear Improves Gear boosts core stats like: Defense Crit Rate Agility Intellect and more 🧩 Why Gear Sets Matter More Than Single Pieces Gear sets add extra effects on top of stats, meaning you’re not just getting bigger numbers—you’re getting real performance boosts. How to play it: if you’re taking too long to kill enemies or getting punished by tougher mobs, gear sets are the cleanest way to stabilize your runs. 🏭 AIC Factory Progression: Automate Your Power Growth Once the factory system unlocks through story progression, your priorities shift from “manual farming” to “automated production.” 🔁 Build Efficient Factory Lines Early Your AIC should focus on producing: Gear crafting materials HP recovery items exploration support items This is how your account transitions from early survival to mid-game scaling. How to play it: don’t wait until you’re stuck. If your factory is producing consistently, you’ll always have materials ready when your story progression raises your caps. 🧩 Blueprints Make AIC Easy (Even If You’re New) Factory building can feel confusing at first, but you don’t need to design everything from scratch. ✅ Use Blueprints as Training Wheels You can use: built-in blueprints other players’ blueprint codes This lets you copy efficient layouts immediately and learn by improving them over time. How to play it: copy first, optimize later. Early game is about output, not perfection. 🧭 Exploration Collectibles That Permanently Buff Your Account Two collectible types matter a lot more than they look: 💠 Aurylenes (Stamina Growth) Collecting Aurylenes increases your stamina bar, which improves everything: more farming more exploration more long sessions without downtime You can also submit them at: TP Points The Hub Submission can reward: stamina increases Origeometry Operational EXP 📟 Protocol Dataloggers (AIC Growth) Protocol Dataloggers give you the AIC Index, which is used to research upgrades inside the AIC Plan menu. That AIC Plan research is what expands your factory potential by unlocking more facilities and options. How to play it: if you want stronger production and smoother progression, treat dataloggers like mandatory loot—not optional exploration flavor. 🧠 The Best Early Game Route (Simple and Efficient) If you want the cleanest path with the least wasted time: Always level Operators + weapons the moment your cap increases Clear Operational Manual missions daily for steady rewards Spend Sanity in Protocol Space when you hit power walls Craft gear + activate gear sets as soon as enemies slow you down Start AIC automation early, even with basic lines Use blueprint codes to skip trial-and-error layouts Collect Aurylenes + Protocol Dataloggers while exploring to boost stamina + factory growth Players who want to accelerate their early-game progression can browse verified Accounts to start with stronger rosters, book professional Hourly Services for route planning and early optimization, or use trusted Boosting to push story milestones, unlock key systems faster, and stabilize farming with less grind. If you build your momentum early, Endfield becomes less about “surviving fights” and more about upgrading on schedule—so your account stays ahead of the difficulty curve instead of reacting to it. GameMarket.gg is a trusted digital marketplace for everything gaming-related. We serve the gaming community by providing secure access that enhances every gaming journey.

Arknights: Endfield
Arknights: Endfield Guide: Daily + Weekly Routine for Max Rewards
📌 Arknights: Endfield Guide — Your Daily + Weekly Routine for Fast Progress Arknights: Endfield doesn’t reward “playing forever”—it rewards showing up consistently and cashing out the systems that refresh on a timer. This Guide is built around the real early-to-mid game loop: Operation Manual points for daily currency, Sanity efficiency through Protocol Space, and AIC collection timing so your production lines never clog while you’re offline. Instead of grinding one thing until burnout, Endfield progression is at its best when you treat the game like a clean checklist: claim, spend, collect, repeat—then use the rest of your playtime for story, exploration, or pushing your next power spike. ✅ The 3 Daily Tasks That Actually Matter (Do These First) These are the core dailies that stack EXP, currency, and account power without wasting time. 1) 📘 Clear Your Operation Manual Daily Tasks (100 Points Goal) Once you unlock the Operational Manual during Chapter 1, your daily routine becomes simple: do tasks → earn points → hit 100 points for maximum rewards. Typical rewards include: Pass Experience Oroberyl T-Creds Emergency Sanity Booster Advanced Combat Record Protoprism Arms INSP Set Operational EXP Best habit: Don’t stop at “some tasks.” The system is tuned around the 100-point completion, and that’s where the daily value spikes. 2) ⚡ Spend Sanity in Protocol Space (Don’t Let Stamina Cap) Sanity is your stamina system, and Protocol Space is where it turns into real progression. Why this matters: Protocol Space farming gives you the materials that decide whether you can keep leveling, tuning, and upgrading—especially when enemies start scaling faster than your base stats. What Protocol Spaces can drop (by type): 🔧 Skill Upgrade Materials Protoprism Protohedron Protodisk Protoset Operational EXP 🧪 Weapon EXP Materials Arms INSP Set Arms INSP Kit Arms Inspector Operational EXP 🛠️ Weapon Tuning Materials Cast Die Heavy Cast Die Operational EXP 📈 Operation EXP Focus Advanced Combat Record Intermediate Combat Record Elementary Combat Record Advanced Cognitive Carrier Elementary Cognitive Carrier Operational EXP 💰 T-Creds Farming T-Creds Operational EXP How to play it: If you only have time for one thing, spend Sanity. A capped stamina bar is basically wasted progression. 3) 🏭 Collect Your AIC Materials (Prevent Overnight Clogs) This one is simple, but it’s the most common “silent loss” in Endfield. Daily AIC habit: Visit your AIC Collect finished products Make sure nothing is stuck or clogged Restart lines if needed Even if you didn’t craft anything “new,” collecting matters because production lines that clog overnight are basically dead time. 🕒 Daily Reset Reminder (Why Timing Matters) Your daily routine is designed around refreshes, so it’s not just what you do—it’s when you do it. Best timing rule:Log in → clear Manual tasks → spend Sanity → collect AIC → log outThat loop keeps your account progressing even on low-energy days. 📅 Weekly Routine: The 2 Weekly Systems You Should Never Skip Weekly tasks aren’t about huge effort—they’re about big payout per minute. 1) 🎯 Weekly Routine (Events Center) Each week, check the Events Center for Weekly Routine objectives. Objectives can include things like: Giving gifts to Operators Fighting a certain number of enemies General “play the game normally” tasks Why it’s good: It’s flexible. You can finish it naturally while doing your normal progression. 2) 🎟️ Protocol Pass Weekly Missions (Big Pass EXP) Weekly Protocol Pass missions give significantly more Pass EXP than daily missions. This matters more if you have: Originium Supply Protocol Customized Even if you don’t spend, the weekly missions are still one of the cleanest value sources in the game. ⏰ Weekly Reset Time (Plan Around This) Weeklies reset every Monday: Asia server: Monday 4:00 AM (GMT+8) America server: Monday 4:00 AM (UTC-5) Don’t get punished by timing:Claim your rewards before reset, because unfinished progress is just lost value. 🧠 The Best “Minimal Effort, Max Rewards” Route If you want the fastest routine that still pays off hard: Daily (5–10 minutes) Operation Manual tasks → hit 100 points Spend Sanity in Protocol Space Collect AIC materials Weekly (2 quick check-ins) Finish Weekly Routine objectives Clear Protocol Pass weekly missions This keeps your EXP, currency, and materials flowing without needing marathon sessions. Players who want to progress faster without wasting time can start with stronger Accounts, get expert help through Hourly Services for optimizing daily routes and resource planning, or use trusted Boosting to push story milestones, farming goals, and weekly clears with less grind. This daily + weekly loop is what keeps your Endfield account growing even when you’re busy—because the real power comes from consistency, not endless hours. GameMarket.gg is a trusted digital marketplace for everything gaming-related. We serve the gaming community by providing secure access that enhances every gaming journey.

Arknights: Endfield
AIC Factory Guide: Valley IV to Wuling Layouts, Items, and Power
🏭 AIC Progression Guide: Build the Factory That Builds Your Account AIC is one of those systems that feels “extra” until you realize it quietly controls how fast you gear, how stable your power is, and how easily you can fund expansions. The players who progress smoothly aren’t doing more—they’re doing the right production lines at the right time, then scaling them only when their mining and power can actually support it. This update-style progression changes what “efficient farming” means: instead of grinding one best stage forever, your best progress comes from stacking systems—mining node control, stable plant loops, trade goods, batteries, and modular production lines—so every hour of play multiplies your output instead of bottlenecking it. 🧭 The Breakpoints That Decide Your Whole Factory Plan Valley IV progression windows (your “swap points”) Early game: Start → until you can mine Ferrium (around Authority Lv. 18) Mid game: Ferrium online → until you can grind Cryston / Power Plateau access (around Authority Lv. 34) Late game: Authority 34+ → Sandleaf era + multi-step endgame lines Wuling: New facility constraints, new staples, new trade goods Your top 3 factory KPIs (if these are wrong, everything feels bad) Ore consistency (node coverage + purity) Power headroom (Thermal Banks + battery pipeline) Routing freedom (Depot Bus + Protocol Stash so lines don’t choke) ✅ Valley IV Early Game (Pre-Ferrium): What to Build First and Why The early-game rule You’re not “building a base.” You’re building a foothold: One line for early gear progression One line for Stock Bills One line for stockpiling the parts that future recipes demand Priority items (and what they actually unlock) 1) Amethyst Component (your early gear backbone) Purpose: early gear crafting so exploration doesn’t stall Hidden value: it prevents the common early trap where you’re “progressing story” but undergeared for quarry enemies and detours Recipe focus (the idea, not the spreadsheet): Keep your Amethyst Fiber and Origocrust flow stable so the line runs continuously This is a “must-run” line, not a “burst craft” line Blueprint code (Asia): EFO01ouiO4aa58639IieO 2) Buck Capsule C (your early Stock Bills engine) Purpose: trade good + early sustain Hidden value: it’s what funds your factory expansion and routing upgrades faster than passive trickles This line has two phases: Infinite Buckflower Powder loop Merge Buckflower Powder into your filling process (with bottles) to finalize capsules Infinite loop farm blueprint (Asia): EFO012O9A7uuU48aeIOoBuck Capsule C merge blueprint (Asia): EFO01iUIa6551e2e272U4 3) Amethyst Part (your “future-proof” stockpile) Purpose: machines and later recipes constantly ask for it Hidden value: it reduces “sudden stops” later when you unlock something new and realize you don’t have the basic part chain ready Blueprint code (Asia): EFO0101O3o7789i7E979 🧱 Early Valley IV Layout Planning: How to Avoid Spaghetti The layout shape that scales cleanly Build your base like three lanes: Lane A: Core production (Amethyst Component) Lane B: Plant loop module (Buckflower loop) Lane C: Merge + output (Filling / capsule finishing + depot output) Keep each lane compact and copyable. If you have to “trace” pipes and belts with your eyes, you’ve already lost future scaling. The biggest early mistake (and how to fix it) Mistake: trying to run too many lines off limited AmethystFix: cap your active lines to the 2–3 priorities above, and only add “nice-to-haves” when mining coverage increases. ⛏️ Early Game Mining: The Fastest Way to Double Output Take over Mineral Beds like it’s your main quest Mining nodes are your factory’s income. Every node you don’t capture is production you’ll never get back. Don’t wait until you “need” the material—rig it when you pass it. Purity is the silent multiplier Higher purity isn’t just “more ore.” It’s: faster crafting cycles fewer idle machines fewer clogged lines from uneven flows That’s why Regional Development matters later—purity is what turns your factory from “functional” to “smooth.” ⚡ Early Power: Thermal Banks Without Eating Your Whole Economy The early power rule Use Originium first for Thermal Banks. Batteries in early Valley IV compete with your Amethyst bottleneck. Originium is easier to scale via mining coverage. Two practical layouts you can drop in when power starts choking: Manifold layout (Asia): EFO01ouiO4aa5860IieO Load Balanced layout (Asia): EFO01Ue3608e87OEA7Oa8 Power checkpoint If you’re constantly turning machines off to keep the grid alive, you’re not “short on power”—you’re short on: Thermal Bank fueling consistency battery transition planning (mid game) or simply mining coverage ✅ Valley IV Mid Game (Ferrium Online): Your First Real Scaling Phase Your mid-game pivot (what changes immediately) Once Ferrium is available, your early priorities stop being “best” because: gear tier jumps trade goods improve batteries become efficient enough to standardize power Mid-game priority items 1) Ferrium Component (mid-game gear crafting) Purpose: craft Level 36 Blue rarity gear Scaling rule: duplicate the line when you unlock more Ferrium nodes instead of overengineering one huge line Blueprint codes: Asia: EFO019aEu8UU36eu5UI2 USA: EFO01eE7O6A33a4ioAi8 2) LC Valley Battery (your “stable grid” upgrade) Purpose: efficient Thermal Bank fuel Scaling trick: one packaging line can feed multiple Thermal Banks if you route output smartly Blueprint codes: Asia: EFO01O4a7i88eEI3i9oe4 USA: EFO0189304IUUO1eUI73 3) Buck Capsule B (better trade good + better healing) Purpose: preferred trade good at stronger outpost levels + stronger sustain item Setup concept: two bottle lines + one powder line → merge into filling Blueprint codes: Asia: EFO017i89aEE0U55EO0Ai USA: EFO01O3E8A499eIi9oe4 The mid-game plant loop module (make it stackable) You’re going to expand. Your farm needs to expand with you. Blueprint codes: Asia: EFO0101O3o7789i0E179 USA: EFO01eE7O6A33a4AoAi8 🧰 Mid Game Factory Systems: The Upgrades That Change Everything Factory expansion: why it matters now Mid game is where “PAC port reliance” starts to break your speed.You want: more space the ability to run parallel lines the routing tools that make modular builds possible Depot Bus + Protocol Stash: the “no choke points” upgrade This is the moment your factory becomes a network: You don’t need every line to touch the PAC directly. You can split production into modules and centralize storage/output. You can stop building awkward “bridge belts” just to reach ports. Practical mid-game scaling rule If your line stalls, it’s usually one of these: your input node isn’t mined consistently your plant loop isn’t truly self-sustaining at the volume you’re asking your outputs aren’t dumped to storage fast enough (clog) Fix the cause, not the symptom. ✅ Valley IV Late Game (Authority 34+): Sandleaf Era and Modular Factories Late-game reality check Late game isn’t “one bigger line.”It’s several smaller lines feeding one final combine, because recipes now: have more steps have more streams punish clogging Step 1: Lock Sandleaf Powder production Sandleaf Powder becomes the backbone of late Valley IV.If it’s not stable, you’ll constantly stop-and-start everything else. Anti-clog rule: use all shredder outputs and route them cleanly into storage/module feeds.Scaling rule: build Sandleaf like a utility grid—oversupply is good. Step 2: After Sandleaf, prioritize these three 1) Cryston Components (Level 50 Purple gear) Concept: two ingredient chains → final combine Rule: build each ingredient chain as its own module, then combine at the end Efficiency tip: if the final unit starves, your modules aren’t balanced—duplicate the starving side 2) Buck Capsule A (strong trade + strong sustain) This is where people clog constantly unless they build it like a merge: Ground Buckflower Powder module Steel Bottle module Final fill merge Anti-waste rule: feed two inputs of each side into the final fill so the unit doesn’t idle waiting on one stream. 3) SC Valley Battery (your power “endgame”) This is the “flip the switch” upgrade for power: replaces LC Valley Batteries provides substantially better power per cycle Routing tip: one packaging output can feed up to four Thermal Banks—late game is where that kind of routing matters a lot. 📈 Late Game Scaling: Regional Development and Purity as a Production Multiplier Why Regional Development becomes mandatory In late Valley IV, you’re not capped by “what you can craft.”You’re capped by how fast your inputs arrive. Higher Regional Development: increases node purity unlocks additional nodes makes your modules run continuously instead of “burst crafting” The late-game comfort target When you stop having to babysit power and inputs: your factory can run while you explore you can batch-craft explosives or gear mats without dismantling lines your depot actually fills instead of stalling at 50% uptime ✅ Wuling Starter Factory: New Staples, New Constraints, New Routing Wuling priority items (what actually matters first) Xiranite (core ingredient for Wuling crafting ecosystem) Xiranite Components (high-tier gear crafting material) LC Wuling Batteries (Wuling’s stable power source) Yazhen Syringe C (recommended trade good early) The Wuling rule: split lines immediately Wuling recipes are complex and your space/tooling is tighter early. Build modules (carbon/stabilized, powder, water/fluid steps, etc.) Merge only at the final unit Route to storage so outputs never clog Facility constraint planning If a facility is globally limited, treat it like a “slot.”Decide whether it serves: battery line stability component line stability or a trade loop that funds upgrades If you try to serve everything at once, you’ll run everything at half efficiency. Wuling early sequence that feels best Push story until the first outpost unlock opens the map and reveals your node plan Rig mining nodes immediately (Wuling is an economy reset if you delay) Unlock and place the Wuling Depot Bus early (routing freedom matters more here than Valley IV) Raise Regional Development so purity climbs and your modules stop starving Players looking to speed up their progress can grab a stronger start with verified Accounts, book expert help through Hourly Services for factory planning and blueprint optimization, or use trusted Boosting to push Authority milestones, expand your AIC faster, and farm key materials with less grind. If you’re trying to keep your production smooth while scaling into mid and late game, the right setup now saves you hours later. GameMarket.gg is a trusted digital marketplace for everything gaming-related. We serve the gaming community by providing secure access that enhances every gaming journey.
Arknights: Endfield
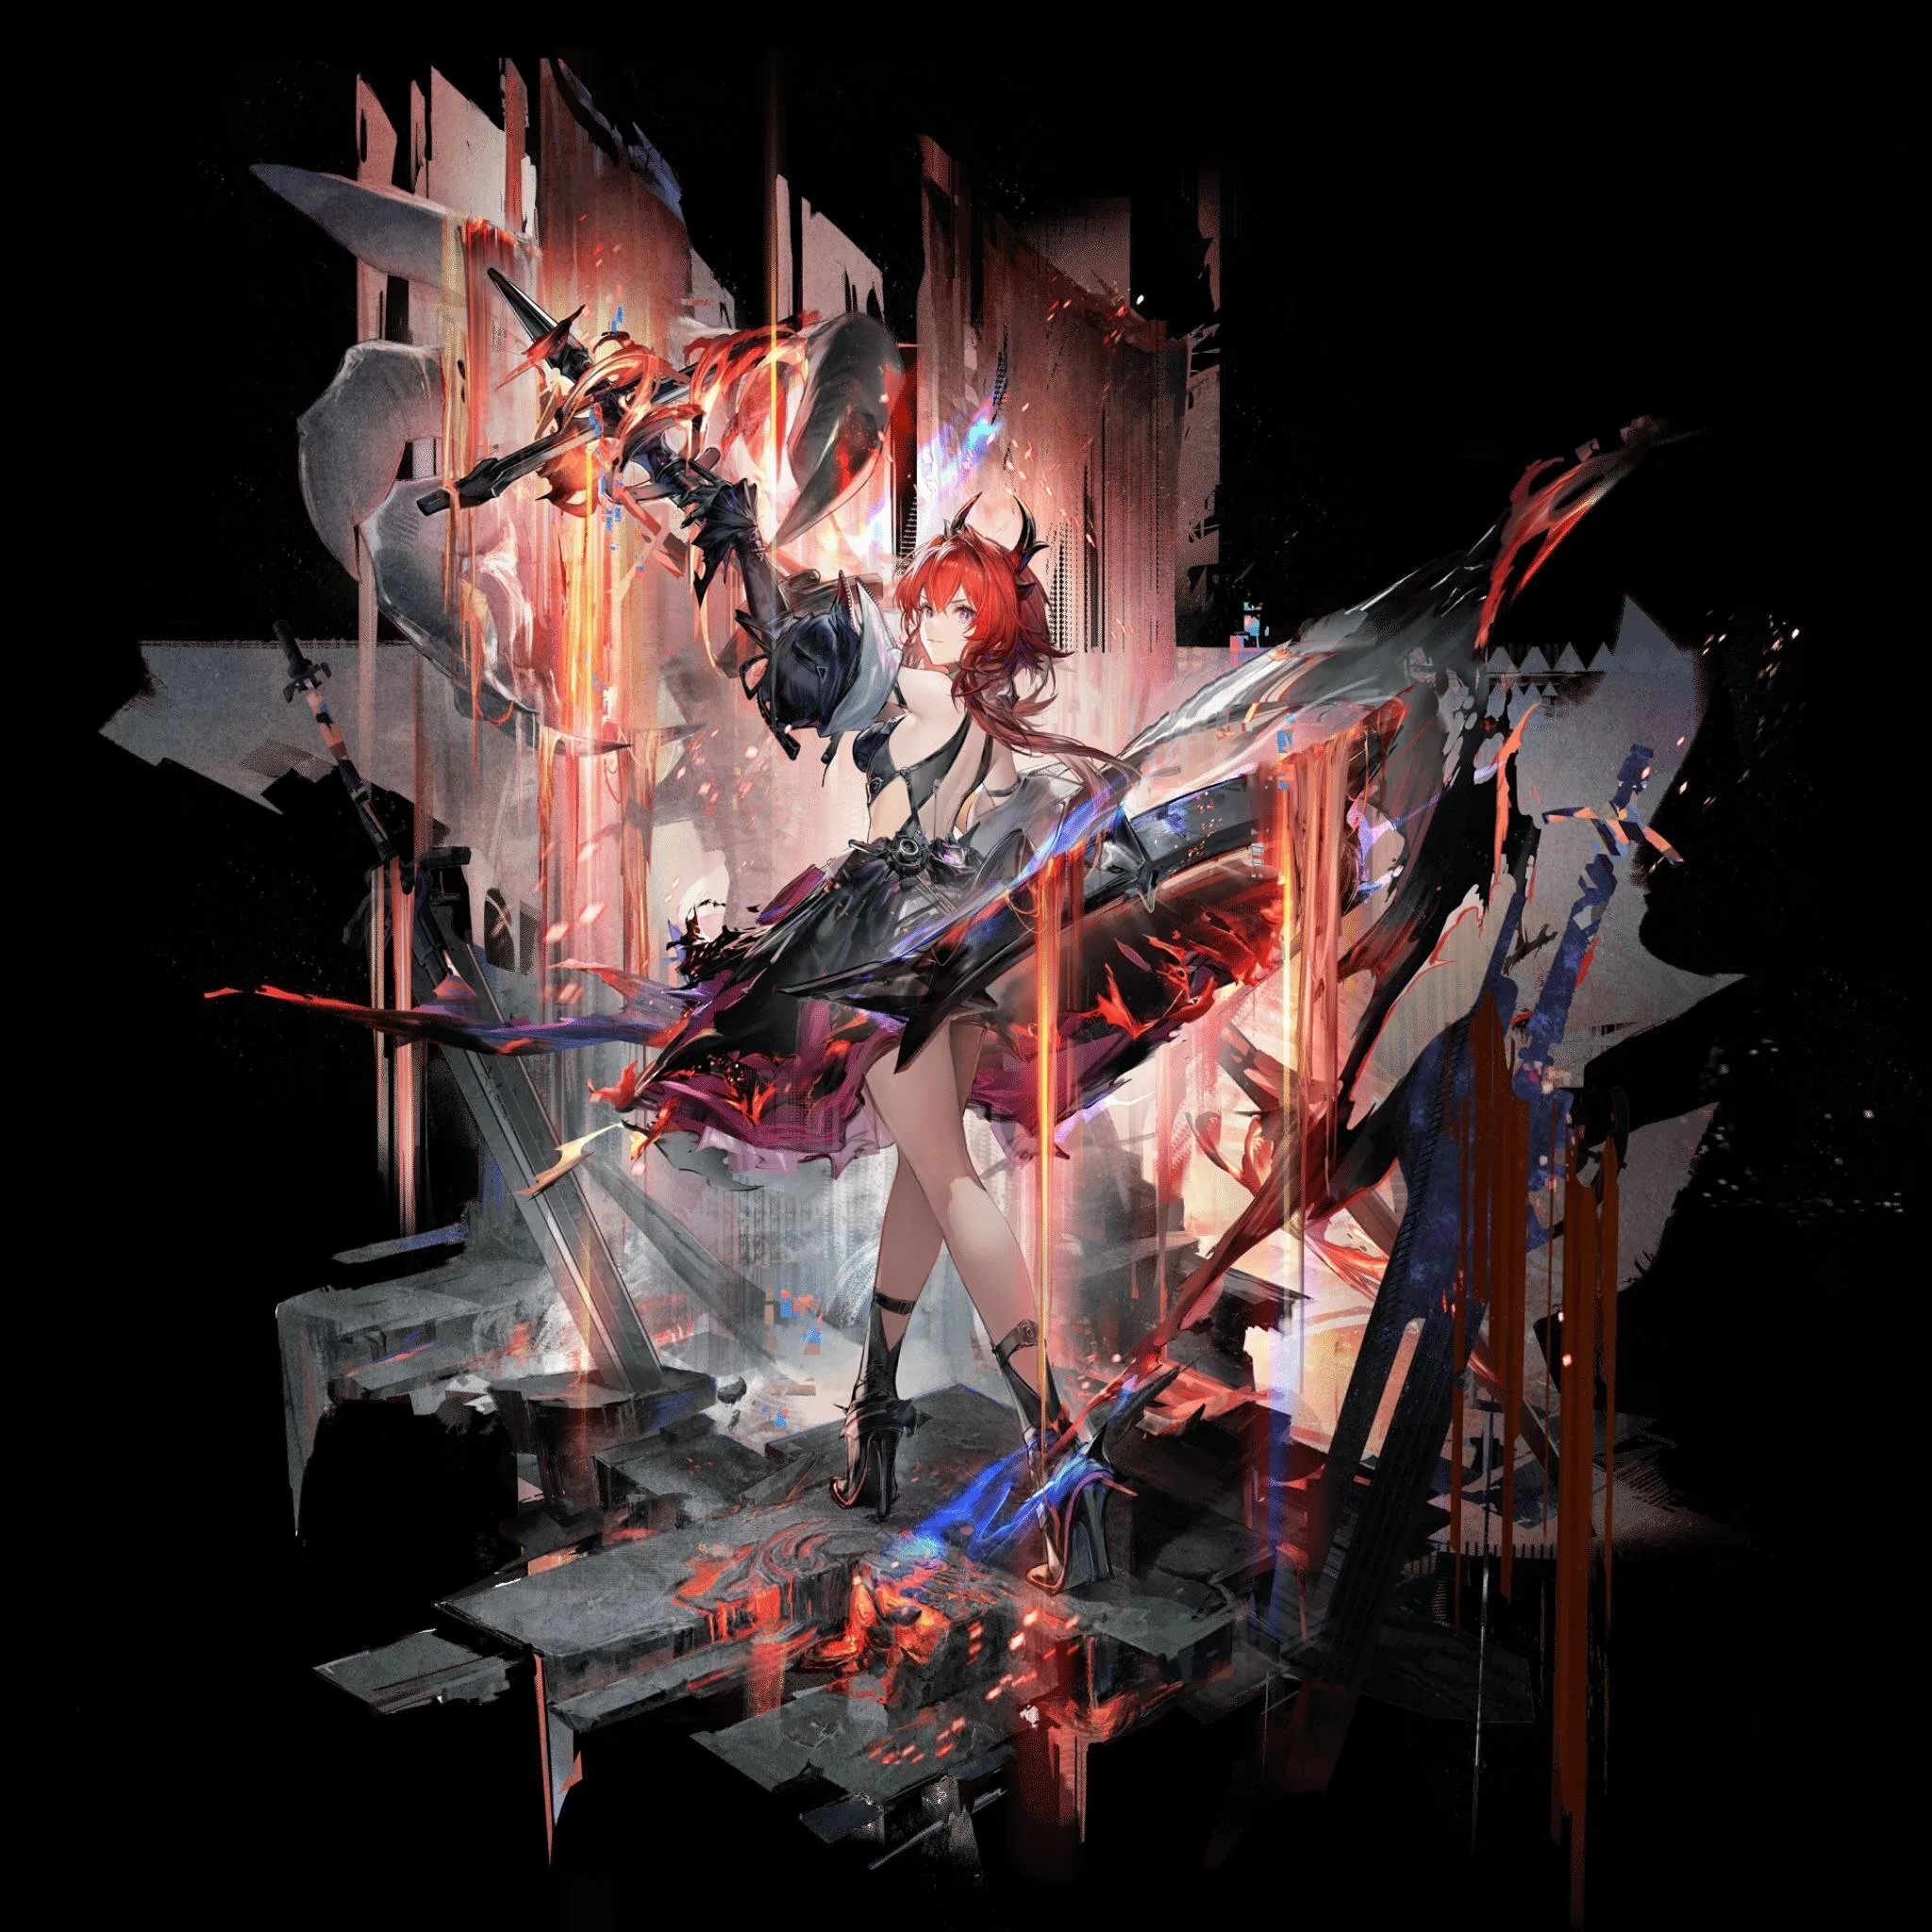
Laevatain Build Guide: Best Weapons, Gear, Teams, and Rotation
🔥 Laevatain Is a Heat Hypercarry Built Around Stack Discipline Laevatain isn’t a “turn your brain off” DPS. She’s a Heat Striker whose damage ramps when you convert teammate Heat Infliction into Melting Flame stacks using Final Strikes, then cash those stacks into two things that matter most: Enhanced Battle Skill at 4 stacks (your biggest spike outside Ultimate + huge Ultimate charging) Ultimate window uptime, where most of her total damage actually happens That’s why her best builds aren’t just “more stats.” They’re designed to keep her Ultimate cycling and to make her 4-stack breakpoints frequent and repeatable. 🧾 Laevatain Profile Snapshot and What It Implies for Builds Basic Info Rarity: 6★ Race: Sarkaz Faction: Rhodes Island Class / Element / Weapon: Striker / Heat / Sword Main Attribute: Intellect (primary scaling target) Secondary Attribute: Strength Level 1 Base Stats (reference) HP: 500 ATK: 30 STR: 13 AGL: 9 INT: 22 WIL: 9 Strengths / Weaknesses (real gameplay meaning) Strengths Wide AoE and high damage, especially during Ultimate Her strongest team core is accessible early (story + common pulls) Weakness She needs Heat Infliction sources on the team (otherwise stacks slow down and her kit feels “flat”) What that means: If your team isn’t consistently applying Heat Infliction, Laevatain becomes a “cool-looking sword user” instead of a hypercarry. Her performance is team-engine dependent. 🧠 The Two Mechanics You Must Understand 1) Melting Flame stacks (the entire kit revolves around this) You gain stacks by performing Final Strike / Finisher and absorbing Heat Infliction from nearby enemies Max stacks: 4 Hitting 4 stacks unlocks the payoff loop that her whole build is designed around 2) Ultimate windows (where her damage actually lives) A large portion of Laevatain’s output is tied to: buffed basic attacks during Ultimate stronger range / better coverage her ability to apply Heat Infliction inside the window and immediately convert it into more stacks Damage split perspective (why builds look “weird”): Her damage isn’t “Battle Skill spam.” It’s mostly basic attack output inside Ultimate, then Battle Skill as the big spike/charger outside it. 🧰 Best Builds for Laevatain (Two Clear Lanes) ✅ Best Endgame DPS Build (Hot Work + Signature) This is the high-ceiling, hypercarry setup. Best Weapon: Forgeborn ScatheEssence Priority: Twilight Attack Boost Intellect Boost Best Gear Pieces (core plan) Armor: Tide Fall Light Armor (off-piece utility) Gloves: Hot Work Gauntlets Kit I + Kit II: Hot Work Pyrometer + Hot Work Pyrometer Why this build wins Hot Work gives a massive Heat DMG bonus window after Combustion application Laevatain’s enhanced Battle Skill applies Combustion, so she triggers the set herself Forgeborn Scathe amplifies the single most important thing for her burst: basic attack damage during Ultimate What you’re building for: consistent “4 stacks → enhanced skill → fast Ultimate → delete window.” ✅ Early Game Build (Mordvolt + Fortmaker) This is the “you just got her, you’re not geared yet” plan. Best Weapon: FortmakerEssence Priority: Inspiring Ultimate Gain Boost Intellect Boost Gear Set: Mordvolt Insulation Intellect +50 When HP > 80%, Arts DMG +20% Why it works early It directly boosts Intellect and adds stable damage It rewards keeping her healthy (which you should do anyway to maintain rotation stability) Fortmaker helps her scale while you wait for real 6★ weapon options ⚔️ Best Weapons Deep Dive (When Each One Makes Sense) 1) Forgeborn Scathe (Best-in-slot) Why it’s #1: It supercharges her Ultimate burst window because her Ultimate output is heavily basic-attack weighted. When a weapon directly buffs that, alternatives struggle to compete. When it matters most: Bosses, timed clears, anything where you win by deleting phases. 2) Umbral Torch (Best substitute if you can maintain uptime) Why it’s strong: It has the right mix (Intellect/ATK/Heat bonuses), but its passive asks for Combustion/Corrosion uptime. Translation: it performs best when you’re running multiple reliable appliers, not a sloppy team that lets reactions drop. When it’s best: Battle-pass weapon at high copies, especially on the classic Heat core with consistent application support. 3) White Night Nova (why it underperforms despite being 6★) It leans too hard into stats that don’t map cleanly into Laevatain’s biggest damage lane. It’s not “bad,” it’s just not aligned with the part of her kit you’re trying to maximize. 4) Fortmaker / Wave Tide (fallback logic) Fortmaker is the best early option because it supports her core scaling and Ultimate rhythm Wave Tide is the “I need an Intellect sword now” option until upgrades arrive 🧩 Best Gear: What Actually Changes Your Output Hot Work Set (Best overall damage set) Set effect: Heat DMG +50% after applying Combustion (10s window)Why it’s perfect: Laevatain can trigger it reliably through the enhanced Battle Skill. Two common ways to run it Full Hot Work leaning into pure damage Hot Work core with a flex piece chosen for either: more damage (best flex) Ultimate gain breakpoint chasing (more advanced) Mordvolt Insulation (Best early game) It’s straightforward: main stat + conditional damage. Great until you have proper endgame sets and flex pieces. 👥 Best Team: Laevatain Hypercarry (Why Each Slot Exists) Laevatain Hypercarry Team Laevatain (Main DPS / controlled operator during Ultimate) Akekuri (SP engine + consistent skill flow) Wulfgard (Heat Infliction supply + stack feeding) Ardelia (Corrosion support + sustain utility) What this team solves Heat Infliction uptime (so you can stack Melting Flame consistently) Corrosion access (helps keep effects and triggers flowing) SP economy (so you can actually cast what you need on schedule) Sustain (so your DPS window isn’t interrupted by panic play) Why it’s early-access friendly Wulfgard is story-acquired Ardelia comes from a sign-in event Akekuri is a commonly obtainable unit 🔁 Rotation Breakdown (Expanded, Step-by-Step With Purpose) Your goal is always the same: reach 4 Melting Flame stacks, then spend into enhanced Battle Skill and accelerate Ultimate. Outside Ultimate: Stack + Setup Loop Basic combo → Final Strike (this is your stack engine) Trigger support actions to ensure enemies have the right status coverage Repeat Final Strikes to keep absorbing Heat Infliction When Laevatain’s Combo trigger appears, prep debuffs first (don’t waste it) Once you hit 4 stacks, you’re ready for the cashout Cashout Point: Enhanced Battle Skill (Your biggest non-Ult hit) Cast Battle Skill at 4 stacks This gives the extra hit + extra Ultimate gain, pushing you toward the next window Enter Ultimate: Burst Window Rules Inside Ultimate: Your basic attacks become the main damage source On the third hit, you apply Heat Infliction The next Final Strike consumes that Heat Infliction, feeding stacks again Your priority is staying disciplined and not dropping the sequence The mistake that kills DPS: panic-skilling inside Ultimate and breaking the attack chain that fuels the stack loop. ✅ Skill + Talent Priority (With “Why”) Skill Priority Ultimate — biggest multipliers, biggest AoE, biggest identity Battle Skill — highest spike outside Ultimate + charges Ultimate Combo Skill — supports stacks + extra charge, but not core damage Basic Attack — last, because you already get most value through Ultimate scaling first Talent Priority Scorching Heart first At 4 stacks, she starts ignoring a chunk of Heat Resistance for a long window That’s a direct multiplier to the damage profile you’re building around Re-Ignition later Strong survival, but lower value when you’re already running sustain 🧱 Potentials That Actually Matter (What Changes Your Gameplay) Pot 1: Battle Skill improvement (more multiplier + SP return) feels like smoother rotation and less “dead time” Pot 4: Ultimate cost reduction increases Ultimate uptime and can unlock faster burst cycles Pot 5: Ultimate damage multiplier increase + duration extension on kills strongest in AoE-heavy stages where she’s deleting multiple enemies 🎁 Gifts and Trust (Quick Reminder) Best: Breeze of Kjersch Good alternatives: Simonch Shawl, Eureka Teabox (especially when Hot) 🗓️ How to Get Laevatain (Banner Window Clarity) Banner: Scars of the Forge Window: Jan 21, 2026 → Feb 6, 2026 (UTC-5) Jan 22, 2026 → Feb 7, 2026 (UTC+8) Can also appear as an off-rate 6★ in Version 1.0 Chartered Headhunting banners 🧠 Best Route to Build Laevatain Without Wasting Resources Start with Fortmaker + Mordvolt if you’re early Lock in the team engine (Akekuri + Wulfgard + Ardelia) Practice the core loop: Final Strike → stacks → 4-stack cashout → Ultimate Transition into Hot Work + Forgeborn Scathe when available Upgrade Ultimate first, then Battle Skill, then the rest Players who want to fast-track Laevatain setups can browse verified Accounts to start with stronger Heat cores, book professional Hourly Services for rotation coaching and build optimization, or use trusted Boosting to accelerate progression and reach the content where Ultimate window DPS matters most. Laevatain rewards clean execution—once your team consistently feeds her Heat Infliction and your rotation hits 4 stacks on schedule, her Ultimate windows stop feeling “strong” and start feeling inevitable. GameMarket.gg is a trusted digital marketplace for everything gaming-related. We serve the gaming community by providing secure access that enhances every gaming journey.
Arknights: Endfield
Arknights: Endfield Tier List : Best Team Comps + How to Build Them Right
🏆 Arknights: Endfield Tier Guide — Teams Matter More Than “Good Units” This Arknights: Endfield Tier article combines two angles that players usually treat separately: a performance-based team Tier ladder built around endgame testing expectations, and the practical “best comps” reality of what actually works when you’re assembling a 4-unit roster with limited slots. In Endfield, many Operators are at their best inside a specific element lane or archetype—so the real power jump happens when your team is built to feed one carry’s kit with the right supports, SP generation, and status/reaction coverage. That’s why the best teams don’t just stack strong characters. They stack the conditions that make those characters function at full strength: infliction uptime, susceptibility/amp debuffs, reliable Combo triggers, and enough SP flow to keep your battle-skill rhythm from collapsing. 📌 What This Team Tier List Measures The team Tier ratings here are framed around endgame performance expectations, using the current hardest benchmark as Umbral Monument. For story and low difficulty content, you don’t need to chase Tier placements—properly built teams should clear comfortably. Tier becomes meaningful when you’re pushing peak potential, consistency, and ceiling in harder stages. 🥇 Team Tier List (Compositions Ranked by Endgame Performance) T0 (Top Tier Teams) 🔥 Laevatain Hyper Laevatain (carry) Wulfgard Akekuri Antal Ardelia What it’s doing: This is the pure “enable the carry” blueprint. You’re feeding Laevatain the Heat infliction and supportive layering she needs, while keeping SP flow stable enough to maintain pressure. How to play it: If your Heat uptime is inconsistent, this team drops from “unstoppable” to “annoyingly average.” Keep the engine running—don’t freestyle your rotation. T0.5 (Near-Top Tier Teams) ❄️ Last Rite Hyper Last Rite (carry) Xaihi Ardelia Perlica What it’s doing: Cryo carry built around making the Cryo lane feel “continuous” instead of bursty. Xaihi is the core identity piece here, and the rest of the team is about maintaining the right conditions for Last Rite’s damage pattern. How to play it: If you’re not consistently meeting your Cryo lane’s setup needs, Last Rite feels team-dependent in the worst way. This comp solves that—when piloted cleanly. T1 (Strong, Reliable Endgame Teams) 🥊 Endministrator Physical Endministrator (carry) Chen Qianyu Ardelia Pogranichnik Lifeng What it’s doing: Physical lane pressure with Vulnerable stacking and SP flow that keeps your battle-skill tempo high. This comp is about consistency and scaling through proper debuff application. How to play it: Physical teams feel bad when Vulnerable application is sloppy. Your goal is to keep the enemy permanently “open,” then spend SP like you mean it. 🥊 Da Pan Physical Da Pan (carry) Chen Qianyu Ardelia Pogranichnik Lifeng Endministrator What it’s doing: Similar physical core, but with Da Pan as the damage centerpiece. You’re still riding the same structural pillars: Vulnerable stacks, physical susceptibility, and sustained SP generation. How to play it: Treat Da Pan as the win condition, not “one of the DPS.” If you spread resources too wide, you get a functional team that never spikes. ⚡ Avywenna Electric [Expert] Avywenna (carry) Arclight Antal Perlica What it’s doing: An Electrification-driven team where reaction access and Combo synergy matter more than raw stats. Perlica’s Electrification access and Antal’s amplification are doing the heavy lifting behind the scenes. How to play it: This team punishes messy play. If you’re missing Final Strike timing or wasting Electrification windows, your damage collapses. T1.5 (Playable Endgame Teams with Higher Friction) 🔥 Wulfgard DPS Wulfgard (carry lane) Perlica Antal Arclight Gilberta Akekuri What it’s doing: A “secondary carry” structure that can still perform, but is more sensitive to how cleanly you manage stacks and support uptime. How to play it: This is the kind of team that feels strong when played correctly and “why is my damage gone?” when played casually. Keep your engine pieces aligned. ❄️/🥊 Cryo / Physical Hybrid Estella Alesh Ardelia Endministrator Pogranichnik What it’s doing: Hybrid structure that leans into Solidification and physical payoff lines. It’s less plug-and-play than pure element lanes, but it can work when the triggers are stable. How to play it: Hybrid comps are Combo-check teams. If your triggers aren’t being met consistently, the whole plan falls apart. 🧱 Best “Element Lane” Team Comps (Practical Builds You Can Run) Even if you’re not chasing Umbral Monument peak play, these are the cleanest “build a real team” templates—especially early. 🔥 Best Heat Team: Laevatain Team Main DPS: Laevatain Sub-DPS: Wulfgard SP Gen: Akekuri Sustain: Ardelia Why it works: Wulfgard + Akekuri supply Heat infliction to feed Laevatain’s stacking needs, while Ardelia provides Corrosion access that helps trigger key parts of her kit. ❄️ Best Cryo Team: Yvonne Team Main DPS: Yvonne SP Gen: Alesh Support: Gilberta Sustain: Xaihi Why it works: The team is built around Cryo infliction and Solidification uptime to enable Yvonne’s buffs and damage pattern, with Alesh helping force control conditions. ❄️ Best Cryo Team: Last Rite Team Main DPS: Last Rite SP Gen: Akekuri Support: Fluorite Sustain: Xaihi Why it works: This is a pure “feed Cryo infliction” team. Fluorite increases Cryo infliction support, and Akekuri keeps SP flowing so the team can keep pressure up. ⚡ Best Electric Team: Avywenna Team Main DPS: Avywenna SP Gen: Arclight Support: Antal Support: Perlica Why it works: Perlica’s Electrification access links into Arclight and Avywenna’s Combo needs, while Antal amplifies damage with susceptibility/amp support. 🥊 Best Physical Team: Lifeng Team Main DPS: Lifeng SP Gen: Pogranichnik Sub-DPS: Chen Qianyu Sub-DPS: Endministrator Why it works: Pogranichnik drives the team’s SP economy, Chen Qianyu stacks Vulnerable, and Endministrator contributes additional damage and utility. Lifeng plays as the primary carry. 🧊 Shatter Team Template Main DPS: Endministrator SP Gen: Alesh Support: Estella Sustain: Ardelia Why it works: Solidification triggers and Combo chaining are the core identity. If you like “reaction teams,” this is a clean structure—when the triggers are consistent. 🧠 How to Build Teams That Actually Match Tier Performance 1) Choose the DPS (Your Carry Lane) DPS anchors listed include: Laevatain, Yvonne, Last Rite, plus Endministrator, Da Pan, Avywenna. How to play it: Pick one DPS to invest in first. Endfield punishes “four half-built characters.” 2) Pick Supports That Increase Ceiling, Not Just Comfort Supports highlighted: Gilberta, Ardelia, Antal.Some supports are generalists (easy plug-ins), others are lane specialists that make one element pop off. How to play it: A specialized support can be worth more than an extra DPS—if it enables your carry’s real kit. 3) Always Run an SP Generator SP Generators include: Arclight, Pogranichnik, Akekuri.Akekuri is broadly flexible; the others tend to spike harder in their “right” teams. How to play it: If your team feels “slow,” you’re usually missing SP, not damage. 4) Build Around Statuses and Reactions Physical statuses and Arts reactions are core mechanics that drive damage windows via susceptibility, resistance reduction, and trigger-based effects. How to play it: Your Tier increases when your team’s reaction uptime becomes reliable, not occasional. 5) Ensure Combo Skills Can Actually Trigger Combo skills often require specific triggers (Final Strikes, reactions, etc.). A team can look perfect on paper and still fail if it can’t meet those trigger conditions consistently. How to play it: If your team feels inconsistent, it’s often a trigger problem—fix the condition, not the stats. ✅ Best Route to Use Tier Info Without Overcomplicating It Pick one lane: Heat / Cryo / Electric / Physical Choose a carry, then fill: 1–2 supports that enable their kit 1 SP generator 1 sustain/utility slot if needed If you want the best ceiling, aim toward T0/T0.5 structures If you want clean progression, the “best comp templates” will carry you comfortably Upgrade wide later—build one strong team first Players who want to speed up their Endfield Tier climb can browse verified Accounts to start with stronger roster cores, book professional Hourly Services for team routing and rotation tuning, or use trusted Boosting to push Umbral Monument performance and secure higher-end rewards with less grind. Because Endfield’s meta is built around complete team engines—not single characters—having the right core early makes every Tier jump feel cleaner and more consistent. GameMarket.gg is a trusted digital marketplace for everything gaming-related. We serve the gaming community by providing secure access that enhances every gaming journey.

Arknights: Endfield
Arknights: Endfield Tier List: Who’s Worth Building First in v1.0
🏆 Arknights: Endfield Tier Guide — Pick a Core, Then Build Around It This Arknights: Endfield Tier breakdown is for Version 1.0 (January 2026), and it’s built around one simple truth: your first “meta decision” isn’t about perfection—it’s about direction. The strongest accounts aren’t the ones with the most units, they’re the ones that lock into one carry lane early and surround it with the right amplifiers, infliction sources, and utility so the kit actually performs the way it’s designed to. You can feel the design philosophy in this tier spread: the top performers aren’t just high damage—they’re characters whose kits either scale across multiple team types, or they enable a whole element lane cleanly enough to raise the team ceiling. 📌 Version 1.0 Tier List Snapshot (January 2026) SSSS Tier (Top Priority) Laevatain Ardelia Yvonne SS Tier (Core Team Staples) Last Rite Xaihi Pogranichnik Lifeng Avywenna Gilberta Antal AA Tier (Strong Flex / Stopgaps) Endministrator Perlica Wulfgard Akekuri Chen Qianyu Da Pan Arclight Alesh BB Tier (Functional, Often Outclassed) Ember Snowshine Estella CC Tier (Niche / Replaceable) Fluorite Catcher 🧠 Tier Criteria (What the Rankings Actually Mean) This Tier list ranks Operators by: Individual power and impact Kit flexibility (how many team styles they fit) Role performance (how reliably they do the job they’re meant to do) In short: higher Tier means “strong now + stays useful,” while lower Tier often means “works, but gets replaced.” ⭐ SSSS Tier Characters and Why They’re Top 🔥 Laevatain (Heat / Striker) Why she’s SSSS: She’s a high-end AoE DPS with massive damage and wide reach, but she’s designed to be enabled—her ceiling is unlocked by teams that feed her the right status setup. Strengths Strong AoE DPS Uncontested raw power from damage + range Limits Team dependent (wants Combustion and Corrosion support) Needs heavy Heat Infliction from teammates Build direction If you pull Laevatain, your next goal is “build the team that powers her,” not “add random DPS.” 🌿 Ardelia (Nature / Supporter) Why she’s SSSS: She’s a support that does multiple jobs at once—healing, susceptibility setup, and forced Corrosion access. That kind of role compression makes teams cleaner and more consistent. Strengths Can heal Applies Arts and Physical Susceptibility Can forcibly apply Corrosion Limits Does not apply Nature Infliction Build direction Ardelia is the kind of unit that makes every early team feel safer and smoother, even before you optimize. ❄️ Yvonne (Cryo / Caster) Why she’s SSSS: Strong Cryo DPS with flexible options and built-in control. She’s not just “damage,” she’s also stability. Strengths Strong Cryo DPS with flexible team options Minor crowd-control via Solidification Limits Primarily single target Can struggle when mobs are scattered Build direction Yvonne loves teams that group or control enemies so she can keep her output consistent. 💎 SS Tier Characters (The Real “Team Engines”) ❄️ Last Rite (Cryo / Striker) Strong Cryo DPS Applies Cryo Susceptibility Wants heavy Cryo Infliction support from team How to play it: She’s a carry if you commit to Cryo support—if you don’t, she feels “good but not insane.” ❄️ Xaihi (Cryo / Supporter) Core support for Cryo teams Applies Arts Amp, Cryo Amp, and boosts Cryo damage dealt Limited to Cryo teams How to play it: If your main lane is Cryo, Xaihi is the kind of support that turns “decent clears” into “clean clears.” 🛡️ Pogranichnik (Physical / Vanguard) High SP generation Decent damage, applies Breach Limited to Physical teams and greedy with Vulnerable stacking How to play it: He’s valuable when your team plan is “more skill usage, more pressure, more tempo.” ⚔️ Lifeng (Physical / Guard) Can act as Physical DPS Applies Physical Susceptibility and Link Limited to Physical teams How to play it: Lifeng is a clean foundation unit—strong early and stays useful when you build Physical properly. ⚡ Avywenna (Electric / Striker) Decent Electric DPS Applies Electric Susceptibility Can underperform if played incorrectly; limited to Electric How to play it: If your rotation is messy, Avywenna’s value drops—she rewards clean execution. 🌿 Gilberta (Nature / Supporter) Strong crowd-control Applies Arts Susceptibility Has minor healing Weak in single-target scenarios How to play it: She’s a “fight stabilizer”—amazing when fights are chaotic, less impressive when it’s pure boss burn. ⚡ Antal (Electric / Supporter) Strong amplifier for Heat and Electric DPS teams Limited to Heat and Electric DPS lanes How to play it: Antal is a multiplier piece—best when you already have a carry worth amplifying. 🧩 AA Tier Characters (Strong Tools, Usually Not the Final Answer) These Operators are strong and usable, but often end up as flex picks, substitutes, or early anchors until your roster fills in. Highlights: Perlica is flexible for Arts teams and can forcibly apply Electrification via Combo Skill. Wulfgard is a Heat team core with Laevatain and a strong Heat infliction applicator, but wants good stack handling. Akekuri is a flexible SP generator, but needs specific triggers (staggering or ultimate). Chen Qianyu is a great Vulnerable applicator for Physical teams. Da Pan is strong in AoE Physical content but replaceable as DPS later. Arclight brings frequent Combo Skills and SP value for Electric, but consumes Electrification. Alesh has strong SP generation in certain setups but can be RNG-reliant. 🧱 BB and CC Tier (When to Build Them) BB Tier: Ember, Snowshine, Estella These units can do their jobs, but their kits are more constrained and usually get outscaled by higher-tier options. Ember has sustain tools (heal/shields/Protection) and Vulnerable stacks, but her lane restrictions make her less flexible. Snowshine heals and can force Solidification via ultimate, but utility is mostly healing and Cryo application can be awkward. Estella applies Cryo infliction but is limited to Shatter teams. CC Tier: Fluorite, Catcher Fluorite adds Cryo and Nature inflictions but is limited in utility. Catcher provides Protection/shields but is also limited in impact. How to play it: Build BB/CC mainly if they fill a missing role on your account, not because you’re chasing “meta.” 🛠️ Best Builds: Quick “What to Equip” Direction (v1.0) Because the build list is still in progress, the best use is as a practical starting point: take the weapon/gear recommendations for your main core and lock them in early so your team clears feel consistent. Here are high-signal examples from the build list: 🔥 Laevatain (DPS / Early Game) DPS weapons: Forgeborn Scathe (best-in-slot), Umbral Torch, Fortmaker, Wave Tide Early game: Fortmaker (best-in-slot), Wave Tide Gear callout: Mordvolt Insulation (best-in-slot for early game) 🌿 Ardelia (Early Game / Support) Early game weapons: Freedom to Proselytize (best-in-slot), Fluorescent Roc Support weapons: Dreams of the Starry Beach (best-in-slot), Stanza of Memorials, Monaihe, Fluorescent Roc Gear callout: Mordvolt Resistant (best-in-slot for early game) ❄️ Yvonne (Early Game / Single-Target) Early game weapons: Wedge (best-in-slot), Howling Guard Single-target weapons: Artzy Tyrannical (best-in-slot), Navigator, Wedge, Howling Guard Gear callout: Mordvolt Insulation (best-in-slot for early game) ❄️ Xaihi (Healer Support Lane) Early game healer: Monaihe (best-in-slot), Freedom to Proselytize Cryo Arts healer: Chivalric Virtues (best-in-slot), Detonation Unit, Monaihe, Freedom to Proselytize Gear callout: Mordvolt Resistant (best-in-slot for early game) 🛡️ Pogranichnik (SP Regen / Early Game) SP regen build: Never Rest (best-in-slot), Thermite Cutter, Eminent Repute, Rapid Ascent Early game: Thermite Cutter (best-in-slot), Sundering Steel Gear callout: Mordvolt Resistant (best-in-slot for early game) How to play it: Gear your Tier core first. If your SSSS/SS units feel “mid,” it’s often because they’re running generic weapons that don’t match their role. 🧠 Best Route: How to Use the Tier List Without Wasting Resources Pick one carry lane early (Heat with Laevatain, Cryo with Yvonne/Last Rite, Physical with Lifeng/Pogranichnik) Add the right enablers, not more DPS (infliction sources, amps, susceptibility, SP engines) Use AA Tier as flex or bridge units while you stabilize your core Don’t overbuild BB/CC unless they solve a role gap on your roster Once your core clears smoothly, then expand into secondary team lanes Players who want to skip the early roster lottery can browse verified Accounts to start with Tier-ready cores, book professional Hourly Services for team planning and build optimization, or use trusted Boosting to speed up progression and reach the content where Tier differences matter most. If you treat the Tier list like a routing tool—pick a lane, build the supports, and gear the core—you’ll progress faster than players who just level whoever looks cool. GameMarket.gg is a trusted digital marketplace for everything gaming-related. We serve the gaming community by providing secure access that enhances every gaming journey. s, and a base-building automation loop that quietly decides how fast your account grows. If you try to brute-force progress with just combat, you’ll eventually hit resource friction. If you over-focus on the base early without story unlocks, you’ll stall on features you can’t access yet. The most efficient early progression comes from syncing the two halves: push Main Story to unlock systems, stabilize one core team, then get your automation running so your upgrades don’t depend on constant manual farming. 🎮 What Endfield Actually Is: ARPG + Automation, Not Just “Another Gacha” Endfield’s identity is split by design: Semi-open world ARPG combat with team swaps, resource management, and reaction-style planning Base Building + Automation through the AIC, where production lines turn raw materials into the items that power progression It also layers in social-style features like visiting a friend’s base and interacting with shared infrastructure-style tools, which makes traversal and utility feel like part of the progression loop rather than optional fluff. 👥 Team Building Basics: 4 Operators, 4 Kits, One Shared Resource Problem You can bring up to 4 Operators per team. Each Operator has a Class, an element, and a full kit built around four main tools: Basic Attacks (including a finisher for the controlled character) Battle Skills (no cooldown, consume SP, can be chained fast) Combo Skills (don’t cost SP, but require triggers) Ultimates (use Energy that builds through combat) The important hidden pressure point is SP: your team shares 3 SP bars (300 SP total), so dumping SP carelessly is how teams feel “weak” even when your characters are leveled. ⚔️ Combat Priorities: Learn the Rhythm Before You Chase Power Endfield combat rewards players who understand tempo: You can dodge up to twice, and a well-timed dodge can improve SP regeneration for a period Enemies telegraph attacks—watch for key cues like red warning circles Some fights want smart swaps (melee vs ranged) to keep damage up while avoiding hazards This is why “easy to learn, hard to master” fits: you can clear casually, but harder content expects you to react quickly and solve mechanics on the fly. 🏭 AIC Basics: Your Progress Engine Starts When You Automate The AIC (Automated Industry Complex) is the heart of Endfield’s base-building and automation half. As you progress, you unlock facilities and technologies that improve how you farm materials and produce what your account needs. If you want the cleanest early growth curve, don’t treat AIC as a “later” system. Once it unlocks, start building production lines early—especially for gear—because higher-tier production takes longer and becomes a long-term timer you’ll wish you started sooner. 🧠 Early Game Route: What to Do First So You Don’t Waste Resources A clean beginner route looks like this: Follow the Main Story first to unlock essential features and systems Prioritize New Feature and Time Limited quests after Main Story steps Once AIC unlocks, build a gear production line early so your progression doesn’t stall later Do Simulations early when they unlock for account EXP, blueprints, and momentum Build one team first—resources get time-gated and expensive fast, and spreading upgrades across multiple teams slows everything Save rare “double reward” style tickets for higher-level farm stages where they matter most While exploring, place Pylons and Ziplines as you go—especially toward rare growth spots—so your map routing improves over time ✅ Daily Routine Guide: The Checklist That Stops You Falling Behind Once you’re past the first wave of unlocks, your daily routine becomes your consistency engine. A practical daily list includes: Trade Elastic Goods Delivery Job Trade at Outposts Gather materials from Recycling Stations and Rare Growth Sites Spend stamina on the farm you actually need (materials or essence) Manage your ship Clear the Daily Mission Board If it feels overwhelming at first, that’s normal—what matters is consistency. Staying on top of daily tasks keeps your account economy stable, and that stability is what lets you push story and upgrades without constant stop-and-farm walls. Players looking to speed up their Endfield start can browse verified Accounts to begin with stronger early setups, book professional Hourly Services for team planning and efficient routing, or use trusted Boosting to accelerate unlock milestones and reduce grind. If you treat Endfield like two connected systems—story unlocks + one stable team + early automation—you’ll hit midgame faster, waste fewer resources, and feel “ahead” without ever needing to brute-force the grind. GameMarket.gg is a trusted digital marketplace for everything gaming-related. We serve the gaming community by providing secure access that enhances every gaming journey.
Arknights: Endfield
Arknights: Endfield Guide: Raise Regional Development Level Fast
🗺️ Arknights: Endfield Guide — Regional Development Is “Account Power,” Not Map Flavor This Arknights: Endfield Guide is about Regional Development because it’s one of the rare systems that improves your whole game loop at once: better regional resource flow, stronger base growth, and more “working room” for tools and upgrades that otherwise feel capped. The key is understanding that you’re not leveling RDL by grinding one thing—you’re leveling it by stacking Regional Development progress from multiple regional systems that were designed to feed into each other. Once you start treating Regional Development like a checklist you clear while traveling—outposts, station unlocks, rigging, terminals, exploration—your growth stops feeling random and starts feeling compounding. 📈 The “Big Picture” Loop: RDM Sources That Stack Together Regional Development progress is most efficient when you hit these pillars in a loop: Anchor the region (Outpost setup + Prosperity pushes) Turn on passive sources (Recycling Stations and similar regional unlocks) Lock in automation (Mining rigs and depot support so materials keep flowing) Spend your regional action currency wisely (Stock Bills are the quiet limiter) Explore with purpose (you’re not wandering—you’re unlocking nodes and access) That’s why your map can suddenly feel “richer” later: you didn’t just get stronger in combat—you upgraded the region itself. 🏠 Outposts: The Fastest “Chunk” Progress You Can Force Outposts are the most consistent way to push Regional Development quickly because they’re both a progress gate and a multiplier: They’re where you formalize your connection to a region They’re where your economy starts to behave like a system instead of random drops What to do in every new region Find the Outpost and get it online early Treat Prosperity as a target, not a background stat Trade and complete the region’s “setup” actions first before you roam too far How to play it: If you roam first and outpost later, you often end up doing the same travel twice—once to find things, then again because you still need the outpost chain to actually progress the region. ⛏️ Mining Rigs: The “Do It Once, Profit Forever” Habit Mining rigs are one of the cleanest Regional Development habits because they convert discovery into ongoing value. If you see a good mining spot, rig it immediately If it’s an electric rig setup, plan your pylons so the rig isn’t “installed but idle” How to play it: Rigging isn’t about today’s ore. It’s about making sure tomorrow’s upgrades don’t stall because you ignored the region’s long-term resource engine. ♻️ Recycling Stations and Regional Unlocks: Passive Progress That Adds Up Recycling Stations and similar regional infrastructure matter because they’re: Passive material sources Direct Regional Development progress levers “Early activation advantage” systems (the earlier you start them, the more value you get over time) There’s also a quality-of-life layer now: when certain regional progress nodes are available—like Recycling Stations, Stock Redistribution Terminals, depot nodes, or monitoring terminals—the game can surface notifications to point you toward what’s ready to unlock or upgrade. How to play it: If the game is pointing you to an unlock/upgrade node, it’s usually because you’re sitting on progress you can convert immediately. 🧾 Stock Bills: The Hidden “Throttle” Behind Regional Actions Players often feel like they’re “doing everything” but still progressing slowly, because the limiter isn’t combat—it’s how many regional actions you can actually perform. Stock Bills are tied to regional systems and are used for key actions (like certain crafting/activation steps), and managing them well is part of staying ahead instead of perpetually “one step short.” Practical approach Don’t blow Stock Bills on low-impact actions early Use them on unlocks that increase your ability to generate materials or access new nodes If you’re running out constantly, your route is likely too “wide” (too many small actions) instead of “deep” (a few high-impact unlock chains) 🧠 PAC Upgrades: Why RDL Feels Like Your Base Is “Breathing Bigger” RDL ties into upgrades that make your base systems feel less constrained—especially around storage and how far your systems can reach. This is why RDL is so valuable even if you’re not “stuck” right now: it prevents future bottlenecks before they happen. How to play it: Think of PAC/RDL as increasing your ceiling. If you raise the ceiling early, you spend less time later doing emergency detours just to unlock space. 🧭 Exploration That Actually Speeds You Up (Not Random Wandering) Exploration helps Regional Development most when it’s tied to: Unlockable infrastructure icons you pass near (stations, terminals, nodes) First-time setup actions (that often award progress) Material access routes you’ll want later (rare spots, awkward terrain) If you want extra efficiency, use a map tool to plan “node runs” instead of free roaming. How to play it: Exploration becomes “progress” when you’re collecting unlock points, not scenery. ✅ The Fast RDL Checklist Route (Simple and Repeatable) When entering a new region: Outpost first (connect it, start Prosperity pushes) Activate obvious infrastructure (Recycling Stations / terminals / nodes) Rig mining on good spots you pass Spend Stock Bills only on high-impact unlock chains Explore toward rare access points (then improve travel routes so revisits are fast) Do that loop region by region and your Regional Development stops being a grind and becomes a compounding account upgrade path. Players looking to accelerate their Endfield progression can browse verified Accounts to start with stronger early unlocks, book professional Hourly Services for regional routing and base optimization, or use trusted Boosting to speed up unlock milestones and reduce grind pressure. Regional Development is the kind of system that rewards smart routing more than raw playtime—once you treat every region like an upgrade checklist, the whole game feels faster. GameMarket.gg is a trusted digital marketplace for everything gaming-related. We serve the gaming community by providing secure access that enhances every gaming journey.
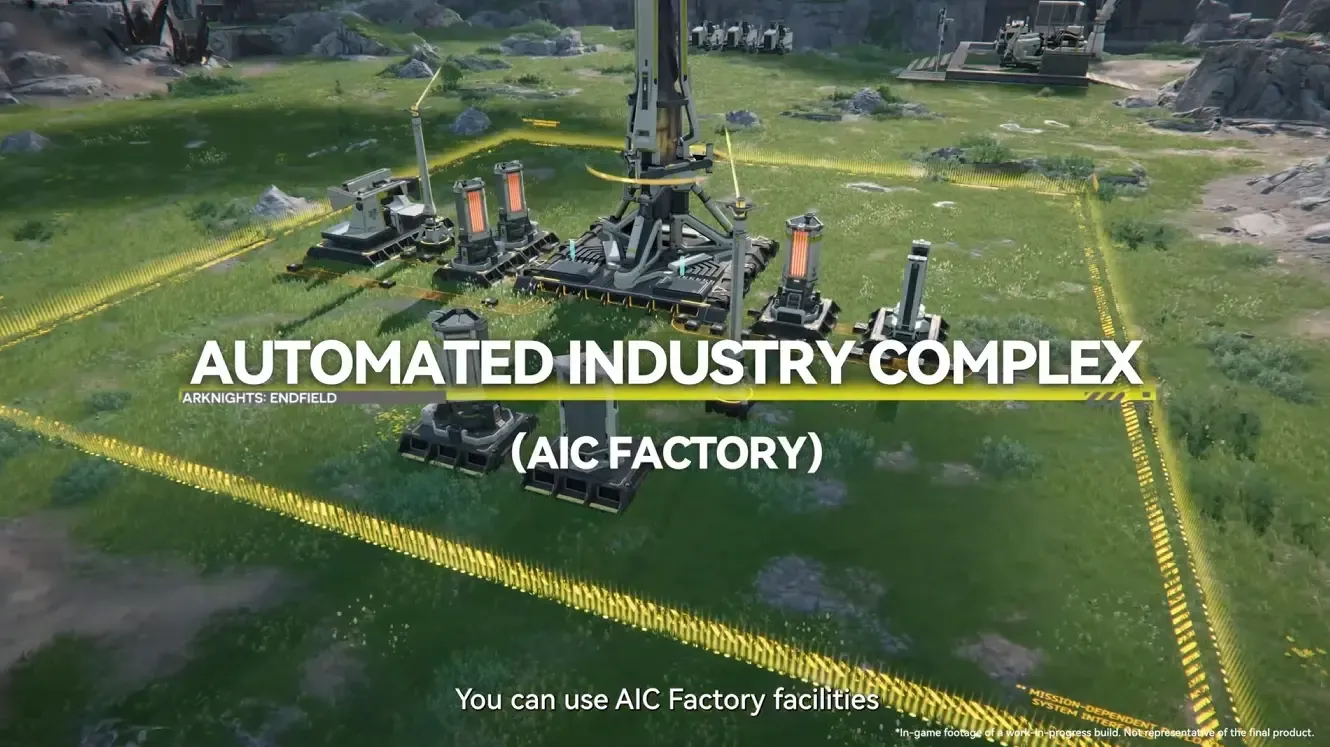
Arknights: Endfield
AIC Factory Guide: Automated Lines, Exploration Tools, and Build Tips
🏭 AIC Factory Guide — The Base System That Turns Materials Into Momentum The Automated Industry Complex (AIC) isn’t just a “crafting menu” in Arknights: Endfield—it’s a full factory system that converts what you gather into the resources that actually move your account forward. Once you start building real production lines, the AIC becomes your most consistent source of gear and development materials, and the difference between a clean setup and a messy one shows up fast: longer routes slow output, and a disorganized base turns automation into babysitting. This also changes what efficient progression looks like. Story clears unlock the next steps, but your AIC layout determines whether you’re steadily producing what you need—or constantly short on the exact materials that gate upgrades. 🧩 What the AIC Factory Actually Does The AIC processes raw materials into crafted products like gear, medication, food, and explosives, using linked facilities and logistics units to create automated production lines at your base. Your base ends up functioning as a major resource engine for Operator and Weapon development, so skipping AIC upkeep is basically choosing slower long-term growth. How to play it: Treat AIC as an account system you maintain, not a one-time feature you unlock. 🔁 Set Up Automated Production Lines (The Core Loop) The AIC is strongest when you build with a production-line mindset: Gather raw materials Process them through connected facilities Link facilities with logistics units Let automation run so outputs scale with time, not effort How to play it: The goal isn’t “build a lot.” The goal is “build lines that run clean,” because longer automation routes reduce output speed. 🧭 Use the AIC for Exploration Support Some AIC facilities aren’t about crafting—they’re about mobility and access. Tools like the zipline help you reach hard-to-access areas faster, including paths that would otherwise require longer routes or platforming. This matters because some rare materials are positioned behind awkward terrain, and being able to reach them consistently makes your upgrade path smoother. How to play it: If you’re missing a material that feels “annoying” to grab, your AIC exploration support can turn that into a quick routine. ⚔️ Get Support From Combat Facilities The AIC can also contribute directly in combat through facilities that damage enemies or heal your team in scenarios where AIC support is available. This becomes especially valuable when enemies out-level you—AIC combat facilities can stabilize fights that would otherwise be inefficient or risky. How to play it: If you’re pushing content above your comfort level, AIC combat support can be the difference between a clean clear and repeated resets. 🌿 Utilize Mechanized Planting for High-Volume Crafting The AIC includes Planting Units that automate growing common plants in high volume. Those plants then feed crafting for practical items—especially healing items and even explosives—which means planting isn’t “flavor,” it’s supply chain stability. How to play it: If you craft frequently, mechanized planting reduces the “I’m out of basics again” problem that slows progression. 🧱 Building Tips: How to Make Your Base Faster, Not Bigger 🗺️ Plan Out Your Base Design Early As you unlock more facilities, you’ll naturally expand into multiple lines at once. Planning ahead keeps the base organized and efficient. If you build without a plan, you tend to create long routes, and long routes mean slower automation output. How to play it: Design for short routes. A tidy base is a faster base. 📖 Progress the Story to Unlock Key Upgrades Several AIC upgrades are tied to Main Story progression. Some of these aren’t optional—they’re required to move into deeper factory upgrades. Story unlocks can include: Outposts (more space, more lines) Basic Expansion Core (access to additional facilities) How to play it: If your AIC feels capped, it’s often because you’re story-locked—push main story until the next expansion unlocks. 🏗️ Pay Attention to Regional Development Regional Development affects resource gathering. Higher levels can increase Mineral Purity and unlock additional resource nodes. You raise the level by increasing Regional Development Metrics through actions like: Rigging mining spots for the first time Upgrading outposts Unlocking recycling stations How to play it: Regional Development is the quiet multiplier. If your resource flow feels weak, raise the region first instead of forcing more farming. 🤝 Utilize Outpost Liaisons for Bonus Value Outposts can assign Operators as Liaisons, and their Liaison traits influence the outpost they’re assigned to. Matching the right Operator to the outpost’s qualities helps maximize bonuses. How to play it: Don’t assign liaisons randomly—treat them like passive buffs that add up over time. 🧠 Best Route to Improve Your AIC Fast Build your first automation lines with short routes Use AIC to stabilize both crafting and exploration Push story when upgrades feel gated (outposts + expansion cores matter) Raise Regional Development so your resource base scales Assign the right Outpost Liaison for free efficiency boosts Add mechanized planting once you’re crafting consumables regularly Players looking to speed up their Endfield progression can browse verified Accounts to start with stronger unlocks, book professional Hourly Services for base planning and optimization help, or use trusted Boosting to accelerate unlock milestones and reduce grind. If you want the AIC to feel powerful instead of tedious, optimize for short routes and steady production first—then expand once your base can run multiple lines without slowing itself down. GameMarket.gg is a trusted digital marketplace for everything gaming-related. We serve the gaming community by providing secure access that enhances every gaming journey.
Arknights: Endfield
Arknights: Endfield Guide: What to Do First, What to Farm, What to Skip
📘 Arknights: Endfield Guide — The “Day 1” Win Is Unlocking Systems Fast This Arknights: Endfield Guide is built around one reality: Endfield is two games stapled together—a semi-open ARPG with team combos, and a base-building automation loop that quietly decides how fast your account grows. If you try to brute-force progress with just combat, you’ll eventually hit resource friction. If you over-focus on the base early without story unlocks, you’ll stall on features you can’t access yet. The most efficient early progression comes from syncing the two halves: push Main Story to unlock systems, stabilize one core team, then get your automation running so your upgrades don’t depend on constant manual farming. 🎮 What Endfield Actually Is: ARPG + Automation, Not Just “Another Gacha” Endfield’s identity is split by design: Semi-open world ARPG combat with team swaps, resource management, and reaction-style planning Base Building + Automation through the AIC, where production lines turn raw materials into the items that power progression It also layers in social-style features like visiting a friend’s base and interacting with shared infrastructure-style tools, which makes traversal and utility feel like part of the progression loop rather than optional fluff. 👥 Team Building Basics: 4 Operators, 4 Kits, One Shared Resource Problem You can bring up to 4 Operators per team. Each Operator has a Class, an element, and a full kit built around four main tools: Basic Attacks (including a finisher for the controlled character) Battle Skills (no cooldown, consume SP, can be chained fast) Combo Skills (don’t cost SP, but require triggers) Ultimates (use Energy that builds through combat) The important hidden pressure point is SP: your team shares 3 SP bars (300 SP total), so dumping SP carelessly is how teams feel “weak” even when your characters are leveled. ⚔️ Combat Priorities: Learn the Rhythm Before You Chase Power Endfield combat rewards players who understand tempo: You can dodge up to twice, and a well-timed dodge can improve SP regeneration for a period Enemies telegraph attacks—watch for key cues like red warning circles Some fights want smart swaps (melee vs ranged) to keep damage up while avoiding hazards This is why “easy to learn, hard to master” fits: you can clear casually, but harder content expects you to react quickly and solve mechanics on the fly. 🏭 AIC Basics: Your Progress Engine Starts When You Automate The AIC (Automated Industry Complex) is the heart of Endfield’s base-building and automation half. As you progress, you unlock facilities and technologies that improve how you farm materials and produce what your account needs. If you want the cleanest early growth curve, don’t treat AIC as a “later” system. Once it unlocks, start building production lines early—especially for gear—because higher-tier production takes longer and becomes a long-term timer you’ll wish you started sooner. 🧠 Early Game Route: What to Do First So You Don’t Waste Resources A clean beginner route looks like this: Follow the Main Story first to unlock essential features and systems Prioritize New Feature and Time Limited quests after Main Story steps Once AIC unlocks, build a gear production line early so your progression doesn’t stall later Do Simulations early when they unlock for account EXP, blueprints, and momentum Build one team first—resources get time-gated and expensive fast, and spreading upgrades across multiple teams slows everything Save rare “double reward” style tickets for higher-level farm stages where they matter most While exploring, place Pylons and Ziplines as you go—especially toward rare growth spots—so your map routing improves over time ✅ Daily Routine Guide: The Checklist That Stops You Falling Behind Once you’re past the first wave of unlocks, your daily routine becomes your consistency engine. A practical daily list includes: Trade Elastic Goods Delivery Job Trade at Outposts Gather materials from Recycling Stations and Rare Growth Sites Spend stamina on the farm you actually need (materials or essence) Manage your ship Clear the Daily Mission Board If it feels overwhelming at first, that’s normal—what matters is consistency. Staying on top of daily tasks keeps your account economy stable, and that stability is what lets you push story and upgrades without constant stop-and-farm walls. Players looking to speed up their Endfield start can browse verified Accounts to begin with stronger early setups, book professional Hourly Services for team planning and efficient routing, or use trusted Boosting to accelerate unlock milestones and reduce grind. If you treat Endfield like two connected systems—story unlocks + one stable team + early automation—you’ll hit midgame faster, waste fewer resources, and feel “ahead” without ever needing to brute-force the grind. GameMarket.gg is a trusted digital marketplace for everything gaming-related. We serve the gaming community by providing secure access that enhances every gaming journey.
Arknights: Endfield
Arknights: Endfield Reroll Guide: How to Do It and Who to Chase
🎲 Reroll in Endfield Is a Real Time Investment — So Make It Count Reroll in Arknights: Endfield isn’t the “two-minute reset” type of gacha routine. The core loop requires account setup, clearing story until Headhunting unlocks, and then pushing pulls until you hit a 6-star outcome through guarantee or pity—meaning your biggest cost isn’t currency, it’s time. If you’re going to do it at all, the only correct approach is to treat rerolling like a short-term project: decide your target list, set a hard stop condition, and avoid drifting into endless “one more run” resets. This also shifts what “efficient progress” looks like in week one. You’re not optimizing farming—you’re deciding whether your first 20–45 minutes goes into building momentum on one account, or restarting repeatedly to force a stronger opening roster. 🧭 How Reroll Works in Endfield (The Exact Loop) The reroll process follows a clear pattern: Create and verify a new account email Log in with that account when prompted Progress story until the Headhunting menu unlocks Spend your rolls on either the Exclusive Banner or New Horizons Banner until you trigger a 6-star result via guarantee/pity If the result isn’t good enough, repeat from step one with a new account How to play it: Don’t “sample pull” and quit early. The entire reroll point is reaching the moment where your account’s 6-star outcome is decided. ⏱️ How Long a Reroll Takes (Plan Your Attempts Properly) A single reroll attempt can take roughly 20–45 minutes, and that’s before factoring in extra time for setting up a new verified email each run. How to play it: If you don’t have at least an hour to commit, you’ll usually get a worse result by half-rerolling than by just playing forward and collecting early rewards. 🏆 Reroll Tier List: The Best Characters to Aim For If you’re rerolling with intent, you’re chasing units that can carry early progression and stay relevant into harder content. ⭐ SS Tier (Top Targets) Laevatain (DPS)Big AoE damage ceiling, but wants team support that enables her damage patterns. Yvonne (DPS)High output with flexible options, stronger in focused single-target play with useful control. ⭐ S Tier (Great, More Conditional) Pogranichnik (Support)Strong skill-point support and utility, best in physical-focused setups. Last Rite (DPS)Strong Cryo damage profile with team dependency that becomes more valuable as your roster expands. Gilberta (Support)Crowd-control plus support utility that shines most when fights get messy. ⭐ A Tier (Solid, More Niche) Lifeng (Support)Useful physical-oriented support tools, best when your team leans into that lane. Ardelia (Support/Sustain)Flexible support with healing and debuff utility that fits many early teams. Ember (Support/Sustain)Defensive support that can stabilize runs, but less “carry” power than higher tiers. How to play it: SS-tier rerolls are about skipping the “early roster gap.” S/A-tier rerolls are about landing a strong core you can build around without burning days resetting. ❓ Is Reroll Worth It in Endfield? For most players, the practical answer is no—not because rerolling can’t work, but because Endfield makes it tedious: There’s no guest account system, so resets require real account setup Headhunting unlock timing means every reroll is a full 20–45 minute run 6-star rates are low enough that chasing perfection can spiral into a time sink Early progression already includes safety nets like consistent 5-star frequency and free character rewards that reduce the need to force a perfect start How to play it: Reroll only if you enjoy the process and you’re willing to stop once you hit a “good enough” outcome. If you want fast progress, start playing and let early rewards do the heavy lifting. 🧠 Best “Smart Reroll” Rules (So You Don’t Waste Your Week) Set a target: aim for an SS-tier carry (or a specific favorite) Set a hard stop: limit attempts (example: 3–5 runs), or stop once you hit SS/S Avoid perfection traps: if your account rolls a strong start, keep it and move forward Don’t reroll blind: know whether you’re pulling Exclusive or New Horizons first, and why Players who want to skip the reroll grind can browse verified Accounts to start with stronger openers, book professional Hourly Services for early-team planning and pull routing, or use trusted Boosting to accelerate early milestones and get into midgame content faster. If you’re chasing the cleanest week-one momentum, the real win is choosing one path: either reroll with a strict stop rule, or commit to a single account and let the game’s early rewards carry your growth. GameMarket.gg is a trusted digital marketplace for everything gaming-related. We serve the gaming community by providing secure access that enhances every gaming journey.
Arknights: Endfield
Arknight: Endfield Released: How to Avoid Failed Installs and Day-One Stutter
🎮 Endfield Is Out — Use This as Your Post-Launch Install + Setup Checklist Arknight: Endfield is now live, and this notice is best read as a post-launch “get in fast” guide: it focuses on the real reasons players lose time after release—failed installs, slow extraction, and launcher conflicts. If your download is crawling or your install keeps restarting, it’s usually not a mystery. It’s storage headroom (especially on PC), old test clients still sitting on your device, or an outdated launcher path pulling the wrong build. The best move is to treat launch week like a checklist. Clear space first, install clean once, and lock your account so cross-save works immediately. 🗓️ Launch Timing and Where Players Are Downloading Endfield launched worldwide at Jan 22, 2026, 11:00 AM (UTC+8) and is available on PS5, PC, Android, iOS, and Epic Games Store. 💾 Storage Requirements: The #1 Install Failure Trigger Most “it won’t install” problems come down to storage math: PC: needs 50GB+ free — plus an extra 40GB during extraction PS5: needs 60GB+ free Android: needs 25GB+ free iOS: needs 25GB+ free How to play it: On PC, the extraction step is the trap. If you only have “just enough,” installs fail late and you waste time re-downloading. Give yourself real headroom. 🔄 Cross-Save: One Rule to Prevent Split Progress Cross-platform saves work as long as you use the same account on every platform. Using different logins across devices can make it look like your progress didn’t carry over. How to play it: Pick your main login once, then stick to it everywhere. 🧹 If You Played a Test Build, Clean It Out First If you still have an older Endfield client from a previous test, uninstall it before installing the official release version. This avoids conflicts where old files block or corrupt the release install. 🖥️ PC Requirements: What You Need for Stable Performance Windows 10/11 (64-bit), DirectX 11.1+ Minimum CPU: i5-9400F (or equivalent) Recommended CPU: i7-10700K (or equivalent/higher) Minimum GPU: GTX 1060 (or equivalent) Recommended GPU: RTX 2060 (or equivalent/higher, latest drivers) RAM: 16GB minimum (16GB+ recommended) How to play it: If you’re near minimum GPU, install on SSD and keep drivers current—those two changes reduce stutter risk more than most “performance tips.” 📱 Mobile Requirements: Quick Compatibility Check Android Minimum: Android 10 / HarmonyOS 2.0.0+ (HarmonyOS NEXT not supported) Recommended: Android 11 / HarmonyOS 4.0.0+ Minimum chips: Snapdragon 855 / Dimensity 1000 / Kirin 990 (or equivalent) Recommended chips: Snapdragon 8+ Gen1 / Dimensity 9000 / Kirin 9000S (or higher) RAM: 6GB minimum, 8GB+ recommended GPU note: most PowerVR GPUs aren’t supported (except Imagination D-Series) iOS / iPadOS iOS/iPadOS 15.0+ Minimum: iPhone XS / iPad A12 (or later) Recommended: iPhone 13 Pro / iPad A15 (or later) RAM: 4GB minimum, 6GB+ recommended 🎮 PS5 Notes: Simple but Strict PS5 requires 60GB+ free space. If you’re trying to run the game on borderline hardware elsewhere, expect stuttering or frame drops—this launch build is still being optimized. 🧰 PC Launcher Fix: GRYPHLINK Conflicts PC installs go through GRYPHLINK. If you have an older GRYPHLINK version from prior tests, it may not download the release client correctly—uninstall the old launcher and reinstall the current one. If GRYPHLINK is installed, use All Games → Arknights: Endfield to reach the correct download page. 🧠 Best Route to Get Playing Today Clear storage first (PC needs extraction headroom) Remove old test clients and old launcher versions Install on your main platform once Confirm your account login for cross-save If anything fails, storage + old files are the first things to fix Players looking to start Endfield strong can browse verified Accounts to begin with stronger early progress, book professional Hourly Services for routing and setup help, or use trusted Boosting to accelerate milestones and reduce launch-week grind. If you’re joining after release, the fastest win is still the same: install clean, free extra space, and get your account sync right once—then you’re in. GameMarket.gg is a trusted digital marketplace for everything gaming-related. We serve the gaming community by providing secure access that enhances every gaming journey.
Showing 31 of 43 from 43 Results