
News

The Seven Deadly Sins: Grand Cross
7DS Grand Cross 7th Anniversary Update
Dive into the massive The Seven Deadly Sins: Grand Cross 7th Anniversary Update! Discover the new LR Golden Wings Elaine evolution, conquer the Transcendent Skoll and Hati Demonic Beast, and master the new Vaizel Fight Festival rules to claim all your exclusive event rewards. The grand 7th Anniversary celebration has officially arrived in Britannia! The massive 3/25 Update for The Seven Deadly Sins: Grand Cross is packed with an unbelievable amount of content, bringing game-changing character evolutions, grueling new endgame boss floors, and a tidal wave of progression events. Whether you are returning to the tavern after a long break or are a veteran Knight looking to optimize your Holy Relics, this comprehensive update guide covers every single detail you need to master the anniversary patch. 🧚♀️ LR Evolution and The Seventh Spring The character progression meta receives a massive boost in this update with the introduction of a brand-new Legendary Evolution. Players can now upgrade [Fairy of Blessings] Golden Wings Elaine to the coveted LR grade, drastically enhancing her base stats and utility for high-level combat scenarios. To complement this evolution, the Grand Season Selection Draw -Our Seventh Spring- is now live, offering an excellent opportunity to bolster your roster and acquire highly sought-after heroes. Alongside the new draw, the update introduces the Grand Season -Our Seventh Spring- Costume Sets. Players can purchase exclusive weapon, outfit, and cosmetic pieces either bundled with 30 Diamonds or standalone. For true completionists, a massive Costume Resale and Discount Event has also been activated, allowing you to pick up previously missed outfits for only 20 Diamonds apiece. 🐺 Transcendent Skoll and Hati: The 4th Floor Endgame PvE combat has been pushed to its absolute limits with the addition of the Transcendent Demonic Beast (4th Floor) 'Skoll and Hati'. Unlocking this brutal challenge requires clearing Chapter 13 [Episode 237] and completing Floor 3 of the Twilight Temple. Battle Mechanics: Once Floor 3 is cleared, your heroes' remaining HP is preserved, and the passive effects from the previous floors will not stack. If you manage to clear this 4th Floor, the stage locks but can be reopened using 1 'Twilight Source', allowing you to completely skip Floors 1–3 on subsequent runs. Additionally, the 'Thonar' Bad Blood effect has been applied across Floors 1–4 to shake up team compositions. Exclusive Rewards: Conquering this beast yields the brand-new Holy Relic Enhancement Material: Skoll and Hati's Claw. This material unlocks a completely new tier of Holy Relic Enhancement, which uniquely grants 1 GP of Constellation Points upon completion. Guaranteed Drops & Titles: To ease the farming grind, guaranteed Holy Relic Enhancement Materials have been added for all Transcendent Demonic Beasts (Hraesvelgr's Feather, Eikthyrnir's Broken Horn, and Skoll and Hati's Claw). Furthermore, players who clear all related missions will earn the prestigious 'Skoll and Hati Destroyer' title. ⚔️ Vaizel Fight Festival (Elite) Season 24 For players seeking dominance in PvP, the Vaizel Fight Festival (Elite) Season 24 kicks off on March 30 and runs until April 12. This season introduces a massive disruption to standard burst strategies: the core rule prevents Ultimate Move Gauges from being filled by more than 1 orb from Unique Abilities. Week 1 Tactical Rule: The arena heavily favors debuff compositions. Allies' Max HP increases by 3% for every Shock, Poison, and Bleed effect active on the enemy. Furthermore, allies restore HP equal to 10% of the damage dealt by these specific status effects. Rank Rewards: Climbing the ranks this season is highly lucrative, rewarding top players with Diamonds and the exclusive SSR [Knight of the Holy War] Guardian Gilthunder, ensuring your defensive PvP setups get a massive boost. 🎁 Grand Season Events and Boosting Campaigns Netmarble is showering players with resources to celebrate the anniversary, drastically reducing the stamina and material grind across the entire game. Friend Invite Event: The 'New Semester Club Recruitment Drive' allows Inviters to share codes with Invitees. Inviters can generate a hero reward list through up to 100 'Hero Draw x10' retries. When Invitees use the code, they immediately receive the granted heroes and an Awakened/Enhanced SSR Life and Iron Wall Equipment Set featuring 13% base substats! Hawk's Journey for Scraps: Take control of Hawk in a three-lane swipe mini-game. Avoid obstacles by jumping or use the 'Rolling Ham Attack' to smash through them. Accumulate high combo scores to unlock rare cosmetics and upgrade materials. Massive Resource Boosting: The Demonic Beast Battle stamina cost is reduced by an incredible 50%, alongside a 2x drop rate for Guaranteed Stage Rewards and Artifact Cards. Additionally, Main and Free Stages feature 50% stamina discounts and double Player Rank EXP, while Hero and Equipment Enhancement super/ultra success rates are heavily boosted. Transcendent Skoll and Hati anchors the early progression of the update, especially for players investing in new characters. Travelers aiming to accelerate ascension farming can explore trusted The Seven Deadly Sins: Grand Cross Accounts, optimize resin/stamina efficiency with expert The Seven Deadly Sins: Grand Cross Hourly Services, or secure consistent boss clears through reliable The Seven Deadly Sins: Grand Cross Boosting as farming rotations intensify. GameMarket.gg is a trusted digital marketplace for everything gaming-related. We serve the gaming community by providing secure access that enhances every gaming journey. Is there another patch note or character guide you'd like me to transform next, Bosku? Just drop the text and the keyword!

Honkai Star Rail
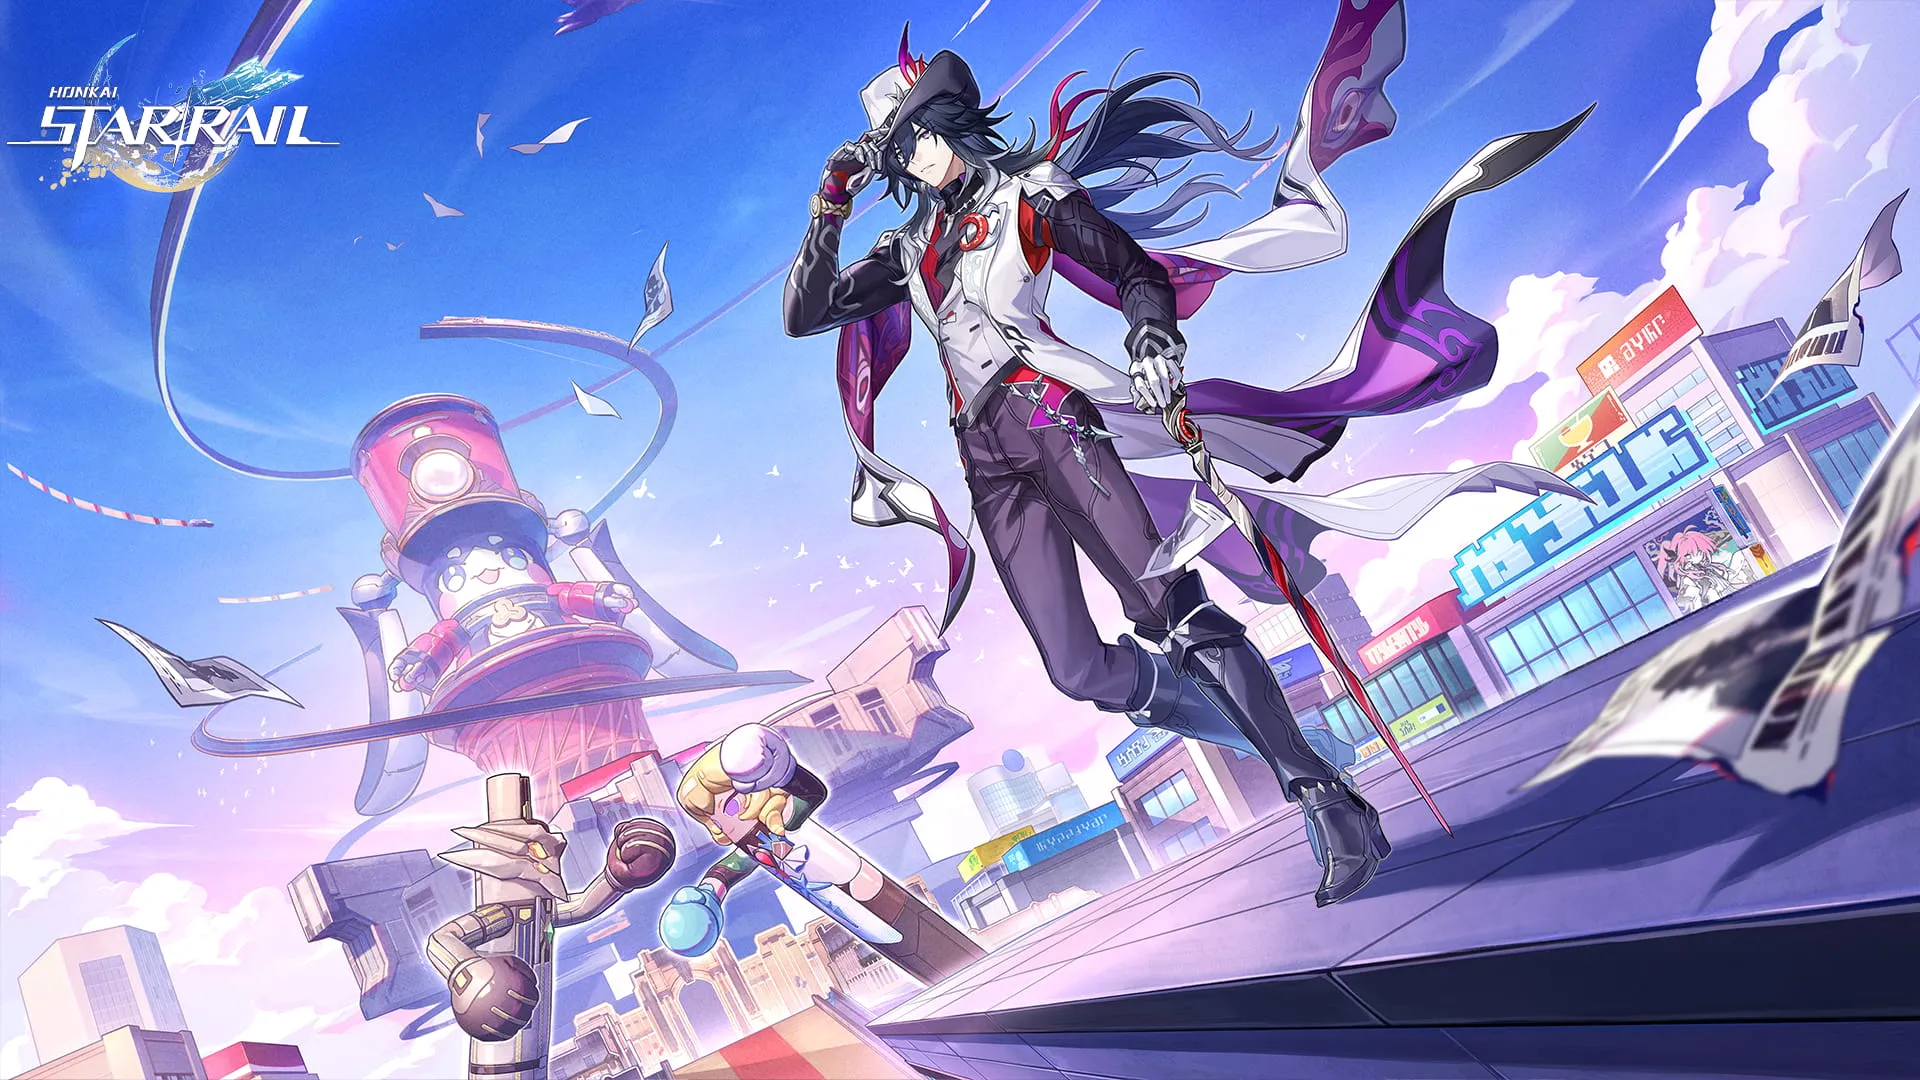
Ultimate Ashveil Build Guide for HSR
Master the battlefield with this comprehensive Honkai: Star Rail Ashveil Build Guide. Discover the absolute best relics, light cones, Eidolons, team compositions, and trace priorities to unleash this 5-Star Lightning Hunt character's devastating Follow-Up Attack potential in Version 4.1. 🕵️ Ashveil Character Overview: The Lightning Detective Voiced by Blythe Melin (EN) and Koyasu Takehito (JP), Ashveil is a brilliant 5-Star Lightning character walking the Path of The Hunt. Hailing from the Ashen Detective Agency, he completely redefines the single-target DPS role. Instead of relying solely on his own turns, he acts as a high-tempo Follow-Up Attack (FUA) hybrid hypercarry. His entire kit revolves around marking enemies as "Bait" and consuming "Charge" stacks to launch coordinated automatic attacks alongside his teammates. Furthermore, his presence on the battlefield massively buffs his allies, making him an absolute necessity for players building premium Follow-Up Attack teams. His banner, A Hunt Through Night, runs from March 24, 2026, until April 21, 2026. ⚙️ Optimal Gear: Best Relics, Stats, and Light Cones Building Ashveil requires a strict focus on maximizing his CRIT values and Follow-Up Attack damage multipliers. Because his attacks are typically single-hit nukes triggered by his allies, ensuring he critically strikes every single time is absolutely mandatory for consistent damage output: Best Relic Set: The 4-piece The Ashblazing Grand Duke is his undisputed best-in-slot, providing massive Follow-Up ATK DMG and a stacking ATK% buff whenever his FUA triggers. Alternative Relic Set: The 4-piece The Wind-Soaring Valorous is a great secondary option, boosting his CRIT Rate, ATK, and Ultimate damage. Best Planar Ornament: The 2-piece City of Converging Stars perfectly synergizes with his kit by increasing his ATK and providing a party-wide CRIT DMG boost. Duran, Dynasty of Running Wolves is a highly viable alternative for its stacking FUA damage and CRIT DMG. Main Stat Priority: Body (CRIT Rate or CRIT DMG), Feet (ATK%), Sphere (Lightning DMG), and Rope (ATK%). Substat Tuning Priority: ATK% > CRIT Rate > CRIT DMG > Flat ATK. Target Stat Values: You must aim for an ATK stat of 3000 or more. Critically, you should push his CRIT Rate as close to 100% as possible, alongside a CRIT DMG stat of 150% or higher. To achieve these demanding stat requirements, equipping the right Light Cone is crucial. His signature 5-Star Light Cone, The Finale of a Lie, is undeniably his best choice. It provides a massive CRIT Rate boost and easily triggers the "Umbra Devourer" effect, granting him ATK and applying a DMG amplification debuff to enemies. If his signature is unavailable, premium alternatives like Dr. Ratio's Baptism of Pure Thought or Topaz's Worrisome, Blissful work exceptionally well. For Free-to-Play Trailblazers, the Herta Store's Cruising in the Stellar Sea provides an excellent CRIT Rate and ATK boost. 🤝 Best Team Compositions and Synergies To unleash Ashveil's maximum damage-per-rotation, he must be paired with allies who attack frequently to trigger his "Charge" stacks, or dedicated supports who can hyper-buff his damage window. The Premium FUA Team: Ashveil (Sub-DPS), Feixiao (Main DPS), Robin (Support), and Permansor Terrae (Sustain). This team is an unstoppable engine. Feixiao and Permansor Terrae's summons constantly attack the Bait, rapidly triggering Ashveil's Talent, while Robin massively buffs the entire party's damage and action advance. The Hypercarry Team: Ashveil (Main DPS), Sunday (Support), Tribbie (Support), and Permansor Terrae (Sustain). Sunday provides crucial Energy and CRIT stats while advancing Ashveil forward. Tribbie shreds All-Type RES and triggers Ashveil's talent with her own Follow-Up Attacks. The F2P FUA Team: Ashveil (Main DPS), Herta (Sub-DPS), March 7th (Sub-DPS), and Permansor Terrae (Sustain). A highly accessible team where Herta and March 7th's frequent FUAs consistently trigger Ashveil's attacks. 📚 Trace Priority, Gameplay Loop, and Eidolons Ashveil's gameplay loop requires strict management of his "Bait" and "Gluttony" stacks. Use his Skill (Flog: Smite Evil) to mark an enemy as Bait, which deals Lightning DMG and reduces the DEF of all enemies on the field by 20%. Whenever an ally attacks the Bait, Ashveil's Talent (Rancor: Enmity Reprisal) consumes 1 Charge to launch an FUA and generate 2 stacks of Gluttony. Once you accumulate enough Gluttony, unleash his Ultimate (Banquet: Insatiable Appetite). This massive burst fires an enhanced FUA that does not consume Charge, and for every 4 Gluttony stacks consumed, it deals an additional instance of massive Lightning DMG. If the Bait is killed, the attack automatically chains to the next target. When leveling his Traces, prioritize his Talent first, as it houses his core FUA damage multipliers. Follow this closely by leveling his Skill (to increase DEF shred) and Ultimate equally. His Basic Attack can be ignored. To fully ascend Ashveil and max his Traces, you will need 65 Thunder Strums, 139 Lances of Retribution, 12 Vanquished Flow's Reticence, and an abundance of Dreamweave Steel and Whimsy Wax, totaling roughly 3.3 million Credits. For players looking to push his combat potential, unlocking his Eidolons provides massive combat advantages: E1 (Beware: Venture Not at Full Moon): Increases DMG taken by all enemies by 24%, leaping to 36% if the enemy is below 50% HP. E2 (Knock: Where Snickers Echo): The best stopping point for spenders. Increases max Gluttony stacks to 18 and refunds 35% of consumed stacks after his Ultimate, drastically speeding up his burst cycles. E4 (Heed: Swallow Truth Whole): Grants a 40% ATK boost for 3 turns after using his Ultimate. E6 (Finale: And Then There Were None): The ultimate capstone. The Bait now reduces All-Type RES by 20% for all enemies, and Ashveil gains a 4% DMG increase per Gluttony stack (up to 30 stacks). Mastering Ashveil's Follow-Up mechanics anchors the early progression of the update, especially for players investing in new characters. Travelers aiming to accelerate ascension farming can explore trusted Honkai: Star Rail Accounts, optimize resin/stamina efficiency with expert Honkai: Star Rail Hourly Services, or secure consistent boss clears through reliable Honkai: Star Rail Boosting as farming rotations intensify. GameMarket.gg is a trusted digital marketplace for everything gaming-related. We serve the gaming community by providing secure access that enhances every gaming journey.
Genshin Impact
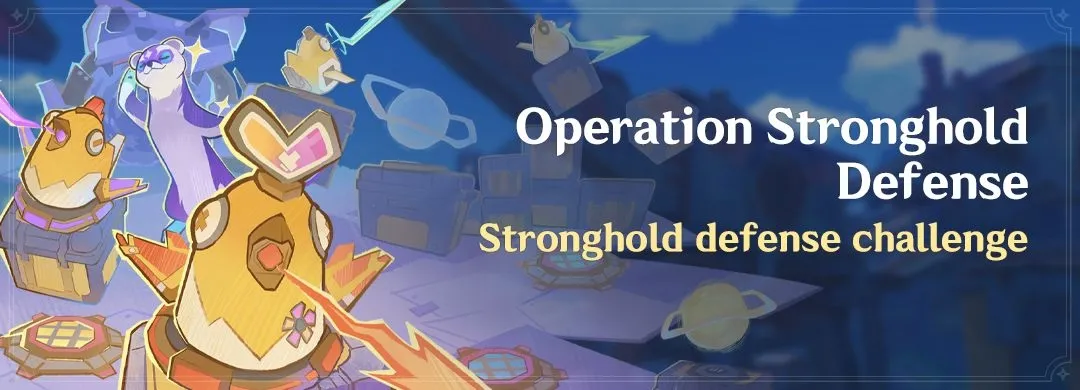
Step-by-Step Operation Stronghold Guide
Master the Operation Stronghold Defense event in Genshin Impact Version 6.4! Our ultimate Guide breaks down every single wave, turret placement, and elemental trap upgrade to guarantee a flawless victory and maximum Primogem rewards. Welcome back to the frontlines, Travelers! The highly anticipated tower defense game mode has returned to Teyvat in Version 6.4 Luna V. Running from March 23 to April 2, 2026, this massive tactical event requires Adventure Rank 20 and the completion of "Song of the Dragon and Freedom." To help you claim every single Primogem, Talent Book, and Hero's Wit available, we have crafted the most exhaustive Operation Stronghold Defense Event Guide imaginable. We are leaving no stone unturned—down to the exact placement of every single mechanism. ⚙️ The Mechanics of War: Turrets, Traps, and Skills Before diving into the stages, you must understand the exact tools at your disposal. During the Preparation Phase, you will spend Bolts (earned by defeating enemies) to place mechanisms. During the Challenge Phase, you will unleash devastating Support Skills. Crucially, your Support Skill cooldowns do not reset between waves, so resource management is the key to this Guide. Energy Turrets: Your primary DPS. Place them on blocks and infuse them with Pyro, Electro, or Anemo. You can upgrade them for rapid-fire, AoE splash, or single-target artillery bursts. Trap Mechanisms: Permanent floor panels that activate when stepped on. They can be upgraded to pull enemies inward, continuously lay mines, or periodically unleash elemental shockwaves. Collection Mechanisms: Passive generators that boost Bolt or Energy income for kills within their radius. Their effects do not stack with overlapping fields. Support Skills: You have access to six abilities replacing your normal kit. The Boom-Boom Fireball and Crackle-Crack Thunderstrike offer massive Pyro and Electro nukes. The Rumble-Rumble Rainstorm and Thump-Thump Earthwave deal Hydro/Geo damage while severely slowing enemies. Finally, the Whish-Whish Blizzard provides a global freeze, while the Whoosh-Whoosh Tornado deals sustained Anemo AoE. 🔥 Stage 1: First Battle! Support From a Warmhearted Weasel This introductory stage is designed to teach you the devastating power of Vaporize and Melt reactions. Wave 1: The tutorial forces you to place a Pyro Energy Turret and a Hydro Trap Mechanism next to each other. When the challenge begins, do not panic. Wait for the Hilichurls to group up heavily before using your Fireball or Thunderstrike to relieve the pressure. Always save at least one skill for the next wave. Wave 2: Buy the Fire Intensity upgrade for your first Pyro Turret. This grants it rapid-fire capabilities, instantly vaporizing anything that touches the Hydro Trap. Place a second Pyro Turret on the exact same column to prepare for later. Wave 3: Hasty Hydro Finches will blitz down the second lane. Immediately place a Cryo Trap and a third Pyro Turret on the right side to freeze them. Upgrade this new turret with Fire Intensity. When the multiple waves of Mitachurls and Finches spawn, wait for the second batch of Finches before dropping your Thunderstrike to clear the board. Wave 4: The Eroding Avatar of Lava appears. This boss self-destructs when its Pyro gauge fills up. Simply max out your board with six total Pyro Turrets, ensuring every single one has the Fire Intensity upgrade. They will effortlessly melt the Avatar without you needing to press a single Support Skill. ❄️ Stage 2: Got 'Em! Mechanism Supplies Multi-lane pathing and Bolt Collection mechanics are introduced here. Positioning is everything. Wave 1: Two Bolt Collection Mechanisms are pre-deployed. Surround them with three Pyro Turrets strictly within their radius to rake in massive bonus Bolts. If a few enemies slip past the frontline, let them go—the setup ensures stragglers will die in the bottom-right corner, which is also covered by a Collection Mechanism. Wave 2: Purchase a Cryo Trap and place it directly on the center corner, immediately upgrading it with the Pulling Mechanism. Buy a fourth Pyro Turret. The trap will suck Finches inward, freezing them while your turrets trigger continuous Melt reactions. Wave 3: Healing Samachurls and an Eroding Avatar of Lava will rush you. Upgrade at least two or three of your Pyro Turrets with DMG Range to enable AoE splash damage. When the Samachurls step on the Cryo Trap, drop your Rumble-Rumble Rainstorm skill to perma-freeze them so they cannot heal the Avatar. Wave 4: Cryo-shielded Abyss Mages enter the fray. Upgrade your Cryo Trap with the Fracturing Mechanism to violently shred enemy defenses. Purchase a Bolt Collection Increase buff and add a final Pyro Turret. Your frontloaded Pyro damage will completely block the Abyss Mages. Wave 5: Upgrade all remaining inner turrets to DMG Range and change your Collection Mechanisms from Bolt to Energy generation. Save both of your Support Skills for the final boss. Wave 6: The ultimate test against a massive Cryo Lawachurl. Upgrade your two innermost Pyro turrets with Target Analysis (massive RES shred) and Focused Attack (single-target burst). Ready your Boom-Boom Fireball to instantly crack the Lawachurl's Cryo shield when it spawns. Once the unshielded beast walks over your Cryo Trap, drop your Rainstorm to freeze it in place while your six splash-damage turrets obliterate it. 🌪️ Stage 3: Transformation? A Cunning New Trick This complex three-lane map demands absolute mastery over Anemo Swirls and Electro-Pyro Overload mechanics to break heavy elemental shields. Wave 1: Establish dominance in the middle lane by placing an Anemo Turret beside a Bolt Collection Mechanism. This Anemo Turret will aggressive swirl elements from surrounding traps, dealing enough AoE damage to handle the Hilichurls alone. Wave 2: Geo-shielded Mitachurls and Slimes begin their march. Place an Electro Turret right next to a Pyro Turret, and upgrade the Pyro Turret with Fire Intensity. Add a Geo Trap to the upper-middle lane. This creates an endless Overload reaction loop that shatters Geo shields and violently knocks enemies backward. Wave 3: The Tenebrous Mimiflora and its stubborn Ward Shield appears on the southern lane. Place a new Electro and Pyro Turret combo on the southern boxes, and upgrade your central Anemo Turret with Fire Intensity. Buy an Energy Collection Mechanism. The sheer volume of Swirl and Overload will break the Mimiflora's shield effortlessly. Wave 4: It is time to max out. Ensure all Electro and Pyro Turrets have Fire Intensity. Most importantly, upgrade your Anemo Turret with Suppressing Fire. This makes your Anemo Turret your strongest AoE asset against the incoming Eroding Avatar of Lava. Wave 5: The upper path becomes accessible. Place a Geo Trap there and upgrade it with both the Minelaying and Shackling mechanisms. Upgrade your older Geo Trap with Minelaying as well. Your Anemo setup will handle the middle, while the Shackling trap completely locks down the northern flank. Wave 6: A terrifying Geo Lawachurl charges down the middle path. To counter this, place a brand new Geo Trap right next to your first one in the center lane, and upgrade both with the Shackling Mechanism. As the Lawachurl advances, these paired traps will stun it twice in a row. Your fully upgraded Overload turrets will easily chip away its massive Geo shield and health pool before it ever reaches your base. Mastering Operation Stronghold Defense anchors the early progression of the update, especially for players investing in new characters. Travelers aiming to accelerate ascension farming can explore trusted Genshin Impact Accounts, optimize resin/stamina efficiency with expert Genshin Impact Hourly Services, or secure consistent boss clears through reliable Genshin Impact Boosting as farming rotations intensify. GameMarket.gg is a trusted digital marketplace for everything gaming-related. We serve the gaming community by providing secure access that enhances every gaming journey.
Zenless Zone Zero
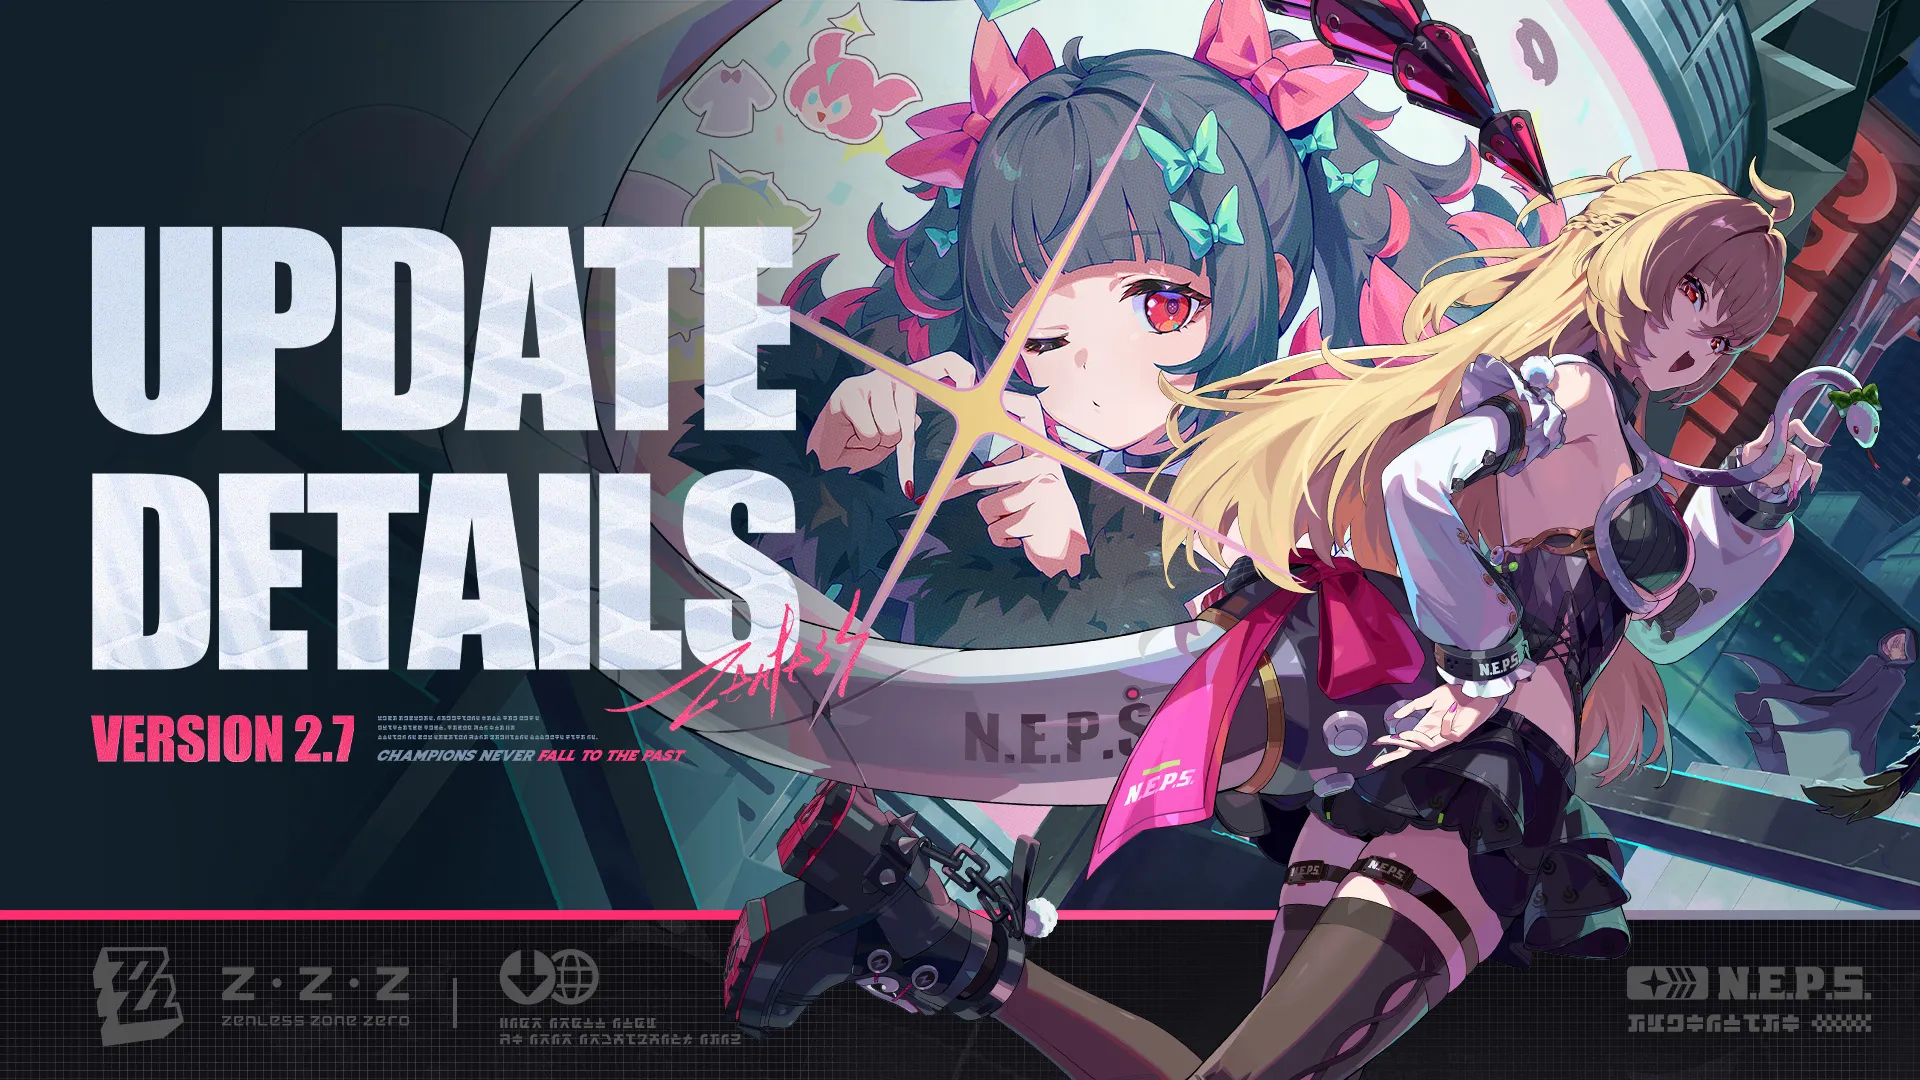
Zenless Zone Zero Update: Champions Never Fall
Dive into the massive Zenless Zone Zero Version 2.7 Update! Discover the new S-Rank Agents Nangong Yu and Cissia, conquer the Tidal Wave Battle Trial, and claim free Master Tapes in this comprehensive update guide for all Proxies. Welcome back to New Eridu! The servers are officially live for the highly anticipated Zenless Zone Zero Version 2.7 Update, titled "Champions Never Fall to the Past." This massive content drop brings an epic epilogue to the Season 2 Main Story, fundamentally shifts the endgame combat meta with revamped Shiyu Defense nodes, and introduces two top-tier S-Rank Agents that will completely transform your squad building strategies. 💥 The Meta-Defining S-Rank Agents The roster expansion in this update introduces two incredibly powerful characters designed to push Ether and Electric team compositions to the absolute limit. Whether you need a premier stunner or a devastating attacker, the new Signal Searches have you covered: Nangong Yu (S-Rank, Ether Stun): Available in the Axiom of Captivation banner, Nangong Yu is a Stun Agent who provides incredible utility for Anomaly-focused teams. She significantly increases the Anomaly Buildup Rate for her allies and boasts a unique mechanic that allows her to trigger Polarity Disorder on enemies who are already Stunned, resulting in massive burst damage windows. Cissia (S-Rank, Electric Attack): Featured in the Evolution of Gluttony banner, Cissia is an Attack Agent who seamlessly blends raw offensive power with top-tier support capabilities. She accumulates Venom during combat to automatically apply Corrode Bone, which deals continuous Electric DMG and allows her entire squad to ignore a percentage of enemy DEF. Furthermore, her Ultimate activates Ether Veil: Cold-Blooded, a buff that massively spikes the CRIT DMG of all squad members. 🛡️ Expanding the Arsenal and Proxy Wardrobe To ensure your new Agents perform at their peak, the Version 2.7 Update introduces their signature premium W-Engines. Proxies can acquire the S-Rank Stun engine, Neon Fantasies, and the S-Rank Attack engine, Serpentine Seeker, through their dedicated weapon banners. If you are saving your Polychromes, do not worry—you can earn the reliable A-Rank Stun engine, The Simmering Pot, entirely for free by participating in the Chronicle of Simmering Flavors event. Alongside the gear upgrades, the fashion scene in Ridu is getting a refresh. Nangong Yu's stunning Rhapsody's Muse outfit is available at a limited-time discount in the store, while Pan Yinhu's highly requested Culinary Jewel outfit has been added as a permanent purchase option. ⚔️ Battle Trials and Shiyu Defense Overhaul For veteran Proxies seeking the ultimate test of skill, the combat systems have received a massive structural update. The standout feature is the all-new Battle Trial: Tidal Wave mode. Once you complete Main Story Chapter 3, you can take your strongest Agents and Bangboo through escalating floors of simulated combat to earn exclusive titles, the "Crowned by Waves" avatar, Hamster Cage Passes, and Tuning Calibrators. Additionally, the endgame gauntlet of Shiyu Defense introduces completely revamped Critical Nodes. The newly implemented buffs heavily favor Electric, Ether, and Ice compositions. For example, Phase II massively boosts Electric DMG and allows Basic and Special Attacks to ignore 15% of enemy DEF, while Phase III amplifies Anomaly Buildup Rates by 25%, drastically punishing enemies afflicted by Attribute Anomalies. 🎁 Massive Events and Daily Rewards To help you fund your Signal Searches, the development team has packed this patch with an incredible lineup of lucrative events and check-in campaigns: Free Pulls Galore: Participate in the All-New Program and "En-Nah" Into Your Lap login events. Simply checking in for a total of seven days during these periods will grant you 10 Encrypted Master Tapes and 10 Boopons for free. Chronicle of Simmering Flavors: Run the popular Simmer Hot Pot restaurant, gather delicacies across Ridu, and complete challenges to earn Polychromes and event-exclusive rewards. Double Drop Weeks: Maximize your stamina usage during the Advanced Bounty and Data Bounty events, which provide double drops for Area Patrols and Combat Simulations, respectively. Mastering the Tidal Wave combat trials anchors the early progression of the update, especially for players investing in new characters. Travelers aiming to accelerate ascension farming can explore trusted Zenless Zone Zero Accounts, optimize resin/stamina efficiency with expert Zenless Zone Zero Hourly Services, or secure consistent boss clears through reliable Zenless Zone Zero Boosting as farming rotations intensify. GameMarket.gg is a trusted digital marketplace for everything gaming-related. We serve the gaming community by providing secure access that enhances every gaming journey.
Honkai Star Rail
HSR 4.1 Update: Ashveil & Event Details
Dive into the massive Honkai: Star Rail Version 4.1 Update! Master Ashveil's unique combat mechanics, conquer the Wispae War Saga event for Stellar Jades, and explore the new Divergent Universe changes in this comprehensive guide. Before you step back onto the Astral Express, every Trailblazer needs a comprehensive briefing on the massive Honkai: Star Rail Version 4.1 Update. Titled "Unraveled for Daybreak," this massive patch completely redefines the endgame meta with the introduction of a highly anticipated detective, a chaotic tactical war event, and a massive expansion to the Divergent Universe. 🕵️ Ashveil: The Lightning Hunt Detective Stepping into the spotlight for Version 4.1 is Ashveil, a brilliant 5-Star Lightning character walking the Path of The Hunt. Hailing from the Immortal Detective Agency, Ashveil completely subverts the traditional single-target DPS role. Instead of solely focusing on his own turns, he acts as a hybrid hypercarry who thrives in high-tempo Follow-Up Attack teams. By marking targets and coordinating strikes with his allies, he ensures the pressure never drops: The Bait Mechanic: Ashveil's Skill marks a single enemy as Bait, dealing Lightning DMG while simultaneously reducing the DEF of all enemies on the field by 20 percent. If the Bait is defeated, the mark automatically jumps to the enemy with the lowest HP. Charge and Gluttony Talent: Ashveil starts with Charge stacks. Whenever an ally attacks the Baited enemy, Ashveil consumes a Charge to launch an automatic Follow-Up Attack, generating a stack of Gluttony in the process. Banquet Insatiable Appetite Ultimate: His burst instantly fires an enhanced Follow-Up Attack without consuming Charge and detonates all accumulated Gluttony stacks for massive Lightning DMG. Optimal Build: Equip his signature Light Cone, The False Finale, to grant him the Umbra Devourer state. For Relics, the new City of Myriad Forms or the classic The Ashblazing Grand Duke sets are his undisputed best options. ⚔️ Wispae War Saga: Reclaim Graphia Academy Graphia Academy is engulfed in chaos, with rival powers vying for dominance in unpredictable skirmishes. The flagship event of this update, the Wispae War Saga, tasks Trailblazers with leading a massive tactical campaign to reclaim the peace of old and establish order across the campus grounds: Tactical Skirmishes: Command your Wispae army to challenge four entrenched heroes stationed throughout the academy. Defeating them unlocks brand-new Wispae Legions for your roster. Battalion Buildup: As you progress, you will earn Wishpower Crystals. These are utilized in the Battalion Buildup menu to directly enhance your legions' stats and abilities. Massive Rewards: Increasing your Campaign Level and completing limited-time missions will yield 1,220 Stellar Jades, one Self-Modeling Resin, two Tracks of Destiny, and crucial enhancement materials. 🌌 Divergent Universe Systemic Overhaul The core endgame mode is receiving a comprehensive upgrade to keep veteran Trailblazers on their toes. The Divergent Universe is introducing a brand-new strategic layer that allows you to actively influence the flow of your runs rather than relying entirely on randomness: Masks and Waypoint Passes: Selecting a specific Mask at the start of your run will require you to use matching Waypoint Passes to trigger powerful localized effects and massive combat buffs. Comprehensive Gear Expansion: Equations, Weighted Curios, standard Curios, and Occurrences have all received massive additions, demanding entirely new build strategies to conquer the final bosses. Expanded Character Trials: You can now freely use trial versions of all characters released two versions prior to the current one, and all characters receive innate stat enhancements within the mode. 🌟 New Banners and Anticipated Additions Alongside Ashveil's debut in Phase 1, the Version 4.1 cycle is loaded with highly anticipated character drops and massive gameplay expansions. For Trailblazers looking to optimize their Stellar Jade spending, the upcoming weeks will feature incredible additions to the roster: Evanescia: A highly anticipated new character arriving in Phase 2, bringing devastating area-of-effect damage and unique utility to the battlefield. The Elation Trailblazer: The Trailblazer unlocks a brand-new playable path! Embracing the Path of Elation, this new form is expected to synergize flawlessly with the broader Follow-Up Attack meta. Gift of Odyssey: Do not forget to log in for seven days during the version to instantly claim 10 Star Rail Special Passes for your warp funds. Mastering the Wispae War Saga anchors the early progression of the update, especially for players investing in new characters. Travelers aiming to accelerate ascension farming can explore trusted Honkai: Star Rail Accounts, optimize resin/stamina efficiency with expert Honkai: Star Rail Hourly Services, or secure consistent boss clears through reliable Honkai: Star Rail Boosting as farming rotations intensify. GameMarket.gg is a trusted digital marketplace for everything gaming-related. We serve the gaming community by providing secure access that enhances every gaming journey.
Raid: Shadow Legends
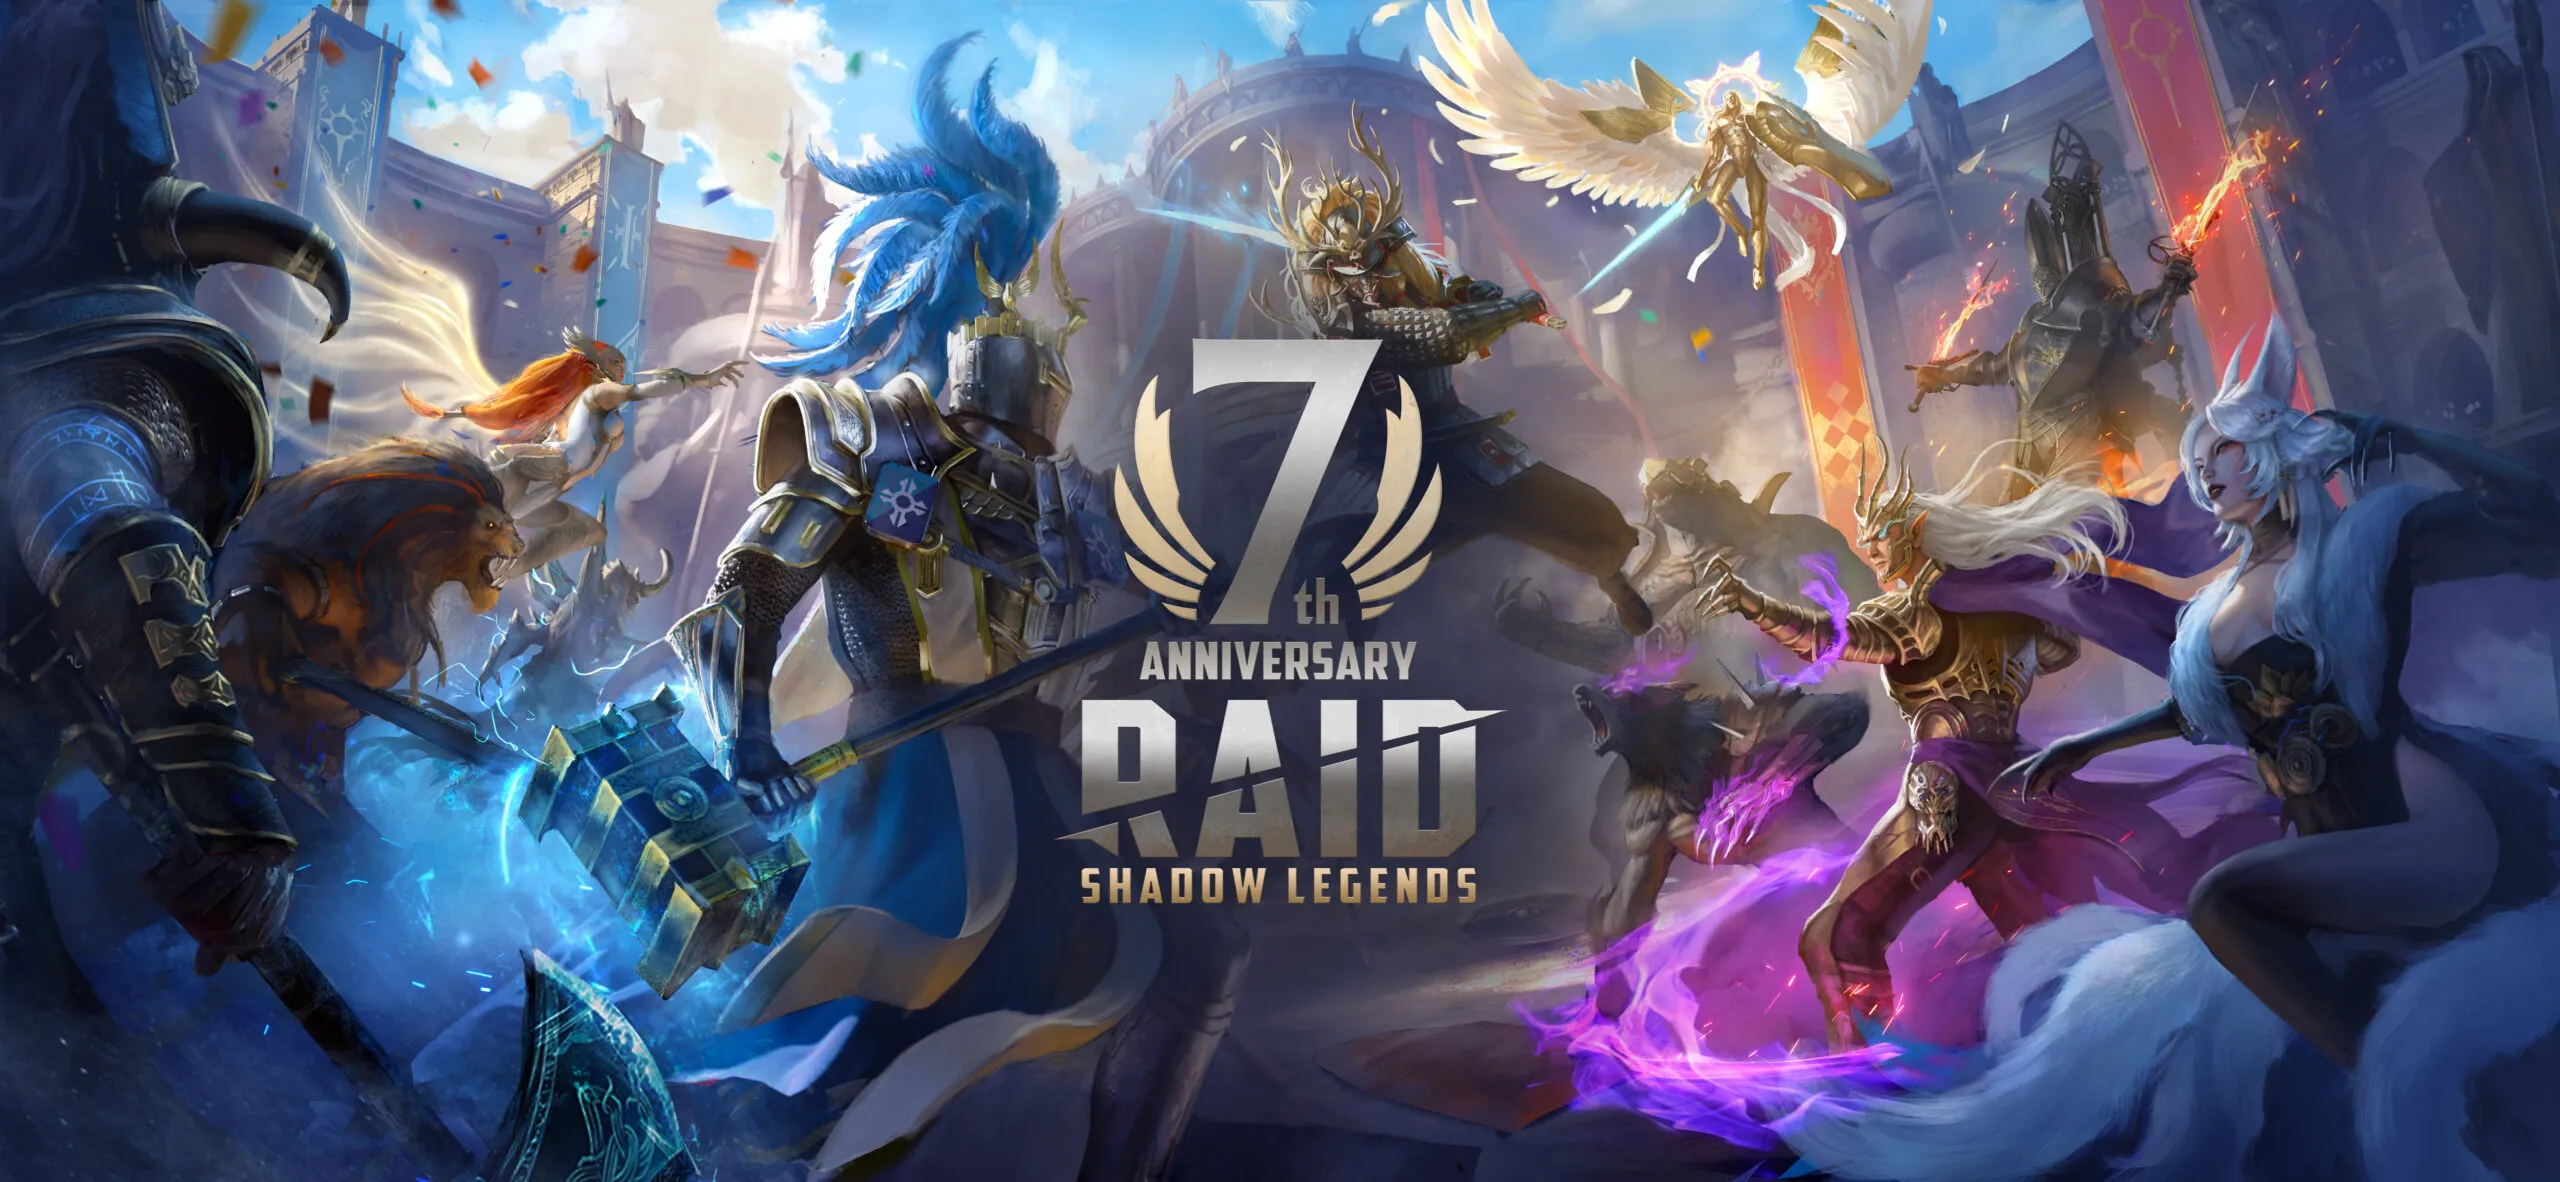
RAID: Shadow Legends 7th Anniversary Update
Celebrate the massive RAID: Shadow Legends 7th Anniversary Update with the return of the Festival of Creation. Discover the new Gymnastikon event, unlock the legendary Pelops the Victor through the latest fusion event, and claim exclusive free rewards in this spectacular update! 🏛️ The Festival of Creation: Enter the Gymnastikon It is time to celebrate a monumental milestone in Teleria as the RAID: Shadow Legends 7th Anniversary Update officially arrives, bringing back the highly anticipated Festival of Creation. This year, the festivities are bigger than ever, coinciding with the grand Gymnastikon—a spectacular competition where the realm's finest athletes and artists clash for eternal glory and fame. Hosted by the Argonites, RAID’s newest and most fascinating Faction, this prestigious contest is opening its doors to everyone in Teleria for the first time in history. From March 5th all the way through August 4th, players will notice a complete thematic overhaul in-game. The familiar Bastion has been beautifully transformed into an arena of athletic prowess, featuring stunning marble architecture and an exclusive limited-time soundtrack designed to welcome you into this season of triumph. ⚔️ Pelops the Victor: The Ultimate Fusion Event Athletic and artistic competitions throughout history have paved the way for many to claim plaudits for their actions, but none are more well-renowned than Pelops the Victor. As the undisputed star of this update, this powerful warrior has conquered all that the Gymnastikon has to offer, earning him the absolute adoration of legions of fans and the bitter jealousy of his peers. Fortunately, all players have a straightforward path to adding this legendary Argonite to their roster: Dedicated Fusion Event: Running from March 5th until March 21st, 2026, players can participate in specially-labeled Events and Tournaments to gather required Rare and Epic Champions. Fusing these specific champions will permanently unlock Pelops the Victor. Alternative Summoning: If you are unable to complete the rigorous Fusion Event in time, you still have a chance to obtain him! Pelops the Victor has been added to the summoning pool and can be acquired using Ancient, Primal, and Sacred Shards. 🎁 Free Gifts, Promo Codes, and Community Celebrations Beyond the intense competitions and champion fusing, the developers are making sure every player feels the generosity of the 7th anniversary. The update is packed with extended celebrations, free loot, and community-driven activities designed to reward both veterans and newcomers to Teleria: Shop Freebies: Between March 5th and August 4th, every single player can log in and claim a massive free gift bundle via the in-game Shop, containing a whole slew of valuable goodies to aid your progression. New Player Promo Code: If you are just starting your journey in Teleria, you are in for a massive head start! New players can use the exclusive Promo Code "RAID7" to instantly claim Pelops the Victor completely for free, bypassing the Fusion Event entirely. Social Media Festivities: Be sure to check out RAID: Shadow Legends on all major social media platforms and join the online communities to take part in exclusive activities and stay updated on the ongoing celebrations. Mastering the Gymnastikon event anchors the early progression of the update, especially for players investing in new characters. Travelers aiming to accelerate ascension farming can explore trusted RAID: Shadow Legends Accounts, optimize resin/stamina efficiency with expert RAID: Shadow Legends Hourly Services, or secure consistent boss clears through reliable RAID: Shadow Legends Boosting as farming rotations intensify. GameMarket.gg is a trusted digital marketplace for everything gaming-related. We serve the gaming community by providing secure access that enhances every gaming journey.
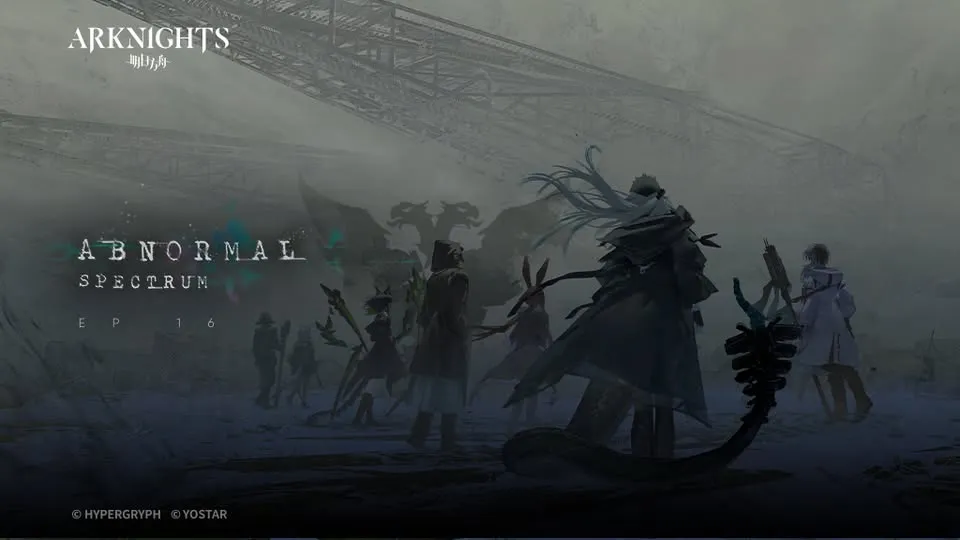
Arknights
Arknights Episode 16 Update: Abnormal Spectrum
Prepare your operators for the thrilling Arknights Episode 16 Update. Dive into the Abnormal Spectrum main theme, master the new Strategic Simulation, and recruit powerful new operators like Mantra to secure your victory in this massive content drop. 🔮 Unlocking the Abnormal Spectrum: Episode 16 The battle for Terra's future continues to escalate as the highly anticipated Main Theme Episode 16: Abnormal Spectrum officially opens its doors. To ensure all Doctors can participate in this massive storyline update, Rhodes Island has temporarily lowered the entry barrier. From March 19 to April 2, players only need to clear Main Storyline 3-8 to access the new stages. However, once this grace period ends, the standard requirement will revert to clearing Episode 15-21. As you navigate these challenging new battlefields, you will collect Flint, a valuable event currency, and earn Simulation Points from the Strategic Simulation to unlock extra rewards like Originite Prime and Elite Materials. For the ultimate tactical test, the punishing Extreme Mode will officially unlock on March 26. 🛍️ Humanitarian Assistance and Event Rewards Clearing the rigorous challenges of the Abnormal Spectrum yields substantial rewards for your operator roster. By tackling event stages and completing specific Footprints missions, players can gather an abundance of Flint to spend in the Humanitarian Assistance shop. The development team has loaded this event with incredible free cosmetic and progression items to accelerate your base operations: Footprints Mission Rewards: Epoque Collection - Cloud in Foreign Lands outfit for Windscoot, the exclusive Plaque 'Golden Blood', Elite Materials, and LMD. Humanitarian Assistance Shop: Witch Feast Series - Imp's House outfit for Rope, Emergency Sanity Samplers, Rhodes Island Supply Crates, Module Materials, and Battle Records. New Furniture: Pieces for the brand-new 'Elite Operator Lounge' themed furniture set can be redeemed in the shop or purchased during the limited-time store sale. ⚔️ The Silent Wavelengths: New Operators No major storyline expansion is complete without fresh tactical talent joining the ranks of Rhodes Island. The Silent Wavelengths Limited-Time Headhunting banner introduces a formidable lineup of new operators ready to turn the tide of battle. As a Standard Headhunting banner, it features a generous pity system guaranteeing the rate-up 6-star operator within 150 pulls if you haven't received her yet. During this event, the following operators enjoy a significant rate-up and will gain extra trust from all sanity-consuming stages: Mantra (6-Star): The highly anticipated new addition to the elite Rhodes Island roster. Vetochki & Poncirus (5-Stars): Powerful new mid-tier tactical options to flesh out your squad compositions. Snegurochka (4-Star): A reliable new operator joining the fray. (Note: Mantra, Vetochki, and Snegurochka are non-limited and will be added to standard headhunting pools after April 2). 👗 Storyboard Breakers and Store Additions For Doctors looking to customize their favorite operators and stockpile vital resources, the storefront has received a massive seasonal restock. The highly stylish Storyboard Breaker Series arrives at the Outfit Store, bringing cinematic flair to your squad alongside a lucrative Fashion Review event: New Outfits: The Chainsaw Nurse for Narantuya, Under Surgical Lights for Mitm, Biochemical Submergence for Greyy the Lightningbearer, and The Nursing Home Creepshow for Haze. Fashion Review: A massive rerun featuring 18 classic outfits (including Coral Coast collections for Eyjafjalla, Shining, and Angelina). Participate using Orundum to randomly unlock an outfit from the pool. Headhunting Packs: The Silent Wavelengths Headhunting Permit and Ten-roll Bundle are available to maximize your pulls on the new banner. Progression Bundles: The Caster Chip Pack provides massive class-specific upgrade materials, while the Heavy Funding Pack instantly injects 21 Originite Prime and 1,000,000 LMD into your reserves. Mastering the Abnormal Spectrum anchors the early progression of the update, especially for players investing in new characters. Travelers aiming to accelerate ascension farming can explore trusted Arknights Accounts, optimize resin/stamina efficiency with expert Arknights Hourly Services, or secure consistent boss clears through reliable Arknights Boosting as farming rotations intensify. GameMarket.gg is a trusted digital marketplace for everything gaming-related. We serve the gaming community by providing secure access that enhances every gaming journey.
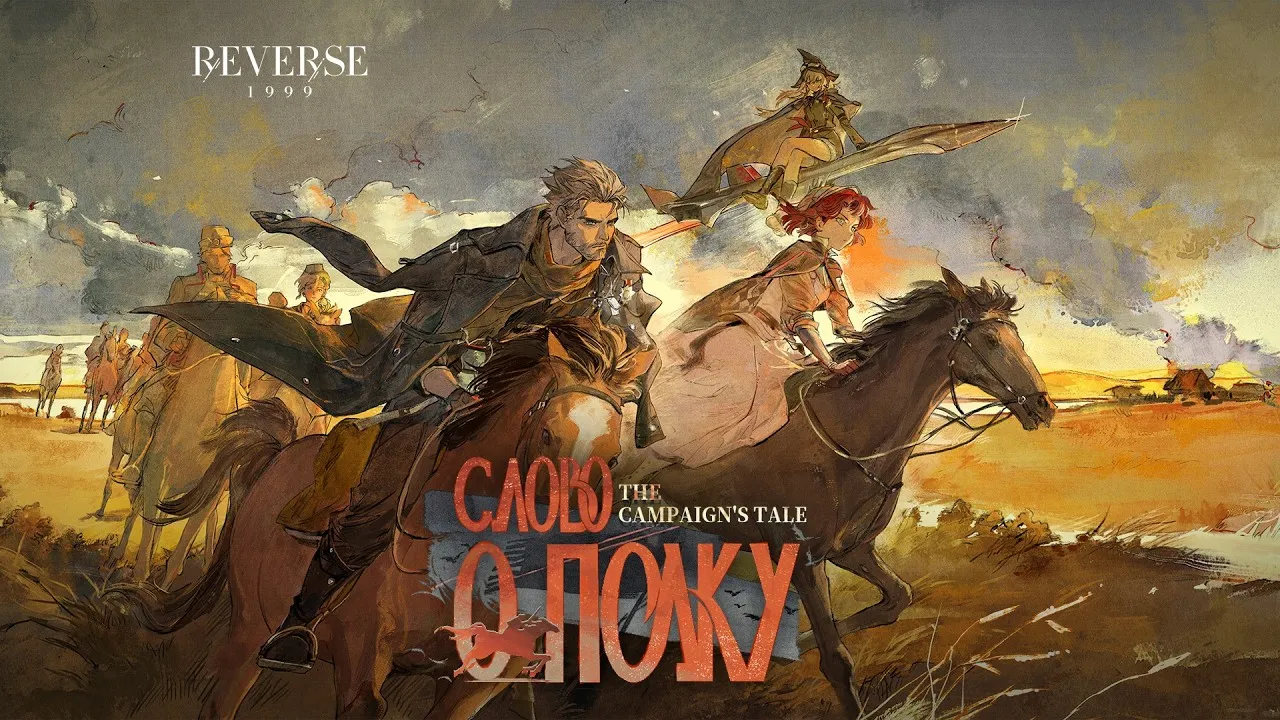
Reverse: 1999
Reverse: 1999 Chapter 12 Update Guide
Dive into the massive Reverse: 1999 Chapter 12 Update featuring The Campaign's Tale. Master the new Tides of Thought gameplay, optimize your pulls on the Marsha and Igor banners, and conquer every limited event to maximize your rewards and accelerate your progression. 📖 The Campaign's Tale: New Storylines and Core Events The aftermath of conflict ripples across the quiet river in Chapter 12, where wanderers set aside past disputes over the golden fields of autumn. This massive update brings a wealth of new narrative content, allowing Timekeepers to dive deep into the lore of the 3.0 series while stockpiling valuable resources. To maximize your gains during this season, you must participate in a variety of interconnected story missions and logging milestones: Main Event - The Campaign's Tale: Consume Cellular Activity to gain Wartime Coins and Picrasma Gummies (temporary stamina candies). Exchange coins in the Safe House Supplies shop for the new 6-Star Psychube Singleness of Heart, Gluttony, and Crystal Caskets. Marsha's Story - In the Name of Chivalry: Control the core's absorption of emotion fragments to keep negative emotions below the stress threshold, earning Clear Drops and Growth Materials. Igor's Story - Into the Maelstrom: Spend resources to deploy tactical units against enemies and destroy their command center on the golden steppe. Double Sign-in Events: Log in across two different event periods (March 5th - March 26th, and March 26th - April 16th) to claim a massive total of 14 Unilogs simply for showing up. War Room Enhancements: Access the brand-new Relation Network feature to view the intricate relationships between characters in the 3.0 series, alongside newly added rewards like the Key of Thought. 🌊 Tides of Thought and Arcade Remix Gameplay Combat and exploration receive a massive overhaul with fresh game modes designed to test both your strategic planning and your reflexes. From facing shifting nightmares in the depths of myth to experiencing a nostalgic pixelated adventure, there are countless ways to earn unique rewards: Tides of Thought (Reveries in the Rain): Challenge stages to collect Boss Parts, Modifiers, and Environments. Implant these into the boss, Deceitful Nightmare, to alter its abilities and increase your Projection score. Clear challenges to earn Solidified Myth for the Harbor of Echoes shop. 8-Bit Arcade Remix: Enter Musae's Arcade and control a pixel Player using a D-pad. Trigger beep frenzies, cast Pixel Bombs, and navigate random events (Treasure Hoard, Gentleman's Trading Stall) to defeat the final boss. Earning Pixel Gems unlocks Bunny Bunny's free Service Fit for Royalty garment. Syndrome of Silence Optimizations: The mode has been streamlined with shorter, faster battles, optimized tutorials, a new track setup for targeted buffs, and the introduction of the Slapstick instrument for training Manus creatures. Mane's Bulletin Investigations: Challenge three new high-threat targets: the Insatiable Bloodsucker, Distortion of Faith, and Captive of Transcendentality. Moldir's Anecdote: Delve into the "In the Shadow of the Mountains" storyline starting March 14th to secure a free 5-Star Psychube and Greed. 🌟 Expanding Your Roster: Banners and Enhancements Expanding your lineup of Arcanists is easier than ever with an incredible lineup of Time-Limited Character Banners. Whether you are aiming for the new tactical commanders or trying to secure a missed powerhouse from the past, this patch offers unprecedented pulling value: The Oath Unyielding Banner: Features the brand-new 6-star Beast character, Marsha, running alongside Sweetheart and Click (Available until March 26th). Witness of Iron and Blood Banner: Features the new 6-star Beast character, Igor, accompanied by Horropedia and Baby Blue (Available March 26th - April 16th). Both Igor and Marsha will join the Standard Pool in v3.6. Ripples on the Water Custom Banner: Freely select one 6-star character (An-an Lee, Mercuria, Getian, Melania, Isolde, or Kaalaa Baunaa) for a guaranteed Rate Up. Your first 10-pull on this banner is heavily discounted to just 7 Unilogs. Yearning of the Water Banner: Features Sentinel and Charon with a 20% discount on your first three 10-pulls (costs 8 Unilogs each). Euphoria System Update: The Euphoria Character Enhancement System is now officially live for An-an Lee and Mercuria, allowing you to push their combat limits further than ever. 👗 Wilderness Themes, Garments, and Premium Packs For Timekeepers looking to customize their experience or accelerate their arcanist building process, the storefront has been completely refreshed. From exclusive jukebox cosmetics to highly efficient resource bundles, the latest additions include: Roar Jukebox - Galloping on the Steppe: Unlock the Collector's Edition to obtain Medicine Pocket's limited garment, Forever Is Too Short. Ballad of the Iron Fortress Garments: Sentinel's By Reflections Witnessed and Moldir's Idyll of the Luberon are now available for purchase in the Garment Shop. Wilderness Theme Packs: The Along the Don River theme pack is available for a limited time, while Tropical Splendor and Foggy Town become permanently available additions. High-Value Gift Packs: Numerous limited bundles are available, including the Gift of the Cavalry (Unilogs and Sharpodonty), Harvest of the Steppe (Clear Drops, Unilogs, and Crystal Caskets), and the highly customizable Materials Bonanza and Tides of Arcanum selection packs. Mastering the Tides of Thought anchors the early progression of the update, especially for players investing in new characters. Travelers aiming to accelerate ascension farming can explore trusted Reverse: 1999 Accounts, optimize resin/stamina efficiency with expert Reverse: 1999 Hourly Services, or secure consistent boss clears through reliable Reverse: 1999 Boosting as farming rotations intensify. GameMarket.gg is a trusted digital marketplace for everything gaming-related. We serve the gaming community by providing secure access that enhances every gaming journey.
Wuthering Waves
Ultimate Qiuyuan Build Guide for WuWa
Master the battlefield with this comprehensive Wuthering Waves Qiuyuan Builds Guide. Discover the absolute best echoes, weapons, Resonance Chains, team compositions, and skill priorities to unleash this 5-star Aero Sword resonator's unique Echo Skill DMG amplification potential across Solaris. 🌪️ Qiuyuan Character Overview: The Wandering Swordsman Voiced by Jeremy Ang Jones (EN) and Shin-ichiro Miki (JP), Qiuyuan is a 5-star Aero Sword resonator hailing from Huanglong. He is a highly specialized Sub-DPS whose kit is uniquely designed to enable and amplify Echo Skill-centric teams. While his personal damage is relatively lackluster at S0, his incredibly fast internal rotations allow him to rapidly generate Concerto energy and funnel massive Echo Skill DMG and Crit DMG buffs to the main DPS. However, his value plummets outside of his specific archetype, as there are currently very few resonators (like Galbrena, Phrolova, and Cantarella) who primarily scale off Echo Skill DMG. For players willing to invest in his Resonance Chains, particularly reaching S3, Qiuyuan completely transforms into a viable Main DPS capable of unleashing devastating Heavy Attacks. ⚙️ Optimal Gear: Best Echoes, Stats, and Weapons Gearing Qiuyuan depends entirely on his intended role within your party. If you are utilizing him in his primary role as an Aero Echo Skill Sub-DPS, you must maximize his buffing capabilities through specific sets and stat thresholds: Best Sonata Effect: A 3-piece Law of Harmony combined with a 2-piece Sierra Gale is his absolute best-in-slot, perfectly boosting his team-wide Echo Skill DMG buffs while providing necessary Aero DMG. Alternative Sonata Effect: If you need more Energy Regen, a 5-piece Moonlit Clouds set is an excellent secondary option that allows him to function as a general-purpose Crit DMG Sub-DPS. Best Main Echo: Reminiscence: Fenrico. This Law of Harmony Echo synergizes flawlessly with his kit by boosting both his Aero and Heavy Attack DMG. Main Stat Priority: 4-COST (Crit Rate or Crit DMG), 3-COST (Aero DMG), and 1-COST (ATK%). Substat Tuning Priority: CRIT Rate > CRIT DMG > Energy Regen > Heavy Attack DMG > ATK% > Flat ATK. The 65/130 Golden Rule: Qiuyuan’s Resonance Liberation provides the team with 2% Crit DMG for every 1% of his Crit Rate that exceeds 50% (up to a 30% max buff). Therefore, hitting exactly 65% Crit Rate is absolutely mandatory. Furthermore, because his on-field time is so short, securing 130% Energy Regen is required to guarantee his Liberation is available every rotation. When selecting his weapon, his signature 5-star sword, Emerald Sentence, is undeniably his best choice, providing a massive 12% ATK boost and a crucial 30% Heavy ATK DMG Bonus that stacks twice. If his signature is unavailable, the standard 5-star Emerald of Genesis provides excellent Energy Regen and ATK buffs. For 4-star options, Lumingloss excels due to its Heavy Attack DMG buffs, while the event-exclusive Somnoire Anchor serves as a decent alternative. 🤝 Best Team Compositions and Rotation Combos To unleash Qiuyuan's maximum potential, he must be paired with allies who can fully utilize his highly specific buffs. His absolute best team composition is the Fusion Echo Skill Team, featuring Galbrena (Main DPS) and Shorekeeper (Support). Qiuyuan is inarguably Galbrena's best Sub-DPS option, as he is the sole unit in the game capable of directly buffing the Echo Skill DMG that she primarily scales off of. To execute his flawless, fast-paced combo rotation on the battlefield, follow this exact sequence: Enter the field via Intro Skill to instantly generate 400 points of his Swordster's Soliloquy Forte gauge. Quickly perform two Basic Attacks to completely fill his Forte to max stacks (600 points). Cast your Echo Skill followed immediately by his Resonance Liberation to maximize the team-wide Echo Skill DMG and Crit DMG buffs. Hold the Heavy Attack button to perform his 3-attack string. During his Inksplash of Mind state, these attacks are considered Echo Skill casts. Cast his Resonance Skill for extra damage and instant damage negation, then immediately swap out via Outro to grant a massive 50% Echo Skill DMG Amplification to the incoming main DPS. 📚 Skill Priority, Resonance Chains, and Ascension Materials When investing your hard-earned materials into his skill tree, prioritize upgrading his Forte Circuit first, as his transformed Basic and Heavy attacks scale entirely off this node. Follow this by leveling his Resonance Liberation for its instantaneous burst damage, then equally distribute points into his Resonance Skill and Normal Attacks. His Intro Skill should be leveled last. To fully ascend Qiuyuan and max out his Forte, you will need to farm 46 Truth in Lies boss materials, 60 Wintry Bells, 26 Curse of the Abyss weekly boss drops, alongside an abundance of Whisperin Cores and Metallic Drips, totaling over 2.2 million Shell Credits. For players looking to push his combat potential, unlocking his Resonance Chains (Sequence Nodes) provides massive advantages: S1 (Sword Sheathed, Mind Unclouded): Grants interruption immunity during his Forte attacks and a flat 20% Crit Rate increase, making his 65% threshold incredibly easy to reach. S2 (O Blade, I, Who Teach No More): The best stopping point for Sub-DPS builds. It grants an additional 30% Echo Skill DMG Amplification to the entire team. S3 (O Blade, I, Who Save No More): The Main DPS enabler. It increases his Liberation damage multiplier by 500% and completely revamps his Resonance Skill to deal massive Echo Skill DMG while consuming Concerto Energy. S4 (O Blade, I, Who Sacrifice No More): A mediocre node that only provides a flat 20% ATK increase. S5 (O Blade, I, Who Await to be Wielded): Allows all of his damage to ignore 15% of the target's DEF. S6 (Thus I Heard, Thus I Saw, Thus I Spoke): The ultimate capstone. His heavy attacks now stagnate enemies, and casting his S3 Resonance Skill grants him a massive 100% Crit DMG boost for 6 seconds. Mastering Qiuyuan's rapid rotations anchors the early progression of the update, especially for players investing in new characters. Travelers aiming to accelerate ascension farming can explore trusted Wuthering Waves Accounts, optimize resin/stamina efficiency with expert Wuthering Waves Hourly Services, or secure consistent boss clears through reliable Wuthering Waves Boosting as farming rotations intensify. GameMarket.gg is a trusted digital marketplace for everything gaming-related. We serve the gaming community by providing secure access that enhances every gaming journey.
Punishing: Gray Raven
Best Nirvatia Dirge Builds in PGR
Unlock the true potential of the new Nihil Amplifier with these optimal Nirvatia Dirge Builds in Punishing: Gray Raven. Whether you are maximizing her support capabilities alongside Parhelion or running her as a devastating main DPS, mastering her memory sets is the key to conquering the hardest endgame content. 🪶 Mastering the Judgment Scythe: Nirvatia Dirge Overview The arrival of Nirvatia: Dirge in the A Better Tomorrow update has completely shifted the meta for the Nihil element in Punishing: Gray Raven. As the Security Director of the Science Council, this S-Rank Amplifier frame utilizes her devastating Judgment Scythe to manipulate the battlefield, charm enemies, and rapidly break Equilibrium Fields. Her unique kit allows her to seamlessly transition between a dedicated healer and a brutal damage dealer, depending entirely on how you construct her memory sets and who she is paired with. By utilizing her Bloodhunter Form and accumulating Omen Points, she can unleash massive bursts of Nihil damage, making the pursuit of her optimal Builds absolutely crucial for Commandant success. 🛡️ The Standard Nihil Support Build (Parhelion < SSS) When played in her primary intended role, Nirvatia acts as an unparalleled Amplifier for the Nihil team. Her healing abilities natively trigger the Void Collapse effect, boosting team Nihil damage by 20%, which is further enhanced by the Flock effect if the entire team shares the same element. If your Ishmael: Parhelion has not yet reached SSS-Rank, Nirvatia needs to focus on maximizing her supportive QTE presence to buff the main attackers. Memory Set: 4-Piece Da Vinci / 2-Piece Guinevere. Top Resonance Slot: Any ATK (+15 ATK). Bottom Resonance Slot: Amplifier (Class Skill Level +1). Usage Notes: This setup ensures massive burst damage windows during QTE activations. If you do not have Weapon Harmony unlocked, it is highly recommended to strictly keep the 2-Piece Guinevere to ensure consistent elemental resistance shredding and healing output. ⚔️ The Advanced Support Build (Parhelion ≥ SSS) As your roster scales in power, the dynamics of the Nihil team begin to shift. When Ishmael: Parhelion reaches SSS-Rank, she gains additional QTE charges and firmly establishes herself as the ultimate Breaker. Because of this, Nirvatia's role on the field becomes much more rotation-heavy, requiring careful energy management to keep up with the team's accelerated pace. Memory Set Adjustments: If Nirvatia herself is also at SSS-Rank, she drastically reduces the necessary amount of 3-Pings required for her damage cycle. In this scenario, you should swap out the Harmonized Da Vinci memories for 2-Piece Cottie. Top Resonance Slot: Any ATK (+15 ATK). Bottom Resonance Slot: Amplifier (Class Skill Level +1) or Death's Kiss (Signature Move Level +1) depending on field-time needs. Usage Notes: The addition of the Cottie set compensates for the energy loss during her highly limited field time, ensuring that team rotations remain perfectly smooth without dropping the Void Collapse buffs. 🩸 The Bloodhunter Main DPS Build Nirvatia is not just a supportive Amplifier; she is fully capable of carving through corrupted constructs herself. If your Ishmael: Parhelion is missing her Signature Weapon, or if you simply do not own key Nihil attackers like Luna: Oblivion, Nirvatia comfortably steps into the main DPS role. This configuration relies entirely on feeding her Signature Energy to maintain her deadly Bloodhunter Form. Memory Set: 4-Piece Bulgakov / 2-Piece Cottie. Top Resonance Slot: Any ATK (+15 ATK). Bottom Resonance Slot: Death's Kiss (Signature Move Level +1). Weapon Resonance Priority: Dead Line Timing > Superconducting Axial Ray > Incandescence. Usage Notes: Utilizing the 2-Piece Cottie is mandatory here, as it enables a devastating double Signature Move cycle. When paired with the "Dead Line Timing" weapon resonance on her 6★ Obituary for Yesterday scythe, she receives enough extra Signal Orbs to make this aggressive rotation incredibly consistent. 🚀 Elevate Your Commandant Journey Optimizing these memory setups anchors the early progression of the update, especially for players investing in new characters. Travelers aiming to accelerate ascension farming can explore trusted Punishing: Gray Raven Accounts, optimize resin/stamina efficiency with expert Punishing: Gray Raven Hourly Services, or secure consistent boss clears through reliable Punishing: Gray Raven Boosting as farming rotations intensify. GameMarket.gg is a trusted digital marketplace for everything gaming-related. We serve the gaming community by providing secure access that enhances every gaming journey.
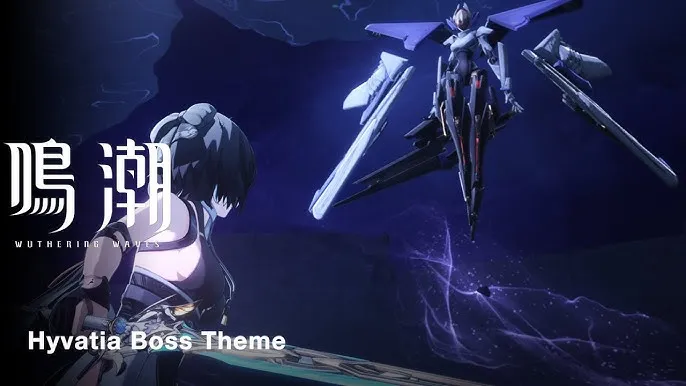
Wuthering Waves
Hyvatia Boss Guide: Wuthering Waves
Before traversing the treacherous terrains of Starward Riseway, every Rover needs a comprehensive Wuthering Waves Guide to survive the encounter with Hyvatia. Mastering this Lahai-Roi boss's deadly mechanics, evasive maneuvers, and unique Tune Break vulnerabilities is essential for farming Suncoveter's Reach. 📍 Locating Hyvatia in the Frostlands Finding this formidable Lahai-Roi boss requires progression through the main storyline, specifically Chapter 3 Act 1: What Burns Beneath Frostlands. Once you successfully unlock the first Lahai-Roi Resonance Nexus, head towards the circular arena located directly below the massive long bridge in Starward Riseway, just north of Startorch Academy. You must be on high alert as you approach the arena; Hyvatia is incredibly aggressive and will instantly initiate the battle in its railgun form the moment you enter its periphery. A crucial tip from this Guide is to utilize your Expedition Motorbike to close the distance rapidly, preventing you from getting caught off guard by a sudden, devastating railgun shot. ⚔️ Mastering Hyvatia's Deadly Mechanics Hyvatia is notoriously slippery, preferring to maintain a safe distance while raining down ranged attacks from above. Instead of wasting your precious stamina endlessly chasing it while it hovers high in the air, simply dodge through its projectile barrages and wait patiently for it to descend. When it finally lands, use your Intro and Outro skills, or deploy resonators with innate aerial mobility like Phoebe or Mornye, to quickly close the gap and stick to the target. To secure a swift victory, you must properly counter its specific attack patterns and exploit its weaknesses: The Eye of Perception: This lethal attack sequence triggers shortly after you break the boss's Vibration Strength for the first time. Hyvatia will launch into the sky, attempting to grab and instantly eliminate your active character. It sweeps in twice; if you dodge the first sweep, you must parry the second. Conversely, if you parry the first sweep, you must dodge the second. Repeating the exact same defensive action guarantees an instant elimination. After surviving the sweeps, be prepared to dodge the resulting ground slam a few seconds later. Tune Break Vulnerability: Hyvatia will glow brightly when its Tune Break meter (located to the left of its HP bar) is completely full. Breaking the boss leaves it stunned and extremely vulnerable to Tune Rupture. Once Tune Broken, it takes 100% more damage initially, and an additional 15% more damage for the following 15 seconds. Bypassing Phase Two: The dangerous second phase activates immediately after the first Vibration Strength break and the subsequent Eye of Perception sequence. It is highly recommended to unleash your strongest burst damage and Echo skills to eliminate the boss before this phase can fully trigger. 💎 Reaping the Rewards: Ascension Material Drops Surviving this intense aerial encounter yields incredibly valuable resources for your roster's progression. The most sought-after drop from this boss is the Suncoveter's Reach, an exclusive Resonator Ascension material absolutely necessary for leveling up newer generation characters like Lynae. Alongside this rare material, your successful hunt will also reward you with a bounty of Union Experience, Advanced Resonance Potions, Advanced Sealed Tubes, Advanced Energy Cores, and a generous amount of Shell Credits to fund your ongoing resonator upgrades. Mastering Hyvatia's mechanics anchors the early progression of the update, especially for players investing in new characters. Travelers aiming to accelerate ascension farming can explore trusted Wuthering Waves Accounts, optimize resin/stamina efficiency with expert Wuthering Waves Hourly Services, or secure consistent boss clears through reliable Wuthering Waves Boosting as farming rotations intensify. GameMarket.gg is a trusted digital marketplace for everything gaming-related. We serve the gaming community by providing secure access that enhances every gaming journey.
Wuthering Waves
Sigrika Best Build and Teams Guide
Master the battlefield with this comprehensive Wuthering Waves Sigrika Build Guide. Discover the absolute best echoes, weapons, Resonance Chains, team compositions, and skill priorities to unleash this 5-star Aero Gauntlet resonator's devastating Echo Skill DMG potential across Solaris. 🌪️ Sigrika Character Overview: The Aero Solsworn Voiced by Maya Lindh (EN) and Akasaki Chinatsu (JP), Sigrika is a formidable 5-star Aero Gauntlet resonator hailing from the Startorch Academy. Her kit is uniquely designed around a very specific and powerful archetype: Echo Skill DMG. While she boasts incredibly high damage multipliers, phenomenal self-buffing capabilities, and amazing crowd control utility for endgame content, she comes with a notable caveat. Her true potential is heavily gated behind specific team compositions, making her a high-investment character. She lacks the tune-shifting mechanics common among Version 3.x characters and suffers significantly if placed in general Aero-centric teams. However, for players willing to construct a precise Build around her unique strengths, Sigrika stands as a premier main DPS capable of annihilating foes through complex rune management and explosive heavy attacks. ⚙️ Optimal Gear: Best Echoes, Stats, and Weapons Gearing Sigrika requires a complete shift from standard DPS conventions, as her damage primarily scales off Echo Skill DMG buffs rather than standard attribute damage. Maximizing her potential requires careful attention to her Echo sets, main stats, and substat tuning: Best Sonata Effect: The 5-piece Sound of True Name set is her absolute best-in-slot, optimally boosting both her Aero and Echo Skill DMG. Alternative Sonata Effect: The 5-piece Sierra Gale set provides a generalistic Aero DMG buff, making it a decent placeholder. Best Main Echo: Nameless Explorer. This summon-type Echo seamlessly weaves into her combos while stacking its buffs directly on top of her Sound of True Name Sonata Effect. Main Stat Priority: 4-COST (Crit DMG or CRIT Rate), 3-COST (Energy Regen or ATK%), and 1-COST (ATK%). Actively rolling for Aero DMG bonuses on 3-COST echoes is highly inefficient for her. Substat Tuning Priority: CRIT DMG > CRIT Rate > Energy Regen > ATK% > Flat ATK. The 150% Energy Regen Rule: Sigrika’s passive talent grants her a 2% Echo Skill DMG Bonus for every point of Energy Regen she has above 125%. Therefore, hitting exactly 150% Energy Regen is absolutely mandatory in her Build to secure a massive 50% Echo Skill DMG Bonus. Because of her incredibly niche damage scaling, her weapon options are currently quite limited. Her signature 5-star weapon, Solsworn Ciphers, is undeniably her best choice, providing a massive 12% ATK boost, 32% Echo Skill DMG Amplification, and a crucial 10% DEF ignore when she casts her Intro or Echo Skills. If her signature is out of reach, the battle pass gauntlet Blazing Justice serves as the next best alternative with its innate DEF shred. Standard 5-star options like Abyss Surges can also be used as a solid stat stick thanks to its high base ATK and Energy Regen passive. 🤝 Best Team Compositions and Rotation Combos To unleash Sigrika's maximum damage-per-rotation (DPR), she must be paired with allies who can consistently funnel buffs and trigger her passive abilities. Her ultimate team composition is the Echo Skill Hypercarry Team, featuring Qiuyuan (equipped with the Moonlit Clouds set) and Shorekeeper (equipped with the Rejuvenating Glow set). Qiuyuan is the irreplaceable engine of this composition; his ability to perform multiple Echo Skill casts directly triggers Sigrika’s Blessing of Runes and Soliskin Vitality passive buffs. To execute her flawless full-damage combo rotation on the battlefield, follow this exact sequence: Enter the field via Intro Skill to activate the Convergent state. Quickly cast your Echo Skill followed by three Basic Attacks to enter the Decipher state. Cast Resonance Skill to pull enemies together and generate Runes. Perform an enhanced Heavy Attack, then immediately cast your Resonance Liberation to enter the Divergent state. Execute five more Basic Attacks, followed by another enhanced Heavy Attack. Hold your Resonance Skill to charge and unleash her ultimate Forte finisher, Learn My True Name, before swapping out via Outro. This combo heavily relies on her Rune mechanics. She generates Rune: Trust (Yellow) via Basic Attacks/Dodge Counters, and Rune: Answer (Blue) via her Resonance Skill. Combining these Runes dictates the effect of her Heavy Attack: opposite runes trigger Runic Outburst (massive damage), two yellows trigger Runic Chain Whip (stagnates enemies), and two blues trigger Runic Soliskin (pulls enemies in). 📚 Skill Priority, Resonance Chains, and Ascension Materials When investing your hard-earned materials into her skill tree, prioritize upgrading her Forte Circuit first, as it houses her primary nuke damage. Follow this by leveling her Resonance Liberation, then equally distribute points into her Normal Attacks and Resonance Skill to empower her combo setups. Her Intro Skill should be leveled last. To fully ascend Sigrika and max out her Forte, you will need to farm 46 Our Choice boss materials, 60 Arithmetic Shells, 26 Gold in Memory weekly boss drops, alongside an abundance of Exoswarm Pendants and Waveworn Shards, totaling over 2.2 million Shell Credits. For players looking to push her damage ceiling even higher, unlocking her Resonance Chains (Sequence Nodes) provides massive combat advantages: S1 (The Gleam Meant for Radiance): Grants interruption immunity during key skills, increases base skill DMG multipliers by 70%, and allows her Encapsulated out-skill to stack up to 3 times for more frequent enemy stagnation. S2 (The Bitterness Steeped in Hope): The best stopping point for low spenders. It provides a massive 120% DMG multiplier to her Forte Circuit finisher, Learn My True Name. S3 (I Flee, Yet I Seek): Doubles her DMG Amplification by allowing Innate Gift to stack up to 4 times, persisting even when she swaps off-field. S4 (I Lose, Yet I Gain): Grants the entire team a 20% ATK buff for 20 seconds whenever an Echo Skill is cast. S5 (Until Submerged by the Dark): Increases her Resonance Liberation damage multiplier by 30%. S6 (True Names Resurfaced, Rising in Light): The ultimate capstone. Enemies take 30% more damage from Sigrika, and her Forte skills gain an additional 15% DMG Amplification and 7.5% DEF ignore per stack. Mastering Sigrika's complex rune combos anchors the early progression of the update, especially for players investing in new characters. Travelers aiming to accelerate ascension farming can explore trusted Wuthering Waves Accounts, optimize resin/stamina efficiency with expert Wuthering Waves Hourly Services, or secure consistent boss clears through reliable Wuthering Waves Boosting as farming rotations intensify. GameMarket.gg is a trusted digital marketplace for everything gaming-related. We serve the gaming community by providing secure access that enhances every gaming journey.
Wuthering Waves
Wuthering Waves 3.2 Update: Sigrika & Events
Prepare for an incredible journey across Solaris as the Wuthering Waves Version 3.2 Update drops. From the fierce new aero resonator Sigrika to massive Echo optimizations and challenging Endstate Matrix gameplay, this massive patch redefines the adventure. 🌑 Shadows Illuminated: Maintenance and Story Expansion The highly anticipated Resolution to Illuminate the Shadows patch officially brings a wealth of fresh content and generous compensations for Rovers. Following the maintenance, players who have unlocked the mail feature will receive three hundred Astrite and two Crystal Solvents for the downtime, alongside an additional three hundred Astrite for crucial bug fixes. This major expansion introduces the captivating Chapter III Act IV main quest, Gold Suspended in Shadows, where you will join forces with a new student to investigate mysterious frequencies lurking within the Dark Side of Startorch Academy. Once the festival dust settles, the narrative continues with the Rabbit Reflected in Shades afterstory, challenging players to uncover the Fractsidus's true motives alongside a strange rabbit. Furthermore, the new permanent event, Whispers Between Stars, allows Rovers to delve deeper into resonator side storylines, offering Astrites and the exclusive Memories of the Stars expedition motorbike livery. 🌪️ Sigrika's Arrival: New Resonators, Weapons, and Brutal Foes Combat in Solaris is about to reach exhilarating new heights with the debut of Sigrika, a prestigious five-star Aero gauntlet user hailing from Startorch Academy. Designed as a formidable main damage dealer with exceptional traction and echo skill damage capabilities, she is ready to dominate the battlefield and prove herself as a true Solsworn. To maximize her devastating potential, players can pull for her signature five-star weapon, the Solsworn Ciphers, which perfectly complements her aggressive playstyle. However, this power will be immediately put to the test against a terrifying new roster of enemies, including the chaotic Phagosite variants such as the Bipolarch, Hysterarch, and Miserarch, alongside deadly Fractsidus operatives like the Milliner, Mawdoll, and Ripper. 🎮 Rhythmic Festivals and High-Stakes Academy Events Beyond intense combat and deep storytelling, the academy grounds are bustling with an incredible lineup of special events designed to test a variety of skills. Rovers can unwind, gather rewards, and engage their minds with an array of unique challenges scattered throughout the world: Soar to the Beat: A rhythm challenge at the Mind Dive Arcade where you catch "Stellar Orbit Beats" to earn the Astral Flight Sigil. Lahai-Roi Blocks: A leisure event introduced by Tetoris that tests your spatial awareness with a wondrous new block game. F.U.E.L. Instrumentality Project: A quirky simulation playtest hosted by Van Tassie to revolutionize food optimization. Knights of the Wild: A featured combat challenge where you must assist roaming Mechascouts in peril across Lahai-Roi. The Flaming Red in Memory: A showcase event where you join Platya, a Black Shores Bloom Bearer, to chase the legend of a Ghost Miko. Endstate Matrix: A high-difficulty recurring challenge in Solaris's data space where you battle malice to earn the Matrix Ranger title, Doomsday Cycle Sigil, and Call from Beyond the Stars livery. Gifts of Solsworn: A 7-day login event providing a steady stream of daily rewards. Collab Livery Bundles: Limited-time QUEEN and VIOLET expedition motorbike bundles available in the in-game store. New Hologram Challenge: A brand new Tactical Hologram synchronization fight against the formidable Hyvatia. ⚙️ Echo Management Overhaul and Quality of Life Enhancements Managing your hard-earned loot has never been easier thanks to the massive systematic overhauls implemented in this patch. The development team has completely revolutionized how Rovers handle their gear and traverse the open world, ensuring a much smoother gameplay loop: Echo Filtering & Discarding: Added batch discard, batch lock, and smart discard features directly within the Echo Backpack and Data Bank. Plan Codes & Sharing: You can now import recommended management plans, edit plans based on Sonata Effects, and share your Echo configurations with other Rovers using Plan Codes. Auto-Discard System: A highly requested feature that, when enabled, automatically marks all non-5-Star Echoes for discard upon obtaining them. Enhanced Absorption Fixes: Guaranteed Echo drops from quests and base drop rate successes no longer consume your precious Enhanced Absorption attempts. Material Tracking: Clicking a specific material now opens the map and exclusively tracks Tacet Discords that drop it within your radius. Motorbike Autopilot: Improved obstacle-avoidance logic to prevent wrong turns and temporarily expanded joystick control areas on mobile for effortless reversing. Resonator Trials: Ascendant Aces now allows you to instantly claim rewards for Resonator trials you already completed in previous versions. 💻 Next-Generation Graphics, UI, and Deep Bug Fixes To ensure the visual fidelity matches the thrilling gameplay, Kuro Games has rolled out substantial graphical, performance, and UI upgrades across all platforms. Accompanying these massive upgrades is an extensive list of bug fixes that resolve countless immersion-breaking issues, ensuring your journey remains flawless: PC & Mobile Graphics: Added PC Render Distance settings (Default, Far, Farthest) and a High Quality mobile toggle (supported by Snapdragon 8 Elite/8s Gen 4, Dimensity 9400, or XRing O1). Resource Cleanup (Beta): PC and Mac users can now delete watched cutscenes to save storage space (requires an initial 10GB structural download). UI Polish: Implemented cross-device synchronization for red notification dots, added text and visual previews for graphics settings, and simplified the Weekly Challenge display. Character Bug Fixes: Resolved abnormal model behaviors for Luuk Herssen, fixed camera pulls and SFX issues during Aemeath's Mech form/Dodge Counters, corrected Lynae's Optic Camo interactions with Hoverdroids, and fixed Iuno's Resonance Liberation lighting. Quest & Co-op Fixes: Fixed progression blocks in "The Star That Voyages Far," "What Yesterday Wept," "By Moon's Fated Light," "Treasures in the Painting," and "Moments Captured in Light." Also corrected abnormal Tacet Field co-op countdown timers. System & Environment Fixes: Resolved issues preventing DLSS and 120 FPS from enabling on capable PCs and M5 iPads, fixed iOS crashing instances, and corrected rendering errors for snowfields and skies in the Roya Frostlands and Honami City. Mastering the Endstate Matrix anchors the early progression of the update, especially for players investing in new characters. Travelers aiming to accelerate ascension farming can explore trusted Wuthering Waves Accounts, optimize resin/stamina efficiency with expert Wuthering Waves Hourly Services, or secure consistent boss clears through reliable Wuthering Waves Boosting as farming rotations intensify. GameMarket.gg is a trusted digital marketplace for everything gaming-related. We serve the gaming community by providing secure access that enhances every gaming journey.

Arena Breakout
Arena Breakout Season 12 Update Guide
Prepare for the ultimate tactical shift as the Arena Breakout Season 12 Update arrives. Navigating the completely revamped Valley map, mastering experimental combat gear, and adapting to massive system overhauls will determine your survival in the Dark Zone. 🗺️ Rebuilding the Dark Zone: Valley Expansion and Armory Weather The landscape of the Dark Zone is shifting drastically with Doss returning to rebuild the Valley on a massive scale. The entirely new Valley: New Order map boasts a territory expanded by an impressive forty-seven percent, with over ninety percent of the original area undergoing extensive renovations. Operators exploring this fresh terrain will discover new geographical features like rivers and swamps, alongside hidden containers, civilian vehicles, drift bottles, and homing pigeons. High-stakes looters can hunt for exclusive new high-value items such as the Gold Dumbbell and the Project 400 Bomber Model. Dedicated mercenaries who complete the Valley's New Look missions can earn up to 1,800 Permanent Appearance Vouchers, while a map-exclusive experimental item, the Type 151 Handheld Radio Replica, allows players to intercept details about enemy encounters in other areas. Simultaneously, the Armory map introduces a dynamic weather system featuring complete day and night cycles. By participating in the Armory: Nightfall event, players can deliver Nightfall Tokens to unlock exclusive weapon skins and limited stamps, though they must adapt to new extraction point activation requirements that swap the delivery order of dog tags and miscellaneous items depending on the bunker or mine exits. 🔫 Arsenal Evolution: New Season Firearms and Experimental Gear Survival in this hostile environment requires superior firepower, and the arsenal has expanded to include top-tier conventional and season-exclusive weaponry. The A545 Assault Rifle arrives as a conventional powerhouse, utilizing a balanced recoil system and a unique muzzle compensator that alters the horizontal recoil axis. For seasonal exclusive drops, the G28 Marksman Rifle offers incredible control with a specially designed bolt that eliminates downward torque, while the SCAR-HAMR Assault Rifle balances rapid response and sustained suppressive fire with its shifting rate of fire. Close-quarters specialists can wield the Daydream KS23 Shotgun, utilizing its 23mm rifled barrel to fire devastating armor-piercing slugs, or experiment with the M79 Grenade Launcher for low-velocity explosive pushes. Tactical vision is also redefined through the Snake Eyes Thermal Imaging Camera, Dual Military Night Vision, and the highly coveted Quad White Phosphorus Night Vision that casts a striking blue hue across the battlefield. Operators can further modify their loadouts with the Verified Prototype FAL Stable Stock, deploy an Individual Ballistic Shield for mobile heavy alloy cover, utilize a Laser Targeting Module to paint targets, or even pause to heat up a Spicy Hot Pot to share with teammates for a sudden rush of combat adrenaline. ⚙️ Tactical Movement, Healing, and Gameplay Optimizations Beyond the new weaponry, the core mechanics of movement and survival have been thoroughly refined to create a more fluid combat experience. Operators can now physically drag knocked-down teammates to safety and directly administer medical treatments, a vital addition considering the maximum number of knock-downs per raid has been increased to ten. Stamina management has been completely overhauled, drastically reducing the physical cost of going prone, sprinting, vaulting, and climbing. Players can now execute omni-directional prone movements, allowing them to crawl and fire from their side or back. Momentum remains unbroken as you can now switch weapons, reload, load ammo, and pull bolts entirely while sprinting. Vaulting can seamlessly be triggered in mid-air with far more lenient angle requirements, and character strafing speeds along walls have been increased to navigate tight spaces effortlessly. Adding to the realism, the game now features crosshair hit feedback, joystick creeping for silent approaches, and the ability to look around by dragging the camera while holding movement stance buttons. ⚖️ Massive Balance Adjustments and Interface Upgrades The combat sandbox has seen rigorous adjustments to ensure a punishing but fair competitive environment. The armor penetration calculation formula has been fundamentally altered, meaning lower-tier ammunition can no longer directly penetrate full-durability high-tier armor and helmets. Weapon balancing brings massive buffs across the board: the P50A Pistol and MG-3 Light Machine Gun have received significant improvements to recoil control, accuracy, and effective range, while the SG550 Assault Rifle boasts a drastically increased rate of fire. Experimental Scout Drones have been reworked to include a powerful laser marking function and higher durability, though they now fly slower, sound louder, and can no longer be stored in secure cases. The user interface inside the backpack has been vastly improved, allowing items to automatically rotate to fit open slots, supporting horizontal swipe-to-drag gestures, and enabling double-click stacking. A new quick-load button appears when selecting magazines, and players can seamlessly search containers much faster, even while simultaneously going prone or reloading their weapons. 💰 Economic Shifts, Dispatch Changes, and Quality of Life The economy and pre-raid preparations have been rigorously updated to streamline the operator experience. A strict new Equipment Value Calculation system now separates your starting value from your currently worn equipment value, completely changing mode entry requirements. Entering the Lockdown Zone now strictly demands a 50,000 Koen minimum loadout value and an 8,000 Koen entry fee. To fund these expensive runs, the Dispatch System has been overhauled to remove difficulty selections entirely, instead refreshing three operators daily who possess unique dispatch traits. Dispatch times have been heavily reduced to six, twelve, or twenty-four hours, and players can now save favorite dispatch equipment loadouts and collect their earnings in a dedicated dispatch mail tab. Quality of life improvements extend to the shooting range, which now features an infinite stamina switch and direct access to the equipment build screen. Furthermore, players can save up to three custom equipment loadouts in storage, quick-buy up to 500 rounds of ammunition instantly, and utilize a new automatic voice line system that dynamically reacts to reloading, taking damage, or throwing grenades on the battlefield. Mastering these massive tactical mechanics anchors the early progression of the update, especially for players investing in new characters. Travelers aiming to accelerate ascension farming can explore trusted Arena Breakout Accounts, optimize resin/stamina efficiency with expert Arena Breakout Hourly Services, or secure consistent boss clears through reliable Arena Breakout Boosting as farming rotations intensify. GameMarket.gg is a trusted digital marketplace for everything gaming-related. We serve the gaming community by providing secure access that enhances every gaming journey.
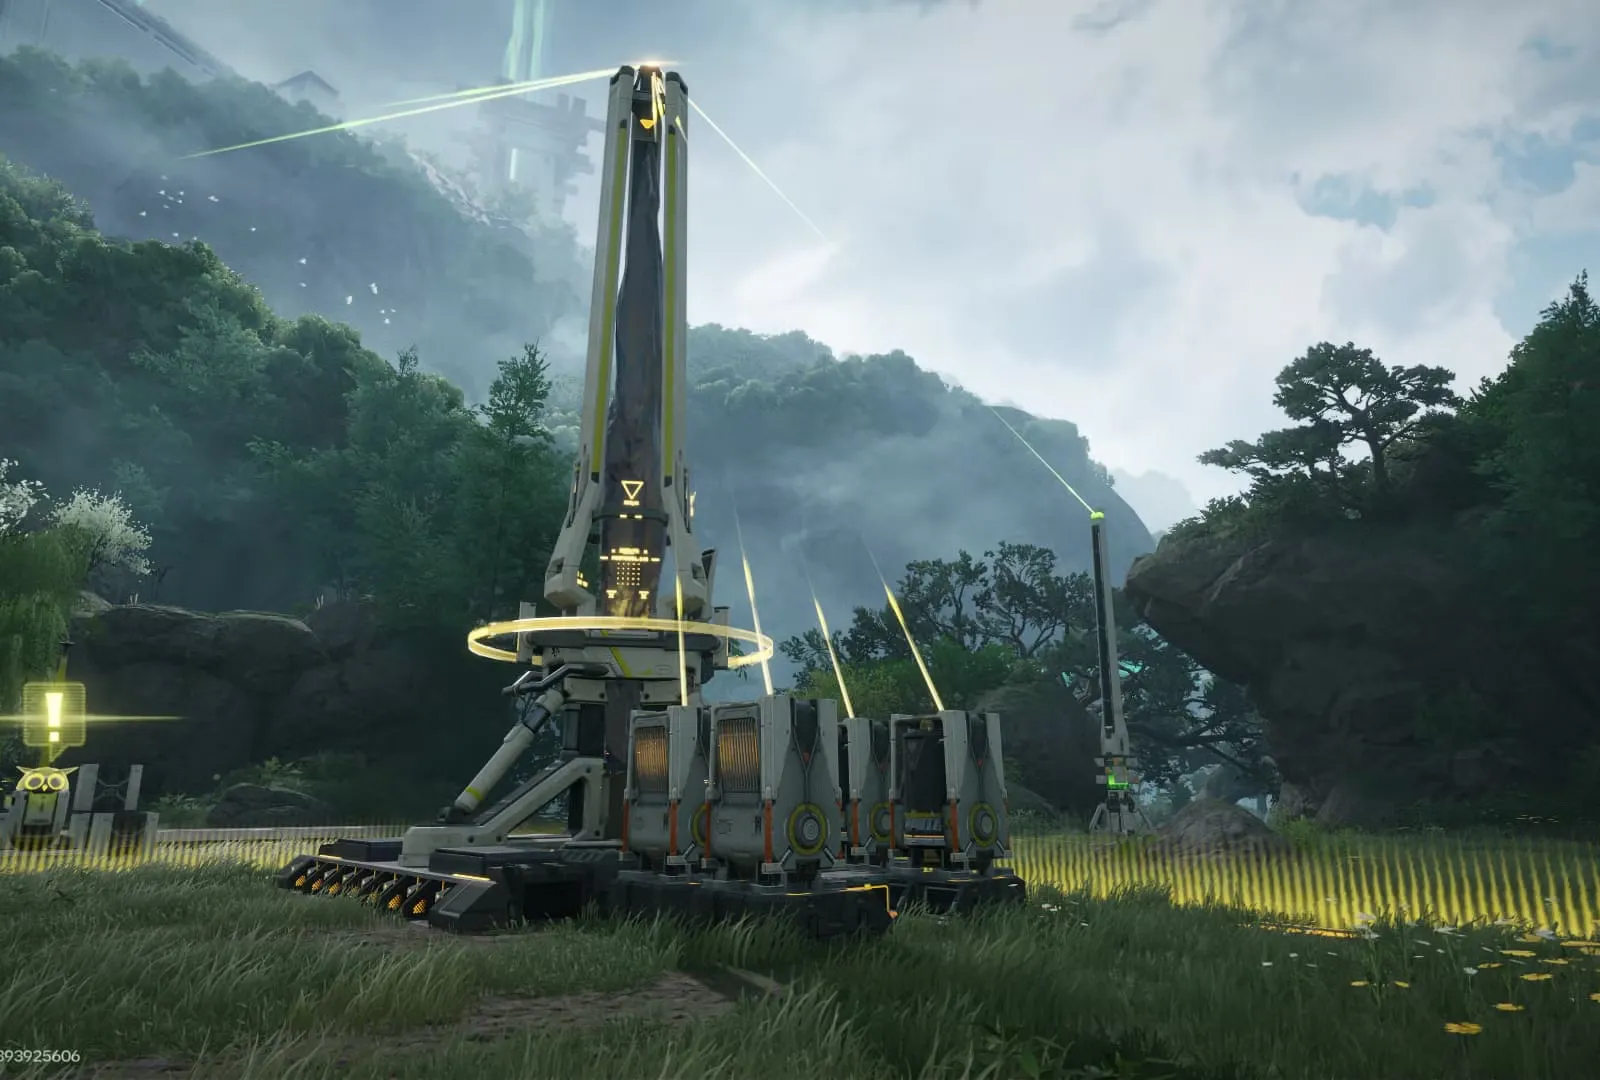
Arknights: Endfield
Wuling Mid Game Factory Guide for Endfield
Before diving into the harsh environments of Talos-II, every pioneer needs a reliable Arknights: Endfield Guide to survive. Mastering your Wuling mid game factory layout, optimizing AIC blueprint codes, and streamlining SC Wuling Batteries will accelerate your progression. 🏗️ Architecting the Future: The Ultimate Wuling Factory Layout Navigating the industrial complexities of Talos-II requires precision, planning, and a deep understanding of resource management. As players transition out of the early game in Arknights: Endfield, the Wuling mid-game factory presents a massive leap in logistical difficulty. This comprehensive Guide delves into the exact layouts, blueprints, and material processing lines required to transform raw Cuprium Ore into high-value technological assets. Transitioning your base effectively ensures a stable economy of Stock Bills, keeping your progression smooth as you face the escalating dangers of the wasteland. 🔌 Constructing the Core AIC Area and Efficiency Codes The foundation of a successful mid-game operation lies in the Core AIC Area layout. A highly optimized blueprint requires precisely ten Conduit Inlets and Outlets to function without bottlenecking. When constructed correctly according to this Guide, your facility will boast an impressive production rate: yielding roughly ten SC Wuling Batteries per minute. Because the facility consumes two and a half batteries per minute to sustain itself, you are left with a massive net profit of seven and a half batteries every sixty seconds. To achieve this flawless automation, you can directly import specific Asia server layout codes into your AIC system. For your top left module, input the code EFO01194ou26OuUi534O7, and pair it with the top right module code EFO013o72Oe8AOa920579. The middle sections require EFO01iUIa6uA862o872U4 for the left and EFO01u8U4E73iE0eIAoOU for the right. Finally, the bottom module, which uses the code EFO017i89aoeua58uO0Ai, should be placed twice side-by-side. Placing Sandleaf and Yazhen in the Planting Units within this bottom section is crucial, as these organic materials fuel the chemical reactions needed later on the assembly line. 🧪 The Chemistry of Xircon and SC Wuling Batteries Creating advanced power sources is a multi-layered process that tests your base-building acumen. Producing Xircon—a mandatory ingredient for SC Wuling Batteries—requires the clever utilization of industrial waste. First, you must synthesize Liquid Xiranite in a Reactor Crucible using Water and Xiranite. Next, route this liquid into a second crucible alongside the sewage byproduct generated from refining Cuprium Ore. This volatile mixture creates Xircon Effluent. The pure Xircon Effluent is then sent to a final Reactor Crucible to be combined with Ferrium Powder. For instant implementation of this setup, utilize the Asia blueprint code EFO01iUIa6uA862372U4. From there, the production of the SC Wuling Battery can begin. You must process Originium Ores and Sandleaf in a Grinding Unit to create Dense Originium Powder. A critical tip from this Guide is to maintain optimal efficiency by establishing four distinct Dense Originium Powder lines feeding into a single Packaging Unit alongside one Xircon line. To bypass the manual setup, you can import the SC Wuling Battery Asia code EFO01iUIa6uA862e572U4, which brilliantly provides an extra two outputs of Sandleaf Powder that can be redirected into other Grinding Units. 🧬 Synthesizing Yazhen Syringe A and Heavy Components The medical and mechanical wings of your factory are just as demanding. Yazhen Syringe A is a highly lucrative item crafted by combining Cuprium Parts with Cuprium Bottles filled with Yazhen Solution. By shredding raw Yazhen and mixing it with water, you create the solution. Utilizing a Filling Unit, you pump this mixture into Cuprium Bottles, and a Packaging Unit merges them with Cuprium Parts. To perfectly align these machines without the headache of manual routing, players can use the Asia component code EFO012O9A70E1780eIOo. Because Cuprium Ore outputs are strictly limited at Regional Development Level 8, players must perform a delicate balancing act. You will often need to purposefully throttle the production of Cuprium Components, which require Xiranite and Cuprium Parts via a Gearing Unit. To set up the baseline for these mechanical parts efficiently, load the Cuprium Component Asia code EFO01iUIa6uUuA2oo7aU4. This Guide recommends this specific routing to ensure enough raw Cuprium is diverted to your highly profitable syringe and battery lines without entirely halting your gear progression. 🌍 Essential Milestones for Economic Dominance To truly capitalize on this massive industrial output, specific world milestones must be met. Sandleaf and Yazhen are the lifeblood of your chemical engineering, so establishing continuous seed-planter loops is non-negotiable. Furthermore, you must unlock the Qingbo Stockade by completing the "Deep in the Mire" main mission. This allows you to deploy Hydro Mining Rigs directly onto Mineral Beds for automated Cuprium extraction. Finally, pushing your Outpost to Level 3 is the ultimate goal, as it grants you the authorization to sell your stockpiled SC Wuling Batteries and Yazhen Syringe A units for Stock Bills. Mastering the Wuling factory layout anchors the early progression of the update, especially for players investing in new characters. Travelers aiming to accelerate ascension farming can explore trusted Arknights: Endfield Accounts, optimize resin/stamina efficiency with expert Arknights: Endfield Hourly Services, or secure consistent boss clears through reliable Arknights: Endfield Boosting as farming rotations intensify. GameMarket.gg is a trusted digital marketplace for everything gaming-related. We serve the gaming community by providing secure access that enhances every gaming journey.
Showing 286 of 300 from 698 Results