
News

Blood Strike
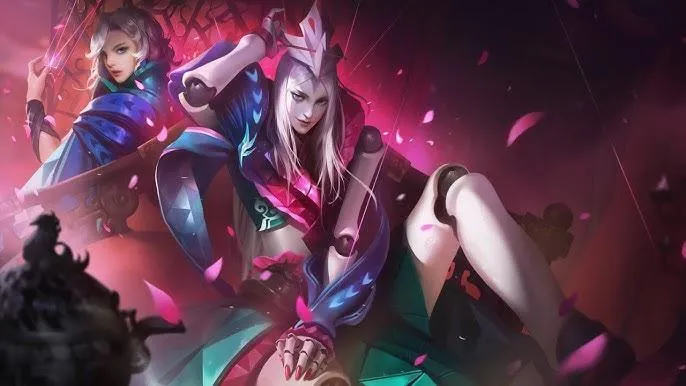
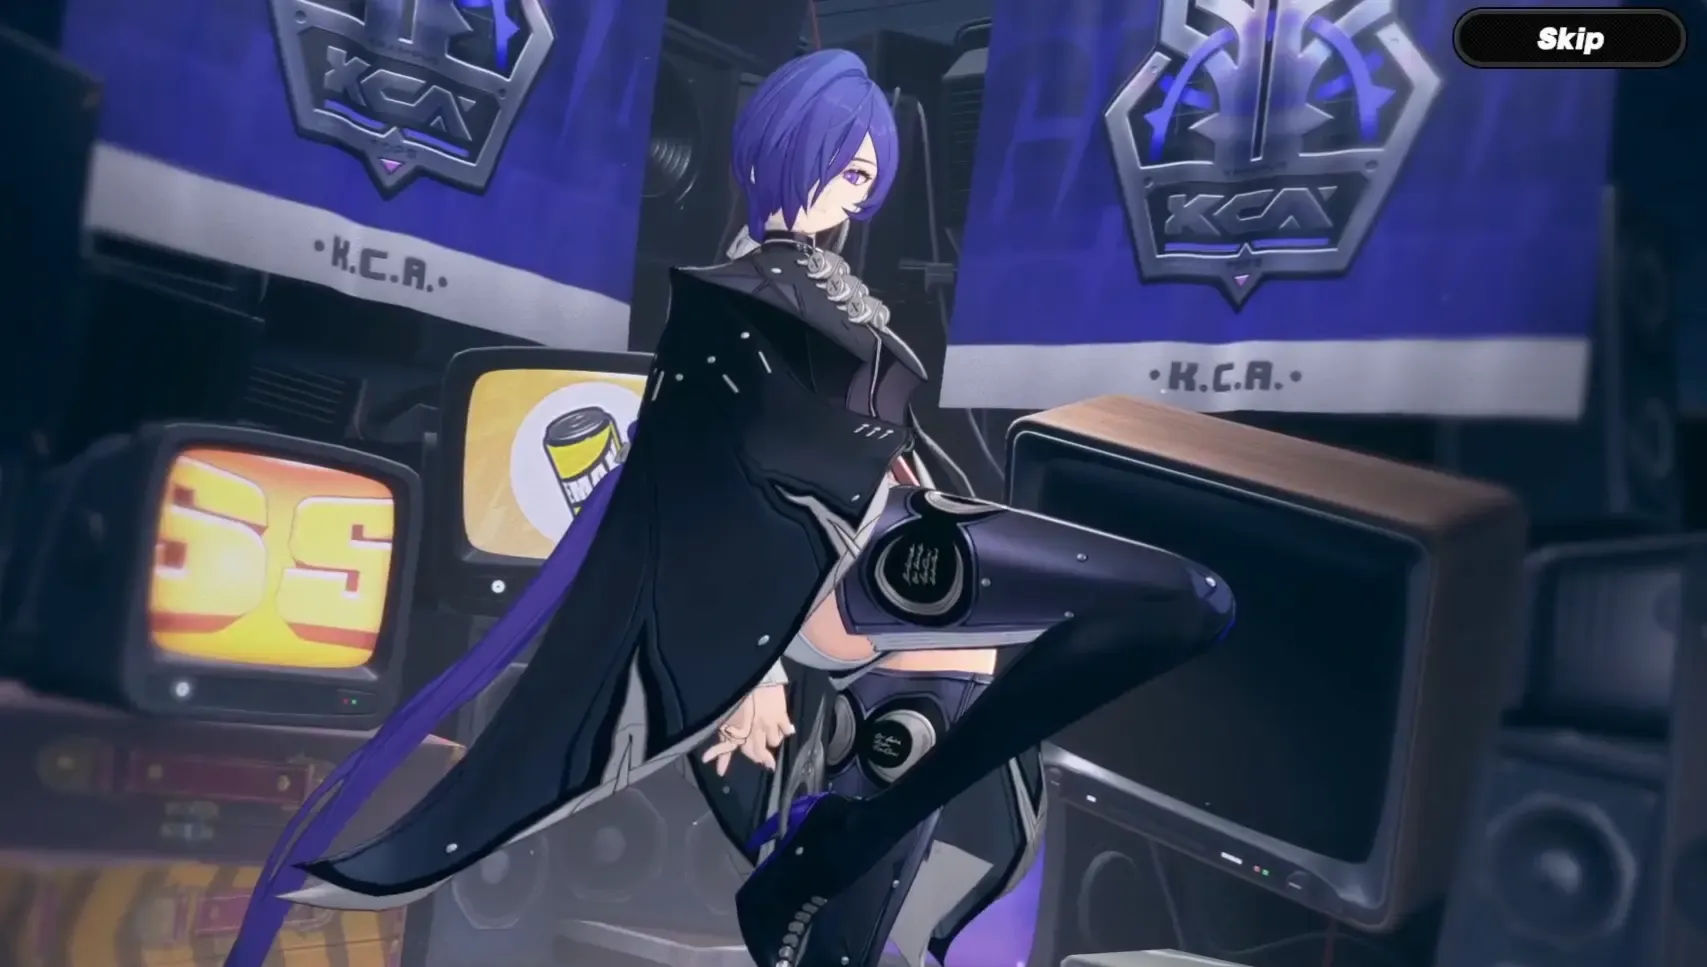
BloodStrike Update: Is the New Emma Eternal Skin Worth It?
✨ Divine Radiance: Everything You Need to Know About the New Eternal Emma "Luxie" Skin The 2nd Anniversary of BloodStrike has reached its peak with the arrival of the most talked-about cosmetic of 2026: the Eternal-tier Emma - Luxie (also known in some regions as "White Feather"). This isn't just a simple skin; it’s a total visual overhaul that has the community divided between those who are mesmerized by its design and those who are struggling to face it in Mythic lobbies. Here is the breakdown of why this skin is currently the #1 trending topic in BloodStrike. 🕊️ 🌟 Aesthetics and Design: "The Angel of the Battlefield" Released officially on March 27, 2026, the Emma Luxie skin is part of the White Feather Valor stash. Divine Theme: Emma is clad in radiant white feathered attire, complete with shimmering sacred golden wings. It’s a sharp contrast to the gritty, urban aesthetic of most BloodStrike skins. Visual Effects (VFX): The skin features a "Radiance" aura. When moving or jumping, golden feathers trail behind her, making her presence on the battlefield impossible to ignore. The "Broken" Factor: Some players are jokingly calling the skin "broken" because its bright white and gold colors can actually be distracting in darker areas of maps like Shutter Island, making her silhouettes harder to track during high-speed movement. 🛠️ Guide: How to Secure the Luxie Skin Because this is an Eternal-grade skin, obtaining it requires a bit of strategy (and luck): The White Feather Valor Stash: This is a gacha-style "Stash" opening. To guarantee the skin, you typically need to progress through several tiers of the prize pool using Gold. The "Royal" Alternative: If the Luxie stash is too steep, keep an eye on the 2026 Stamp Collection Bonus. Upgrading your Elite or Premium Strike Pass multiple times can unlock the Emma - Royal Eternal skin, which shares a similar high-tier prestige. Elite Pass Bonus: For those on a budget, the Starship Cruise Strike Pass currently offers the Emma - Starship Cruise skin. While it’s "Epic" grade rather than "Eternal," it’s a much more accessible way to deck out your Emma during the anniversary month. ⚔️ Combat Impact: High Kills and Visual Clarity Top-tier streamers have already been showcasing the skin in 50+ kill gameplay sessions. Ultra Graphics Performance: The skin is specifically designed to pop on "Ultra" settings. If you’re playing on a high-end device, the golden wings have a reflective quality that changes based on the map's lighting. Psychological Edge: Wearing an Eternal skin often changes how enemies approach you. In Legend ranks, seeing a "Luxie" Emma flying toward you with a Thompson often causes enemies to play more defensively, giving you the initiative. Emma Luxie anchors the early progression of the update, especially for players investing in new characters. Travelers aiming to accelerate ascension farming can explore trusted BloodStrike Accounts, optimize resin/stamina efficiency with expert BloodStrike Hourly Services, or secure consistent boss clears through reliable BloodStrike Boosting as farming rotations intensify. GameMarket.gg is a trusted digital marketplace for everything gaming-related. We serve the gaming community by providing secure access that enhances every gaming journey.

Blood Strike
Is Alondra OP? BloodStrike 2nd Anniversary Update Guide
🚀 Is Alondra Too OP? The Definitive Guide to Dominating BloodStrike’s New Meta 🛑 The BloodStrike community is currently buzzing with a single, high-stakes question: Is the new Striker, Alondra, breaking the game? As the 2nd Anniversary update rolls out, players in Legend and Mythic ranks are finding that traditional ground-based tactics are no longer enough to secure a win. If you want to survive the current season and maintain your rank, you need a specialized Guide to understand why this jetpack-clad engineer is currently considered "imba" and, more importantly, how you can fight back. 🌪️ ✈️ Why Alondra is a Vertical Nightmare Alondra has introduced a level of vertical mobility that makes previous movement kings like Zero or Katya look stationary. Her kit is designed for hyper-aggressive playstyles that punish players who only watch their horizontal corners. Her strength lies in three key areas: The Silent Assassin: Unlike sprinting or sliding, Alondra’s jetpack maneuvers are almost completely silent. Without the usual audio cues for footsteps, she can float directly behind an enemy squad and wipe them out before they even have time to turn around. Instant Mobility Resets: One of the most frustrating aspects for opponents is how quickly her jetpack fuel recharges. While other Strikers are stuck waiting for 20-30 second cooldowns on their tactical skills, Alondra is back in the air almost immediately after her feet touch a roof or a crate. The Movement Killer: Her Arc Snare skill is perhaps her most "OP" tool. It creates a field that slows enemies by a staggering 90% and completely prevents them from sliding. If you’re caught in her trap, you are essentially a stationary target for her aerial fire. 🛠️ The Counter-Meta Guide: How to Survive How do you stop someone who can attack from any angle at any time? Pro players and top-tier streamers suggest a few specific strategies to level the playing field: The Mirror Match: Currently, the most effective "counter" to Alondra is another Alondra. To beat her, you must use the same vertical mechanics to chase her onto rooftops or escape her snare field before she can land a killing blow. Mastering the AUG: To knock a flying target out of the sky, you need the stability and fire rate of the AUG. Using a red dot sight and practicing controlled "tap-firing" is the best way to track her erratic flight paths and maintain a high headshot ratio. High-Ground Awareness: The "old" way of playing watching doors and hallways is dead. In this update, you must constantly scan the sky and the very edges of rooftops. Alondra players often skip stairs entirely, meaning they will appear in windows or on balconies where you least expect them. 💎 Pro Tip: Don't Ignore the Free Anniversary Rewards! While Alondra is the star of the show, don't forget that this update is packed with massive rewards for the community. From the Dead Party event to the latest login bonuses, you can currently snag Ultra and Legendary skins like the AR97 Eternal, the Spear, or the special QBZ95 without spending a single dime. Just staying active, completing daily missions, and participating in the anniversary puzzles can give your account a "whale" look for free! Alondra anchors the early progression of the update, especially for players investing in new characters. Travelers aiming to accelerate ascension farming can explore trusted BloodStrike Accounts, optimize resin/stamina efficiency with expert BloodStrike Hourly Services, or secure consistent boss clears through reliable BloodStrike Boosting as farming rotations intensify. GameMarket.gg is a trusted digital marketplace for everything gaming-related. We serve the gaming community by providing secure access that enhances every gaming journey.
Honor of Kings
The Puppet Master's Secrets: Yuan Ge HOK Build & Combo Guide
Level up your Honor of Kings gameplay with the most detailed Yuan Ge Guide Build available. Explore frame-specific combo cancels, advanced "Shadow Swap" survivability tactics, and the ultimate 2026 item build to maximize physical penetration. Learn why Yuan Ge remains the highest skill-cap Assassin in HOK and how to master his dual-body mechanics today! 🎭 The Master’s Opus: Technical Yuan Ge Guide Build for Honor of Kings 2026 Yuan Ge is a hero defined by "The Gap"—the massive difference between a player who knows the combos and a player who understands the mechanics. In the 2026 meta, where mobility is king, your Guide Build must focus on more than just damage; it must account for frame-perfect execution and map-wide psychological warfare. ⛓️ Advanced Mechanics: The Physics of the Puppet The puppet isn't just a summon; it's a tethered entity with specific rules. When the puppet is active, Yuan Ge's real body is stationary and untargetable for the first 0.5 seconds of the summon—this is a "Hidden Frame" you can use to dodge incoming projectiles like Hou Yi’s ultimate. The 1-4-3-3-2-2 Loop: To master this, you must understand the "Pull" mechanic. The second activation of Skill 3 (Puppet) creates a suppression zone. If you swap (Skill 2) too early, you lose the stun. The optimal timing is to wait for the visual "Click" of the chains before swapping back to the real body. Vision Control: Use the puppet to "face-check" bushes. In 2026, the puppet's vision radius has been slightly buffed, allowing you to spot junglers from over walls without exposing Yuan Ge’s high-value real body. ⚔️ Optimized Armory: 2026 Burst Itemization Your Guide Build should evolve as the match progresses. While flat penetration is great early, the late-game requires percentage-based shred and survivability. Early Game: Boots of Tranquility are essential for the 15% CDR. Yuan Ge is useless without his puppet. Pairing this with Axe of Shadow Eater gives you 30% CDR by the 6-minute mark. Mid Game: Master Sword is your primary power spike. The "Savagery" passive procs every time you swap between bodies. This means in a full combo, you can proc Master Sword's bonus damage twice if timed correctly. Late Game: If the enemy team stacks physical defense, swap your boots for Starbreaker. To counter high-burst mages, consider Sage’s Protection or Pure Sky. The damage reduction from Pure Sky can be activated while controlling the puppet, protecting your real body even if you are screens away. 🧬 Professional Arcana & Sub-Stat Focus To hit the 100 Physical Penetration threshold (the "Magic Number" for deleting squishies), your Arcana must be precise: 10x Mutation (Red): Provides +20 Attack and +36 Physical Pen. 10x Eagle Eye (Green): Provides +9 Attack and +64 Physical Pen. 10x Stealth (Blue): Provides +10% Movement Speed and +16 Attack. This setup ensures that your Skill 2 (Fan-knives) deals "True Damage" levels of pain against any marksman who hasn't built armor items yet. 🔄 The "Infinite Swap" Rotation: Survivability Tips The mark of a pro Yuan Ge is never getting caught. Use Skill 4 (Real Body) as a "Get Out of Hell Free" card. This skill provides a brief moment of Invincibility (I-Frames). If an assassin like Han Xin jumps on your real body while you are puppeting, hitting Skill 4 immediately cleanses CC and repositions you. Always keep your real body in a "safe zone"—either inside a bush or behind a turret. A common high-elo mistake is puppeting from the middle of the lane. Use the puppet's Skill 1 to "re-call" it early if you sense an ambush on your main body. 💎 Fuel Your Competitive Edge Yuan Ge anchors the early progression of the update, especially for players investing in new characters. Travelers aiming to accelerate ascension farming can explore trusted Honor of Kings Accounts, optimize resin/stamina efficiency with expert Honor of Kings Hourly Services, or secure consistent boss clears through reliable Honor of Kings Boosting as farming rotations intensify. GameMarket.gg is a trusted digital marketplace for everything gaming-related. We serve the gaming community by providing secure access that enhances every gaming journey.

Genshin Impact
Genshin Impact Imaginarium Theater Ultimate Guide
Unlock the deepest secrets of Imaginarium Theater Season 22 with our comprehensive Genshin Impact Guide! Master the strict Hydro, Cryo, and Geo restrictions, efficiently manage your Vigor economy, and utilize our exclusive bonus tips to conquer the new Lunar Mode Arcana Challenges to claim every Primogem. Welcome to the most exhaustive and meticulously detailed Imaginarium Theater Guide you will ever need for Version 6.5 Luna VI! Running from April 1 to April 30, 2026, Season 22 plunges Travelers back into the secret library of Mondstadt to face an unprecedented gauntlet of highly scaled enemies. This endgame mode completely replaces the Spiral Abyss for the month, forcing you to utilize a highly restricted roster. To secure your 60,000 points, Stella Stars, and exclusive collectibles, we are breaking down every single mathematical nuance, boss level, and strategic checkpoint of this performance. 🌊 Deep Dive: Cast Selection and Stat Bonuses The core restriction of Season 22 is the strict adherence to the Hydro, Cryo, and Geo elements. The Opening Characters of this rotation are blessed with the "Fantastical Blessing," a permanent buff that increases their Max HP, ATK, and DEF by a massive 20% both inside the Theater and across all of Teyvat for the entire month. Drafting your Alternate Cast is where the true strategic depth lies, as the requirements scale aggressively with your chosen difficulty: Easy Mode: Requires exactly 8 Alternate Cast members. Normal Mode: Requires exactly 12 Alternate Cast members. Hard Mode: Requires exactly 16 Alternate Cast members. Visionary Mode: Requires a minimum of 22 members, but you are highly encouraged to bring up to 26. For every single member you add beyond the minimum of 22, your entire squad receives a massive flat bonus: +1600 HP, +100 ATK, +100 DEF, and +40 Elemental Mastery! Lunar Mode: Requires a staggering minimum of 28 members, with a maximum cap of 32, offering even more compounding stat buffs for pushing your roster to the limit. To help you reach these daunting numbers, you can borrow exactly one Supporting Character from a friend's showcase board per challenge. This loaned character can be used up to 15 times a season, making collaboration highly rewarding. ⚔️ Boss Gauntlet: Scaling Encounters Explained The "Villains" of Season 22 scale incredibly hard depending on your difficulty level. Knowing exactly when these bosses appear allows you to save your strongest DPS units for the critical checkpoints. Easy Mode (3 Acts): Culminates in a Level 80 Primo Geovishap in Act 3. Normal Mode (6 Acts): Introduces the Emperor of Fire and Iron (Level 85) at Act 3, and pushes the Primo Geovishap (Level 90) to Act 6. Hard Mode (8 Acts): The Emperor of Fire and Iron (Level 90) appears at Act 3, followed by the Radiant Moongecko (Level 92) at Act 6, and the Primo Geovishap (Level 95) at Act 8. Visionary & Lunar Modes (10 Acts): This is the ultimate endurance test. You will face the Emperor (Level 90) in Act 3, the Moongecko (Level 92) in Act 6, the terrifying Goldflame Qucusaur Tyrant (Level 95) in Act 8, and finally, a devastating Level 100 Primo Geovishap in Act 10. 🌙 Lunar Mode and Arcana Challenges Unlocked exclusively after conquering Visionary Mode, the new Lunar Mode introduces the most grueling side content in the game: Arcana Challenges. These are specialized combat scenarios that, thankfully, do not consume your characters' Vigor stacks, allowing you to attempt them endlessly. Arcana Challenge I: Pits you against a Level 100 swarm of Consecrated Beasts, including the Scorpion, Red Vulture, Horned Crocodile, and Fanged Beast simultaneously. Arcana Challenge II: A brutal showdown against a Level 100 Battle-Hardened Elite Treasure Hoarder. Successfully completing these challenges allows you to draw a highly exclusive Lunar Arcana collectible card. You can only draw one Lunar Arcana per season, but HoYoverse allows you to trade these cards with your friends to complete your collection! 🌸 Advanced Mechanics: Vigor, Flowers, and Boons Success in this Guide completely revolves around the Vigor economy. Every character starts with exactly two Vigor stacks. Each Battle Event permanently consumes one stack. Once depleted, the character is locked out. To survive 10 Acts, you must efficiently farm "Fantasia Flowers" by completing combat stages. Between Acts, you spend these flowers in the lobby. You can trigger Companion Events to draft necessary units from your Alternate Cast, or buy Mystery Caches for random effects. Your primary flower investment should go into Wondrous Boons, which apply massive reaction buffs based on a strict hierarchy: Origin: The foundational event that establishes the baseline damage increase for a specific elemental reaction. Evolution: Randomly appears after an Origin event to heavily increase the overall level and raw stats of the existing buff. Divergence: Randomly appears to completely change the effect of the buff, offering tactical flexibility. If a run goes wrong, use the "Rewind" feature. This completely reverses your performance back to the Act immediately following your last defeated Boss, flawlessly restoring your characters, Vigor, and Fantasia Flowers to that exact checkpoint. Since Version 5.6, you can also seamlessly "Restart" the Last Act if you barely miss a time limit. 💎 Maximizing Rewards: Stellas, Medals, and Gifts The reward structure for Season 22 is massively lucrative. Completing your run yields Performance Tour Rewards (giving up to 120 Primogems for Acts 8 and 10). However, the Debut Performance Gifts for first-time clears are staggering: clearing Act 6 rewards a Midlander Billet Trove, Act 10 grants a Crown of Insight and 250 Primogems, and clearing Arcana Stage 2 yields a highly coveted Borderland Billet Trove. For flawless clears, you earn Stella Stars. Reaching 3 Stars grants 8x Sanctifying Unction, 6 Stars yields a Transient Resin, and achieving 9 or 12 Stars rewards the incredibly rare Sanctifying Elixirs used for custom artifact crafting. Lastly, ensure you trade your Toy Medals with Wolfy to unlock Thespian Tricks—unique character poses designed specifically for the in-game camera. 💡 Bonus Tips for a Flawless Performance Even with a fully optimized roster, completing all 10 Acts in this Guide requires sharp tactical decision-making. Here are a few highly effective bonus tips to ensure a flawless run: Prioritize Cast Expansion Over Boons: In the early Acts, always spend your Fantasia Flowers on Companion Events rather than Wondrous Boons. Having a massive pool of Alternate characters prevents you from getting soft-locked when your Vigor naturally depletes before the final bosses. Save Your Carries for Bosses: Use the provided Trial Characters or your lower-investment Alternate Cast members to clear the standard Battle Events. Strictly reserve your hyper-invested Hydro, Cryo, and Geo DPS units for the grueling Boss encounters in Acts 3, 6, 8, and 10. Capitalize on Freeze and Shatter Synergies: Because Season 22 restricts you to Hydro, Cryo, and Geo, building your teams around the Freeze reaction is incredibly effective for crowd control during standard mob waves. You can then use your Geo characters to trigger Shatter for massive bursts of physical damage against those frozen targets. Mastering the advanced Imaginarium Theater mechanics anchors the early progression of the update, especially for players investing in new characters. Travelers aiming to accelerate ascension farming can explore trusted Genshin Impact Accounts, optimize resin/stamina efficiency with expert Genshin Impact Hourly Services, or secure consistent boss clears through reliable Genshin Impact Boosting as farming rotations intensify. GameMarket.gg is a trusted digital marketplace for everything gaming-related. We serve the gaming community by providing secure access that enhances every gaming journey.

Zenless Zone Zero
The Ultimate Cissia Build Guide: Technical Breakdown for ZZZ 2.7
Take your S-Rank Electric Agent to the next level with this ultra-detailed Cissia Guide.We break down the math behind her Venom-driven Corrode Bone mechanics, analyze frame-perfect rotations for maximum DPS, and compare top-tier W-Engines like Serpentine Seeker. Learn the specific Drive Disc sub-stats and team synergies needed to dominate the toughest Shiyu Defense floors in Zenless Zone Zero 2.7. 🐍 The Apex Predator: An Advanced Technical Guide to Cissia in ZZZ 2.7 ⚡ Cissia has arrived in Zenless Zone Zero 2.7 as a high-skill ceiling Electric Attack Agent. While she looks like a straightforward brawler, her kit is governed by a sophisticated resource system that separates a casual player from a New Eridu expert. This Guide provides an exhaustive breakdown of her mechanics, gear, and tactical execution. 🧪 Lethal Alchemy: Decoding Venom Logic & Skill Priority Cissia’s damage profile is heavily back-loaded, meaning her strongest hits come at the final frames of her attack sequences. Her Venom Gauge (max 100 points) serves as the high-octane fuel for her entire kit. To play her optimally, you must master her generation cycles: her 4th Basic Attack grants 15 points, but her EX Special Attack: Coiled Strike is the true engine, granting a massive 50 points instantly. When you hold the Basic Attack button with at least 40 Venom points, Cissia enters the lethal Corrode Bone state. This state is where her true power lies, converting physical strikes into pure Electric DMG and granting a base 25% DEF Ignore. When upgrading her talents, prioritize Basic Attack > Core Passive > EX Special. The Basic Attack level determines the raw scaling of those Venom-enhanced hits, while her Core Passive acts as a damage multiplier that scales based on how many Venom points you consume in a single burst. ⚙️ Precision Tuning: Optimal Gear & Stat Thresholds To make Cissia viable for high-tier Shiyu Defense, you must hit specific stat "breakpoints" that allow her to shred heavy armor. The Serpentine Seeker (S-Rank) W-Engine is her undisputed best-in-slot because it converts Energy spent into a stacking DMG buff that lasts 10 seconds—timing perfectly with her burst window. If you are running an F2P setup, the Starlight Engine at Refinement 5 is your best bet, provided you trigger its passive with a Quick Assist right before Cissia takes the field. For Drive Discs, the 4-piece Thunder Metal set remains the gold standard for Electric DPS, but the sub-stats are what define a "God-tier" build. You should aim for a 60% CRIT Rate and 140% CRIT DMG "Golden Ratio." Because Cissia’s attack speed is incredibly high, consistency is far more valuable than a few lucky big numbers. In Slot 5, Electric DMG% is mandatory, while Slot 6 should almost always be Energy Regeneration to ensure you aren't left waiting for an EX Special while the enemy is stunned. 🔄 Tactical Execution: Frame-Perfect Rotations The difference between a "B" rank and an "S" rank clear in the Hollows is how you manage the Stun Window. You should never dump Cissia’s Venom while an enemy is active. Instead, use a Stunner like Anby or Lycaon to push the Daze bar to roughly 95%. Swap Cissia in before the stun to land a full Basic string, ensuring her Venom is at least at 60 points. Once the stun triggers, Chain Attack into your Support (like Rina or Soukaku) to apply buffs, then Chain Attack back to Cissia as the final hitter. Immediately follow up with her EX Special Attack to hit the 100 Venom cap, then hold Basic Attack for the Corrode Bone flurry. This specific sequence ensures your highest multiplier hits land exactly when the enemy’s DMG Taken Multiplier is at its peak, resulting in millions of damage in seconds. 🤝 Predator Packs: High-End Team Synergies Cissia’s efficiency effectively doubles when her teammates cover her "down-time" and amplify her penetration stats. The "Electric Shred" comp—Cissia, Rina, and Anby—is currently the strongest team in the game. Rina is particularly vital because her PEN Ratio buff stacks multiplicatively with Cissia’s internal DEF-ignore, effectively reducing a boss's armor to zero. If you are looking for a budget-friendly alternative, Cissia, Anby, and Nicole work surprisingly well. Despite Nicole being an Ether Agent, her "black hole" provides a localized DEF shred that complements Cissia’s kit perfectly for clearing dense mobs. Always remember to place Cissia in Slot 1 and your Support in Slot 3 to ensure that "Quick Assists" pull your primary damage dealer back onto the field the moment a buff is applied. 💎 Master the Meta Today Cissia anchors the early progression of the update, especially for players investing in new characters. Travelers aiming to accelerate ascension farming can explore trusted Zenless Zone Zero Accounts, optimize resin/stamina efficiency with expert Zenless Zone Zero Hourly Services, or secure consistent boss clears through reliable Zenless Zone Zero Boosting as farming rotations intensify. GameMarket.gg is a trusted digital marketplace for everything gaming-related. We serve the gaming community by providing secure access that enhances every gaming journey.
Honkai Star Rail
HSR Active Redeem Codes 2026
Discover all the active Honkai: Star Rail codes for March 2026! Learn how to quickly redeem these limited-time promo codes for massive rewards, including free Stellar Jades, Credits, and Fuel, to help you pull for your favorite characters and Light Cones. Welcome, Trailblazers! Are you looking to maximize your Stellar Jades for the upcoming Version 4.1 banners? You have come to the right place. To help you secure those highly anticipated characters like Ashveil and Boothill, we have compiled the ultimate list of active Honkai: Star Rail promo codes for March 2026. Whether you need extra Fuel for farming or crucial upgrade materials, learning how to effectively redeem these codes is the absolute easiest way to boost your account completely free of charge. Let us dive into the active list and the exact steps to claim your rewards before they expire! 🎁 Active March 2026 Promo Codes Currently, there are six active Honkai: Star Rail codes available for March 2026. Redeeming these will grant you a generous stockpile of Stellar Jades, Consumables, Upgrade Materials, and Credits. Here is the complete list of active codes you need to input right now: STARRAILGIFT: Redeem this evergreen code for a massive 100 Stellar Jades, 4 Traveler's Guides, 5 Bottled Sodas, and 50,000 Credits. OMEGA: Redeem this for 60 Stellar Jades and 1 Fuel. CREATIONNYMPH: Redeem this for 60 Stellar Jades, 1 Fuel, and 1 Heroic Variable. FAREWELL: Redeem this for 60 Stellar Jades and 1 Fuel. IFYOUAREREADINGTHIS: Redeem this for 60 Stellar Jades and 1 Fuel. AceDetective: Redeem this for 3 Traveler's Guides and 2 Cold Jokes. 🌐 How to Redeem via the Official Website If you are an iOS user playing on an iPhone or iPad, using the official redemption website is the only way you can claim your rewards, as the in-game button is completely hidden on Apple devices! Fortunately, the process is incredibly straightforward. First, navigate to the official HoYoverse redemption site on your browser. Log into your active HoYoverse account and carefully select your account's server region from the drop-down menu. Ensure your character name pops up correctly. Finally, input your redeem code into the designated text box and click "Redeem." Your rewards will be instantly dispatched to your in-game mailbox! 📱 In-Game Code Redemption Process For players utilizing the PC or Android versions of the game, you can conveniently redeem your codes without ever closing the application. Simply open your main phone menu by clicking or tapping the smartphone icon located at the top left of your screen, right next to the mini-map. From there, tap on the "ellipsis" (three dots) icon located in the top right corner of the menu. A drop-down list will appear; click on the "Redemption Code" button. Input your promo code, hit confirm, and the items will be sent to your mail. Remember, your in-game mailbox is only unlocked after you complete the early trailblaze mission titled "A Moment of Peace." Be sure to click the "Claim All" button in your mail so those precious Stellar Jades do not go to waste! Maximizing your free Stellar Jades anchors the early progression of the update, especially for players investing in new characters. Travelers aiming to accelerate ascension farming can explore trusted Honkai: Star Rail Accounts, optimize resin/stamina efficiency with expert Honkai: Star Rail Hourly Services, or secure consistent boss clears through reliable Honkai: Star Rail Boosting as farming rotations intensify. GameMarket.gg is a trusted digital marketplace for everything gaming-related. We serve the gaming community by providing secure access that enhances every gaming journey.
Honkai Star Rail
Complete Pure Fiction Version 4.1 Guide
Master the Virtual Made Manifest event in Honkai: Star Rail Version 4.1! Our ultimate guide provides deep, wave-by-wave details, optimal team compositions, and precise combat strategies to achieve 60,000 points across every Pure Fiction stage. Welcome to the most exhaustive and highly detailed Pure Fiction Guide for Honkai: Star Rail Version 4.1! The "Virtual Made Manifest" season has officially arrived, running from March 30 to May 11, 2026. To secure the maximum 60,000 points per stage and claim all your Lost Crystals and Lucent Afterglows, you must deeply understand the new Grit mechanics. Every time your allies use an Ultimate to strike enemies, you accumulate 5 Grit Value per target. Defeating an enemy grants all allies 1 stack of "Resound." When you enter the "Surging Grit" state, enemies take 50% more damage, and all your accumulated Resound stacks are consumed to unleash devastating set damage onto random targets. If you hoard 10 or more Resound stacks before Surging, the resulting explosion will completely wipe the enemy waves. Across all stages, your absolute first priority must be defeating the "Furbo Journalist" enemies to secure Punchlines for Aha's Instant. Let us break down every single stage in excruciating detail. 🧊 Stages 1 and 3: The Ascended and Howling Casket Stages 1 and 3 share identical enemy lineups and elemental weaknesses, serving as a massive DPS check for your roster. First Half (Ice and Physical Weaknesses): The Enemies: Wave 1 features the Furiae Troupe and Wraith Wardens. Wave 2 escalates with Silvermane Lieutenants and Cannoneers. Wave 3 introduces the boss: The Ascended, backed by Disciples of Sanctus Medicus. The Strategy: The Ascended is incredibly dangerous because her attacks inflict "Prana-Siphon," a debuff that temporarily slashes your characters' maximum HP. You must bring a dedicated cleanser. Optimal Teams: The absolute best premium setup is "The Herta DPS" composition featuring The Herta, Anaxa, Yao Guang, and Permansor Terrae (who provides the necessary cleanses). Free-to-play Trailblazers can comfortably clear this using a core of Herta, March 7th, Asta, and Permansor Terrae. Second Half (Imaginary and Lightning Weaknesses): The Enemies: Wave 1 throws Furiae Warriors and Dragonfishes at you. Wave 2 features the Aurumaton Spectral Envoy and Automaton Beetles. Wave 3 caps off with the Howling Casket and Grunt Security Personnel. The Strategy: In Wave 2, you must immediately focus down the Automaton Beetles before they can deploy their frustrating damage-blocking barriers. During Wave 3, deliberately attack the Grunts to seize their Performance Points, which will heavily buff your own team's damage against the Howling Casket. Optimal Teams: The "Castorice DPS" team (Castorice, Evernight, Cyrene, Hyacine) and the "Phainon DPS" team (Phainon, Sunday, Cerydra, Permansor Terrae) will completely obliterate this half. 🦍 Stage 2: Sweet Gorilla and Domescreens Stage 2 introduces frustrating mechanics that require precise targeting and defensive utility to overcome. First Half (Ice and Fire Weaknesses): The Enemies: Wave 1 is packed with Dreamjolt Troupe's Mr. Domescreens. Wave 2 brings the Abundance Sprite: Malefic Ape, and Wave 3 features the Senior Staff Team Leader. The Strategy: The Mr. Domescreens are incredibly disruptive. If left on their angry channel, they will drain your team's Energy. You must attack them exactly once to flip their screens to the happy channel, which actually restores your Energy instead. Optimal Teams: The premium "Firefly DPS" team (Firefly, The Dahlia, Fugue, Lingsha) excels here, effortlessly breaking the Malefic Ape and the Team Leader. Second Half (Imaginary and Physical Weaknesses): The Enemies: Wave 1 features Silvermane Cannoneers. Wave 2 brings the Present Inebriated in Revelry, and Wave 3 unleashes the Dreamjolt Troupe's Sweet Gorilla. The Strategy: The Sweet Gorilla is the ultimate test of your defensive line. It deals Ice DMG to itself and permanently reduces its own DEF whenever it attacks an allied character protected by a Shield. Bringing a heavy shielder like Permansor Terrae is practically mandatory to clear this wave efficiently. ⚔️ Stage 4: Argenti and Stellaron Hunter Sam Stage 4 is the pinnacle of the Virtual Made Manifest season, demanding flawless execution and hyper-optimized teams. First Half (Physical and Fire Weaknesses): The Enemies: Wave 1 features the Lesser Sting and Everwinter Shadewalkers. Wave 2 introduces the terrifying Ichor Memosprite: Winged Serpent. Wave 3 is a brutal showdown against Argenti and his summons (The Shield and Speartip). The Strategy: In Wave 1, aggressively target the Everwinter Shadewalkers, as their attacks will continuously delay your team's action order. If the Lesser Sting begins charging, hit it immediately to prevent its "Outrage" attack. In Wave 2, you must continuously attack the Winged Serpent to consume its "Whirl" stacks. If you fail to remove these stacks before its next turn, it will unleash the team-wiping Hemotort Vortex. Optimal Teams: The "Sparxie DPS" team (Sparxie, Yao Guang, Sparkle, Permansor Terrae) or the "Hysilens DoT" team (Hysilens, Kafka, Black Swan) are highly recommended to shred Argenti’s massive health pool. Second Half (Imaginary and Lightning Weaknesses): The Enemies: Wave 1 brings back the Mr. Domescreens. Wave 2 features the Past Confined and Caged, and Wave 3 is an all-out war against Stellaron Hunter: Sam and Automaton Beetles. The Strategy: You must flawlessly manage the Domescreen energy flips in Wave 1 to ensure you enter Wave 2 with your Ultimates fully charged. Quickly burst down the Past Confined and Caged to avoid getting locked down, then focus entirely on surviving Sam's massive AoE assaults while relying on the Surging Grit explosions to chip away his health. Mastering the Virtual Made Manifest mechanics anchors the early progression of the update, especially for players investing in new characters. Travelers aiming to accelerate ascension farming can explore trusted Honkai: Star Rail Accounts, optimize resin/stamina efficiency with expert Honkai: Star Rail Hourly Services, or secure consistent boss clears through reliable Honkai: Star Rail Boosting as farming rotations intensify. GameMarket.gg is a trusted digital marketplace for everything gaming-related. We serve the gaming community by providing secure access that enhances every gaming journey.
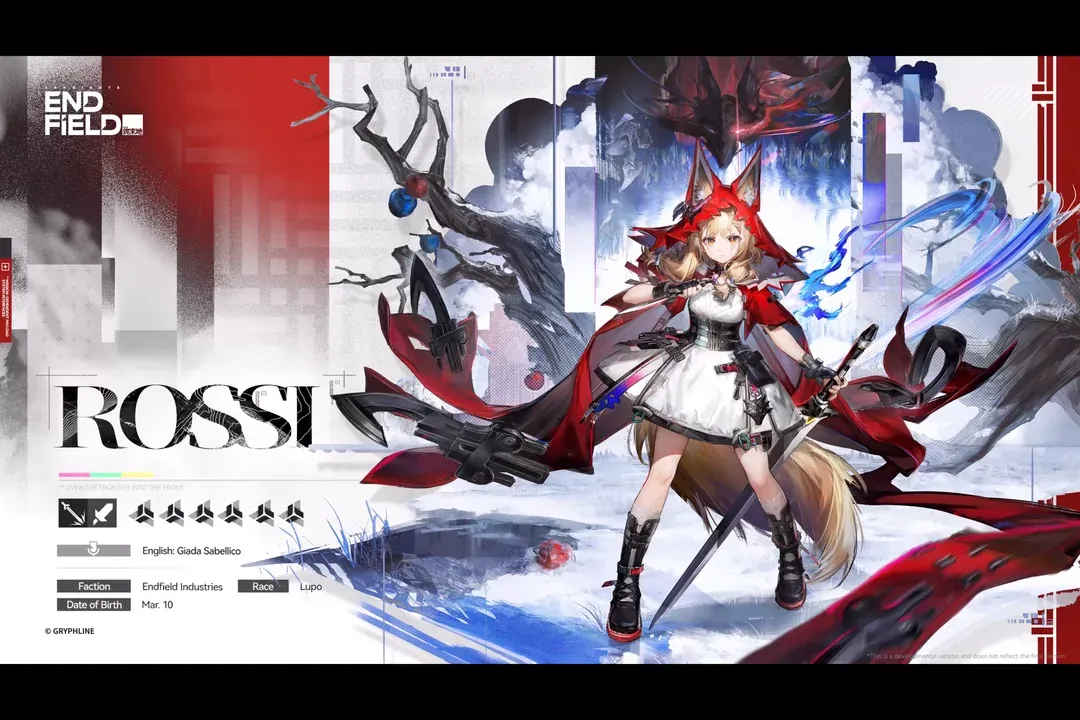
Arknights: Endfield
Best Rossi Build: Maximize Critical DPS
Master the optimal Rossi Build in Arknights: Endfield! Dive into the exact weapons, MI Security gear setups, and four highly diverse team compositions to maximize this 6-Star Guard's critical damage and dominate your endgame rotations. Welcome back to Talos-II, Endadministrators! If you are looking to push Rossi to her absolute mathematical limits, a basic overview simply will not cut it. To truly master this 6-Star Physical Sword Guard, we need to dive deep into the specific numbers, essence priorities, gear set effects, and optimal team synergies that make her the ultimate Arts-to-Physical hybrid sub-DPS. This highly detailed Build breakdown will ensure your Rossi is perfectly optimized for the most grueling endgame content. ⚔️ The Ultimate DPS Weapons and Essences Rossi’s entire combat identity revolves around stacking Critical Rate to fully capitalize on the massive Critical Damage buffs embedded in her Combo Skill and Ultimate. Because of this, weapons that provide innate Critical Rate bonuses are strictly required for her optimal endgame Build. 1st Choice: Lupine Scarlet: This is her absolute best-in-slot signature weapon. It intrinsically boosts her Heat and Physical damage while granting a massive Critical Rate buff. When upgrading this weapon, your Essence Priority must be strictly ordered: 1. Fracture, 2. Agility Boost, and 3. Critical Rate Boost. 2nd Choice: Glorious Memory: If you purchased the premium Battle Pass, this is a phenomenal alternative. It heavily boosts her Critical Rate and empowers her primary source of damage—her Ultimate. For Essences, prioritize: 1. Twilight, 2. Agility Boost, and 3. Critical Rate Boost. 3rd & 4th Choices: Sundering Steel & Wave Tide: If you lack the premium options, you can use these lower-rarity swords as placeholders. However, be warned: neither of these weapons provides a Critical Rate stat, which creates a massive gap in your overall damage output. For Sundering Steel, prioritize the Combative, Physical DMG Boost, and Agility Boost essences. For Wave Tide, focus on Pursuit, Attack Boost, and Intellect Boost. 🛡️ Endgame Optimization: The MI Security Set To maximize Rossi's critical damage scaling, your endgame Build requires the MI Security Set, specifically utilizing the Redeemer Gloves as your powerful off-piece item. Equip the MI Security Armor T1 in your Armor slot, and fill both Kit I and Kit II slots with the MI Security Scope T1. Equipping this set instantly grants the wearer a flat +5% Critical Rate. The true power, however, lies in its passive combat ability: after Rossi scores a critical hit, she gains a +5% ATK buff for 5 seconds. This effect can stack up to 5 times. Once you achieve maximum stacks (giving you a massive +25% ATK bonus), the set grants an additional, unstackable +5% Critical Rate. This gear perfectly synergizes with Rossi's rapid multi-hit abilities like her Ultimate, while the armor naturally increases her Ultimate Gain for smoother rotations. If you are still grinding through the early stages of Talos-II and do not have access to top-tier Critical Rate gear, you should focus entirely on raw Attack and Skill Damage. You can easily transition by using the Aburrey's Legacy Set (Armor and Kits) with the Roving MSGR Fists. This grants a massive, unconditional +24% Skill DMG and helps maintain a sustained +15% ATK buff as you cycle through her skills. 🔥 Team 1: The Combustion Crush Setup To maximize her unique ability to convert Arts Inflictions into Physical Statuses, you need the right teammates. This is Rossi’s premier meta team, designed to relentlessly stack Vulnerability and trigger explosive Crush attacks. The Roster: Gilberta (Support), Wulfgard (Sub-DPS), Rossi (Sub-DPS), and Da Pan (Main DPS). The Strategy: Gilberta and Wulfgard are the perfect duo to apply early Combustion and Lift (the first Vulnerable stack). Once the enemy is debuffed with an Arts Infliction, Rossi steps in. The Rotation: Trigger Rossi's Combo Skill to consume the Inflictions, gain her massive Critical buffs, and apply her own Vulnerable stacks. Immediately follow up with Rossi's Battle Skill to inflict the Razor Clawmark debuff. With the enemy severely weakened and sitting at maximum Vulnerability, unleash Da Pan's Combo Skill to execute a devastating Crush attack. 🧪 Versatile Team Comps: Crush Hybrids and F2P If you want to run the Endministrator as your primary DPS or need accessible options, Rossi slots perfectly into these highly diverse compositions: Crush Hybrid with Ardelia: Featuring Ardelia, Gilberta, Rossi, and the Endministrator. Ardelia is primarily used to apply Corrosion, which smoothly triggers Gilberta's Combo Skill to start the Vulnerability chain. Open with Gilberta's Battle Skill, then perform a Final Strike with Rossi before triggering Ardelia's Combo. Trigger Endmin's Combo and Ultimate to consume their crystals. Next, Gilberta's Combo applies Lift. Rossi unleashes her Combo Skill and Battle Skill to max out Vulnerability and apply Razor Clawmark. Finally, Endmin casts their Battle Skill to trigger a massive Crush. Crush Hybrid with Perlica: Featuring Perlica, Gilberta, Rossi, and the Endministrator. You must place the Endministrator after Gilberta in the team order to properly control the Originium Crystal application. Start with Gilberta's Battle Skill, then use Perlica's Combo. Trigger Gilberta's Combo to apply Lift, but do not use Endmin's or Rossi's Combos yet. First, cast Rossi's Battle Skill to apply Razor Clawmark. Next, trigger Endmin's Combo and Ultimate. Finally, trigger Rossi's Combo Skill to max out Vulnerability, followed by Endmin's Battle Skill for the Crush trigger. The F2P Accessible Roster: Featuring Wulfgard, Rossi, Akekuri, and the Endministrator. This team relies heavily on Akekuri generating SP to fund a rotation that requires four Battle Skills. Cast Endmin's Battle Skill, followed immediately by Rossi's Battle Skill. Use Wulfgard's Battle Skill to apply a Heat Infliction, then use his Combo for a second stack. Trigger the first part of Rossi's Combo Skill. Apply Originium Crystals with Endmin's Combo, then trigger the second part of Rossi's Combo to consume all Heat Inflictions. End the rotation with Akekuri's Ultimate for SP, allowing Endmin to trigger Crush. Mastering Rossi's critical damage and diverse team rotations anchors the early progression of the update, especially for players investing in new characters. Travelers aiming to accelerate ascension farming can explore trusted Arknights: Endfield Accounts, optimize resin/stamina efficiency with expert Arknights: Endfield Hourly Services, or secure consistent boss clears through reliable Arknights: Endfield Boosting as farming rotations intensify. GameMarket.gg is a trusted digital marketplace for everything gaming-related. We serve the gaming community by providing secure access that enhances every gaming journey.
Zenless Zone Zero
In-Depth Promeia Build: ZZZ Skills & Gear
💥Dive deeper into the ultimate Promeia Build for Zenless Zone Zero! Uncover the exact multipliers for her explosive Abloom skills, meticulously optimize your Drive Disc sub-stats, and master her Frostbite mechanics to completely obliterate Shiyu Defense bosses today. Welcome back to the definitive breakdown for crafting the perfect Promeia Build in Zenless Zone Zero! To truly push this S-Rank Ice Anomaly agent to her mathematical limits, a basic overview simply will not cut it. As the ultimate anomaly detonation engine from the Krampus Compliance Authority, Promeia's damage ceiling is entirely determined by how efficiently you manage her skill priorities, Frostbite generation, and hyper-optimized gear stats. Let us dive deep into the exact numbers, multipliers, and Drive Disc setups required to master her devastating combat loop. 🧠 Deep Dive: Skill Mechanics and Priorities To maximize your damage output, you must understand exactly how Promeia’s "Frostbite Value" and "Abloom" mechanics interact across her entire skill kit. Her Frostbite Value caps at 100 and regenerates automatically by 2 points per second. She gains an additional 5 points whenever your squad triggers Freeze, Disorder, or Chaotic Flow, and another 5 points when casting her EX Special, "Executioner: Shadow Stalk." Once you hit 50 Frostbite points, her heavy hits consume them to trigger "Abloom," detonating existing anomalies for massive burst damage. The multipliers vary drastically depending on the skill used: EX Special Attack (Icy Verdict): Triggers Abloom for 240% of the corresponding attribute’s anomaly damage (or 18% standard damage if it is a Wind Anomaly). Chain Attack (Suspended Reckoning): Triggers Abloom for 110% of the corresponding attribute’s anomaly damage. Ultimate (Penetrating Frostbite): The absolute nuke of her kit, triggering Abloom for a staggering 780% of the corresponding attribute’s anomaly damage! Skill Upgrade Priority: Your absolute highest priority must be her Core Passive, as this dictates her Frostbite regeneration efficiency and the core logic for her Abloom triggers. Without this maxed, her entire system falls apart. Next, heavily invest in her Special Attack, which houses her primary damage combos (Shatterfall, Heavy Frost, Icy Verdict). Follow this with her Basic Attack (essential for entering the "Shackled Absolution" state and applying Ice anomaly) and her Chain Attack. You can safely leave her Assist and Dodge skills for last. 💽 The Ultimate Drive Disc Optimization Because her kit revolves around detonating existing anomalies, your Promeia Build must hyper-focus on Anomaly Proficiency to scale her Abloom damage. The 4-Piece Sets: The absolute best-in-slot option is Notes From the Chained. The 2-piece grants a flat +10% Ice DMG. The 4-piece is practically tailor-made for her: triggering Abloom increases her Anomaly Proficiency by 48 for 30 seconds, and triggering Freeze increases her All-Attribute Anomaly DMG and Disorder DMG by 16% for 30 seconds. Because Promeia triggers these effects constantly, she enjoys near-permanent uptime on these massive buffs. If you want her to function as the primary anomaly applier for the team rather than a pure detonator, Freedom Blues is a strong alternative, reducing enemy Anomaly Buildup RES by 20% when she uses an EX Special Attack. The 2-Piece Pairings: Pair your primary set with a 2-piece Swing Jazz to secure a crucial +20% Energy Regen, ensuring perfectly smooth rotations. If energy is not an issue, a 2-piece Freedom Blues provides an extra +30 Anomaly Proficiency. Main Stat & Sub-Stat Priorities: Slot 4: Anomaly Proficiency (Highest priority for Abloom scaling). Slot 5: Ice DMG (Universally strong) or PEN Ratio (Exceptional for high-defense endgame bosses). Slot 6: Energy Regen (For smoother rotations) or Anomaly Mastery (To boost Ice anomaly buildup speed). Sub-Stats: Strictly prioritize Anomaly Proficiency > ATK% > PEN Ratio / CRIT Rate > Energy Regen. ⚙️ Best W-Engines for Your Build Your choice of W-Engine will dictate how easily you can maintain your damage loop. Promeia's Signature S-Rank W-Engine is peerless. It grants a permanent 35% Ice DMG boost, and whenever she uses an EX Special Attack, her Anomaly DMG increases by 15% for 30 seconds (stacking twice for a total of 30%). This perfectly aligns with her EX Special-heavy playstyle, requiring zero extra effort to maintain. If you do not pull her signature weapon, the Fusion Compiler serves as an excellent S-Rank stat stick. For A-Rank alternatives, Electro-Lip Gloss is incredibly consistent, granting 60 Anomaly Proficiency and a permanent ATK boost as long as the enemy suffers from an attribute anomaly. However, the true champion for free-to-play players is Weeping Gemini. Because Promeia operates in anomaly-heavy teams, this engine effortlessly maintains 4 stacks to provide an absolutely massive 192 Anomaly Proficiency, completely supercharging your Promeia Build. Mastering Promeia's anomaly detonations anchors the early progression of the update, especially for players investing in new characters. Travelers aiming to accelerate ascension farming can explore trusted Zenless Zone Zero Accounts, optimize resin/stamina efficiency with expert Zenless Zone Zero Hourly Services, or secure consistent boss clears through reliable Zenless Zone Zero Boosting as farming rotations intensify. GameMarket.gg is a trusted digital marketplace for everything gaming-related. We serve the gaming community by providing secure access that enhances every gaming journey.

Stella Sora
Ultimate Stella Sora Version 1.8 Update
Get ready for the massive Stella Sora Version 1.8 Update! Uncover the secrets of the To My Dearest You event, unlock the powerful Aqua Trekker Donna, and maximize your Stellanite Dust rewards with our complete strategy guide for this incredible patch. The servers are officially live, and the highly anticipated Version 1.8 Update has finally descended upon the world of Stella Sora! This massive content patch introduces a heartwarming new storyline, drastically shifts the elemental meta with a brand-new Trekker, and provides an absolute avalanche of progression rewards through unique gameplay events. Whether you are a veteran defender or a newly authorized Trekker, this comprehensive Update breakdown will ensure you do not miss a single Azure Feather or exclusive cosmetic during this limited-time celebration. 🌊 Aqua Trekker Donna and Premium Runic Discs The absolute centerpiece of this Update is the introduction of the brand-new 5-Star Aqua Trekker, Donna. Available exclusively through the "Heartfelt Messages, Delivered on Time" limited recruitment banner, Donna brings a devastating array of aquatic skills that will completely revolutionize your team's elemental synergy. To ensure Donna reaches her maximum combat potential, players can also pull for her perfect companion gear: the 5-Star Aqua Disc, "Soaring Blue," featured in the "Joy Sets Sail, Wishes Aloft" banner. Investing in both will give you a massive tactical advantage in the newly refreshed endgame combat zones. 💌 The "To My Dearest You" Story and Event Mechanics A terrible crisis has struck Post Haste, and it is up to you to save the day! The new story event, "To My Dearest You," tasks Trekkers with investigating a mischievous letter-stealing monster that is causing chaos for the postal service's young leader, Donna. As you play through this charming narrative, you will simultaneously participate in the limited-time reward event. By completing specialized missions and retrieving the lost letters, you will earn a highly valuable currency known as Azure Feathers. You can take these feathers straight to the Event Shop to redeem incredible rewards, including the exclusive 5-Star Runic Disc "Delivered by the Breeze," the "To My Dearest You" Honor Title, and massive stockpiles of Stellanite Dust and Trekker tier-up materials. 🗺️ Treasure Shovels and Cataclysm Survivor If you need a break from battling monsters, this Update introduces the relaxing yet highly rewarding "Lucky Treasure Shovel" event. As you explore designated areas, you can use specialized shovels to dig up hidden treasures, accumulating points that unlock even more Stellanite Dust and Azure Feathers. However, for those seeking pure combat, the Cataclysm Survivor defense battles have been updated with fierce new challenges. You will need to carefully construct your squads to exploit the specific enemy vulnerabilities in Zone 1 (Aqua and Ventus) and Zone 2 (Aqua and Lux). Clearing these grueling defense stages will grant you the highly coveted Defender's Medals to further upgrade your roster. 👗 Fresh Cosmetics and System Optimizations Beyond the combat and story, the developers have packed this Update with incredible visual enhancements and quality-of-life adjustments. Fashion-forward players can head to the Style Gallery to purchase the stunning new 3D appearance for Nazuka, titled "A Dip of Fresh Summer." Furthermore, the narrative experience has been vastly improved; the 2x playback speed in Story Stages has been perfectly refined for a much smoother viewing experience, and several pesky text description errors have been completely fixed. Mastering the new event modes anchors the early progression of the update, especially for players investing in new characters. Travelers aiming to accelerate ascension farming can explore trusted Stella Sora Accounts, optimize resin/stamina efficiency with expert Stella Sora Hourly Services, or secure consistent boss clears through reliable Stella Sora Boosting as farming rotations intensify. GameMarket.gg is a trusted digital marketplace for everything gaming-related. We serve the gaming community by providing secure access that enhances every gaming journey.
Diablo Immortal
Diablo Immortal Patch 4.3 Update Details
Dive into the massive Diablo Immortal Patch 4.3 Update! Master the new Challenge of Equals PvP tournament, conquer the Rocky Waste subzone, unlock the Leviathan Tomb Legendary Gem, and claim your exclusive event rewards in this comprehensive guide. Sanctuary is calling you back to the frontlines! The highly anticipated Diablo Immortal Patch 4.3 Update is officially live, bringing a wave of unprecedented darkness and thrilling new mechanics to the game. Titled "Put a Stop to The Taking," this massive patch completely redefines the competitive PvP meta, expands the world with a treacherous new desert subzone, and introduces a haunting main questline that will test the resolve of even the most seasoned adventurers. Whether you are hunting for the new 5-Star Legendary Gems or looking to dominate the standardized PvP arenas, this update is packed with content. 🏜️ The Taking Main Quest and The Rocky Waste Anguish is taking root across Sanctuary in the form of unsettling, eerie disappearances. In "The Taking," you are tasked with investigating port cities where entire communities have vanished without a trace. By following the twisted trail of Andariel, the Maiden of Anguish, you will confront echoes of old evils and uncover the opening movements of a massive cosmic scheme. To expand your exploration, the update introduces the Rocky Waste. This is the first new subzone arriving this year, expanding the arid deserts that surround the embattled city of Lut Gholein. These unforgiving badlands are home to vicious wildlife—including spur wolves, dune mantids, seething swarms, and malignant vultures—alongside anguish demons carving out brutal dominions. Exploring this zone provides fresh challenges and lucrative rewards through new Wanted Monsters and Bounties. ⚔️ Challenge of Equals and Siege of Corvus The PvP experience is receiving its most significant structural update yet. The new Challenge of Equals is an 8v8 PvP tournament that normalizes player power to emphasize pure mechanical skill. By disabling Resonance, Normal Gems, and Charms, and standardizing Legendary Gem affixes to Two-Star values, the playing field is completely leveled. Players can even utilize curated Elite Slayer Loadouts based on top real-world builds, allowing newcomers to immediately jump into competitive play. Additionally, the Classic and Convoy Battleground maps have been refreshed with the Siege of Corvus. As your team pushes idols to specific progress markers, waves of demons will spawn. Slaying these invaders drops Demonic Essence, which grants your team a stacking damage increase up to 100 percent. If your team delivers the killing blow to the powerful boss demon that appears at 50 percent progress, you can summon the Spirit of Corvus to push your advantage and crush your enemies. 💎 Legendary Gems and Awakened Wings Customization Customizing your character's combat potential and visual flair has never been more rewarding. The update introduces three powerful new Legendary Gems. The crown jewel is the 5-Star Leviathan Tomb, which grants the Abyssal Depths buff to massively increase your damage and amplify critical hits against debuffed enemies. It is joined by the 2-Star Tundra Blight, which chills and weakens nearby foes, and the 1-Star Taxman's Pity, which inflicts grievous wounds to slash enemy healing. For the most dedicated players who have reached 1000 Resonance, visual customization takes flight! You can now visit Yaira at Westmarch to claim your first pair of customizable Awakened Wings. By trading Astral Plumes, you can reroll your wings across three different variables: Shape, Material, and Color. Accumulating a high aesthetic score unlocks incredible perks, including the highly requested ability to fly in non-PvP content. 👹 Horrid Transformations and Shifting Events To ensure your resource farming remains highly profitable, the update features a slate of shifting limited-time events. The "Versatile Rings" event temporarily allows newly acquired rings of specific qualities to feature a universal socket, meaning you can slot in a gem of any color for unprecedented build flexibility. Meanwhile, the "Horrid Transformations" event twists familiar zone bosses, like the Haunted Carriage and Ancient Nightmare, into enhanced, deadly variants. Slaying these empowered bosses guarantees rare rewards, including 2+2 Legendary Items and Rare Ore. Conquering the Rocky Waste anchors the early progression of the update, especially for players investing in new characters. Travelers aiming to accelerate ascension farming can explore trusted Diablo Immortal Accounts, optimize resin/stamina efficiency with expert Diablo Immortal Hourly Services, or secure consistent boss clears through reliable Diablo Immortal Boosting as farming rotations intensify. GameMarket.gg is a trusted digital marketplace for everything gaming-related. We serve the gaming community by providing secure access that enhances every gaming journey.

Brawl Stars
Brawl Stars April Fools 2026 Guide
😎 Master the hilarity of the 2026 April Fools event with our ultimate Brawl Stars Guide! Discover how to unlock every exclusive Fool Skin, including Bruce Nita and Inflatable Melodie, and learn the best tactics to defeat the chaotic 3v1 Bruce Nita boss mode today. Welcome to the ultimate Brawl Stars Guide for the wildest and most ridiculous event of the year! April Fools' is essentially a second Christmas in the Brawl Stars universe, bringing chaotic game modes, absurd cosmetics, and massive rewards that make logging in completely worth it. The 2026 lineup is completely stacked, featuring an incredible roster of meme-worthy skins and a hilarious new boss fight. Let us break down everything you need to know to maximize your fun and progression during this spectacular limited-time celebration. 🤡 The 2026 Fool Skins Lineup Fool skins are wild, ridiculous cosmetics that perfectly capture the chaotic April Fools' spirit. Rather than sleek seasonal themes, these outfits embrace oversized props and hilarious concepts to make your opponents do a double-take mid-match. Bruce Nita (Mythic): Costing 199 Gems, this highly anticipated cosmetic turns the tables, making Nita's bear the giant oversized antagonist. The chunky model and unique animations make it a must-have flex for collectors. Inflatable Melodie (Epic): This skin transforms her into a giant, wobbly inflatable toy ready for a kiddie pool. It costs 149 Gems, but amazingly, it can also be purchased with Bling, making it extremely free-to-play friendly. Royale Trunk (Epic): A Clash Royale crossover skin that cannot be found in the regular shop. Instead, you unlock it exclusively using Supercell ID points gathered from quests or store purchases. Ywolg / Bertglow (Mythic): A quirky skin (199 Gems) with a reversed-name charm ("Glowy" spelled backward). The Meme Trio: The early sneak peeks have finally been confirmed. Prepare to witness Egg Rico, Egg Pam, and the utterly absurd Poop Spike hitting the arena to deliver peak April Fools energy. ⚔️ Conquering the Bruce Nita Boss Mode Skins are only half the fun. This event introduces the limited-time Bruce Nita Mode, a chaotic 3v1 boss fight. In this mode, three players team up against a giant, overpowered Bruce Nita boss. Interestingly, every player on the team is forced to play as the exact same brawler—Najia. This means your success in this Guide relies entirely on flawless coordination and teamwork rather than getting lucky with your roster picks. As the battle progresses, Supercell ramps up the chaos. Weapons become comically oversized, the boss becomes aggressively faster, and Bruce can even summon frustrating mini-bosses to swarm your team. Just like previous boss events, clearing stages unlocks higher difficulty levels, providing endless replayability for competitive players looking to test their limits. 💎 Unlocking Your Rewards Knowing how to efficiently acquire these items is the most important part of this Guide. Not all skins are unlocked the same way. You will need to balance your Gem purchases for premium Mythic skins like Bruce Nita, while saving your Bling for accessible Epic skins like Inflatable Melodie. Make sure to frequently check your quest log to farm Supercell ID points for the exclusive Royale Trunk, and do not forget to log in heavily around April 1st to claim potential free drops and exclusive bonuses! Mastering the Bruce Nita boss fight anchors the early progression of the update, especially for players investing in new characters. Travelers aiming to accelerate ascension farming can explore trusted Brawl Stars Accounts, optimize resin/stamina efficiency with expert Brawl Stars Hourly Services, or secure consistent boss clears through reliable Brawl Stars Boosting as farming rotations intensify. GameMarket.gg is a trusted digital marketplace for everything gaming-related. We serve the gaming community by providing secure access that enhances every gaming journey.
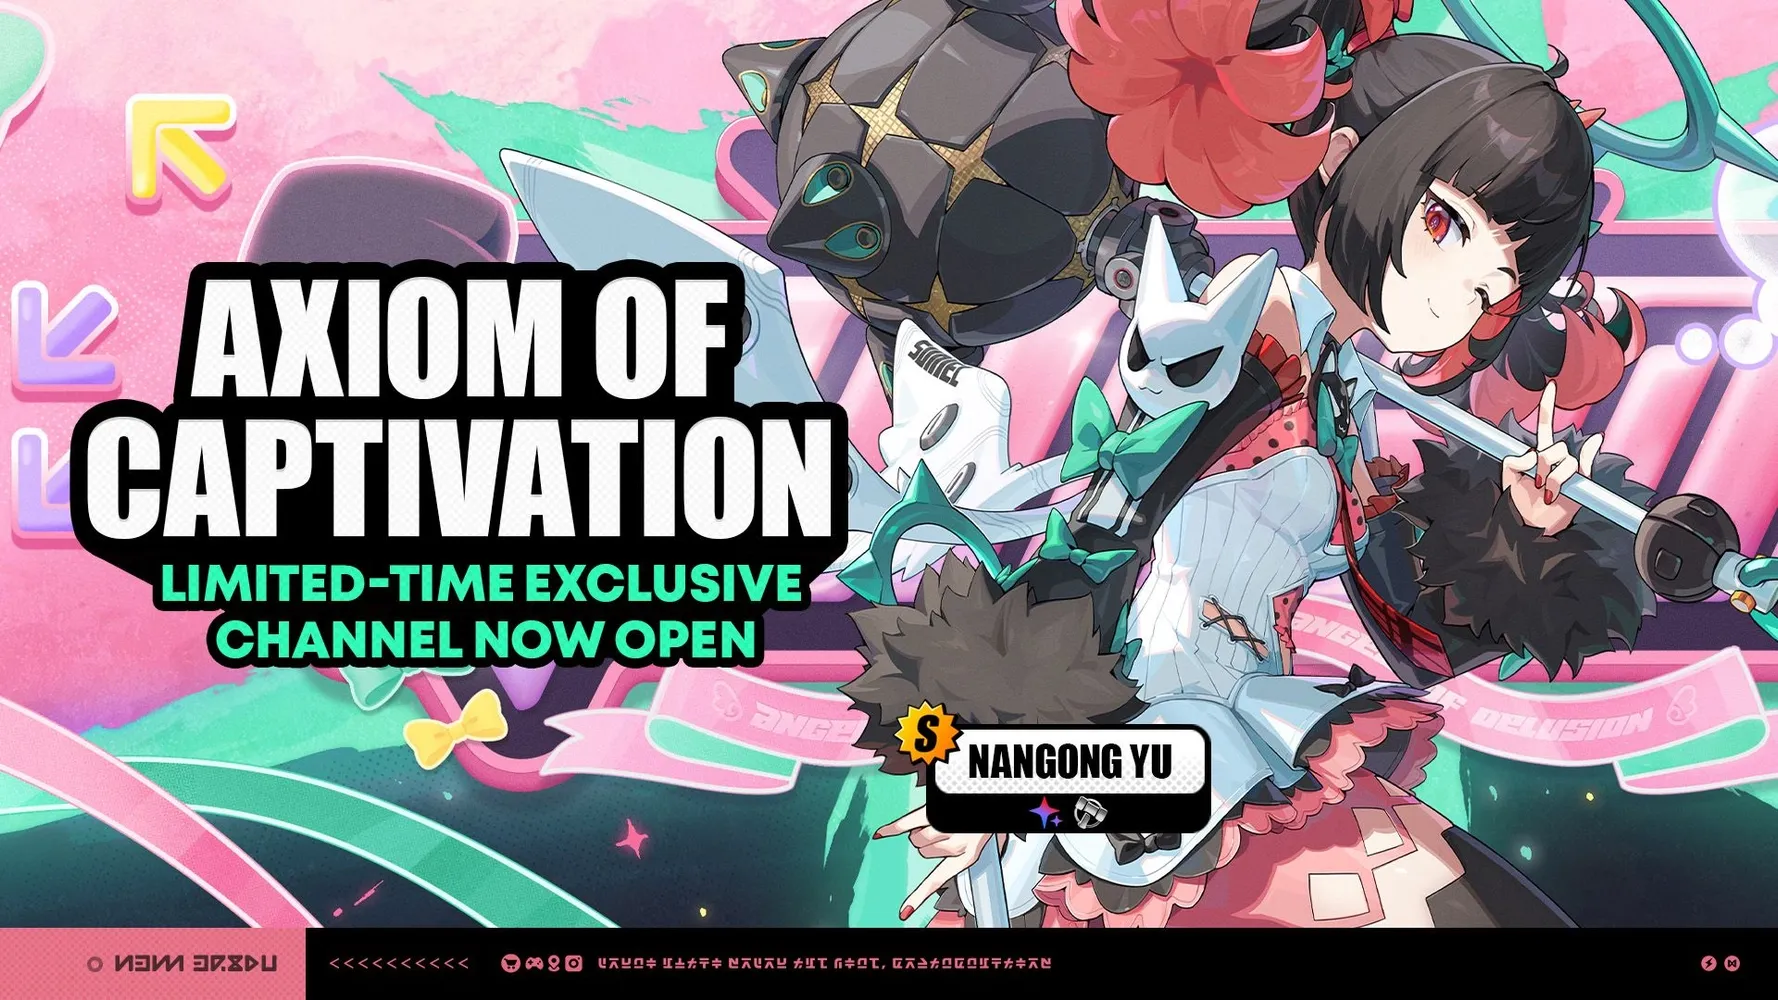
Zenless Zone Zero
Ultimate Nangong Yu Stun Build Guide ZZZ
Master the battlefield with this comprehensive Zenless Zone Zero Nangong Yu Build Guide! Discover the absolute best W-Engines, Drive Discs, team compositions, and Core Skill priorities to unleash this S-Rank Ether Stun Agent's devastating Polarity Disorder damage in Version 2.7. 🎵 Nangong Yu Agent Profile and Strengths As the confident Lead Dancer and Captain of the Angels of Delusion faction, Nangong Yu steps onto the stage as a revolutionary S-Rank Ether Stun Agent in Zenless Zone Zero Version 2.7. Unlike traditional Stun characters whose sole purpose is to accumulate Daze, Nangong Yu bridges the gap between stunning and Anomaly application. Her unique kit revolves around managing "Downbeats" to execute charged attacks, boosting her team's Anomaly Buildup Rate, and triggering a devastating special effect known as Polarity Disorder on Stunned enemies. She is an absolute necessity for players looking to elevate their Anomaly-focused squads. ⚙️ Optimal Gear: Best W-Engines and Drive Discs To maximize Nangong Yu's combat potential, your build must heavily prioritize Anomaly Mastery and Anomaly Proficiency. Although she is a Stun character, pushing her Anomaly Mastery past 110 inherently increases her Impact stat, making her a dual-threat powerhouse. Best W-Engine: Her signature S-Rank engine, Neon Fantasies, is her undisputed best-in-slot. It grants a massive 90 Anomaly Proficiency and provides a highly stackable DMG buff to the entire squad whenever her EX Special Attack deals Ether DMG. If this is unavailable, premium Stun alternatives like Koleda's Hellfire Gears or the free-to-play A-Rank The Simmering Pot are excellent backups. Best Drive Disc Set: Equip the 4-piece Phaethon's Melody to maximize her Anomaly stats and Ether DMG output. Pair this with a 2-piece Freedom Blues set to further push her Anomaly Proficiency. Main Stat Priorities: Slot 6 (Anomaly Mastery), Slot 5 (Ether DMG, PEN Ratio, or ATK), and Slot 4 (Anomaly Proficiency). Substat Priorities: Aim for Anomaly Proficiency, ATK%, ATK, and PEN. 🤝 Best Team Compositions and Synergies Nangong Yu's Additional Ability, Angel Captain, activates when paired with other Anomaly Agents or members of the Angels of Delusion. This ability massively increases the Anomaly Buildup Rate against Stunned enemies and enables her signature Polarity Disorder effect. The Premium AoD Team: Nangong Yu (Stun), Aria (Anomaly), and Sunna (Support), paired with the Biggest Fan Bangboo. This faction-pure team perfectly synergizes their Core Skills to continuously overlap Daze and Anomaly procs. The Ultimate Anomaly Team: Nangong Yu (Stun), Miyabi (Anomaly), and Yuzuha (Support), paired with the Baddieboo. In this setup, Nangong Yu assists Miyabi by stunning enemies and triggering massive Disorder damage windows. The F2P Accessible Team: Nangong Yu (Stun), Piper (Anomaly), and Nicole (Support), paired with the Booressure Bangboo. A fantastic starter team where Nicole groups enemies and shreds DEF, allowing Piper to deal massive Anomaly DMG to targets dazed by Nangong Yu. 📚 Skill Priorities, Gameplay Loop, and Cinemas When leveling her abilities, your absolute first priority is her Core Skill. This directly enhances her Anomaly Proficiency and unlocks her Abloom and Polarity Disorder damage multipliers. Follow this by heavily investing in her Basic Attack (to strengthen her Downbeat-fueled charged hits) and Special Attack. You can leave her Dodge and Assist skills for last. Fully upgrading her will cost roughly 1.7 million Dennies, alongside 32 Advanced Stun Certification Seals, 50 Specialized Ether Chips, and 60 Spiked Corruption Cores. Her gameplay loop is all about rhythm. As you fight or as your team inflicts Anomalies, Nangong Yu accumulates Downbeats. Once she has enough, hold the Basic Attack to unleash up to three devastating Charged Attacks that massively increase enemy Stun duration and her own Daze output. When a teammate stuns an enemy, Nangong Yu gains "Dance Prowess," allowing her EX Special Attack to trigger Polarity Disorder, dealing a massive percentage of the original Disorder DMG without clearing the existing Anomaly. Furthermore, her Ultimate activates Ether Veil: Delusion Reprise, which grants a flat 50 ATK buff to the entire squad. For Proxies pulling for duplicates, her Mindscape Cinemas offer incredible power spikes: M1 (Lazy Spotlight): Her EX Special and Basic Attacks lower enemy All-Attribute RES by 18%, and she enters combat with maximum Downbeats. M2 (Painless Tears): The best stopping point for spenders. It massively increases her Abloom damage multipliers and Stun DMG. M6 (An Angel's Delusion): The ultimate capstone. Her attacks deal 50% more Daze, and she gains a modified Vibrato stack system that enables her to trigger massive Abloom damage even when enemies are not Stunned. Mastering Nangong Yu's Polarity Disorder mechanics anchors the early progression of the update, especially for players investing in new characters. Travelers aiming to accelerate ascension farming can explore trusted Zenless Zone Zero Accounts, optimize resin/stamina efficiency with expert Zenless Zone Zero Hourly Services, or secure consistent boss clears through reliable Zenless Zone Zero Boosting as farming rotations intensify. GameMarket.gg is a trusted digital marketplace for everything gaming-related. We serve the gaming community by providing secure access that enhances every gaming journey.
Blood Strike
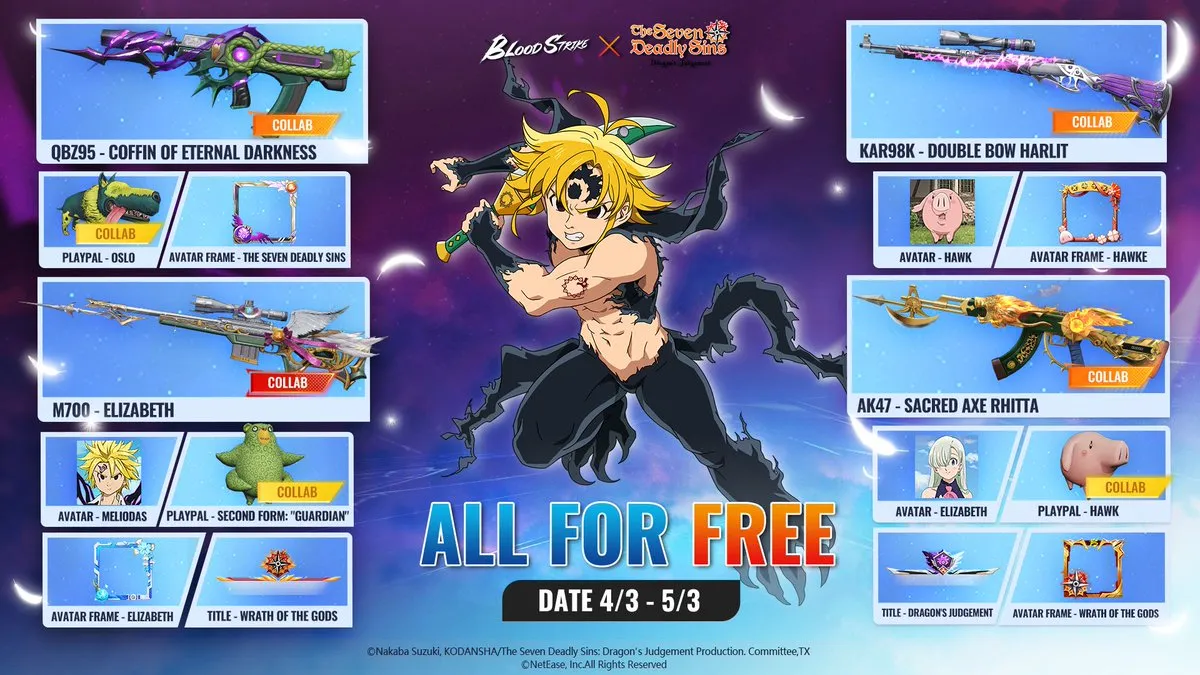
Breaking News: Blood Strike Collab Skins & Meta
⭐Dive into the latest breaking news for the Blood Strike x The Seven crossover event! Discover exclusive character skins, weapon blueprints, time-gated token mechanics, and the ultimate meta strategies to maximize your limited-time rewards before they vanish. Welcome to the biggest breaking news in the tactical shooter world right now! The highly anticipated Blood Strike x The Seven crossover event has officially dropped, and it is an absolute banger. When a high-octane competitive shooter collaborates with a massive franchise, you already know the servers are going to be packed with sweaty players grinding like their lives depend on it. This is not just a lazy cosmetic patch designed to bait your wallet; the developers have injected completely fresh gameplay mechanics, time-gated loot, and a deep event economy that shifts the entire meta of your standard lobbies. Let’s break down every single detail of this massive crossover so you can min-max your progression perfectly. 💥 The Ultimate Crossover News: A Meta Shift Massive collaborations like this act as the ultimate server buff. The news of The Seven arriving in Blood Strike has successfully baited countless new players into downloading the game, woken up veteran players who had gone AFK, and injected completely fresh content into what was becoming a stale meta. However, because the stakes are so high, the lobbies are more competitive than ever. Players are logging in daily not just to play casually, but to sweat out specific objectives. If you want to survive and thrive during this limited-time window, you must drop your ego, read the mission logs, and approach the event with absolute macro-level planning. 🧥 Exclusive Character Skins and Weapon Drip Let us not cap—the incredible new cosmetics are the primary reason 90 percent of the lobby is logging in right now. The event is dropping absolute heat with skins inspired directly by the heroes and villains of The Seven. For your characters, you can expect completely unique, custom 3D models boasting insane visual and particle effects, alongside exclusive MVP and lobby animations that are guaranteed to flex on your opponents. Your weapon loadouts are also receiving the ultimate crossover treatment. The new blueprints feature custom weapon geometries, glowing bullet tracers, and breathtaking kill effects that make your gunplay feel infinitely smoother. However, here is the ultimate FOMO warning: these skins are strictly locked to the event window. They are not staying in the permanent shop. If you miss them now, they will be vaulted forever, and you will be catching a massive L. ⚔️ Deconstructing the Event Mechanics and Tokens If you do not read how the crossover economy works, you are just throwing your time away. Your main loot stream comes from a strict mission-based progression system. You must grind out daily tasks, complete specific match objectives, and hit massive milestone achievements. As you complete these, you will farm special crossover tokens. The core meta is to hoard this event currency and dump it strategically in the limited-time exchange shop. You must pay extremely close attention to the limited-time challenges. Certain high-value missions are heavily time-gated; if you sleep through the strict timer, you will lose those progression points forever and get locked out of the best rewards. Timing your grinds is literally everything in this patch. 🧠 Advanced Strategies and Common Mistakes To truly clear the event shop, you must avoid the iron-tier behavior seen in every major update. Do not play randomly or W-key blindly without a plan. You could play 50 matches a day, but if you are not tracking your quest log, your reward track will not move. Always route your gameplay to clear multiple tasks at once, prioritizing high-value rewards like exclusive crossover skins and super rare upgrade materials over basic loot. Furthermore, do not waste your resources early! Blowing your entire token stash on day one feels great until the S-tier rewards or discount phases drop in week two and you are totally broke. Diamond-hand your resources until the game rolls out timed point multipliers. Finally, remember that daily consistency will always gap random burst grinding; sweating for 12 hours on Sunday and going AFK the rest of the week will not get you far. Unless you are a massive whale, pick your main targets and lock in. Mastering the crossover event anchors the early progression of the update, especially for players investing in new characters. Travelers aiming to accelerate ascension farming can explore trusted Blood Strike Accounts, optimize resin/stamina efficiency with expert Blood Strike Hourly Services, or secure consistent boss clears through reliable Blood Strike Boosting as farming rotations intensify. GameMarket.gg is a trusted digital marketplace for everything gaming-related. We serve the gaming community by providing secure access that enhances every gaming journey.

The Seven Deadly Sins: Grand Cross
7DS Grand Cross 7th Anniversary Update
Dive into the massive The Seven Deadly Sins: Grand Cross 7th Anniversary Update! Discover the new LR Golden Wings Elaine evolution, conquer the Transcendent Skoll and Hati Demonic Beast, and master the new Vaizel Fight Festival rules to claim all your exclusive event rewards. The grand 7th Anniversary celebration has officially arrived in Britannia! The massive 3/25 Update for The Seven Deadly Sins: Grand Cross is packed with an unbelievable amount of content, bringing game-changing character evolutions, grueling new endgame boss floors, and a tidal wave of progression events. Whether you are returning to the tavern after a long break or are a veteran Knight looking to optimize your Holy Relics, this comprehensive update guide covers every single detail you need to master the anniversary patch. 🧚♀️ LR Evolution and The Seventh Spring The character progression meta receives a massive boost in this update with the introduction of a brand-new Legendary Evolution. Players can now upgrade [Fairy of Blessings] Golden Wings Elaine to the coveted LR grade, drastically enhancing her base stats and utility for high-level combat scenarios. To complement this evolution, the Grand Season Selection Draw -Our Seventh Spring- is now live, offering an excellent opportunity to bolster your roster and acquire highly sought-after heroes. Alongside the new draw, the update introduces the Grand Season -Our Seventh Spring- Costume Sets. Players can purchase exclusive weapon, outfit, and cosmetic pieces either bundled with 30 Diamonds or standalone. For true completionists, a massive Costume Resale and Discount Event has also been activated, allowing you to pick up previously missed outfits for only 20 Diamonds apiece. 🐺 Transcendent Skoll and Hati: The 4th Floor Endgame PvE combat has been pushed to its absolute limits with the addition of the Transcendent Demonic Beast (4th Floor) 'Skoll and Hati'. Unlocking this brutal challenge requires clearing Chapter 13 [Episode 237] and completing Floor 3 of the Twilight Temple. Battle Mechanics: Once Floor 3 is cleared, your heroes' remaining HP is preserved, and the passive effects from the previous floors will not stack. If you manage to clear this 4th Floor, the stage locks but can be reopened using 1 'Twilight Source', allowing you to completely skip Floors 1–3 on subsequent runs. Additionally, the 'Thonar' Bad Blood effect has been applied across Floors 1–4 to shake up team compositions. Exclusive Rewards: Conquering this beast yields the brand-new Holy Relic Enhancement Material: Skoll and Hati's Claw. This material unlocks a completely new tier of Holy Relic Enhancement, which uniquely grants 1 GP of Constellation Points upon completion. Guaranteed Drops & Titles: To ease the farming grind, guaranteed Holy Relic Enhancement Materials have been added for all Transcendent Demonic Beasts (Hraesvelgr's Feather, Eikthyrnir's Broken Horn, and Skoll and Hati's Claw). Furthermore, players who clear all related missions will earn the prestigious 'Skoll and Hati Destroyer' title. ⚔️ Vaizel Fight Festival (Elite) Season 24 For players seeking dominance in PvP, the Vaizel Fight Festival (Elite) Season 24 kicks off on March 30 and runs until April 12. This season introduces a massive disruption to standard burst strategies: the core rule prevents Ultimate Move Gauges from being filled by more than 1 orb from Unique Abilities. Week 1 Tactical Rule: The arena heavily favors debuff compositions. Allies' Max HP increases by 3% for every Shock, Poison, and Bleed effect active on the enemy. Furthermore, allies restore HP equal to 10% of the damage dealt by these specific status effects. Rank Rewards: Climbing the ranks this season is highly lucrative, rewarding top players with Diamonds and the exclusive SSR [Knight of the Holy War] Guardian Gilthunder, ensuring your defensive PvP setups get a massive boost. 🎁 Grand Season Events and Boosting Campaigns Netmarble is showering players with resources to celebrate the anniversary, drastically reducing the stamina and material grind across the entire game. Friend Invite Event: The 'New Semester Club Recruitment Drive' allows Inviters to share codes with Invitees. Inviters can generate a hero reward list through up to 100 'Hero Draw x10' retries. When Invitees use the code, they immediately receive the granted heroes and an Awakened/Enhanced SSR Life and Iron Wall Equipment Set featuring 13% base substats! Hawk's Journey for Scraps: Take control of Hawk in a three-lane swipe mini-game. Avoid obstacles by jumping or use the 'Rolling Ham Attack' to smash through them. Accumulate high combo scores to unlock rare cosmetics and upgrade materials. Massive Resource Boosting: The Demonic Beast Battle stamina cost is reduced by an incredible 50%, alongside a 2x drop rate for Guaranteed Stage Rewards and Artifact Cards. Additionally, Main and Free Stages feature 50% stamina discounts and double Player Rank EXP, while Hero and Equipment Enhancement super/ultra success rates are heavily boosted. Transcendent Skoll and Hati anchors the early progression of the update, especially for players investing in new characters. Travelers aiming to accelerate ascension farming can explore trusted The Seven Deadly Sins: Grand Cross Accounts, optimize resin/stamina efficiency with expert The Seven Deadly Sins: Grand Cross Hourly Services, or secure consistent boss clears through reliable The Seven Deadly Sins: Grand Cross Boosting as farming rotations intensify. GameMarket.gg is a trusted digital marketplace for everything gaming-related. We serve the gaming community by providing secure access that enhances every gaming journey. Is there another patch note or character guide you'd like me to transform next, Bosku? Just drop the text and the keyword!
Showing 271 of 285 from 697 Results