Neverness to Everness
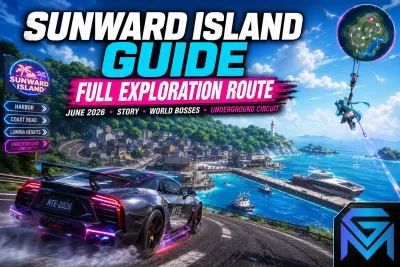
NTE Sunward Island — Complete Exploration Walkthrough
Sunward Island opened to Appraisers on June 3, 2026 as part of Neverness to Everness Version 1.1 "Dreamwalk Corridor" — and it's the game's first major region addition since global launch. Coastal aesthetic, vehicle traversal showcase, new world bosses, and the headline location for the Porsche 918 Spyder collab. Here's the complete exploration walkthrough to help Appraisers find everything Sunward Island has to offer. 🏝️ What Is Sunward Island? Sunward Island is the new explorable region introduced in Version 1.1, opening on June 3, 2026. The region departs from Hethereau's metropolitan urban environment to deliver a coastal, sun-drenched atmosphere — coastlines, beaches, sea-themed encounters, and open roads designed specifically to showcase Neverness to Everness's vehicle traversal system at its best. The region serves multiple roles within Version 1.1's content: Showcase environment for the Porsche 918 Spyder collab and the broader Everdriving Mystery Box event Main story chapter location — significant portions of the Dreamwalk Corridor narrative play out here Exploration content with chests, resource nodes, world bosses, and hidden encounters Mini-game venue — many of 1.1's new game modes are tied to Sunward Island's geography For Appraisers entering Sunward Island for the first time, the region rewards a methodical approach. Rushing through the main story misses significant exploration content that's gated behind side quests, vehicle accessibility, and time-of-day mechanics. 🚗 Vehicle Traversal — The Region's Signature Feature NTE's vehicle system has always been one of its standout features, and Sunward Island is designed specifically to showcase it. The region's coastal roads, beach access points, and open terrain all benefit from driving rather than running. If you've been ignoring the vehicle mechanics in earlier game content, Sunward Island is the region where that approach starts costing you. The Porsche 918 Spyder, available through the Everdriving Mystery Box event running through Version 1.1, is the headline vehicle for Sunward Island exploration. The hypercar's mobility advantages are most apparent on Sunward's coastal stretches — Appraisers who claim the 918 Spyder will find their exploration speed measurably faster than rover-on-foot navigation. Vehicle exploration tips: Many hidden chests are placed at locations that are awkward to reach on foot but accessible by vehicle Some side quests and encounters are gated behind vehicle ownership requirements The Underground Circuit racing mode launches from Sunward Island — having a fast, well-handling car matters for that content Driving along beaches reveals environmental details and Easter eggs that walking misses 📖 Story Connection — Dreamwalk Corridor Sunward Island is central to Version 1.1's main story episode Dreamwalk Corridor. Major story beats take place across the region's coastal locations, and Appraisers who complete the main quest will spend significant time here. Story progression unlocks: Region-wide fast travel points NPCs who offer side quests beyond the main story Access to the Corridor of Echoes anomalous endgame location tied to the narrative Confrontations with the Debt Collector boss as part of Anomaly Pilgrimage content Story-first exploration also unlocks the broader regional content efficiently — many side quests, hidden chests, and Compendium entries are gated behind specific story progression points. Complete the main story chapter in your first 2-3 sessions before fully committing to exploration completionism. 🗺️ What to Look For During Exploration Sunward Island follows NTE's open-world exploration design pattern, but its coastal geography creates unique exploration opportunities: Coastal Chests: Many treasure chests are placed along beaches and cliff edges. Some require approach from specific directions or via vehicle access. Don't assume you can't reach a visible chest — try multiple approach angles before moving on. Underwater/Sea Content: NTE has previously hinted at underwater exploration mechanics. Sunward Island's coastal geography may showcase underwater chests, gathering nodes, or specific encounters tied to the sea. Verify in-game whether your character has swimming/diving capabilities and explore accordingly. Gathering Nodes: New region-specific materials appear in Sunward Island. These materials are likely tied to character ascensions, weapon enhancement, or upcoming content. Map gathering routes early — efficient farming routes become valuable once you start needing the materials in bulk. Hidden Encounters: Time-of-day systems in NTE often gate specific encounters behind day/night cycles. Explore Sunward Island at multiple times of day to catch encounters that only appear during specific windows. Lore Tablets and Vista Points: The region's worldbuilding extends through environmental storytelling. Don't skip the lore tablets and scenic viewpoints — they often reward Compendium progress and provide context for the Dreamwalk Corridor narrative. 👹 World Bosses and Combat Encounters Sunward Island introduces new world bosses unique to the region. These encounters serve multiple purposes: Story significance — major bosses are often tied to specific main story or side quest moments Material farming — boss drops include ascension materials, weapon resources, or unique items not available elsewhere Combat practice — region bosses prepare Appraisers for the harder Corridor of Echoes content Achievement progress — defeating regional bosses contributes to broader account-wide achievements For the highest-difficulty encounters in Sunward Island — particularly the Debt Collector available as an Anomaly Pilgrimage target — bring a fully built team. Lacrimosa is the strongest single-character carry for 1.1 content, but you'll need a properly built support roster (Daffodill, Sakiri, Haniel) to maximize her potential. 🏎️ The Underground Circuit — Combat Racing One of Version 1.1's new game modes, the Underground Circuit, launches from Sunward Island. The mode combines vehicle racing with armed combat — both driver and passenger can use weapons against competing racers during runs. The Porsche 918 Spyder's combination of speed and handling makes it the showcase vehicle for the mode, but other cars can compete with optimized tuning. Underground Circuit serves as both PvP-style content and an exploration of NTE's vehicle combat depth. Appraisers who enjoy fast-paced action and competitive racing should prioritize the mode during their Sunward Island time. 💡 Exploration Strategy Tips Complete the main story first — Many regional unlocks gate behind story progression. The story is also the fastest path to unlocking the region's full exploration potential Claim Porsche 918 Spyder early — The Everdriving Mystery Box event is time-limited. Don't miss the headline collab vehicle during the 1.1 window Vary exploration times of day — NTE's day/night system gates some encounters. Mix up your play sessions to catch different content Map gathering routes systematically — Materials matter for ascensions. Track gathering node locations early before you need bulk resources Try Underground Circuit with friends — Multiplayer modes are most rewarding when coordinated. Get your squad involved Don't rush past lore content — Sunward Island's environmental storytelling rewards careful exploration with Compendium progress and worldbuilding context Save Compendium completion for last — 100% region completion takes time. Focus on story + key encounters first, then return for Compendium completion in a dedicated session 🔗 Connection to Endgame Content Sunward Island content connects to NTE's broader endgame in multiple ways: Corridor of Echoes — The anomalous endgame location accessible after Dreamwalk Corridor story progression Debt Collector boss — Anomaly Pilgrimage target unlocked through region content Material farming — Sunward Island materials feed into upcoming character ascensions (including Chaos in Phase 2) Vehicle mastery — Underground Circuit experience benefits broader vehicle content Appraisers planning for Phase 2 (Chaos's banner opens June 24) should prioritize Sunward Island material farming during Phase 1. The 20-day buffer between now and Chaos's launch is sufficient if you start material gathering during regular exploration. 🛒 Explore Sunward Island to Its Fullest Sunward Island is open now, and the Porsche 918 Spyder collab event window won't last forever. Appraisers ready to push through every exploration session, world boss encounter, and Underground Circuit run can explore trusted Neverness to Everness Accounts with strong existing rosters ready for the new region content, accelerate every exploration session and material farm with expert Neverness to Everness Hourly Services, or clear every endgame encounter through reliable Neverness to Everness Boosting. GameMarket.gg is a trusted digital marketplace for everything gaming-related. We serve the gaming community by providing secure access that enhances every gaming journey.
Neverness to Everness
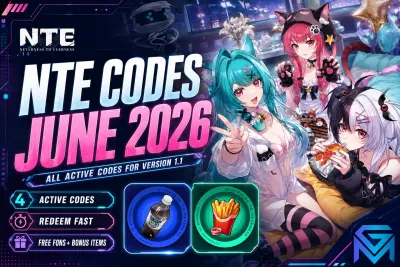
NTE Codes June 2026 — All Active Codes for Version 1.1
All active Neverness to Everness redeem codes for June 2026 — updated for the Version 1.1 "Dreamwalk Corridor" launch. Four codes are confirmed working right now with Fons, DynamiK Zero, and Clicky Fries up for grabs. Redeem fast: NTE codes expire without warning, and new codes typically drop during version launches and Special Programs. 🎫 Active NTE Codes — Updated June 4, 2026 Redeem these immediately — codes expire without warning. All codes are case-sensitive and one use per account. 🎁 NTENENE Rewards: Fons ×10,000, DynamiK Zero ×10, Clicky Fries ×10 Expires: Unknown — redeem now Source: Launch Event 🎁 NTEFREE Rewards: Fons ×30,000 Expires: Unknown — redeem now Source: Standard Code 🎁 NTEWINFONS Rewards: Fons ×20,000 Expires: Unknown — redeem now Source: Standard Code 🎁 NTEFUNGAME Rewards: Fons ×10,000 Expires: Unknown — redeem now Source: Standard Code Total confirmed Fons from active codes: 70,000+ plus bonus DynamiK Zero and Clicky Fries materials. Redeem all four now, then check back after every Special Program broadcast for new livestream codes. ⏰ When Do New NTE Codes Drop? Hotta Studio releases codes during three predictable windows: major version launches (the largest code drops, like Version 1.1's June 3 launch), Special Program livestreams (3 codes per broadcast, expiring within 24–72 hours), and milestone events for download counts or community celebrations. The fastest sources are the official Twitter/X (@NTE_GL), the official YouTube channel during Special Program broadcasts, and the in-game announcements panel. Livestream codes are the most time-sensitive — the three codes from the May 23 Special Program (DREAMWALK0603, TOMATO100, RACENOLIMIT) all expired within 48 hours of release. If you catch a livestream code, redeem it immediately rather than saving it for later. 🔑 How to Redeem NTE Codes NTE supports in-game code redemption on all platforms (PC, PS5, mobile). Tutorial completion is required before the redemption menu unlocks for new Appraisers. Open Neverness to Everness on your platform of choice Complete the tutorial if you're a new Appraiser — the redemption menu is locked until tutorial completion Open the in-game Settings menu Navigate to the Account tab Tap Redemption Code Enter the code exactly as shown — case-sensitive, no extra spaces Confirm to redeem Rewards arrive in your in-game mailbox If a code returns "Invalid" or "Expired," it has either passed its expiry window or already been redeemed on your account. Each code can only be claimed once per account. Codes are not region-locked, but capital letters and special characters must match exactly. ❌ Expired Codes These codes are no longer active. Listed here as a reference and as proof this page is regularly maintained. ❌ NTE429vtuber Rewards: Fons ×30,000, Beetle Coin ×30,000 Expired: May 31, 2026 Source: 4/29 VTuber Event ❌ DREAMWALK0603 Rewards: Annulith ×100, Rising Hunter Guide ×5, Light Dye ×5, Beetle Coin ×4,000 Expired: May 25, 2026 Source: 1.1 Special Program (Livestream) ❌ TOMATO100 Rewards: Annulith ×100, Senior Hunter Guide ×5, Colorless Dye ×5, Beetle Coin ×6,000 Expired: May 25, 2026 Source: 1.1 Special Program (Livestream) ❌ RACENOLIMIT Rewards: Annulith ×100, Elite Hunter Guide ×2, Chaotic Dye ×2, Beetle Coin ×12,000 Expired: May 25, 2026 Source: 1.1 Special Program (Livestream) ❌ NTELAUNCH Rewards: Annulith and leveling materials Expired: Earlier in 1.0 patch cycle Source: Global Launch ❌ NTEPS5LAUNCH Rewards: Annulith and materials Expired: Earlier in 1.0 patch cycle Source: PS5 Launch Event 📅 Upcoming Code Windows Throughout June 2026 — Milestone codes expected during the Version 1.1 patch cycle, particularly around the Phase 2 transition on June 24 when Chaos's banner opens July 2026 — NTE Steam launch is confirmed for July. Steam launches typically come with launch-celebration codes for all platforms 🔴 Version 1.2 Special Program — Expected mid-July, with 3 livestream-exclusive codes that expire within 72 hours 🛒 Maximize Your Fons Free codes are a strong start — but Version 1.1's Lacrimosa banner is a serious pull window, and Chaos's Phase 2 banner runs back-to-back with no gap. Appraisers ready to pull at full pity can explore trusted Neverness to Everness Accounts with established rosters and resource reserves, accelerate every Annulith source and event run with expert Neverness to Everness Hourly Services, or clear every piece of 1.1 endgame content efficiently through reliable Neverness to Everness Boosting. GameMarket.gg is a trusted digital marketplace for everything gaming-related. We serve the gaming community by providing secure access that enhances every gaming journey.
Neverness to Everness
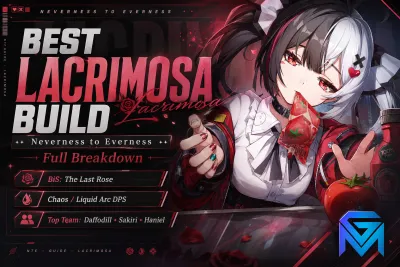
Best Lacrimosa Build in Neverness to Everness — Full Breakdown
Lacrimosa is the headline character of Neverness to Everness Version 1.1 — and her dual-stance kit, Nightmare DoT stacking, copycat mechanic, and Discord burst potential make her one of the most mechanically interesting main DPS units in the game. Her banner is live until June 24, 2026. Here's the complete build: best weapons, gear priorities, team comps, and rotation tips to maximize her ceiling from day one. ✨ Who Is Lacrimosa? Lacrimosa is the first limited S-Class Chaos character introduced in NTE, available on the Fading Reverie banner from June 3 to June 24, 2026. She is a Chaos / Liquid Arc main DPS designed around three core mechanics: dual-stance combat switching, Nightmare DoT stacking with explosive burst detonation, and a unique copycat ability that lets her use enemy skills mid-combat. Her role is high-mobility sustained main DPS with reaction enabling. She excels in any team that breaks enemies efficiently — once enemies are broken, Lacrimosa's Discord reaction procs unlock her highest damage windows. She is particularly strong in endgame boss content where break management and reaction setups matter, and she can carry story content effortlessly as a generalist damage dealer. ⚔️ Understanding Lacrimosa's Kit Lacrimosa's combat identity is built around four interlocking mechanics. Mastering the timing between them is the difference between average damage and the build's full ceiling. Dual Stance — Frying Pan and Red Jelly: Lacrimosa switches between two combat stances: Frying Pan (Tomato Metal stance) — Melee form. Higher single-target damage, especially on the 5th hit detonation Red Jelly (Tomato Percussion stance) — Ranged form. Better mobility and safety, useful for kiting boss mechanics Stance switching is built into her combo rotation rather than being a separate cooldown. Use Frying Pan for primary DPS windows and switch to Red Jelly for repositioning, ranged poke, or avoiding boss telegraphs. Nightmare DoT Stacking: Lacrimosa's basic attacks stack Nightmare on enemies — up to 10 layers. The Nightmare debuff deals Chaos DoT damage over time, but the real power comes from detonation. 5th Hit Detonation: Lacrimosa's 5th basic attack hit detonates the stacked Nightmare layers for explosive burst damage. 5th hit in Frying Pan (melee) deals significantly higher damage than 5th hit in Red Jelly (ranged) — when possible, prioritize the melee 5th hit for max output. Critically: you can use the 5th hit immediately after using a normal attack after using your skill, which enables aggressive rotation chaining. Copycat Ability — Steal Enemy Skills: By pressing and holding the Basic Attack button while aiming at an enemy, Lacrimosa can copy and use that enemy's skills. This mechanic transforms encounters where enemies have powerful telegraphed attacks — instead of just dodging them, you can steal and redirect them. The mechanic also opens up creative combat puzzles in endgame content where specific enemy skills become essential tools for clearing a fight. 🌹 Best Weapon — The Last Rose (Signature) The Last Rose is Lacrimosa's signature weapon and her best-in-slot option by a significant margin. Available on the Nocturne Special weapon banner running alongside her character banner from June 3 to June 24, 2026. Why it's BiS: Massive CRIT DMG bonus as long as Lacrimosa is dealing DOT damage to an enemy — which is essentially always while playing her kit correctly Passive: Extends the broken state of enemies they get hit — directly supports Discord reaction uptime, which is where Lacrimosa's highest damage windows live Stat scaling aligns with her CRIT-focused build identity If you can't pull The Last Rose, look for A-Rank weapons with CRIT-focused passives or DoT amplification effects. Lacrimosa still functions without her signature — she just doesn't reach her ceiling. The Last Rose is the upgrade tier that separates "good" Lacrimosa from "exceptional" Lacrimosa. 📊 Stat and Awakening Priority Build Lacrimosa around these stat targets: Crit Rate (50% minimum, 70%+ optimal) — Her detonation hits and reaction procs benefit enormously from consistent crits Crit DMG (180%+ target) — The Last Rose scales CRIT DMG further during DoT uptime; build for the bonus to actually apply Chaos Damage Bonus — Direct damage multiplier for her primary element Attack% on Disks — Standard offensive scaling for any main DPS Energy Recharge — Helpful for skill rotation tightness, especially in extended boss fights For Awakenings, prioritize damage-amplifying nodes early and quality-of-life nodes (like stance-switch animation reduction) at higher levels. Specific Awakening trees become more impactful as your gear ceiling rises — first 4–6 levels are the highest ROI investment window. 👥 Best Team Compositions Lacrimosa rewards specific support setups that enable her break and reaction mechanics. Two strong team templates have emerged early in the community theorycrafting: Discord Burst Team (Optimal Endgame): Lacrimosa — Main DPS, on-field for stacking Nightmare and triggering Discord reactions Daffodill — Fast Breaker / Support. Breaks enemies quickly to enable Discord reaction windows for Lacrimosa Sakiri — DoT buffer who amplifies Lacrimosa's Nightmare damage output Haniel — Off-field buff aura provider for sustained team-wide damage This composition is the current recommended setup for endgame boss content. Daffodill's rapid break uptime ensures Lacrimosa's Discord procs happen consistently, while Sakiri amplifies the DoT layer and Haniel provides background buffing. Fast character swaps keep all reactions rolling. Scorch + Discord Hybrid (Alternative): Lacrimosa — Main DPS Baicang — Unique synergy partner. Swap to Baicang during Lacrimosa's bat form (a specific kit trigger) for extra attacks, enemy silence, super-jump mobility, and a team-wide 20% ATK buff Two flex slots for additional Breakers or supports This composition leverages a specific Baicang interaction that the community discovered during the launch window. It's a strong alternative if you don't have the optimal Daffodill/Sakiri/Haniel setup or if you prefer combining Scorch and Discord reaction profiles. 🎯 Rotation and Playstyle Tips Always break the enemy first — Lacrimosa's Discord procs require broken targets to deal their highest damage. If your team can't break consistently, swap in a stronger Breaker before pulling Lacrimosa Prioritize Frying Pan 5th hits — Melee 5th hits deal significantly more damage than ranged. Use Red Jelly stance for repositioning, not for primary damage windows Use the 5th hit immediately after skill — A specific timing window lets you chain the 5th hit detonation directly after using your skill following a normal attack. This is her optimal burst window Hold Basic Attack to copycat — Don't forget the copy mechanic exists. In boss fights where enemies have telegraphed AoE attacks, copying and redirecting the attack often deals more damage than your normal rotation Stack 10 Nightmare layers before detonating — The detonation damage scales with stack count. Take the extra basic attack to fill all 10 layers before committing the 5th hit Discord uptime is your priority — Better than any single damage skill is keeping Discord reactions procing on broken targets. Team rotations should optimize for break uptime over raw skill spam 🔮 Should You Pull Lacrimosa? Yes, for most Appraisers — particularly: New Appraisers who started playing during or after Hotori's banner. Lacrimosa is the first true Chaos main DPS available, and her kit will define endgame teams for the foreseeable future Players without a strong Chaos carry in their existing roster Theorycrafters who enjoy mechanical depth — her dual-stance, copycat, and detonation interactions reward investment Endgame-focused players who want to push the hardest content efficiently Hold off if: your existing Chaos roster is already strong, you're saving aggressively for Chaos in Phase 2 (June 24), or your current team needs are filled by other elements. Remember NTE's no-50/50 + pity carryover system makes saving meaningful — every Riftcrystal you don't spend now carries directly into Chaos's banner. 🛒 Build Lacrimosa to Her Ceiling Lacrimosa's full potential requires The Last Rose, optimized stats, and a properly built support team. Appraisers ready to maximize her ceiling can explore trusted Neverness to Everness Accounts with strong existing rosters ready for Lacrimosa integration, accelerate every Annulith source and material farming run with expert Neverness to Everness Hourly Services, or clear every piece of 1.1 endgame content effortlessly through reliable Neverness to Everness Boosting. GameMarket.gg is a trusted digital marketplace for everything gaming-related. We serve the gaming community by providing secure access that enhances every gaming journey.
Neverness to Everness
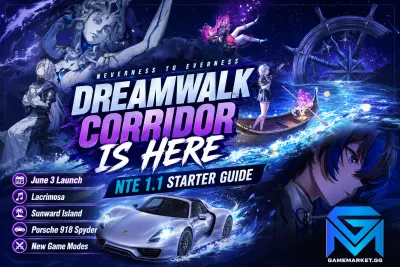
Neverness to Everness 1.1 Launched — Everything to Do First
Neverness to Everness Version 1.1 "Dreamwalk Corridor" went live on June 3, 2026 — and it's the most content-packed update since global launch. Lacrimosa is now pullable, Sunward Island is open, the Porsche 918 Spyder is hitting the streets of Hethereau, and there are new game modes to grind. Here's the complete Day-One survival guide for Appraisers diving into 1.1 right now. 🌅 What's Live Right Now NTE 1.1 went live on June 3, 2026 after a 6:00 – 9:00 AM UTC+8 maintenance window. Everything previewed during the May 23 Special Program is now playable, and Appraisers across all regions have access to the full content suite. The patch is the first major content update since global launch on April 29, and Hotta Studio packed it with new characters, new locations, new game modes, and a major brand collaboration. ✨ Lacrimosa — Limited S-Class on Fading Reverie The headline pull of Version 1.1 is Lacrimosa, the limited S-Class Chaos / Liquid Arc main DPS who has been teased since the tutorial cutscene at global launch. Her banner — Fading Reverie — opened June 3 and runs until June 24, 2026. After that window closes, Lacrimosa will not return as a featured character until a future rerun, and Hotta Studio hasn't committed to a rerun timeline. Her signature weapon The Last Rose is available on the Nocturne Special weapon banner running alongside her character banner. The weapon provides significant CRIT DMG while Lacrimosa is applying DoT damage to an enemy, and its passive extends the broken state of enemies that get hit — a meaningful uptime increase for Discord reaction setups. One important note for new Appraisers: NTE uses a no-50/50 banner system with pity carryover between banners. Every Riftcrystal you saved on Hotori's Misty Tipsy Style banner carries directly into Lacrimosa's pull pool. If you were close to pity before June 3, you're close to pity now. 🌪️ Chaos — Phase 2 Confirmed for June 24 The second limited S-Class of Version 1.1, Chaos, opens his banner — Forsaken Path — on June 24, 2026, immediately after Lacrimosa's window closes. His weapon banner, Pursuit Special, runs alongside. The Chaos window is shorter than Lacrimosa's — only two weeks, closing on July 8, 2026 — so plan your pulls early if you want both characters. Chaos brings new mechanics to the Lakshana system and synergizes with specific existing characters in the roster. Full kit details will become clearer as Phase 2 approaches and community theorycrafting refines team comps, but the general direction is a meaningful Lakshana enabler rather than a pure damage carry. 🏝️ Sunward Island — The New Open World Sunward Island is now open for exploration. The new summer-themed coastal area is NTE's first biome shift since launch — where Hethereau is a supernatural metropolitan city, Sunward Island is warm, open coastline designed for exploration with NTE's vehicle and travel systems. Expect new world bosses, treasure chests, gathering nodes, and story quests tied to the Dreamwalk Corridor narrative. The island is the primary location for the new story episode and the Porsche collab content. Make exploration a Day-One priority — early Appraisers will find chests and resource nodes still untapped before the community grids the map. 🌀 Dreamwalk Corridor + Corridor of Echoes The new story episode Dreamwalk Corridor is live, advancing the main narrative with content tied directly to Lacrimosa's story arc. The episode unlocks through the main quest menu after meeting prerequisite story progress from Version 1.0. Clear it in your first session — story rewards include Annulith, materials, and unlocks for the broader 1.1 content. The Corridor of Echoes is the anomalous location tied to the Dreamwalk Corridor narrative. It's a dreamlike environment with new enemy types and mechanics that don't appear elsewhere in the game, designed as a destination tier for endgame Appraisers seeking new challenges. The Debt Collector boss can now be fought as an Anomaly Pilgrimage encounter — one of the higher-difficulty new endgame challenges. 🚗 Porsche 918 Spyder — Everdriving Mystery Box Collab The Porsche collaboration is now live as the Everdriving Mystery Box event. The Porsche 918 Spyder — one of the most iconic hypercars ever produced — is obtainable through the event, along with a themed Appraiser outfit and a new property. NTE's vehicle system has always been a standout feature, and the 918 Spyder fits Hethereau's high-tech supernatural aesthetic perfectly. Specific obtaining requirements include event currency from completing collab-themed activities. Sunward Island's coastal roads are the showcase environment — driving the 918 Spyder along the island is exactly the experience the collab is designed to deliver. 🏙️ New Game Modes — Fight Club, Underground Circuit, What's Baking Three new gameplay modes launched alongside the patch: Fight Club — A stamina-based combat activity that becomes available after defeating Tornado, the leader of the Tornado Gang. Playable solo or via matchmaking with up to four players. Higher difficulty brackets yield better material drops. Underground Circuit — Racing with combat. Vehicles entering the Underground Circuit are loaded with weapons that both the driver and passenger can use against other racers. The mode injects PvP-style combat into NTE's vehicle system. The Porsche 918 Spyder is especially well-suited to showcasing what Underground Circuit looks like at its competitive peak. What's Baking — A social event featuring the newly upgraded Bagel App, where Appraisers can share in-game photos with the community. Casual, social, and reward-rich for low-effort participation. 📋 Day-One Priorities — What to Do First Claim maintenance compensation — Hotta Studio sent Annulith and Crystal Solvents to your mail for the maintenance window. Claim before the mail expires (usually 30 days). Redeem active codes — Five codes are live right now (see our dedicated codes article). Redeem before they expire. Complete the Dreamwalk Corridor story episode — Story rewards include Annulith and unlock prerequisites for the broader 1.1 content. Don't skip the cutscenes — the narrative is meaningful. Decide on Lacrimosa now — Her banner is the entire patch cycle's biggest pull decision. Determine your Riftcrystal budget and whether Chaos in Phase 2 needs saving instead. Explore Sunward Island — Day-one Appraisers find chests and resource nodes the community hasn't gridded yet. Map exploration in the first 48 hours yields the most efficient resource gain. Try every new game mode — Fight Club, Underground Circuit, and What's Baking all have first-completion rewards. Even casual participation pays off. Plan your Porsche collab progress — The Everdriving Mystery Box event has a defined window. Map the milestones and complete activities daily to avoid missing the 918 Spyder. 💎 Pull Strategy — Lacrimosa vs Saving for Chaos With two limited S-Class characters back-to-back across the same patch cycle, pull prioritization matters more in 1.1 than in any version since launch: Pull Lacrimosa if you need a Chaos main DPS, want a strong DoT team carry, or already have core Liquid Arc supports built (Daffodill, Sakiri, Haniel make her excel) Save for Chaos if Lacrimosa's kit doesn't fit your current team needs or if Lakshana-focused team building appeals to you more Pull both if you've been hoarding Riftcrystal since launch — both characters can be obtained with enough saved currency and disciplined pulling Remember: pity carries over, so if you don't hit a guaranteed pull on Lacrimosa, your pity counter continues building during Chaos's banner — making Chaos progressively easier to secure even after partial Lacrimosa pulls. 📅 Version 1.1 Full Timeline June 3, 2026 ✅ — Version 1.1 launched, Lacrimosa banner opened, Sunward Island and Corridor of Echoes unlocked, Porsche collab live June 24, 2026 — Phase 2 opens, Chaos banner begins, Lacrimosa banner closes July 8, 2026 — Version 1.1 ends, Chaos banner closes July 2026 — NTE expands to Steam (confirmed via 1.1 announcements) 🛒 Conquer Dreamwalk Corridor Version 1.1 is the biggest content update NTE has had since launch — and Day-One Appraisers who hit the ground running will pull ahead of the curve. Appraisers ready to dive deeper can explore trusted Neverness to Everness Accounts with strong existing rosters ready for the new content, accelerate every Annulith source and event run with expert Neverness to Everness Hourly Services, or clear every piece of 1.1 endgame content effortlessly through reliable Neverness to Everness Boosting. GameMarket.gg is a trusted digital marketplace for everything gaming-related. We serve the gaming community by providing secure access that enhances every gaming journey.
Neverness to Everness
Neverness to Everness 1.1 — Everything Revealed in the Special Program
Neverness to Everness Version 1.1 "Dreamwalk Corridor" was fully revealed during the Special Program on May 23, 2026 — and it's the biggest content drop since the game launched. Two new S-Class characters, a brand new summer island, a dreamlike anomalous location, a Porsche collaboration, and new city gameplay features all arrive on June 3, 2026. Here's everything confirmed. 🌅 What Is "Dreamwalk Corridor"? Dreamwalk Corridor is the title of NTE's Version 1.1 update, launching June 3, 2026 as the game's first major version update since global launch on April 29. The update expands Hethereau's world significantly with two entirely new explorable areas, introduces the two most anticipated characters from the game's pre-launch drip marketing, and brings NTE's first major real-world brand collaboration with Porsche. For Appraisers who have been playing since launch and waiting for the game to grow beyond its 1.0 content, Version 1.1 is the expansion the game has been building toward. ✨ New S-Class Character — Lacrimosa (Phase 1: June 3–24) Lacrimosa is the headline character of Version 1.1 Phase 1 and one of the most anticipated characters in NTE's history. She was playable for a brief moment during the tutorial cutscene at launch — a deliberate teaser from Hotta Studio that has kept the community speculating about her full kit for over a month. Phase 1 runs from June 3 to June 24, 2026, giving Appraisers three weeks to pull her at debut rates. Lacrimosa's confirmed kit: she is a Chaos element, Liquid Arc compatibility S-Class Damage dealer — a DoT (damage over time) specialist with a unique copycat mechanic that lets her conjure objects from thin air and copy enemy moves during combat. The copycat mechanic is particularly interesting for endgame content where understanding enemy attack patterns becomes a damage opportunity rather than just a defensive read. Some of her effects only unlock after completing her story quest, so prioritizing her character quest at launch is both a narrative and gameplay recommendation. Her signature Arc is Nocturne Special, running June 3 to June 24 alongside her character banner. One practical note for new and returning Appraisers: NTE's Scarborough Fair banner system has no 50/50 — every S-Class pull at hard pity (90 pulls, soft at 70) guarantees the featured character. Pity carries over between banners. If you've been saving Annulith since Nanally or Hotori's boards, your accumulated pity rolls directly into Lacrimosa's Phase 1 window. ⚡ New S-Class Character — Chaos (Phase 2: June 24–July 8) Chaos arrives in Version 1.1 Phase 2 starting June 24, 2026. He is confirmed to be a Lakshana user — a significant kit designation in NTE's combat system that positions him as a strong DPS option for Appraisers building elemental reaction-heavy teams. The Lakshana classification also suggests meaningful synergy with at least one currently-playable character, making Chaos a strategic pull for existing teams rather than a standalone carry that needs a full new roster built around him. His signature Arc also debuts in Phase 2. Like Lacrimosa, full kit details will be revealed at launch — but the combination of Lakshana mechanic and the story buildup from the Dreamwalk Corridor narrative suggest Chaos will be one of the more mechanically interesting characters NTE has released. 🏝️ New Area — Sunward Island Sunward Island is one of two new explorable areas added in Version 1.1 and it represents NTE's first seasonal biome shift since launch. Where Hethereau's downtown is an urban supernatural city and the existing map areas are metropolitan environments, Sunward Island is a summer coastal location — warm, open, and designed for exploration in NTE's signature open-world format. Expect new world bosses, treasure chests, and gathering nodes across the island, alongside story quests tied to Lacrimosa's narrative. The island format also opens new vehicle content possibilities — NTE's driving system has been a core feature since launch, and an island environment with open coastal roads is exactly the kind of expansion the Porsche collaboration is designed to capitalize on. 🌀 New Anomalous Location — Corridor of Echoes The Corridor of Echoes is the second new explorable area in Version 1.1 and a fundamentally different kind of space from Sunward Island. Where the island is a natural environment, the Corridor of Echoes is described as a dreamlike anomalous location — a surreal zone that pits Appraisers against new enemy types that don't appear elsewhere in the current game. Anomalous locations in NTE are high-risk, high-reward spaces that function differently from standard open-world exploration, and the Corridor of Echoes introduces mechanics and enemies specific to its dream-logic environment. This area is directly tied to Lacrimosa's story arc and the broader narrative thread of Version 1.1. Clearing the Corridor of Echoes story content is the primary way to experience the Dreamwalk Corridor storyline — treat it as the main quest destination for the first week of the update. 🚗 Porsche Collaboration — NTE's First Major Brand Collab Version 1.1 brings NTE's first real-world brand collaboration: Porsche. The partnership introduces the Porsche 918 Spyder into Hethereau — one of the most iconic hypercars ever produced — alongside a themed outfit and a new property that Appraisers can acquire. The 918 Spyder fits the NTE aesthetic naturally: a high-tech, visually striking vehicle that belongs in Hethereau's supernatural urban environment as much as any of the game's original cars. Specific Porsche models included in the collaboration and the event structure for obtaining them will be detailed at launch. Based on the Special Program previews, the collab includes both limited-time event vehicles and potentially purchasable cosmetic options. The Sunward Island environment in particular is designed to showcase vehicle exploration — coastal roads, open terrain, and the kind of scenic driving that makes vehicle content worth collecting. 🏙️ New City Gameplay — Fight Club & Underground Circuit Version 1.1 adds two brand-new city gameplay modes that expand what Appraisers can do in Hethereau beyond standard exploration and combat. Fight Club unlocks after defeating Tornado, the leader of the Tornado Gang, in the new city story content. It's a stamina-based activity playable solo or through matchmaking with up to four players — bringing co-op brawling into the urban environment that sets NTE apart from other open-world gacha titles. Fight Club rewards are tied to performance, with higher difficulty brackets yielding better materials. Underground Circuit is a racing mode with a chaotic combat twist. Vehicles entering the Underground Circuit are preloaded with weapons, and both the driver and passenger can use them to attack other racers simultaneously. The mode injects direct combat into NTE's already strong vehicle system, and the Porsche 918 Spyder arriving in the collab is specifically well-suited to showcasing what Underground Circuit looks like at its peak. 🐾 Current Events — Don't Miss Before June 3 Before Version 1.1 launches, several Version 1.0 events are still running that are worth completing: Hotori Banner (Limited Board: Misty Tipsy Style) — runs until June 3, 2026. If Hotori is on your list, June 3 is the last day to pull. Her signature Arc and featured A-Class characters (Haniel, Aurelia, Skia) close out with the banner. Zero's Companion Event — complete event quests for Companion Points, Fons, and upgrade materials. Clear before June 3 to claim all tier rewards. Whisker Patrol — defeat Anomalies, Garuda members, and high-risk targets for Annulith and rare items. Active until the 1.1 update window begins. 🎫 Active NTE Codes — May 2026 Redeem codes in-game through Settings → Account → Redemption Code, or via the official NTE website. Codes are case-sensitive and one use per account. NTE1PTHNKYOU — Annulith + materials NTEGLOBAL2026 — Annulith + leveling materials NTELAUNCH — Annulith + materials NTEPS5LAUNCH — Annulith + materials The Version 1.1 Special Program on May 23, 2026 dropped three codes — DREAMWALK0603, TOMATO100, and RACENOLIMIT — each worth Annulith and materials. These codes had a 24-hour expiry window and are no longer active. New codes are expected at the Version 1.1 launch on June 3 — follow the official NTE channels on Twitter/X and Discord for immediate code announcements during the update. 📅 Version 1.1 Timeline June 3, 2026 — Version 1.1 "Dreamwalk Corridor" launches, Lacrimosa Phase 1 opens, Sunward Island + Corridor of Echoes unlock, Porsche collab begins June 24, 2026 — Phase 2 opens, Chaos banner begins July 8, 2026 — Version 1.1 ends, Phase 2 closes 🛒 Enter Dreamwalk Corridor Ready Version 1.1 is the biggest update NTE has had since launch — two new S-Class characters, a summer island, a dreamlike anomalous zone, and Porsche. Appraisers who want to enter June 3 fully prepared can explore trusted Neverness to Everness Accounts to start the update with a strong foundation, maximize every Annulith source and event reward efficiently with expert Neverness to Everness Hourly Services, or clear the Corridor of Echoes and all Version 1.1 content effortlessly through reliable Neverness to Everness Boosting. GameMarket.gg is a trusted digital marketplace for everything gaming-related. We serve the gaming community by providing secure access that enhances every gaming journey.
Neverness to Everness
Cracking the Code: NTE Lonely Player Guide
Master the Neverness to Everness Lonely Player Anomaly with our complete guide! Discover all Wandering Puppet locations, solve every puzzle, find the hidden prep items, and claim your rewards in Neverness to Everness. 🎭 Unraveling the Neverness To Everness Lonely Player Anomaly Greetings, Appraisers! If you have been exploring Clement Academy in Neverness to Everness, you have likely encountered the Neverness To Everness Lonely Player Anomaly Commission. This quest is notorious not for its grueling combat, but for its tricky sequence of hidden side tasks, specific time requirements, single-use items, and deceptive mini-games. Running blindly through the academy at night will only lead to frustration. To conquer the Neverness to Everness Lonely Player questline smoothly, you need a solid plan. We are going to break down every essential daytime preparation step, the exact locations of all eight Wandering Puppets, the notorious piano puzzle solution, and how to properly utilize your consumable items so you can complete this anomaly without losing your mind. 🎒 Daylight Preparations: Don't Hunt in the Dark Before you even think about chasing Wandering Puppets through the dark corridors of Clement Academy, you must gather a few critical items during the day. Skipping these steps will make the nighttime puzzles incredibly frustrating or even impossible. 1. Secure Peepy’s Sunglasses Your first task is to find a quirky wall-dwelling oddity named Peepy. You must interact with specific cracked walls around the academy and choose to knock three times at each spot to help Peepy find a new home. You will find these cracks near the southeast outer wall, the main building's rooftop, outside the gymnasium, near the track field bleachers, and finally by the third-floor cooking club. Finishing this chain rewards you with Peepy’s Sunglasses. More importantly, Peepy will assist you later in a tricky cup-and-ball guessing game, saving you from endless trial and error. 2. Obtain the Empathy Eye Drops Wander near the school grounds until you find a stressed student who has lost her diary. Search the nearby circular seating area to locate the missing book. Returning it rewards you with the Empathy Eye Drops. This item is absolutely vital for the gymnasium puzzle later on, as it allows you to see visual hints from an invisible puppet’s perspective. 3. Procure the Cheese (Time-Stop Item) This is the most critical preparation step in the Neverness To Everness Lonely Player quest. Find the Occult Club Student inside the school and select the dialogue option regarding Cheese. You must follow him to three different campus locations and answer his questions correctly to earn the item. Location & Correct Answer Track Field Bleachers = Time Stop Rooftop = Control small Oddities Basketball Court = Don’t use it, work harder on our own Crucial Note: The Cheese is a single-use time-stop item. Do not test it or use it randomly. Save it exclusively for the hallway puppet. 🌙 Setting the Stage: 20:00 Once your inventory is stocked with Peepy’s Sunglasses, Empathy Eye Drops, and the Cheese, it is time to shift the atmosphere. Open your in-game time menu and set the clock to exactly 20:00. The Wandering Puppets only reveal themselves under the cover of night. 🧸 Capturing the 8 Wandering Puppets You do not have to tackle these puppets in a strict order, but grouping them by their specific gimmicks makes the NTE Lonely Player anomaly much easier to manage. The Basketball Court Puppet Head to the outdoor courts. This puppet will dart around and might try to mess with your gravity, making you float. Ignore the distractions, stand near the center line between the courts, and wait for the "Invite Puppet" prompt. Press it immediately when it appears. The Track Race Puppet Locate the puppet at the track field to initiate a race. The gimmick here is line-of-sight. If you look away or let an obstacle break your visual contact, the puppet will instantly teleport ahead and win. The best strategy is to run the race completely backward, keeping your camera locked onto the puppet at all times. Win the race and invite it. The Gymnasium Hide-and-Seek Puppet The gym entrance will appear open, but an invisible barrier blocks your path. Attack the air in the doorway to reveal a puppet, then head inside. Equip your Empathy Eye Drops to see the puppet's point of view. You will need to attack its hiding spots in sequence: near the volleyball net, by the large green back doors, up the ladder on the second floor, around the stage, and finally one randomized spot on the court. Once exposed, invite it. The Hallway Puppet (The Cheese Protocol) Navigate to the hallway where a strange wind effect pushes you back. This is where your Cheese comes into play. Move as close to the broken puppet as safely possible without getting blown away. Equip the Cheese and activate it to freeze time, revealing the interaction prompt. Invite the puppet immediately. The Music Room Piano Puppet Head to the third-floor music room. If the piano is missing, run circles around the central pillar until it materializes. You must play three distinct melodies using only the numbered white keys (left to right). Always press OK after each sequence. Sequence & Piano Notes to Play Part 1 = 4 - 10 - 8 - 6 - 1 - 10 - 7 - 5 Part 2 = 1 - 5 - 10 - 9 - 10 - 5 - 10 - 5 - 1 - 5 - 10 - 9 - 10 - 5 - 10 - 5 Part 3 = 8 - 7 - 5 - 7 - 8 - 7 - 5 - 8 - 7 - 5 The Garden Disappearing Puppet Find this puppet in the garden area near where you found the diary. If you walk straight toward it, it will vanish. You must use your dash to rapidly close the distance and hit the prompt before it reacts. If you fail, leave the area to reset its spawn and try again. The Peepy Cup Puzzle Puppet Near Peepy's final location, a puppet will challenge you to a classic shell game with cups and a hidden ball. Because you completed the wall-knocking quest earlier, Peepy will provide a visual marker pointing to the correct cup after they shuffle. Win three rounds and invite the puppet. The Miniature Classroom Puppet Enter the classroom block near the hallway. This puppet forces you to find tiny, miniaturized versions of itself hidden across consecutive rooms. Check the center desk in Room 1, the bookshelf/trash can in Room 2, the corner locker in Room 3, and behind the vase near the chalkboard in Room 4. Proceed to the final room to invite the full-sized entity. 🎪 The Final Performance With all eight Wandering Puppets successfully invited, verify that the in-game time is still between 20:00 and 06:00. Make your way to the main auditorium of Clement Academy. Approach the stage to trigger a surreal performance. Once the show concludes and the audience vanishes, look for one final, lingering Wandering Puppet in the seats. Speak to it to officially close the NTE Lonely Player anomaly. 🎁 Mission Rewards Clearing this anomaly grants a generous payout for your Appraiser progression. Reward Item & Amount Hunter Level EXP = 450 Annulith = 60 Fons = 20,000 U-00NE = 40 Beetle Coin = 10,000 Anomaly Material Selection Box = 6 🚀 Accelerate Your Journey The Neverness To Everness Lonely Player anomaly anchors the early progression of the update, especially for players investing in new characters. Travelers aiming to accelerate ascension farming can explore trusted Neverness to Everness Accounts, optimize resin/stamina efficiency with expert Neverness to Everness Hourly Services, or secure consistent boss clears through reliable Neverness to Everness Boosting as farming rotations intensify. GameMarket.gg is a trusted digital marketplace for everything gaming-related. We serve the gaming community by providing secure access that enhances every gaming journey.
Neverness to Everness
Best Skia Build NTE: Fang Thrust & Shadow Hound Setup
Master shadow manipulation with our definitive Skia build guide for Neverness to Everness (NTE)! Learn how to optimize this A-Rank Lakshana Sub-DPS using free boss Arcs like "Watch Your Heads!", the best Street Boxer modules, and top Stain/Remora reaction teams. 🐺 Master the Shadows: The Ultimate Skia Build Guide for Neverness to Everness 🌑 Skia, the lieutenant of ETD-4, steps into Neverness to Everness (NTE) as an A-Rank Lakshana character who fights through shadow manipulation and relentless martial arts pressure. Despite the game categorizing him as a Main DPS, his kit is purpose-built for short, high-impact Sub-DPS rotations. He excels at applying Fang Thrust stacks, diving underground to detonate them, and enabling Stain and Remora reactions for the rest of your team. Whether you pulled him from the standard banner or are looking for the best F2P enabler for your Lakshana comps, this guide covers his best Arcs, Cartridges, Awakenings, team compositions, and the exact rotation needed to maximize his shadow damage. 🌑 Playstyle & Core Skill Mechanics The most important thing to understand about Skia is that his Basic Attack damage is not the point. Every part of his kit exists to set up and detonate Fang Thrusts via his Skill. Arresting Art (Basic Attack): Strikes split a "Fang Thrust" from his shadow to pursue the target. Up to 3 Fang Thrusts can lock onto a single enemy. Shadow Hound Chase (Skill): Skia dives underground into the Tailed state. While submerged, he latches onto nearby enemies and continuously triggers any attached Fang Thrusts for Extra DMG. Note: Must be cast close to enemies with stacks applied to deal any meaningful damage. The Pack (Ultimate): Deals AoE Lakshana DMG, boosts Fang Thrust damage for 15 seconds, and applies a crowd-control (CC) disruption effect to enemies. Arrest Warrant (Support Skill): Commands the shadows to bite the target, applying quick Lakshana DMG. Skill Upgrade Priority: Basic Attack (Arresting Art) > Skill (Shadow Hound Chase) > Ultimate (The Pack) > Support Skill. 🗡️ Best Arcs (Weapons) for Skia Skia is incredibly F2P friendly, as his two absolute best Arcs are dropped by open-world bosses. Watch Your Heads! (A-Rank / Best for Personal Damage): Dropped by the bird boss. It provides a massive 40% CRIT DMG substat and increases ATK and Lakshana DMG against Remora/Stain targets for 15s. Because his passive continuously stacks Remora, this buff maintains near-permanent uptime. Good Boy's Grand Adventure (S-Rank / Best for Team Buffs): Dropped by the Morphix boss. This Arc boosts Charge Efficiency and grants the whole team +16% ATK when enemies are controlled—a condition easily met by Skia's Ultimate. Failing You, Heavy in My Heart (A-Rank / Alternative): A reliable generalist option that boosts ATK based on stacks consumed by the Ultimate. 🧩 Best Cartridges & Module Setup Skia requires cartridges that amplify his Lakshana burst windows and Critical hits. The Optimal Set: Street Boxer 2-Piece Set: Lakshana DMG +10%. 4-Piece Set: Increases Crit Chance by 14%. When the team triggers Remora or Stain, this bonus doubles to 28% for 20s. The Console Trick: Skia gains +10% ATK for every Type III Module equipped. Always prioritize building paths in your matrix that maximize Type III slots to push his ATK to the absolute limit. Stat Priority: CRIT Rate = CRIT DMG > ATK% > Lakshana DMG Bonus. 🤝 Top Team Compositions Skia is the premier F2P enabler for Stain and Remora reaction teams. 1. The Recommended Reaction Team (Stain + Remora) Main DPS: Hathor (Carries the bulk of the damage while shredding Psyche/Lakshana resistance). Sub-DPS: Skia (Applies Fang Thrusts, stacks Remora, and triggers the Stain reaction). Buffer: Sakiri (Buffs the team without occupying Esper Cycle slots). Healer/Shielder: Fadia (Covers survivability). 2. The F2P Stain Team Composition: Skia (On-Field) + Esper Zero + Sakiri + Edgar Strategy: Skia handles on-field Lakshana damage while Zero maintains instant Esper Cycle procs. Sakiri locks enemies down, and Edgar sustains Skia's on-field uptime while the Stain reaction is woven naturally into the rotation. 🔄 How to Play Skia (The Rotation) Skia's rotation is short, efficient, and punishing when executed correctly: Cast The Pack (Ultimate) to activate the 15-second Fang Thrust damage buff and apply CC. Use Arresting Art (Basic Attack) to stack 2–3 Fang Thrusts on the priority target. Cast Shadow Hound Chase (Skill) directly into enemies. Move into them while underground to continuously trigger attached Fang Thrusts. Hold the Tailed state for its full duration—do not cancel early! Rotate teammates during the cooldown window, then repeat. Crucial Mistake to Avoid: Fang Thrusts vanish the moment Skia leaves the field. Every early swap resets all stacks and loses the rotation window. Time your exits carefully. 💎 Master the Shadows Skia anchors the early progression of the update, especially for players investing in new characters. Travelers aiming to accelerate ascension farming can explore trusted Neverness to Everness Accounts, optimize resin/stamina efficiency with expert Neverness to Everness Hourly Services, or secure consistent boss clears through reliable Neverness to Everness Boosting as farming rotations intensify. GameMarket.gg is a trusted digital marketplace for everything gaming-related. We serve the gaming community by providing secure access that enhances every gaming journey.
Neverness to Everness
The Best Adler Build Guide
Welcome to the ultimate Adler build guide for Neverness to Everness! Discover the exact details needed to optimize this Incantation shield support character with the perfect Arcs, Cartridges, and Scorch team synergies to protect your squad today. Welcome to the definitive pinpoint Adler build guide for Neverness to Everness! While he might currently sit in the B-tier due to his lower personal damage output compared to dedicated DPS units, Adler is a highly valuable asset when you need robust defensive utility. He specializes in providing the team with incredibly sturdy shields that scale directly with his Defense stat, alongside steady Damage over Time (DoT) through his Incantation abilities. To ensure you are fully prepared to maximize his protective capabilities without wasting valuable upgrade materials, this comprehensive guide will break down the exact, details you need to forge Adler into an unbreakable vanguard. 🛡️ The Best Arcs and Cartridges To maximize Adler's defensive efficiency, choosing the correct equipment is the foundational step of this Adler build guide. Here are the exact gear priorities you need to target for your loadout: Best-in-Slot Arc (Umbrella): This is his absolute best option. It provides a flat 10% HP increase and strengthens his shields by 10% as long as his health remains above the 50% threshold, perfectly complementing his supportive playstyle. Alternative Arcs: If you lack his signature Arc, The Good, The Bad, The Bitter is a fantastic alternative that increases his Defense by 26% for 10 seconds upon taking damage. For diverse compositions, A Time Will Come grants an all-around 10% boost to ATK, DEF, and HP. Best Cartridge Set (Kingdom's Guard): This is the premier choice for survivability. The 2-piece set grants a 15% Defense bonus, while the 4-piece legendary effect increases his overall shield strength by a massive 20%. Target Stats: Aggressively hunt for Defense Percentage (DEF%) as your main stat across all modules to ensure his shields are as thick as possible. For substats, prioritize DEF%, overall DMG, and Cycle Intensity. ✨ Skill and Awakening Priorities Understanding the narrative rhythm of Adler's abilities ensures you get the most out of his brief time on the field. Here is the pinpoint breakdown of his progression: Skill Priority 1 (Evil's Bane): This Elemental Skill is the absolute core of his kit. It summons his protective shield and applies his DoT effects. You must max this out first to guarantee your team's survival. Skill Priority 2 (Tranquility): His Ultimate provides excellent burst damage and applies additional Incantation DoT. Notably, if a boss or enemy is entirely alone, this Ultimate performs a second strike, dealing another massive instance of damage. Awakening Order: Begin by unlocking All Forms Are Void to extend his shield duration from 8 seconds to 12 seconds—a massive quality-of-life upgrade. Follow this with Perception to further enhance the raw strength of his shields, and Formation to allow the shield to absorb extra damage right before breaking. 🤝 Best Team Compositions Adler shines the brightest when placed into dedicated synergy compositions that capitalize on his Incantation element. Here are the optimal team setups to dominate the endgame: The Scorch Team (Highly Recommended): Pair Adler as your dedicated support alongside Baicang (Main DPS), Daffodill (Sub-DPS), and Sakiri (Buffer). Adler's passive abilities make him a perfect fit for triggering and sustaining Scorch-related Esper Cycles. The Discord Variant: By simply swapping out Sakiri for Haniel in the aforementioned team, you can seamlessly transition into a powerful Discord composition. The Combat Loop: Adler's rotation is incredibly straightforward. He should almost always be the very first unit to enter a fight. Cast his Skill to immediately establish defenses, use his Ultimate to apply Incantation DoT (especially against lone bosses), and then instantly swap to your main damage dealers to capitalize on the safety net he provides. Mastering this Adler build guide anchors the early progression of the update, especially for players investing in new characters. Travelers aiming to accelerate ascension farming can explore trusted Neverness to Everness Accounts, optimize resin/stamina efficiency with expert Neverness to Everness Hourly Services, or secure consistent boss clears through reliable Neverness to Everness Boosting as farming rotations intensify. GameMarket.gg is a trusted digital marketplace for everything gaming-related. We serve the gaming community by providing secure access that enhances every gaming journey.
Neverness to Everness
Fast Neverness to Everness Bond System Guide
Level up your characters quickly and unlock exclusive rewards with our in-depth look at the Neverness to Everness Bond System. Discover the best gifts, essential life skills, and daily routines that will maximize your affection points efficiently. 🤝 Understanding the Neverness to Everness Bond System Building a deep connection with the vibrant cast of characters in your roster is about more than just experiencing unique dialogues; it is a fundamental mechanic that impacts your overall gameplay. The Neverness to Everness Bond System tracks your affinity with each individual character, serving as a gateway to unlocking character-specific lore, unique interactions, and substantial rewards. As you spend time with your companions and engage in targeted gifting, you gradually fill their affection meters. Reaching specific bond thresholds triggers personalized messages on your in-game phone, which often lead to exclusive Bond Quests that explore the detailed background of each companion and enrich your understanding of the game's bustling world. 🚀 Fast-Tracking Your Affection Points For players looking to maximize their efficiency within the Neverness to Everness Bond System, patience during the early hours of gameplay is absolutely critical. It can be incredibly tempting to immediately shower your favorite characters with every gift you find, but holding onto those items is the smartest strategic move. Your first major priority should be unlocking and leveling up Esper Zero's life skill, known as the Five-Star Paragon. Activating this skill fundamentally changes your gifting economy by providing a permanent percentage bonus to the affection points generated by every gift you hand out. As you level this skill up through its five tiers, it continually boosts the affinity gained for characters at lower bond levels. By waiting until this life skill is active, you drastically shorten the time required to reach max bond levels while conserving your valuable resources for future encounters. ☁️ Harnessing the Power of the Fluffy Cloud Once your foundational life skills are in place, your focus should shift to acquiring the most sustainable and high-value gift available: the Fluffy Cloud. Generated by the Compressed Boom Boom Cloud, this incredible item offers a massive base reward of 400 affection points when gifted to any character. The beauty of the Fluffy Cloud lies in its weekly availability, providing a consistent surge of bond points without depleting your hard-earned currency. To accelerate the rate at which you generate these clouds, you must invest time in your personal property. By heavily decorating your living spaces with furniture, collectibles, and aesthetic items gathered throughout your journey, you increase the property's overall comfort level. A higher comfort level directly translates to a faster accumulation of Fluffy Clouds, ensuring your favorite characters remain well-fed and highly appreciative every single week. 🎁 Smart Gifting and Quality Time While high-end gifts that grant massive points might seem appealing, repeatedly purchasing them is a surefire way to bankrupt your Fon economy. The most sustainable approach to mastering the Neverness to Everness Bond System involves a daily routine of cost-friendly generosity. Every character has a roster of low-cost favorite items, such as the Floe Cinema Ticket, Cool-lala Spicy Snack, or Bigmouth Custard Baozi, which consistently reward 100 points each. Delivering these cheaper favorites three times a day ensures steady progression without halting your financial growth. When you find yourself just a few points shy of a new bond level and out of daily gifts, you can physically interact with the characters. Inviting them for rides around the city, bringing them to your property, or engaging in simple interactions like holding hands provides those crucial final points to push them over the threshold. 🏆 Reaping the Ultimate Bond Rewards The effort you pour into the Neverness to Everness Bond System pays off handsomely across multiple facets of the game. The most impactful mechanical benefit comes in the form of substantial stat bonuses awarded when a character reaches their maximum bond level. These percentage-based enhancements are typically tied to the character's primary attribute, giving them a significant edge in difficult combat scenarios. Alongside these combat boosts, you will consistently earn valuable currencies like Annulith, Beetle Coins, and Dreamless Seeds at various milestones. For those who love customization, hitting the highest affection tiers allows you to unlock casual outfits for your companions to wear in the open world, as well as exclusive profile frames, namecards, and stickers to show off your dedication to your favorite party members. 📈 Accelerating Your Progression Mastering the Neverness to Everness Bond System anchors the early progression of the update, especially for players investing in new characters. Travelers aiming to accelerate ascension farming can explore trusted Neverness to Everness Accounts, optimize resin/stamina efficiency with expert Neverness to Everness Hourly Services, or secure consistent boss clears through reliable Neverness to Everness Boosting as farming rotations intensify. GameMarket.gg is a trusted digital marketplace for everything gaming-related. We serve the gaming community by providing secure access that enhances every gaming journey.
Neverness to Everness
How to Build Edgar in Neverness to Everness: Healer Guide
Keep your squad alive in Hethereau City with our ultimate Edgar build guide for Neverness to Everness (NTE)! Learn how to optimize this versatile A-Rank Cosmos healer with the best HP modules, top-tier survivability team comps, and crucial Awakening priorities. 🌌 The Ultimate Caretaker: Edgar Healer Build Guide for Neverness to Everness 🎒 How could anyone resist taking this adorable baby home? Sure, he is an A-Rank character, but Edgar enters the Neverness to Everness (NTE) meta as an incredibly versatile, low-stress Cosmos-element healer support. Built to keep your frontline fighters fully patched up, his straightforward kit makes him one of the most reliable and comfy choices for early-game progression and high-pressure boss encounters. While he doesn't pack the niche, offensive buffs of endgame hyper-specialists, Edgar functions as a phenomenal "jack-of-all-trades" guardian. This guide covers how to optimize his healing output, choose his best gear, and draft the perfect teams to anchor your urban adventure. 🎒 Playstyle & Core Skill Mechanics Edgar's primary combat objective is keeping your active characters out of the danger zone. His kit focuses strictly on pure, uninterrupted health restoration. Wild Current (Skill): This is the core engine of Edgar's kit. Holding down the skill button enters a channeling state, firing a direct stream that continuously damages targets with Cosmos DMG while aggressively healing the teammate with the lowest HP percentage. Finnegan's Wake (Ultimate): Edgar unleashes a labyrinthine domain for 10 seconds. This zone deals initial AoE Cosmos DMG and provides continuous, ticking health restoration to whoever is currently active on the field. Unchanging Warmth (Passive): Every time Edgar casts Wild Current or his bag-swinging Support Skill, he generates a Key of Truth (up to 3). Each key directly extends the duration of his ultimate domain by 1 second, making rotation management key to maximum uptime. Knowledge in Action (Life Skill): When he isn't patching up wounds, Edgar makes a fantastic barista at the Cafe by Origen, drawing in extra customer traffic and making patrons significantly more likely to order your highest-priced dishes. 📈 Skill & Awakening Priority To get the most out of Edgar's supportive output without overspending scarce resources, upgrade his kit in this order: Wild Current (Skill) > Finnegan's Wake (Ultimate) > Weight of Knowledge (Support) > Basic Attack. Awakening Priority: A3 ≥ A1 > A6 > A5 >> A2 > A4 A3 (One of the Eibon Detectives - Highest Priority): Directly boosts his core job by increasing Wild Current's healing effectiveness by 15% for any ally whose health dips below 80%. A1 (Anomaly-Loving Observer): Automatically hands Edgar a Key of Truth whenever any teammate casts a Support Skill, drastically optimizing his ultimate domain's duration. A5 (Guardian of the Antique Shop's Light): Grants him a flat +20% Max HP. Because a healer cannot help if they are down, this is a massive boost to his personal survivability. 🗡️ Best Arcs (Weapons) & Modules for Edgar As a pure healer, Edgar doesn't need to chase aggressive critical hit modifiers or offensive raw damage stats. Instead, he scales beautifully with pure survivability. Top Module Set: Tiny Big Adventure 2-Piece Bonus: HP +10%. 4-Piece Bonus: Increases Edgar's Max HP by 4% whenever he takes damage (up to 10 stacks). Casting his Ultimate instantly maxes out these stacks, providing an immediate injection to his healing scaling. Main Stat & Cartridge Priority: Look for HP% or Healing Bonus on your main stats. Substats should focus heavily on HP% and DEF% to anchor his positioning. Arc Selection: While Edgar is versatile enough to hold standard stat-sticks, equipping an defensive utility option that bolsters his position or scales off his Cosmos element will yield the cleanest results for early-game progression. 🤝 Top Edgar Team Compositions Edgar seamlessly slots into any team archetype that needs an emergency button or sustainable health recovery. 1. New Player Survival Team (Early Game Progression) Main DPS: Nanally (Handles the heavy lifting with automatic follow-up bursts). Sub-DPS/Utility: Adler (Layers the field with DoT damage and protective shielding). Healer: Edgar (Stays off-field, dropping in to channel Wild Current when health pools drop). Support: Zero (Provides crucial energy regeneration to keep the team's ultimate abilities cycling). 2. The Double Sustain Team (Hardcore Bossing) Composition: Baicang + Jiuyuan + Fadia + Edgar Strategy: Designed specifically for high-difficulty single-target boss fights. High-skill carries like Baicang are notoriously squishy; pairing them with an off-healer like Jiuyuan and a double-sustain core of Fadia and Edgar ensures your team remains standing through lethal boss phases. 3. AoE Daily Farming Squad Composition: Sakiri + Hathor + Skia + Edgar Strategy: Perfect for clearing out overworld mob packs or farming daily material waves. Sakiri and Skia handle grouping and massive AoE damage, while Edgar provides low-drama passive healing so you can clear your daily tasks without breaking a sweat. 💎 Anchor Your Vanguard Edgar anchors the early progression of the update, especially for players investing in new characters. Travelers aiming to accelerate ascension farming can explore trusted Neverness to Everness Accounts, optimize resin/stamina efficiency with expert Neverness to Everness Hourly Services, or secure consistent boss clears through reliable Neverness to Everness Boosting as farming rotations intensify. GameMarket.gg is a trusted digital marketplace for everything gaming-related. We serve the gaming community by providing secure access that enhances every gaming journey.
Neverness to Everness
Neverness to Everness Aurelia Guide: Master the Jellyfish Driver
Master the streets of Hethereau City with our definitive Aurelia build guide for Neverness to Everness (NTE)! Learn how to optimize this A-Rank Psyche main DPS with the premium Stellar Veil Arc, the complete Devil's Blood Curse module setup, and the ultimate elemental reaction teams. 🌌 Riding the Rhythm: The Ultimate Aurelia Build Guide for Neverness to Everness 🌊 Welcome to Hethereau City, where neon lights mask supernatural anomalies. In Neverness to Everness (NTE), Aurelia stands out as an incredibly fun, unique A-Rank Psyche main DPS. Floating across the battlefield on a jellyfish, she excels at continuous area-of-effect damage, utilizing heavy on-field time to cycle her unique Cadenza state and snowball her personal attack power. Whether you received her as a free 3-Day Login Reward or pulled her from the gacha, this comprehensive guide will detail how to maximize her skill priorities, lock in her best gear, and draft her absolute best team comps. 🪼 Playstyle & Core Skill Mechanics Aurelia's gameplay completely turns standard combat mechanics on their head. Rather than spamming traditional combo strings, her optimal rotation centers around high-speed movement and evasive counters. Cadenza Aria (Skill): This is the ignition switch for Aurelia's damage loop. Activating it deals AoE Psyche DMG and throws her into the Cadenza State for 12 seconds, which massively buffs her jellyfish projectiles. Staccato (Special Dodge Attack): While in the Cadenza state, you want to hold down your Dodge button. This causes Aurelia to mount her jellyfish, sprinting at high velocity while automatically firing jellyfish blasts at nearby targets. Critical Riposte (Syncopation): If an enemy strikes you while sprinting, releasing and quickly re-pressing Dodge triggers a perfect Critical Dodge. This automatically retaliates with a barrage of highly destructive jellyfish blasts that shred enemy Break meters. Crescendo (Passive): Every individual jellyfish blast that lands boosts Aurelia's ATK by 1% for 5 seconds, stacking up to 10 times (or up to 20 times at higher Awakenings). 📈 Skill Upgrade Priority To make the most of your resources, level Aurelia's kit according to how her damage scales: Basic Attack (Cappella): Absolute Priority. Both her standard floating sprint and her Critical Riposte damage scale directly with your Basic Attack level. Ultimate (Canon Chorus): Her second highest damage contributor, providing solid AoE grouping and burst. Passive (Crescendo) / Support Skill: Upgrades her generic attack scaling. Skill (Cadenza Aria): Leave this for last, as the duration and core buff parameters do not scale with leveling. 🗡️ Best Arcs (Weapons) for Aurelia Aurelia is an Attack-scaling Esper who thrives on Critical Hits. Look for Arcs that reward rapid, multi-hit playstyles. Stellar Veil (S-Tier / Best-in-Slot): Provides a clean ATK% substat and gives a massive +12% to +21% Psyche DMG bonus. Even better, dealing Psyche damage stacks her CRIT DMG up to 10 times, pairing perfectly with her high-frequency projectile loop. Oraora! (A-Tier / F2P Budget): An excellent accessible option that increases Basic Attack DMG by 2% to 3.6% per hit, stacking up to 10 independent times. Since she relies on her Staccato sprint, this is a top-tier budget choice. 🧩 Best Modules & Console Setup Aurelia's cartridge setup requires specific geometry to take advantage of her passive attribute buffs. The Optimal Set: Devil's Blood Curse 2-Piece Set: Psyche DMG +10%. 4-Piece Set: Increases total damage output by 18%. This bonus doubles to 36% if the target is afflicted with either the Nova or Stain status effects. The Console Trick: Aurelia's unique console bonus increases her ATK by 10% for every single Type III (3-block) module equipped. The Devil's Blood set natively requires two Type III blocks. Fill out the remaining blank spaces in your matrix with standalone Type III modules to stack up to a permanent +40% ATK bonus. Stat Priority: Focus on a CRIT Rate Circlet, with Psyche DMG% or ATK% on your Sands and Goblet. Substats should prioritize CRIT Rate > CRIT DMG > ATK% > Universal DMG%. 🤝 Top Team Compositions Because Aurelia demands extensive field time to cruise on her jellyfish, she conflicts with other selfish on-field carries. She needs off-field supports that enable the Nova or Stain reactions required to double her module damage. 1. The Ultimate "Charged" Team (Premium) Main DPS: Aurelia Sub-DPS: Hathor (Triggers the Stain reaction with Aurelia, applying a heavy damage vulnerability debuff to targets). Enabler: Zero (Helps Hathor trigger Remora, which effectively slows down aggressive targets for 12 seconds and grants the team extra Crit Rate against them). Support/Healer: Jiuyuan (Triggers Blossom and Charged to restore your ultimate energy back into the loop while healing at Awakening 1). 2. The Pure "Nova" Team Composition: Aurelia + Daffodil + Haniel + Fadia Strategy: This setup uses Daffodil to trigger the raw Nova cycle to shatter enemy boss shields instantly. Haniel provides major Attack scaling buffs, while Fadia applies damage reduction shields so you never have to waste your precious stamina dodging normally. 💎 Leveling Your Journey Neverness to Everness anchors the early progression of the update, especially for players investing in new characters. Travelers aiming to accelerate ascension farming can explore trusted Neverness to Everness Accounts, optimize resin/stamina efficiency with expert Neverness to Everness Hourly Services, or secure consistent boss clears through reliable Neverness to Everness Boosting as farming rotations intensify. GameMarket.gg is a trusted digital marketplace for everything gaming-related. We serve the gaming community by providing secure access that enhances every gaming journey.
Neverness to Everness
Earn Fons Fast Best Tips and Tricks
Master the economy of Neverness to Everness with our ultimate tips and tricks for earning Fons fast. Discover secret safe locations, heist strategies, and passive income methods to quickly amass wealth and dominate the streets of Hethereau today! Fons serve as the absolute lifeblood of Hethereau in Neverness to Everness (NTE). Whether you are looking to purchase luxurious properties, set up lucrative businesses, deck out your space with premium furniture, or buy essential materials through the Hunter Exchange, you are going to need a massive stockpile of this primary currency. Gathering wealth does not have to be a slow, agonizing grind if you know exactly where to look. To help you become a high-roller in the city, we have compiled the ultimate compilation of tips and tricks designed to flood your digital wallet with Fons in record time. 💰 The Ultimate Heists and Secret Safes If you want to make an astronomical amount of money right out of the gate, your absolute first priority should be hunting down the Secret Vaults scattered throughout Hethereau. There are currently nine known vaults hidden across the map, and taking just ten to fifteen minutes to track them down will inject a staggering 470,000 Fons directly into your account. Once you have cleared out the safes, you should immediately direct your attention to the Pink Paws Heist. Participating in this thrilling weekly activity is one of the most lucrative tips and tricks available, allowing you to hit a hard cap of 1,000,000 Fons every single week. A full run only takes about seven to eight minutes, meaning you can casually max out your weekly earnings in roughly an hour of dedicated playtime. 🎵 Rhythm Riches and Weekly Boss Cashouts When you have exhausted your weekly heist limits and opened all the vaults, the Super Sound rhythm game becomes your best friend for quick, repeatable income. By specifically replaying the final track and achieving an S-Rank, you can effortlessly farm 20,000 Fons every two minutes. This makes Super Sound the absolute fastest and most consistent method for burning through your City Stamina while maximizing profits. Additionally, do not forget to visit your property and interact with the Blind Mammon plushie once a week. Defeating the Mammon boss in the weekly Realm of Mammon challenge will grant you a rapid cashout of up to 100,000 Fons for just a few minutes of combat, adding a massive boost to your routine earnings. ☕ Passive Income and City Deliveries For players who prefer a steady stream of wealth while focusing on other aspects of the game, setting up The Cafe by Origen is an absolute must. Keeping your cafe actively stocked ensures you are passively generating over 4,800 Fons daily while you are completely away from the screen. If you prefer active gameplay, grinding out Special City Deliveries is incredibly reliable, rewarding between 10,000 to 16,000 Fons per trip. As you explore the city and complete these tasks, remember to turn in your passively collected Oracle Stones to Blackbird at the Witch's Tower; reaching even-numbered intervals provides a quick 30,000 Fon bonus. For a highly niche but effective combat strategy, utilizing Chiz's holding basic attack allows you to literally siphon money directly from enemies, granting up to a hard cap of 250,000 Fons over the course of a week. Combining these active and passive tips and tricks guarantees you will never be short on cash in Hethereau again! Mastering your economy anchors the early progression of the update, especially for players investing in new characters. Travelers aiming to accelerate ascension farming can explore trusted Neverness to Everness Accounts, optimize resin/stamina efficiency with expert Neverness to Everness Hourly Services, or secure consistent boss clears through reliable Neverness to Everness Boosting as farming rotations intensify. GameMarket.gg is a trusted digital marketplace for everything gaming-related. We serve the gaming community by providing secure access that enhances every gaming journey.
Neverness to Everness
The Best Chiz Build Guide
Welcome to the ultimate Chiz build guide for Neverness to Everness! Discover the exact details needed to optimize this Cosmos DPS with the perfect Arcs, Cartridges, and Charge team synergies to dominate the battlefield today. Welcome to the definitive pinpoint Chiz build guide for Neverness to Everness! As a powerful Cosmos DPS, Chiz stands out not just for her damage potential, but for her highly unique "Grain" and "Fons" economy mechanics. While her stock market-like playstyle might seem daunting at first glance, mastering her kit is incredibly rewarding. To ensure you are fully prepared to execute her powerful market-crashing mechanics without wasting any resources, this comprehensive guide will break down the exact, details you need to forge Chiz into an unstoppable force. 💰 Arcs and Cartridges To maximize Chiz's raw damage output, selecting the correct equipment is the foundational step of this guide. Here are the exact gear priorities you need to target: Best-in-Slot Arc (Contemplative Cat): Increases her Cosmos DMG by 2.5% for every 100,000 Fons she holds in your inventory, up to a maximum of 10 stacks. You will need 1,000,000 Fons to fully maximize this buff. Alternative Arc (Cosmos Daze, Wild Reverie): A highly accessible option that provides a flat 18% damage increase for 10 seconds after casting a Support Skill. Best Cartridge Set (Lost Radiance): The two-piece set provides a 10% Cosmos DMG boost, while the legendary four-piece effect allows her to completely ignore 25% of an enemy's defense for 20 seconds after casting her Ultimate. Target Stats: Prioritize CRIT Rate as your main stat since she naturally gains up to 50% Cosmos DMG from her Bonus Module. Aggressively hunt for ATK%, DMG, and flat ATK substats to round out her offensive capabilities. 📈 Combat Mechanics and Rotations Understanding the rhythm of Chiz's "Grain" mechanics is the most rewarding aspect of this gameplay guide. Here is the pinpoint breakdown of her optimal combat flow: Skill Priorities: Strictly prioritize her Skill, Pink Paws Priority Principe, as it is her primary source of damage, followed closely by her Zero-Sum Game Ultimate. Grain Consumption: You can hold down her Skill button to continuously spin, draining Grain for massive continuous damage. You must ensure her Grain never falls into the negative, as this will severely throttle her DPS. Ultimate Reset: Once her Grain is nearly depleted, unleash her Ultimate to temporarily reset her Grain count back to 15,000. The Burst Combo: During the Ultimate window, execute a combo of casting her Skill followed by two basic attacks. Repeat this exact sequence three times to maximize the buff window before swapping back to your supports. 🤝 The Ultimate Charge Team Chiz functions brilliantly as a specialized on-field Cosmos DPS who dictates the pace of the battle. Here is the pinpoint optimal team setup within this guide to dominate the endgame: The Main DPS (Chiz): Requires significant on-field time to weave her basic attacks and held skills to manage her Grain economy. The Sub-DPS Units (Hathor and Jiuyuan/Mint): By combining Anima and Lakshana characters, this team excels at triggering the Charge Eclipse Cycle, which helps Chiz regain her Ultimate significantly faster. The Defender (Adler): Provides crucial shielding support to ensure Chiz survives her lengthy spin animations without fatal interruptions. Alternative Synergy: If a Charge team is too difficult to assemble, slotting Chiz into a standard Blossom Team is her second-best choice for consistent damage output. Mastering the Chiz build anchors the early progression of the update, especially for players investing in new characters. Travelers aiming to accelerate ascension farming can explore trusted Neverness to Everness Accounts, optimize resin/stamina efficiency with expert Neverness to Everness Hourly Services, or secure consistent boss clears through reliable Neverness to Everness Boosting as farming rotations intensify. GameMarket.gg is a trusted digital marketplace for everything gaming-related. We serve the gaming community by providing secure access that enhances every gaming journey.
Neverness to Everness
Advanced Zero Strategy: Mastering Blossom and Remora Synergy
Master the Cosmos with our ultimate Zero build guide for Neverness to Everness (NTE)! Explore deep tactical rincian on skill priorities, top-tier Arcs like "The Rain That Shook the World," and the best team compositions to maximize the Esper Cycle during the April 2026 global launch. ⚔️ Advanced Tactical Guide: Mastering Zero as a Cosmos Driver in NTE 🌌 As an S-Rank character with the Cosmos attribute, Zero is engineered to be the "engine" of your squad. His primary function is not merely to provide momentary burst damage, but to act as a dedicated on-field driver who maintains the flow of the Esper Cycle throughout the battle. With the global launch on April 29, 2026, understanding his frame-by-frame mechanics will give any Traveler a significant edge. 🛠️ Deep Mechanic Analysis & Skill Priority Zero relies on high-frequency attacks to trigger elemental reactions consistently. Appraise and Engrave (Skill): The heart of his rotation. This skill provides Area of Effect (AoE) damage and an additional hit equal to 200% ATK on the first target, provided the enemy's level does not exceed Zero's own. Divide by Zero (Ultimate): The pinnacle of Zero's damage output. His passive, Anomaly Perception, increases the damage of this Ultimate by 25%, making it a very stable damage conversion tool. Upgrade Priority: Focus on Skill > Ultimate > Basic Attack. The Skill is upgraded first to accelerate the Esper Cycle gauge, while the Ultimate is leveled to increase the damage payoff at the end of your rotation. 🗡️ Arc & Module Selection (The Gear Build) Choosing the right equipment is crucial to covering Zero's energy needs and critical hit reliability. Best-in-Slot Arcs (Weapons): The Rain That Shook the World (S-Tier): This weapon provides a 42% Cosmos DMG increase for both Skills and Ultimates. Additionally, the +72 Cycle Intensity ensures Zero triggers reactions faster without needing long setups. Hethereau’s Keeper (Boss Specialist): Provides a 25% damage boost specifically against Bosses and summons "Officer Whisker" to provide extra attacks for 30 seconds. Day Off (Farming/Overworld): Grants a massive 50% ATK boost and restores Ultimate Energy upon defeating enemies, making it ideal for multi-wave content. Optimal Module Setup: Lost Radiance: This set is the definitive choice for Zero. 2-Piece Bonus: +10% Cosmos DMG. 4-Piece Bonus: Ignores 25% of enemy DEF for 20 seconds after using an Ultimate. Stat Priority: Prioritize Cycle Intensity on the main stat, followed by CRIT Rate/DMG, ATK%, and DMG Bonus on substats. 🧬 Awakening Priority (Power Tree) If you obtain duplicates, the following awakening order is the most efficient for performance: Finding the Calling: Grants 8 Ultimate Energy every time the Skill is used, significantly smoothing out his rotation. Anomalies Record: Grants +50% Crit Chance to his Ultimate, making his final burst far more consistent even with imperfect module stats. Deceptive Liberation: Increases the extra damage ratio of his Skill to 300% ATK. 👥 Meta Team Compositions Zero performs best in teams that can provide continuous Anima elemental pressure. Premium "Complete" Team: Zero (Driver) + Nanally (Sub-DPS) + Hathor (Support) + Fadia (Healer). Nanally increases the number of Lebenstamm for Blossom reactions, while Hathor strengthens Remora effects. Fadia ensures team survival with healing and HP buffs. AoE Blossom Team: Nanally + Jiuyuan + Zero + Sakiri. This team focuses on Jiuyuan's massive area damage, with Zero providing the Cosmos triggers and Sakiri handling enemy grouping. 💎 Maximize Your Journey Zero is a vital foundation for early update progression. Travelers aiming to accelerate their character development can explore Neverness to Everness Accounts, optimize stamina efficiency with Neverness to Everness Hourly Services, or ensure victory against difficult bosses through Neverness to Everness Boosting as the intensity of battles in Hethereau rises. GameMarket.gg is a trusted digital marketplace for all your gaming needs. We serve the community by providing secure access that enhances every gaming journey.
Neverness to Everness
Master the NTE Fishing Minigame: Tips, Tricks, and Gear Upgrades
Take a break from the Hethereau action with our ultimate Neverness to Everness (NTE) Fishing Guide! Learn how to unlock the Sea Angler hobby at City Tycoon Level 3, master the tension minigame, and locate every fish from the Golden Arowana to the White Dragon King. Maximize your Scale Coins today! 🎣 Cast Away: The Ultimate Neverness to Everness Fishing Guide 🌊 While Neverness to Everness (NTE) is packed with high-octane combat, the city also offers a chance to slow down. Fishing is a rewarding side activity that helps you grow your City Tycoon level, earn unique currency, and discover rare aquatic life across Hethereau's diverse districts. 🔑 How to Unlock Fishing (Sea Angler) Fishing is tied directly to your City Tycoon progression. You will first encounter the hobby system during the "Good Morning Hethereau" quest when speaking with the NPC Chiz. City Tycoon Unlock Order: Level 2: Race Challenges Level 3: Fishing (Sea Angler) Level 4: Cafe by Origen To reach Level 3, you must earn Fons by completing other hobbies or finding safes hidden throughout the city. Once unlocked, navigate to the Hethereau Hobbies menu, select Sea Angler, and the game will guide you to the nearest active fishing spot. 🕹️ How to Master the Fishing Minigame Fishing in NTE involves a balance of timing and precision. Once you arrive at a spot, interact with the water and select your preferred rod and bait. Cast: Tap the hook icon to throw your line. Hook: Wait for a fish to bite, then tap again to hook it. Tension Control: A green bar will appear at the top of the screen, shifting left and right. The Goal: Use the on-screen controls to keep your yellow marker inside the moving green zone. Tire Them Out: Maintain your position in the green zone until the fish is exhausted and successfully caught. Good to Know: There is a known community tip where clicking the chat box (located near the bottom-left above your UID) immediately after hooking a fish may bypass the minigame. However, using this may be considered exploitation, so use it at your own discretion. 💰 Scale Coins and the Fish Market Caught fish are stored in your Fish Hold, which can be accessed through the fishing menu or the Sea Angler hobby tab. Selling Fish: You can sell your catch directly for Scale Coins, the exclusive fishing currency. Scale Coins: This currency is reinvested to purchase higher-quality rods and specialized bait. Daily Fish Market: Check the Fish Market daily in your hobbies menu. The market highlights three specific fish each day that sell for significantly higher prices. You are limited to selling six total fish (two of each highlighted species) per day at these premium rates. 📍 Key Fish Locations Different species frequent specific environments. Use this table to target the fish you need for the daily market or gear upgrades: Fish Species Primary Locations Sunfish / Red Sunfish Imaginist, Stellar Marina Koi / Red Arowana Raindrop Court, Caltrop Lake Flame Lionfish Nautili Tunnel East, Cape Square Yellowfin Tuna / Flounder Nautili Tunnel West, Azure Vista, Imaginist Golden Arowana Raindrop Court, Caltrop Lake Whalehead Fish Stellar Marina, Nautili Tunnel East, Cape Square White Dragon King Cape Square Mahi-mahi / Bluefin Tuna All Fishing Spots 💎 Master the Urban Waters Fishing anchors the early progression of the update, especially for players investing in new hobbies. Travelers aiming to accelerate their City Tycoon level can explore trusted Neverness to Everness Accounts, optimize their resource gathering with expert Neverness to Everness Hourly Services, or secure rare fish catches through reliable Neverness to Everness Boosting as the Sea Angler season intensifies. GameMarket.gg is a trusted digital marketplace for everything gaming-related. We serve the gaming community by providing secure access that enhances every gaming journey.
Showing 1 of 15 from 33 Results