
Neverness To Everness News

Neverness to Everness
Neverness to Everness Aurelia Guide: Master the Jellyfish Driver
Master the streets of Hethereau City with our definitive Aurelia build guide for Neverness to Everness (NTE)! Learn how...

Neverness to Everness
Earn Fons Fast Best Tips and Tricks
Master the economy of Neverness to Everness with our ultimate tips and tricks for earning Fons fast. Discover secret...

Neverness to Everness
The Best Chiz Build Guide
Welcome to the ultimate Chiz build guide for Neverness to Everness! Discover the exact details needed to optimize this...

Neverness to Everness
Advanced Zero Strategy: Mastering Blossom and Remora Synergy
Master the Cosmos with our ultimate Zero build guide for Neverness to Everness (NTE)! Explore deep tactical rincian on...
Neverness to Everness
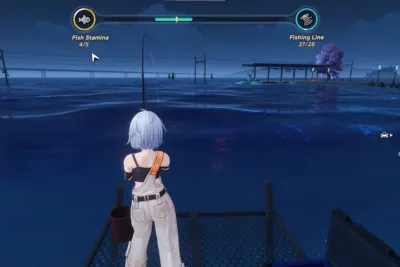
Master the NTE Fishing Minigame: Tips, Tricks, and Gear Upgrades
Take a break from the Hethereau action with our ultimate Neverness to Everness (NTE) Fishing Guide! Learn how to unlock...

Neverness to Everness
Fadia Guide: Best Arcs, Cartridges, and Modules
Unlock the secrets of the ultimate Fadia guide in Neverness to Everness! Learn how to master her HP-scaling mechanics,...

Neverness to Everness
NTE Cafe by Origen Guide: Best Passive Fons Farming
Master passive income in Neverness to Everness (NTE) with our ultimate Cafe by Origen guide! Learn how to reach City...

Neverness to Everness
NTE Pink Paws Heist Guide: Best Fons Farming Route
Master the Pink Paws Heist in Neverness to Everness (NTE)! Our 2026 farming guide provides a step-by-step optimal route...

Neverness to Everness
Best Daffodill Guide for NTE
Master the ultimate Daffodill guide for Neverness to Everness! Discover the exact details needed to optimize this Chaos...

Neverness to Everness
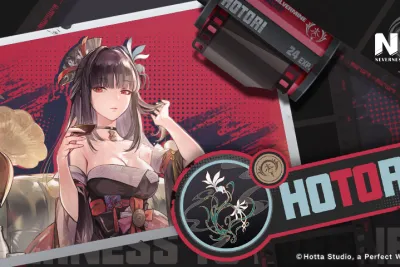
NTE 1.0 Phase 2 Update Guide and Codes
Everything new in NTE 1.0 Phase 2 — Hotori's banner, all active May 2026 codes, new events, and free rewards. Your...
Neverness to Everness
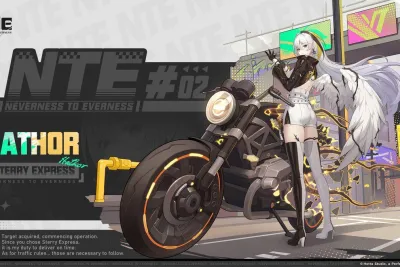
The Best Hathor Build Guide
Maximize your damage with the ultimate Hathor build guide for Neverness to Everness! Discover the exact Arcs,...
Neverness to Everness
Hotori Arc and Relic Guide: Maximize Ultimate Cosmos Damage
Master the Time Stop meta with Hotori in Neverness to Everness (NTE)! Our 2026 build guide breaks down her S-Rank...
Neverness to Everness
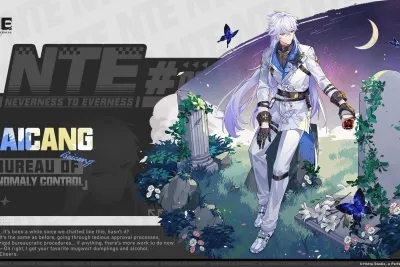
The Best Baicang Build Guide
Master Baicang With This GuideThe BeWelcome to the ultimate pinpoint Baicang build guide for Neverness to Everness!...

Neverness to Everness
NTE All Vehicles Guide: Full Car List, Prices & Unlock Guide
Stop running and start driving! Our comprehensive Neverness to Everness (NTE) All Vehicles Guide covers the full car...

Neverness to Everness
Neverness to Everness Prison Escape Guide
Find yourself locked up in Hethereau? Our detailed Neverness to Everness prison escape guide covers every meticulous...
Showing 16 of 30 from 38 Results