
News
Where Winds Meet
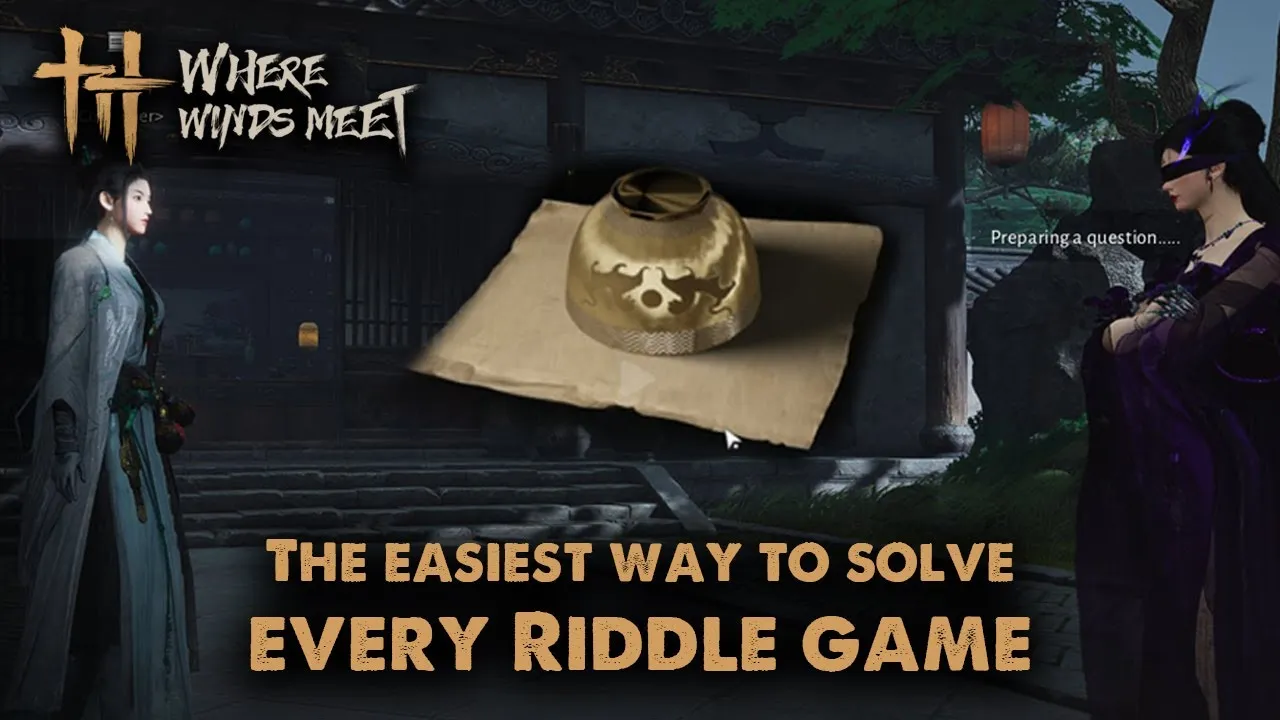
Where Winds Meet Guide to All Riddle Answers and NPC Locations
🗺️ Where Winds Meet Guide to the Jianghu’s Smartest Side Activity Riddles in Where Winds Meet look small at first glance, but they quietly become one of the most distinctive exploration loops in the game. Scattered across Kaifeng, Jadewood Court, Granary of Plenty, and Roaring Sands, these NPC encounters turn simple wandering into a scholar’s scavenger hunt, asking players to read a clue, interpret a theme, and answer with the right word before turns and time run out. What makes this Guide matter now is that riddles are no longer just flavor content for players killing time between bosses and story beats. As the world grows denser and map completion becomes more valuable, riddles start behaving like a different kind of progression track—one built on Intelligence requirements, route planning, and answer familiarity rather than combat. The more regions open up, the more useful it becomes to treat them less like random minigames and more like a collectible network you can clear efficiently. 📍 All Confirmed Riddle NPC Locations The current spread of riddle NPCs is heavily concentrated around Kaifeng and its surrounding routes, with additional placements in Jadewood Court and Roaring Sands. Each NPC has an Intelligence requirement and a Commerce Coin participation cost, which means location planning matters almost as much as knowing the answers. 🌆 Kaifeng City and Nearby Districts Wang Xiaosan — Fairgrounds, Kaifeng CityFound by the shadow puppetry stall west of the East Cross Street Boundary Stone.Requirement: Intelligence 20Cost: 20 Commerce Coins Chan Yi — Kaifeng Prefecture, Kaifeng CityLocated in a courtyard near Bai Yunsheng’s chess match.Requirement: Intelligence 40Cost: 40 Commerce Coins Sha Er — Velvet Shade, Kaifeng CityStanding beside a carriage in the Silk Veil Society area.Requirement: Intelligence 40Cost: 40 Commerce Coins Qingshan — Prosperity Haven, Kaifeng CityAlong the road leading toward Kaifeng Suburbs - North from the Sundries Market Boundary Stone.Requirement: Intelligence 40Cost: 40 Commerce Coins Ruan Shuiyan — Prosperity Haven, Kaifeng CityEast of the Palace of Supreme Oneness Boundary Stone near the temple.Requirement: Intelligence 40Cost: 40 Commerce Coins Tao Xiaoxiao — Imperial Artisan Court, Kaifeng CityNear Xiao Yuan’s general goods shop by the southwestern wall.Requirement: Intelligence 20Cost: 20 Commerce Coins Yoyo — Ghostlight Market, Kaifeng CityBy a stall near two men sitting on the ground.Requirement: Intelligence 60Cost: 60 Commerce Coins 🌾 Granary of Plenty Routes Zhang Jiu — Plainfield, Granary of PlentyAt the pier of Harborlink Crossing.Requirement: Intelligence 40Cost: 40 Commerce Coins Kutuluk — Kaifeng Suburbs - South, Granary of PlentyAlong the path leaving Wheatwind Bazaar for Masterwood Hamlet in the northwest.Requirement: Intelligence 20Cost: 20 Commerce Coins Zhang Yu — Kaifeng Suburbs - East, Granary of PlentyAlong the path going to the bridge to Stillheart Grove.Requirement: Intelligence 60Cost: 60 Commerce Coins 🌿 Jadewood Court Riddle NPCs Shi Lei — Buddha Statue Site, Jadewood CourtNear the Buddha Statue Site Boundary Stone.Requirement: Intelligence 40Cost: 40 Commerce Coins Li Rouzhu — Petalfall Crossing, Jadewood CourtStanding on the bridge.Requirement: Intelligence 40Cost: 40 Commerce Coins Peng Shizhi — South Imperial Garden, Jadewood CourtBy the lake between South Imperial Garden and North Imperial Garden.Requirement: Intelligence 60Cost: 60 Commerce Coins Liang Rongfu — Jinming Pool, Jadewood CourtBy a shed in the small town southwest of Kaifeng City, west of the Imperial Artisan Court.Requirement: Intelligence 40Cost: 40 Commerce Coins 🏜️ Roaring Sands Riddle NPCs Tian Danui — Wansheng Town, Roaring SandsNear the bridge entering South Wansheng Town.Requirement: Intelligence 40Cost: 40 Commerce Coins Tang Xiaofei — Kaifeng Suburbs - North, Roaring SandsNear the Riversong Theater Boundary Stone.Requirement: Intelligence 40Cost: 40 Commerce Coins Tao Qian — Kaifeng Suburbs - North, Roaring SandsNear the Verdant Hill Village Boundary Stone.Requirement: Intelligence 40Cost: 40 Commerce Coins Wang Li — Heavenfall, Roaring SandsStanding by a fence overlooking the river that cuts through Heavenfall.Requirement: Intelligence 40 🧠 How Riddles Actually Work The riddle system is more structured than it first appears. Each NPC gives you a short clue—usually one or two words—and then the guessing begins. You do not get infinite attempts, and the timer at the top of the screen can burn a turn if you hesitate too long. That creates three layers of pressure:the clue itself, the turn limit, and the cost of failure through Commerce Coin spending. The chatbot-style format also changes the feel of the minigame. Instead of choosing from clean multiple-choice options, you are typing guesses and trying to reverse-engineer what category the clue belongs to. Some clues point directly to animals or objects. Others are broad, poetic, or culturally loaded, which is why one clue can sometimes map to multiple possible answers depending on wording. 📚 The Most Useful Answer Patterns to Learn First The full riddle pool is huge, but the fastest way to improve is not memorizing every line one by one. It is learning the game’s answer habits. 🐾 Animal and Creature Clues A massive part of the riddle bank points toward animals, especially when the clue references habitat, behavior, or body traits. Examples include: desert → scorpion / populus euphratica black and white skin → penguin camouflage → chameleon / flounder digging → mole long neck → giraffe migration → salmon / reindeer snow mountain → snow leopard upright swimming → seahorse These are often easier to solve once you identify whether the clue is describing movement, terrain, or a physical feature. 🌸 Plant, Flower, and Herbal Clues Another huge section of the answer pool is plant-based, especially around medicinal, seasonal, or color-driven clues. Examples include: bud → clove / apricot blossom deep love → rose early morning → morning glory flowers before leaves → plum blossom fresh fragrance → jasmine / garland chrysanthemum medicinal → licorice / ganoderma lucidum / peony flowers poisonous → oleander yellow flower → chrysanthemum / sunflower This category is where many players lose time, because the game loves overlapping flower symbolism. 🏺 Everyday Objects and Cultural Items Many answers are neither creatures nor plants, but common items tied to daily life, scholars, or folk customs. Examples include: balance → tumbler bedroom furniture → dressing table braided decoration → chinese knot container → sugar bowl / flagon / salt shaker face → mask illumination → candle / lantern jewelry → necklace / pearl pray for blessings → amulet time → hourglass wooden → box / comb / desk / bed These clues often look vague, but they are usually narrower than they seem once you recognize the object family. ⚔️ Martial, Scholar, and Wuxia-Themed Clues This is the category that makes the minigame feel specifically Where Winds Meet. Examples include: aim, throw → tou hu boxing / martial arts → tai chi general → mulan weapon → spear / sword war spear → spear green steel → sword two-handed weapons → bow and arrow martial arts, boxing → tai chi These clues tend to reward players who think in terms of cultural symbols rather than literal descriptions. 🧭 The Answers Worth Remembering Immediately If you want the fastest practical improvement, memorize the answers that appear across many clue families or show up in multiple wording variants. The most reusable answers include:horse, lantern, chinese knot, tumbler, tai chi, amulet, dressing table, bamboo rat, watermelon seeds, moon cake, fish basket, fishing rod, spear, sword, candied haws, wolfberry, rose, sunflower, elephant, giraffe, penguin, crocodile, mole, scorpion, turtle, eagle, otter, lantern, candle, vase, desk, hourglass, bracelet, necklace, boots, and mask. These repeat across enough clue types that they function like your core vocabulary for the minigame. 💰 The Hidden Resource Cost Behind Riddles The part many players underestimate is the economy behind this side activity. Every attempt costs Commerce Coins, and higher-Intelligence NPCs can become surprisingly expensive if you guess carelessly. Since some clues are broad and some answers overlap, a bad guessing session can chew through your coin stock faster than expected. That is why riddle completion is not only about knowing answers—it is about entering with a coin plan. 🎯 Best Way to Restock Commerce Coins The cleanest refill route is tied to Meow Meow challenges. Complete any two Meow Meow challenges to earn Bells, then head to Meow Meow Temple on Halo Peak. There, you can exchange 10 Bells for 10 Small Boxes of Commerce Coins, with each box containing 2,500 coins, for a total of 25,000 Commerce Coins. That changes the side activity from coin-draining to sustainable, especially if you are clearing multiple riddle NPCs in one route. 🧩 Blueprint: How to Clear Riddles Efficiently Start by grouping riddle runs by region rather than solving them one at a time as you randomly stumble into them. Kaifeng City alone has enough density that you can build a clean route through Fairgrounds, Kaifeng Prefecture, Velvet Shade, Prosperity Haven, Imperial Artisan Court, and Ghostlight Market in one focused session. Before you start, make sure your Intelligence thresholds actually match the NPCs you plan to visit. The biggest time waste is reaching a riddle giver only to realize your stat gate is too low. Treat the clue list like categories, not trivia. If a clue sounds like habitat, think creature. If it sounds ceremonial, think object. If it sounds seasonal or medicinal, think plant first. Most importantly, do not brute-force expensive riddles. The 60-coin NPCs punish bad guessing habits harder than the early 20-coin ones. If the clue feels broad, pause and classify it before typing. Done properly, riddles become one of the cleanest low-combat collection loops in the game—and one of the easiest ways to turn map wandering into structured completion. If you’re pushing map completion across Kaifeng and beyond, strengthen your Jianghu journey with Where Winds Meet Accounts, speed up progression through dedicated Hourly Services, or sharpen your character faster with trusted Boosting. As the world keeps expanding and side systems grow denser, efficient exploration matters more than ever. GameMarket.gg is a trusted digital marketplace for everything gaming-related. We serve the gaming community by providing secure access that enhances every gaming journey.
Honkai Star Rail
Evernight Build Guide: Relics, Stats, Eidolons, and Team Synergy
Evernight Build Guide: Best Relics, Light Cones, Teams, and More Evernight enters Honkai: Star Rail as the kind of character who makes Remembrance teams feel less like a lineup and more like a living machine. She does not simply add damage from the side. She feeds memosprites CRIT DMG, adds teamwide Vulnerability, converts her own Max HP into pressure, and turns every additional summon on the field into a reason for the whole team to hit harder. That immediately gives her a very different build identity from standard sub DPS units. What really changes with Evernight is how players start valuing field presence inside Remembrance teams. She rewards not just good relics or a premium Light Cone, but a full battlefield where multiple memosprites are constantly active and constantly benefiting from her buffs. In other words, Evernight is not built to be slotted anywhere and judged in isolation. She is built to make a full Remembrance shell feel complete, and when that shell is assembled properly, her value snowballs fast. Evernight Overview: What She Actually Brings Evernight is a 5-star Ice character on the Path of Remembrance, designed as a sub DPS and support whose kit scales with Max HP and revolves around her memosprite, Evey. Core profile Element: Ice Path: Remembrance Keywords: Max HP Based Damage / Memosprite Damage Support Role: Sub DPS / Support She does three important jobs at once: buffs allied memosprites with massive CRIT DMG applies strong Vulnerability to enemies contributes her own HP-scaling damage through Evey and Memoria stacks That dual identity is the reason Evernight is so valuable. She is not only helping the main carry. She is also adding her own damage in a way that naturally scales with the same team style she wants to support. Evernight’s Core Mechanic: Evey, Memoria, and HP Loss The heart of Evernight’s kit is her Talent. Whenever Evernight or Evey loses HP, both gain: a large CRIT DMG buff 1 stack of Memoria Once Memoria reaches 16 stacks, Evey immediately attacks, dealing damage based on its Max HP before disappearing. The higher the stack state and the stronger the setup around it, the harder this trigger hits. That means Evernight’s combat loop is not about steady chip damage. It is about building toward repeated memosprite detonations while keeping her support buffs online. Skill Her Skill consumes 10% HP to: summon Evey if absent heal Evey if already present For 3 turns, all memosprites gain +60% CRIT DMG, and with her third bonus ability, this can rise as high as +125% when four memosprites are present. Ultimate Her Ultimate: summons Evey instantly damages all enemies activates Darkest Riddle During Darkest Riddle: enemies take more damage from the whole team Evernight and Evey’s abilities are significantly strengthened SP economy Evernight is unusually comfortable in skill-hungry teams because: her Skill does not consume SP her Ultimate generates SP Evey’s Enhanced Skill also generates SP That alone makes her much easier to pair with aggressive Remembrance carries than many other premium sub DPS options. Evernight’s Built-In Stats: Why She Wants CRIT DMG More Than CRIT Rate One of the easiest mistakes players can make when gearing Evernight is overinvesting in CRIT Rate. She already gets a huge amount of it from her own kit. Built-in bonus stats 53.7% CRIT Rate 88.3% CRIT DMG 160% Evey CRIT DMG 50%+ DMG bonus This is why Evernight relic building is much more about: Max HP CRIT DMG keeping enough CRIT Rate to feel stable in battle rather than trying to force a traditional DPS stat line. As long as she reaches roughly 70%–80% CRIT Rate in battle, the smarter play is usually to pour the rest of that investment into CRIT DMG and HP. Skill Priority: What to Upgrade First Evernight’s kit is very clear about what matters most. Best skill priority Skill > Ultimate > Memosprite Skill > Memosprite Talent > Talent > Basic Attack Skill This comes first because it is the engine of the build: it summons or stabilizes Evey it provides the huge memosprite CRIT DMG buff it defines her support identity Ultimate This comes second because Darkest Riddle is a major part of both her team support and her personal damage window. Memosprite Skill This matters next because Evey is not decorative. Evey is one of the main reasons Evernight’s damage profile works. Memosprite Talent Important for maximizing the value of her summon, but still behind the bigger support levers. Talent Still useful, still worth leveling, but after the major performance pieces are already in place. Basic Attack Lowest priority. It is not what defines her output and can safely wait unless you are overflowing with resources. Key Materials to Prefarm Evernight is not cheap, and several of her core materials create a real bottleneck if you wait too long. Priority materials Daythunder Anamnesis x12 Sea Siren’s Torn Fin x65 Flower of Ālaya x18 / 69 / 139 The practical takeaway is simple: Daythunder Anamnesis is weekly locked Sea Siren’s Torn Fin is new to 3.5 and likely understocked Flower of Ālaya is the biggest stamina sink If you plan to pull Evernight seriously, the Weekly Boss and Flower of Ālaya farm should be your first prep targets. Best Light Cones: Signature, Premium Alternative, and 4-Star Options Evernight wants Light Cones that support her two identities at once: HP-scaling sub DPS Remembrance team enabler That means the best options generally give her: Max HP CRIT DMG memosprite utility team amplification Best-in-Slot Light Cone To Evernight’s Stars This is the cleanest and strongest option by a wide margin. It gives: Max HP +30% all allied memosprites ignore 20% DEF Evernight and Evey gain 30% DMG Evernight recovers 8 Energy when her memosprite disappears This is not just a personal damage cone. It is a full Remembrance-support Light Cone dressed as a DPS weapon, and that is exactly why it is so strong on her. It supports: her HP scaling her own damage the team’s memosprite damage smoother Ultimate cycling If you want the most complete version of Evernight, this is the cone. Best Premium Alternative Make Farewells More Beautiful The article text lists the wrong name image line, but the effect is what matters. This cone gives: Max HP +30% DEF ignore after the wearer or memosprite loses HP during their own turn action advance when the memosprite disappears That is excellent on Evernight because HP loss is already part of her natural loop. This means the cone does not ask her to change anything. It simply turns her existing rhythm into more damage. If you miss signature, this is one of the best fallback choices. Best 4-Star Option The Flower Remembers This is the best practical 4-star cone for players who want strong offensive performance. It gives: CRIT DMG +24% memosprite CRIT DMG +24% That is exactly the kind of direct scaling Evernight wants, especially because she already solves so much of her CRIT Rate internally. Other Budget Option The Story’s Next Page This is more of a functional fallback than a true premium replacement. It gives: Max HP +16% healing output after memosprite attacks The HP is useful, but the rest is more utility-oriented and less explosive than the better options above. Still, it remains usable for lower-investment accounts. Best Relic Set: World-Remaking Deliverer Evernight’s best relic set is one of the easiest recommendations in the build because it was practically made for her. World-Remaking Deliverer 2-Piece CRIT Rate +8% 4-Piece After using Basic ATK or Skill, if the memosprite is on the field, increases Max HP of the wearer and memosprite by 24%, and increases all allies’ DMG by 15% until the wearer’s next Basic ATK or Skill This set does everything Evernight wants: helps stabilize CRIT Rate boosts HP scaling boosts Evey boosts the whole team rewards the exact actions Evernight already wants to take It is the rare relic set that supports both halves of her identity equally well. Best Ornament Set: Bone Collection’s Serene Demesne Bone Collection’s Serene Demesne 2-Piece Max HP +12% when Max HP reaches 5000 or higher, increases the wearer’s and memosprite’s CRIT DMG by 28% This is the perfect planar set for Evernight because it turns a stat she already wants—HP—into even more offensive value. That matters a lot on her because HP is not just durability. It is also damage, memosprite damage, and set activation all at once. The practical goal with this set is clear:get Evernight above 5000 HP in battle and let the rest of the build ride from there. Main Stats and Sub Stats: How to Gear Evernight Properly Evernight’s stat priorities are much cleaner than they first appear. Main stats Body: CRIT DMG% or HP% Feet: HP% Rope: Energy Regen% or HP% Orb: Ice DMG% Body CRIT DMG Body is the more aggressive option and usually the better one once your HP threshold is stable. HP% Body is acceptable if relic quality or team context makes it easier to hit consistency breakpoints. Feet HP% is the standard recommendation here because Evernight scales so naturally with it. Rope Energy Regen Rope is the smoother option if you want more reliable Darkest Riddle uptime. HP Rope is still strong for pure damage scaling. Orb Ice DMG remains the best general recommendation for her personal output. Sub stat priority HP% / Flat HP / CRIT DMG > CRIT Rate That is the right order for most serious builds. You are trying to: get her comfortably above 5000 HP stabilize battle CRIT Rate then push CRIT DMG as high as possible Because her kit gives so much CRIT Rate already, CRIT DMG is usually the better substat payoff. Recommended Endgame Targets The most important real benchmark is this: Minimum practical target 5000+ Max HP in battle After that, the build should push toward: stable in-battle CRIT Rate around 70%–80% as much CRIT DMG as relic quality allows enough Energy support to keep Ultimate timing comfortable Evernight is one of those characters who feels much better once the stat floor is crossed. Below that HP threshold, the build feels incomplete. Above it, the whole kit starts to make sense. Eidolon Priorities: Which Ones Actually Matter Evernight’s Eidolons are powerful, but they are not all equally important. E1 – Sleep Tight, the Night Dreams Long This is her biggest and best Eidolon for most players. It massively increases memosprite damage against enemies and sharply improves her support identity in the teams that want her most. For Remembrance teams, this is the first truly major jump. Rating: Most Recommended E2 – Listen Up, the Slumber Speaks Soft This improves: Evernight’s own rotation her Memoria generation the duration of Darkest Riddle the consistency of her damage This is a strong personal and rotational upgrade, especially if you want her to contribute more as an actual damage dealer. Rating: Highly Recommended E4 – Wake Up, the Tomorrow is Yours This adds Weakness Break efficiency for memosprites, which is situational and mainly valuable in Break-centric or Apocalyptic Shadow contexts. It is not bad, but it is not a priority for most players. Rating: Not Recommended E6 – Like This, Always This is the luxury ceiling. It gives: all allies 20% RES ignore better Memoria refund stronger overall team output much smoother personal rotation It is extremely strong, but this is spender territory. Rating: Highly Recommended Evernight Eidolons vs Signature Light Cone The most important investment question around Evernight is whether to prioritize her signature or her Eidolons. Signature Light Cone Her signature is extremely valuable because it: boosts her HP massively boosts her own damage gives the whole Remembrance team memosprite DEF ignore This is one of the rare support cones that also feels like a teamwide offensive relic piece. E1 E1 is her strongest Eidolon and the best direct boost to her support value in Remembrance lineups. Because of that, the real investment tension is between: getting her signature for immediate complete build performance reaching E1 for the stronger teamwide memosprite amplification Recommended pull order E0S1 > E1S1 > E1S5 > E4S5 > E6S5 That ordering reflects the reality of her kit: signature is incredibly high-value immediately E1 is the most important Eidolon later Eidolons are stronger for luxury optimization than for basic function Best Team Recommendations Evernight is one of the most restrictive team builders in Star Rail right now, but that is not a weakness if you are building exactly the kind of team she wants. She is strongest when the field is crowded with memosprites and the entire team is designed to let her support package reach full power. Best Team: Castorice All-Remembrance Team Castorice / Evernight / Remembrance Trailblazer / Hyacine This is the cleanest and most natural team for Evernight. Why it works Castorice serves as the main DPS and fully benefits from memosprite-focused buffs Evernight boosts CRIT DMG, adds Vulnerability, and contributes her own HP-scaling sub DPS Remembrance Trailblazer adds True Damage and helps support the overall Remembrance structure Hyacine sustains the team while adding another memosprite presence and helping HP-focused synergy This lineup maximizes the number of memosprites on field, which means it maximizes one of the most important parts of Evernight’s skill scaling. This is her best home. Cyrene–Evernight Team Cyrene / Castorice / Evernight / Hyacine This is one of the most exciting premium shells for players who want a full layered Remembrance machine. Why it works Cyrene accelerates tempo and action flow Evernight amplifies memosprite value and helps keep offensive pressure rising Castorice remains the central carry Hyacine supports sustain and field presence The real appeal of this team is the feedback loop. Cyrene and Evernight both help make the overall engine feel faster, fuller, and more explosive. Instead of one support holding up the team, the whole structure feeds itself. Evernight Main DPS Team Evernight / Remembrance Trailblazer / Sunday / Hyacine If players do not have Castorice or another premium Remembrance carry, Evernight can step into the main DPS role more effectively than her “sub DPS” label suggests. Why it works Evernight becomes the active offensive centerpiece Remembrance Trailblazer adds support damage and synergistic pressure Sunday accelerates turns and lets her stack Memoria more quickly Hyacine sustains and boosts Max HP This is not the team that shows her highest support ceiling, but it does show how self-sufficient her own damage profile can become when properly enabled. Blueprint: How to Build Evernight the Right Way Step 1: Build Her as a Remembrance Specialist, Not a Generic Sub DPS She is strongest when the team is built around memosprites. That should shape every gearing and team decision. Step 2: Hit the 5000 HP Threshold First Her ornament, her damage, and her memosprite scaling all get cleaner once that line is crossed. Step 3: Use CRIT DMG as the Main Offensive Push Her kit already supplies a lot of CRIT Rate. Do not waste relic quality overbuilding what she already gives herself. Step 4: Prioritize Signature or E1 Depending on Budget Signature makes the whole build complete immediately. E1 is the best Eidolon if you want to maximize Remembrance team value. Step 5: Put Her in Teams With Real Memosprite Density Evernight is not meant to be diluted into generic comps. She wants a battlefield where her support scaling actually has room to breathe. Trailblazers looking to bring Evernight online faster can strengthen their roster with optimized Accounts, accelerate relic and trace farming through expert Hourly Services, or prepare full Remembrance lineups with trusted Boosting before her strongest teams fully come together. Evernight is not the kind of character who dominates the screen alone. She is more dangerous than that. She stands beside a team full of summoned memory, turns each one sharper, and quietly makes the whole formation hit like it was built to end the fight two turns earlier. That is what makes her one of the most important Remembrance pieces to build correctly. GameMarket.gg is a trusted digital marketplace for everything gaming-related. We serve the gaming community by providing secure access that enhances every gaming journey.

Where Winds Meet
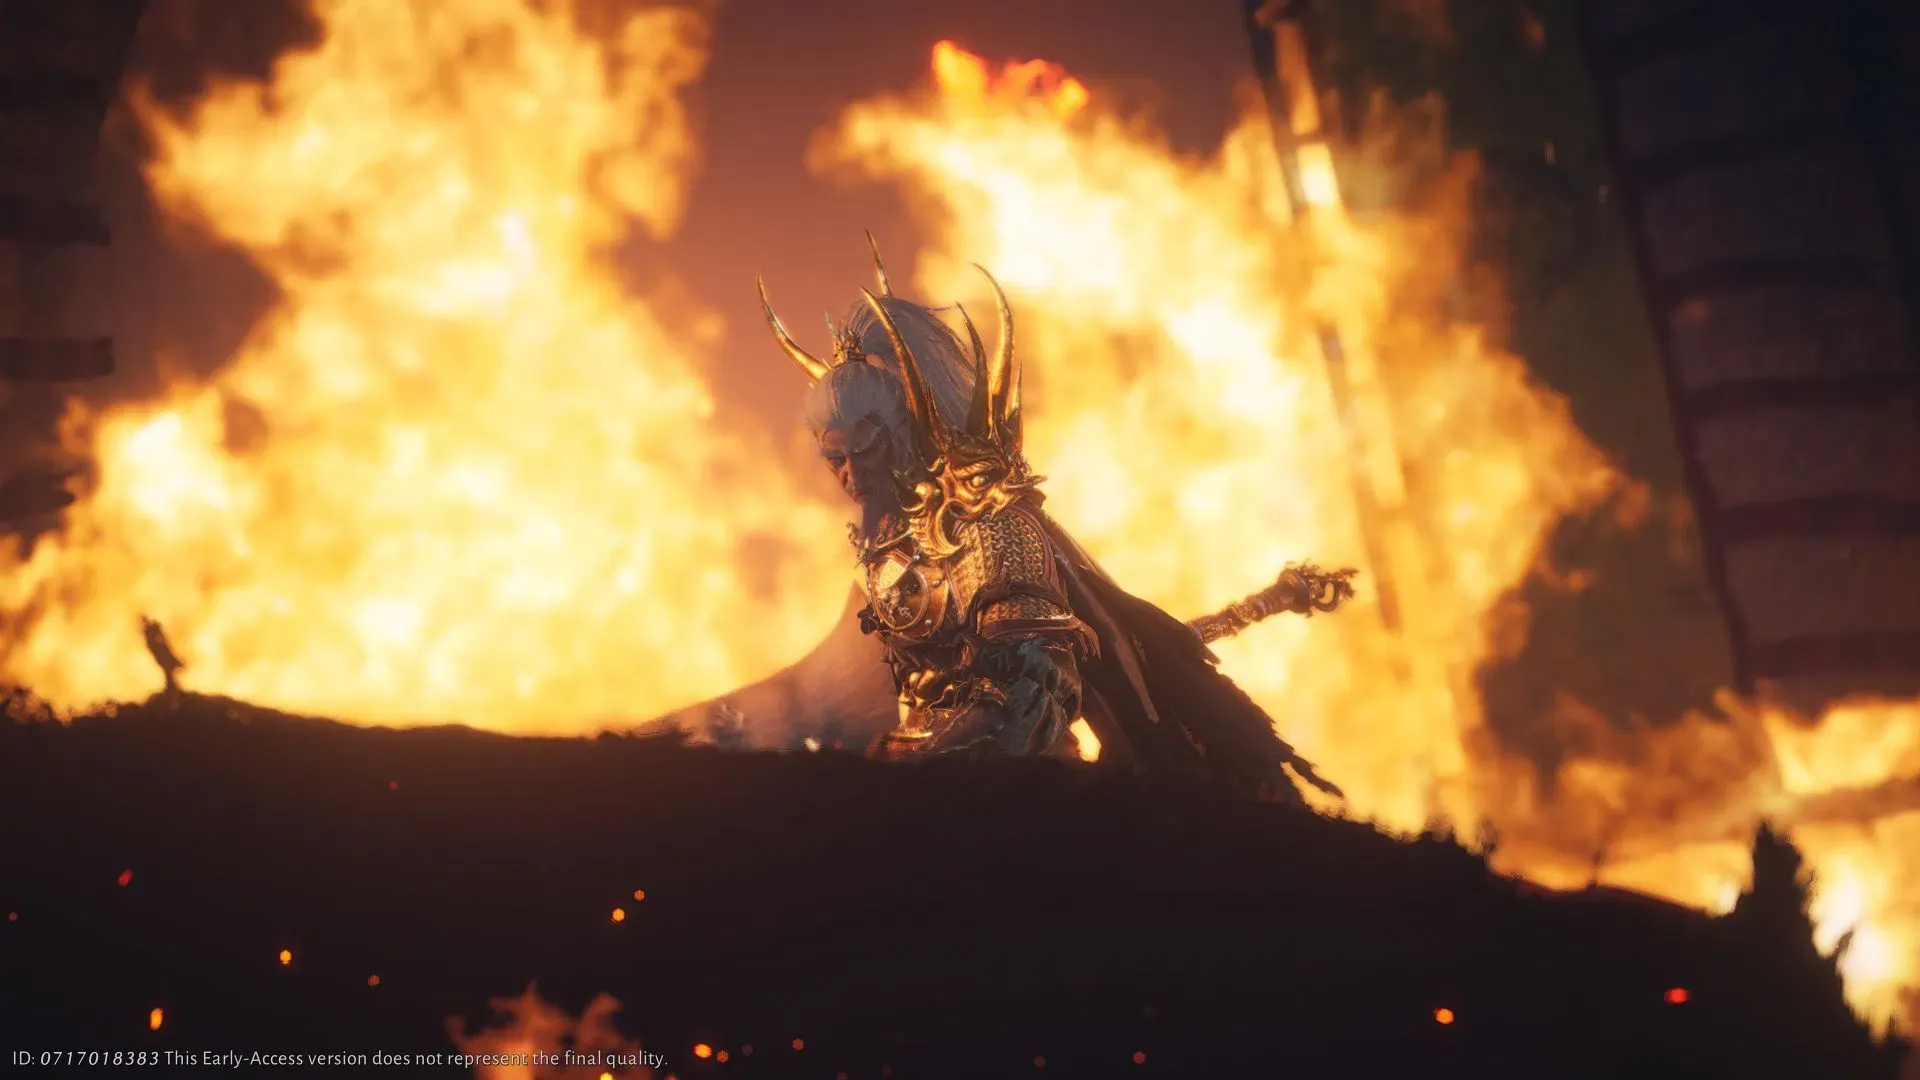
Where Winds Meet Guide: How to Beat the Wandering Ark Boss
⚔️ Where Winds Meet Guide: How to Beat the Wandering Ark The Wandering Ark is one of the most distinctive world bosses introduced during the Hexi expansion of Where Winds Meet. Hidden within the Shifting Sands northeast of Jade Gate Pass, the Ark initially appears as a mysterious relic wandering through a raging desert storm. But once the fight begins, the encounter quickly reveals itself as a mechanics-driven boss battle that rewards awareness and adaptability more than brute-force damage. Unlike campaign bosses that revolve around parry timing and martial duels, the Wandering Ark transforms combat into a puzzle-like encounter built around environmental interactions and weak-point destruction. The fight forces players to break specific components, manipulate falling objects, and even reverse time itself to damage the boss efficiently. That design shift subtly prepares players for later Hexi encounters, where understanding mechanics becomes just as important as mastering martial arts. 📍 Wandering Ark Location in Where Winds Meet Players can find the Wandering Ark in the Shifting Sands region northeast of Jade Gate Pass. To reach the boss: Travel toward the northeastern edge of the Hexi map. Push through the sandstorm covering the Shifting Sands area. Once the storm clears, locate the Boundary Stone nearby. The Wandering Ark waits close to the stone, ready for battle. The encounter functions as a repeatable world boss, allowing players to return and defeat the Ark multiple times for rewards. 🧭 Wandering Ark Boss Overview Attribute Details Difficulty ★★★☆☆ Weakness None Boss Type World Boss Recommended Martial Arts Everspring Umbrella, Nameless Sword, Panacea Fan, Vernal Umbrella Recommended Mystic Arts Cloud Steps, Ghostly Steps Because the boss frequently attacks at range and moves unpredictably, builds with strong mobility and ranged capability perform particularly well. ⚔️ How to Beat the Wandering Ark The Wandering Ark is heavily mechanics-based, meaning that most of the damage dealt during the fight comes from interacting with its special mechanics rather than simply attacking it directly. Close the Distance Immediately At the start of the fight, the Ark attempts to control space using Phantom Volley, a ranged attack that bombards players with ghostly projectiles. Instead of slowly approaching, sprint forward immediately and dodge the volleys. Once you close the distance, the Ark stops using this ability and the fight becomes easier to control. Destroy the Withered Branches (Phase 1) During the first phase, the Ark’s legs are wrapped with four glowing withered branches. These branches function as weak points. Destroying them: Deals significant damage Weakens the boss Progresses the encounter faster Ranged martial arts such as Everspring Umbrella, Vernal Umbrella, and Nameless Sword make targeting these weak points much safer. Attack the Moon Lantern Whenever the Wandering Ark leaps high into the air and crashes down with Arkfall Slam, a Moon Lantern drops onto the battlefield. When this lantern lands, quickly attack it before it disappears. Doing so deals a large burst of damage to the boss and significantly speeds up the fight. Master the Moonfall Mechanic (Phase 2) Phase two introduces the most important mechanic in the encounter. The Ark summons a miniature moon above the battlefield, which crashes toward the player. Once it lands: Sprint out of the red impact marker. Immediately interact with the moon. Use Cosmic Reversal to rewind time. Launch the moon back toward the Wandering Ark. If done correctly, this attack deals massive damage. If ignored, the moon will explode and harm the player instead. Use Your Bow Against the Moon Lantern In the second phase, the Moon Lantern can sometimes be targeted with ranged attacks. Using a bow to hit the lantern deals additional damage, although the target is small and difficult to hit consistently. Treat this as an optional opportunity rather than the main damage method. Focus on Mechanics Over Raw Damage The Wandering Ark is not meant to be defeated through raw DPS alone. Players who ignore its mechanics will find the fight slow and dangerous. Instead, focus on: Destroying the branches in phase one Attacking the Moon Lantern Using the Moonfall mechanic in phase two Handling these mechanics properly dramatically increases damage output. 🌀 Wandering Ark Movesets Phase 1 Attacks Phantom Volley The Ark fires waves of ghostly projectiles while players approach. Sprint and dodge forward to close the distance quickly. Arkfall Slam The boss leaps high into the air before crashing into the ground. Move out of the impact zone and prepare to attack the dropped Moon Lantern. Relentless Arkfall A more aggressive version of Arkfall where the Ark performs three consecutive jumps. Continue repositioning to avoid each landing zone. Phase 2 Attacks Ark Charge The boss charges forward across the battlefield. Sprint sideways to escape the charge path. Moonfall Summons a miniature moon that crashes toward the player. Reverse the moon using Cosmic Reversal and throw it back at the boss. Grasping Sandbloom Thorned brambles erupt from the sand and chase the player. Keep moving to avoid them. Phantom Fleetfall Ghostly boats rain down from the sky. Watch the ground for landing markers and reposition accordingly. Moonlit Shadow Binding The Ark traps the player inside a miniature moon and drags them onto its deck. Use Serene Breeze to escape before being thrown away. Shockwave Leap The Ark leaps forward and creates a shockwave upon landing. Move outside the impact zone. Thornbound Barrage Brambles surround the player while projectiles rain down. Continue circling and avoid touching the thorns until the attack ends. 🎁 Wandering Ark Rewards Defeating the Wandering Ark grants several valuable Hexi progression rewards. Players can receive: Echo Jade ×20 Withered Twig ×1 Inner Way: Custom Notes ×5 Medicinal Tales ×3 Hexi Exploration ×50 Coin ×12,000 These materials support character progression and Hexi exploration advancement. 🧭 Blueprint: Mastering the Wandering Ark Fight To defeat the Wandering Ark efficiently, players should focus on the encounter’s mechanics rather than raw combat. Start the fight aggressively by closing the distance to prevent Phantom Volley pressure. Prioritize destroying the withered branches during phase one to weaken the boss early. Once the Moon Lantern drops after Arkfall attacks, immediately focus your attacks on it to deal bonus damage. During phase two, the Moonfall mechanic becomes the primary source of damage. Learn to quickly dodge the impact zone and reverse the moon back toward the boss. Finally, remain mobile throughout the fight. Most of the Ark’s attacks cover large areas, making constant movement essential for survival. Players who learn these mechanics will find the encounter far easier and far more rewarding. If you're preparing to challenge world bosses across Hexi and strengthen your martial arts progression, you can explore Where Winds Meet Accounts, accelerate development through professional Hourly Services, or power up faster with reliable Boosting. GameMarket.gg is a trusted digital marketplace for everything gaming-related. We serve the gaming community by providing secure access that enhances every gaming journey.

Honkai Star Rail
Cerydra Build Guide: Best Ornaments, Stats, and Pull Priority
Cerydra Build Guide: Best Light Cones, Relics, Teams, and Stats Cerydra enters Honkai: Star Rail as the kind of support who doesn’t just amplify a carry’s numbers—she changes how that carry gets to play. Instead of offering a simple stat stick or one-button team aura, she builds her value around Military Merit, turning one chosen ally into the center of the fight and feeding that ally extra Skill pressure, Speed, CRIT DMG, RES PEN, and eventually a duplicated Skill window that can completely reshape a rotation. That changes the meaning of a Harmony build. Most support characters are judged by how smoothly they maintain buffs across a whole team. Cerydra is different. She is at her best when the team is willing to revolve around one damage dealer and let her turn that one unit into a weapon. In practice, that means she is not just “good support” material—she is one of the clearest examples in Star Rail of a support whose build should be tailored around one idea: make the chosen ally’s next sequence of Skills hit so hard that the fight bends around it. Cerydra Overview: What She Actually Does Cerydra is a Wind Harmony character built around Skill Damage support and Skill re-activation, with a secondary role as a sub-DPS. That already tells you most of what matters about her build direction. She is not here to carry a whole team evenly. She is here to choose one ally, crown that ally with Military Merit, and keep stacking pressure until that buff upgrades into Peerage, where the real burst begins. Core identity Element: Wind Path: Harmony Keywords: Skill Damage Support, Skill Re-activation Role: Support / Sub-DPS The reason she stands out is simple: Cerydra’s kit gives one designated ally a package of premium offensive utility that includes: ATK scaling from her own stats Speed CRIT DMG All-Type RES PEN Skill duplication through Coup de Main That last part is what makes her so important for certain carries. She doesn’t just help a DPS do more damage. She helps them do more Skill actions, which is much rarer and far more explosive. Cerydra Mechanics: How Military Merit Actually Works Everything in Cerydra’s build revolves around Military Merit. When Cerydra uses her Skill, she grants Military Merit to one chosen ally. From that point on, that ally receives a damage bonus based on 24% of Cerydra’s ATK, and Cerydra begins building charge whenever she or the selected ally uses Basic ATK or Skill. That is the first major build clue: Cerydra is not just a support who appreciates ATK. She is a support whose offensive value directly scales with it. The upgrade from Military Merit to Peerage Once Cerydra reaches 6 charges, Military Merit automatically upgrades into Peerage. When that happens: the chosen ally gains Coup de Main their Skill is duplicated they receive 72% CRIT DMG they receive 10% All-Type RES PEN After consuming those 6 charges, the state ends and Peerage reverts to Military Merit. That is the full loop: tag your carry build charges reach 6 detonate through a duplicated Skill window rebuild This is why Cerydra feels restrictive in team-building but incredible in the right team. She is built for lineups where one DPS can repeatedly turn those duplicated Skills into real fight-ending damage. The Extra Layers in Her Kit Military Merit is the center, but the build gets even better when you look at the surrounding details. Skill SPD boost Whenever Cerydra uses Skill, the chosen ally gains 20 SPD. That sounds simple, but it has two major implications: it makes Skill-based carries easier to tune it becomes especially strong with Sunday or Bronya, where action-advance chains become much smoother Technique value Her Technique gives Military Merit before combat starts, transfers it to the current active character, and automatically uses Skill on that character without spending SP. That is a massive quality-of-life advantage for her openers. It means she can enter battle already doing her job, which is exactly what you want from a premium Harmony support. Energy generation Whenever the designated ally attacks with Basic ATK or Skill, Cerydra gains 5 Energy Regen. In the right team, especially with units like Phainon or Anaxa, this lets her cycle her Ultimate much more quickly than her raw numbers first suggest. Sub-DPS contribution Cerydra also deals additional Wind damage whenever the designated ally uses Basic ATK or Skill. This effect can trigger up to 20 times, and the count resets when she uses Ultimate. So while she is absolutely a support first, she is not passive. She keeps contributing damage as long as the chosen ally keeps acting. Trace Priority: What to Upgrade First Cerydra is a support whose power is very clearly concentrated in two parts of her kit. Best trace priority Skill = Talent > Ultimate > Basic ATK Skill This is one of the two most important upgrades because it directly governs the support engine that makes the build work. Talent Her Talent is equally important because it supports the offensive flow and utility that define her role. For Cerydra, Skill and Talent are effectively twin pillars. Ultimate Her Ultimate matters, especially for burst turns and smoother double-cast windows for carries like Phainon, but it comes after the two core support pieces. Basic ATK This is the easiest skip. It is just straightforward Wind damage and does not define how she functions. Materials Snapshot: What You Need to Finish Her Cerydra’s key material profile is fairly standard for a premium 5-star support, but a few items matter more than others in prep planning. Key materials Charred Bud of Twilight x65 Heavenly Melody x18 / 69 / 139 Daythunder Anamnesis x12 If you are prefarming, the real point is that you should treat her like a full-priority limited unit, not a casual side build. Her performance is tied heavily to proper trace investment and stat thresholds, so partial builds lose a lot of value. Recommended Light Cones: Best in Slot, Premium Alternatives, and F2P Options Because Cerydra is a Harmony unit with both support and sub-DPS value, she has several strong Light Cone options. The best ones do one of two things: amplify her personal ATK and support scaling improve team Skill damage and SP flow Best-in-Slot Light Cone Epoch Etched in Golden Blood This is the cleanest and strongest Cerydra cone. It gives: a massive ATK boost 1 Skill Point refund after using Ultimate to attack a powerful Skill DMG boost to the ally she targets with Skill That last part is everything. Cerydra wants to support a single Skill-based carry, and this cone directly pushes that identity to its limit. This is not just “her signature.” It is the Light Cone that best expresses what the character is trying to do. Best Premium Alternatives A Grounded Ascent One of the strongest substitutes. It provides: Energy regeneration stacking Hymn effects repeated DMG increases Skill Point recovery after repeated support use This is a very smooth, premium alternative for players who want a cone that still feels active and synergy-based. Flowing Nightglow This cone builds momentum over repeated ally attacks and turns Ultimate timing into a teamwide DMG window. It is especially useful in teams where the whole party is attacking often enough to fill its value naturally. Past Self in Mirror A strong utility option with: all-team DMG buff after Ultimate Skill Point recovery if the Break threshold is reached immediate Energy at wave start It is not as direct for Cerydra as her signature, but still a high-performance premium cone. Earthly Escapade This is a more CRIT-oriented support option that creates teamwide offensive value in a more generalized way. It is not as tailored to Cerydra’s exact niche, but it still performs well. Best F2P and Budget Options Dance! Dance! Dance! This remains one of the strongest 4-star Harmony cones in Star Rail because action advance is always powerful. However, the article’s caveat matters: in a Phainon team, its value drops if Cerydra does not remain on field long enough for the team to fully exploit the advance. That means it is still excellent in general, but no longer an automatic answer for every Cerydra team. The Forever Victual This is the best practical budget choice for many players. It gives: ATK% extra ATK after Skill use strong consistency easy accessibility for F2P accounts It does not have the spectacle of the premium options, but it does exactly what Cerydra needs: it supports her ATK scaling and helps her reach support breakpoints more comfortably. Best Relic Sets: Support First, Sub-DPS Second Cerydra’s relic selection is refreshingly clear. She wants Speed, she wants offensive scaling, and she wants to make her chosen ally stronger every time she acts. Best Relic Set Sacerdos’ Relived Ordeal This is her best relic set and the most stable recommendation. 2-Piece SPD +6% 4-Piece Using Skill or Ultimate on one ally increases that ally’s CRIT DMG by 18% for 2 turns, stacking up to 2 times This fits Cerydra almost perfectly. It boosts her own Speed, which she already wants, then immediately turns her support actions into additional offensive value for the selected ally. If you are building Cerydra for her intended role, this is the set you want first. Alternative Relic Set Eagle of Twilight Line This alternative is much more about personal turn flow and sub-DPS contribution. 2-Piece Wind DMG +10% 4-Piece Action advances the wearer after using Ultimate This is a valid alternative if your relic quality is better there or if you are leaning harder into her sub-DPS side, but it is still generally behind Sacerdos for most support-focused builds. Best Ornaments Best Ornament Set Lushaka, the Sunken Seas This is her best planar setup. It provides: Energy Regeneration Rate +5% if Cerydra is not in slot 1, it boosts the ATK of the first character in the lineup by 12% This is exactly the kind of quiet but powerful support scaling Cerydra wants. It also reinforces the very obvious lineup advice: place your main carry in the first slot when using this setup. Alternative Ornament Sprightly Vonwacq Also gives: Energy Regeneration Rate +5% immediate action advance on entering battle if SPD reaches 120+ This is the more rotational alternative. It is useful if you want a smoother opener or need help with turn order, but Lushaka is usually the cleaner recommendation for raw support value. Main Stats and Sub Stats: How to Build Her Properly Cerydra is a Harmony support with a very unusual stat profile because her support scaling depends so heavily on ATK, but she also needs Speed and appreciates Energy Regen. That makes her build more demanding than a simple “all Speed support.” Main stats Body: ATK% Feet: SPD / ATK% Rope: Energy Regen / ATK% Orb: ATK% Why ATK body and orb? Because her Talent and support package scale heavily with her own ATK. If you underbuild that stat, her core value gets diluted. Why SPD feet? Because Speed is what turns her from “buff character” into “rotation engine.” Faster actions mean more control over when Military Merit upgrades and when the chosen ally gets their most explosive windows. Why Energy Regen rope? Because smoother Ultimate cycling means more support tempo, more damage contribution, and more consistency. ATK% rope is still usable, but Energy Regen is usually the safer choice unless your build and team already solve her cycling comfortably. Sub stat priority ATK% / SPD > CRIT DMG The most important target is to reach: 4000 ATK with as much Speed as possible That is the real build goal. Once you are there, CRIT DMG becomes a very welcome bonus because her sub-DPS side does still matter. But it comes after the foundation. Cerydra Eidolons vs Signature Light Cone Cerydra is one of those characters where both Eidolons and signature weapon investment are genuinely meaningful, so the pull discussion matters. Signature Light Cone The signature gives: huge ATK boost SP recovery Skill DMG support for the chosen ally This is a major boost to both her stat floor and her actual support identity. E1 This is a very important breakpoint for many players. It lets the ally with Military Merit ignore up to 36% DEF and helps Cerydra recover more Energy whenever she uses Skill. This is one of the best upgrades if your main goal is maximizing a carry like Phainon. E2 This is her biggest overall Eidolon stop for low spenders. It increases: Cerydra’s own damage massively the designated ally’s damage by 40% This is where she becomes much more than a support with a neat trick. She becomes a premium offensive enabler with a serious stat ceiling. E4 This is mostly a sub-DPS Eidolon. It boosts the Wind damage dealt by her Ultimate but does not really improve the core support identity enough to be considered a priority for most players. E6 This is the luxury ceiling. At E6: Cerydra and the buffed ally ignore 20% All-Type RES Military Merit’s additional damage gets much stronger combined with E1 and E2, the chosen DPS can see absurd damage gains This is extremely strong, but also extremely expensive. Recommended pull order E0S0 > E0S1 / E1S0 > E2S1 > E6S1 The article’s logic here is solid: E1S0 is especially strong for Phainon E0S1 is already a premium improvement E2S1 is the real high-value spender stopping point Best Team Compositions Cerydra is strong, but she is not broad. She is not the kind of Harmony character you casually slot anywhere and expect equal value. She wants carries who deal meaningful Skill damage and can exploit duplicated Skill usage. That is why her best teams feel narrow—but very powerful. Best Team: Phainon Team Phainon / Cerydra / Sunday / Bronya This is the intended flagship shell for her. Why it works Phainon is the main DPS and benefits directly from her Skill-centered support Cerydra turns him into the team’s true offensive centerpiece Sunday and Bronya accelerate turns and make the burst rotation far more explosive the whole team exists to push Phainon’s Skill damage as high as possible before he enters his Ultimate cycle This is the team where Cerydra’s design feels the most complete. She was built for this kind of carry. Cyrene-Cerydra Team Cyrene / Phainon / Cerydra / Dan Heng • Permansor Terrae This composition leans into multi-action chaining and control-heavy offensive flow. Why it works Cyrene extends action chains and adds True DMG conversion pressure Phainon keeps those action chains valuable Cerydra amplifies the main offensive unit through Military Merit Dan Heng • Permansor Terrae stabilizes the team with shielding and follow-up pressure This is a much more layered and premium-feeling setup. Instead of one clean support shell, it creates a chain of linked enablers where Cerydra helps keep the main damage cycle coherent. Anaxa Hypercarry Team Anaxa / The Herta / Cerydra / Tribbie or Hyacine This is the surprise team. Why it works Anaxa becomes the real main DPS instead of a secondary piece Cerydra allows him to exploit repeated Skill usage extremely well The Herta supports the team’s overall function while still contributing damage Tribbie or Hyacine round out the support slot depending on what the team needs This team is strong specifically because Cerydra changes Anaxa’s role. She does not just support him—she elevates him from a more limited offensive position into a proper hypercarry shape. Blueprint: How to Build Cerydra Correctly Step 1: Build ATK First, Then Make the Rotation Smooth Cerydra’s support scales with ATK more than players often expect. Do not build her like a pure Speed bot and then wonder why her output feels thin. Step 2: Use Sacerdos and Lushaka Unless You Have a Real Reason Not To Those sets are not just mathematically strong—they fit the exact way she plays. Step 3: Put the Main Carry in Slot 1 If you are using Lushaka, do not waste its best effect. Step 4: Pair Her With Skill-Centric DPS Units Cerydra is at her best when the chosen ally’s Skill really matters. Phainon is the clearest example, and Anaxa is the surprising second case. Step 5: Judge the Build by Burst Windows, Not Idle Stats The question is not “how pretty does her stat page look?”The question is “what happens when Military Merit reaches Peerage and the carry gets their duplicated Skill turn?” Trailblazers preparing to invest in Cerydra can strengthen their roster with optimized Accounts, speed up relic and trace farming through expert Hourly Services, or accelerate team-ready progression with trusted Boosting before her strongest support windows come online. Cerydra is not a support built for everybody. She is built for one chosen ally, one chosen rotation, and one very specific kind of burst. Build her around that promise, and suddenly the carry beside her stops feeling merely buffed and starts feeling crowned. GameMarket.gg is a trusted digital marketplace for everything gaming-related. We serve the gaming community by providing secure access that enhances every gaming journey.
Where Winds Meet
Where Winds Meet Guide: Guo Xin Boss Fight Explained
⚔️ Where Winds Meet Guide: How to Beat Guo Xin in Jade Gate Pass The Guo Xin encounter stands as one of the defining boss fights tied to the Hexi storyline in Where Winds Meet. Encountered at the climax of the Whitecrown City campaign southeast of Jade Gate Pass, this battle pits players against the Iron-Blooded Prince in a duel that revolves around precision, timing, and battlefield awareness. Guo Xin’s fight marks an important turning point in the game’s combat design. Instead of overwhelming players with raw damage, the encounter emphasizes the importance of reading attack cues, mastering parries, and understanding Qi pressure mechanics. His spear techniques blend unblockable assaults with parryable strikes, while his second phase introduces lightning attacks designed to punish impatient reactions. The fight quietly teaches players one of the most important lessons in Where Winds Meet: mastery of Jianghu combat comes not from rushing attacks, but from observing patterns, controlling space, and striking only when the battlefield allows it. 📍 Guo Xin Location in Where Winds Meet Guo Xin is fought during the Whitecrown City Campaign, which becomes available as players explore the Hexi region and progress through the Jade Gate Pass storyline. To reach the encounter: Travel to Jade Gate Pass, the new region introduced in the Hexi storyline. Move toward the southeastern gate leading to Whitecrown City. Teleport using the Outside Whitecrown City Boundary Stone. Continue the Whitecrown City Campaign questline until the final boss encounter begins. After the story battle is completed, players can return to the campaign location to challenge Guo Xin again, allowing repeated attempts to obtain rewards and gear drops. 🧭 Guo Xin Boss Overview Guo Xin serves as a high-difficulty campaign boss, demanding strong defensive awareness rather than pure damage output. Key characteristics of the fight include: Difficulty Rating: High Weakness: None Combat Style: Spear-based martial arts combined with lightning techniques Recommended Martial Art: Everspring Umbrella Unlike some bosses that rely on simple attack loops, Guo Xin constantly mixes defensive mechanics. Many of his combos transition between red-glint parryable strikes and yellow-glint unblockable attacks, forcing players to adjust their reactions mid-sequence. This constant shift between attack types creates a duel where players must remain alert and react precisely. 🤝 Best Companion to Bring One of the most helpful allies for this encounter is Yi Dao. Yi Dao excels at drawing enemy attention, allowing him to temporarily pull Guo Xin’s focus away from the player. This provides several key advantages during the fight: Creates breathing room to recover stamina Allows safer repositioning after dodging large combos Helps prepare for red-glint parry windows Reduces pressure during Guo Xin’s faster second phase With Yi Dao managing aggro, players can focus more on studying Guo Xin’s patterns rather than constantly evading pressure. ⚔️ How to Beat Guo Xin The Guo Xin encounter revolves around a combination of observation and timing. Understanding when to parry, when to dodge, and when to attack is the key to winning the fight. Watch for Mixed Glint Attacks Guo Xin frequently uses combo chains that mix two types of visual attack cues: Red Glint: Parryable attack Yellow Glint: Unblockable attack that must be dodged Because these cues appear within the same combo chains, players must watch carefully rather than assuming an entire combo is parryable. Exploit Recovery Windows Many of Guo Xin’s attack patterns end with noticeable recovery animations. During these moments players should: Attack aggressively Drain Guo Xin’s Qi bar Prepare for the next combo chain However, attacking too early during the active part of the combo can lead to heavy punishment. Use the Tang Soldier Mechanic During the fight, Guo Xin occasionally summons a Tang Soldier to assist him. Instead of immediately eliminating the soldier, players can exploit this mechanic by parrying the soldier’s attacks, which drains Guo Xin’s Qi bar directly. This mechanic creates an opportunity to weaken the boss more efficiently if handled correctly. 🌀 Phase One: Grand Protector of Anxi The first phase focuses on Guo Xin’s traditional spear techniques. Many of his attacks involve quick spear sweeps followed by shockwaves or combo chains that must be parried in sequence. Important attacks include: Cyclone Spear Guo Xin throws a spinning spear before closing the distance and attacking with two fast slashes. The spear throw must be avoided, while the follow-up strikes can be parried. Lunging Strike A fast spear thrust telegraphed by a red glint. The correct response is a well-timed parry just before impact. Tang Soldier Summon Guo Xin briefly summons a soldier to fight alongside him. The soldier disappears after roughly eight seconds but can be used to drain Guo Xin’s Qi if his attacks are parried. Whirling Sandstorm Guo Xin summons a sandstorm before unleashing three consecutive spear strikes. Each strike can be parried individually if the timing is correct. Cavalry Crush A dangerous grab attack where Guo Xin throws the player into the air before a soldier strikes them. The attack can be stopped by parrying when the red glint appears. ⚡ Phase Two: Iron-Blooded Prince Once Guo Xin’s health drops low enough, the fight transitions into its second phase. Lightning energy begins to surround his spear, giving him several new abilities. Lightning Spear Toss Guo Xin leaps into the air and throws a lightning-infused spear toward the player. The safest option is to dodge sideways and reposition. Lightning Arrow Barrage He fires several arrows in quick succession from mid-air. The first three arrive rapidly, while the fourth comes after a short delay designed to catch players off guard. Thundercharged Spear Guo Xin channels lightning into his weapon before crashing down from the air. The attack can be parried if timed exactly when the spear descends. Stormrage Slam A flurry of spear swings followed by a lightning explosion. Players can parry the swings but should dodge the final blast. Skyshatter Guo Xin slams both a physical spear and a lightning spear into the ground before thrusting forward again. This requires two consecutive parries. Heavenrend Finale When Guo Xin reaches extremely low health, he teleports away and fires a lightning arrow into the sky. This moment is purely cinematic and signals the battle’s conclusion. 🎁 Guo Xin Rewards Defeating Guo Xin during the campaign provides several progression rewards tied to Hexi exploration. Players receive rewards such as: Echo Jade Oscillating Jade Medicinal Tales Veteran’s Gleaming Cuirass Copper Coin Greaves Hexi Exploration progress Character EXP and coins The campaign boss can also drop additional items including: Starweave equipment pieces Jadeclasp equipment pieces Whitecrown City Appearance Chest Gear Echo materials Bamboocut martial art tips Attunement Stones Raising your World Level improves the quality of these drops, making repeat fights increasingly rewarding. 🧭 Blueprint: Winning the Guo Xin Duel The Guo Xin fight becomes much easier once players approach it with a clear strategy. First, focus on visual cues rather than attack animations. The glints provide the most reliable indicator of how to respond. Second, prioritize Qi damage through parries instead of attempting to overwhelm the boss with raw attacks. Third, stay patient during the lightning phase. Many of Guo Xin’s attacks contain delays designed to punish players who react too early. Finally, use companions like Yi Dao to create breathing room, allowing you to reset positioning and prepare for the next sequence of attacks. Mastering these fundamentals transforms the encounter from a chaotic battle into a controlled duel worthy of the Jianghu. Players preparing to tackle difficult bosses and campaign challenges in Where Winds Meet often accelerate their progression through reliable services such as Where Winds Meet Accounts, dedicated Hourly Services, and progression-focused Boosting. GameMarket.gg is a trusted digital marketplace for everything gaming-related. We serve the gaming community by providing secure access that enhances every gaming journey.

Honkai Star Rail
Honkai Star Rail Cyrene Build Guide for Relics and Team comps
HSR Cyrene Build Guide: Best Relics, Light Cones, and Teams Cyrene arrives as the final Chrysos Heir with a kit that feels less like a traditional support and more like a conductor standing in front of an entire orchestra. She does not simply buff and leave. She sets tempo, feeds turns, amplifies burst windows, and asks the rest of the team to move in rhythm with her. That alone makes her one of the most unusual Build projects in Honkai: Star Rail. What really changes with Cyrene is how players think about support investment. Most supports in Star Rail are judged by one clean snapshot—speed breakpoint reached, buff active, rotation solved. Cyrene is different. Her value grows as your team takes more actions, as more memosprites enter the field, and as her Recollection economy starts looping back into itself. Building her well is not just about stats. It is about designing an entire team around how quickly she can reach her first Ultimate and how often she can keep that song going afterward. Cyrene Overview: What She Actually Does in Battle Cyrene is a 5-star Ice character on the Path of Remembrance, and the first thing that makes her stand out is that she fights alongside her memosprite, Demiurge. That immediately places her in a different category from standard Harmony-style supports, because her kit is split between her own actions, her memosprite’s actions, and the way both of them interact with the rest of the team. At her core, Cyrene is a support who wants to do three things: reach her first Ultimate as early as possible create repeated value through Recollection generation turn fast, active teams into much stronger teams She does this through a unique resource system called Recollection, which replaces normal Energy. Her first Ultimate requires 24 Recollection points, while the second and later Ultimates only require 12. That first threshold is the real gate. Once you pass it, Cyrene becomes dramatically smoother. She also gains special value in teams filled with Chrysos Heirs or Remembrance characters, because those allies help her start with more Recollection and generate more of it during combat. That is why Cyrene feels merely good in mixed teams, but often feels exceptional inside dedicated Remembrance cores. Cyrene’s Core Mechanic: Recollection, Future, and Why Speed Matters So Much Cyrene’s combat loop revolves around one simple question: how fast can you get to the first Ultimate? She begins battle with Recollection points based on team composition: from Chrysos Heirs: 1 / 2 / 3 from Remembrance allies: 2 / 3 / 6 This immediately pushes her toward Remembrance-heavy teams, because the difference between entering a fight at 3 points and entering it at 6 points is enormous when you are trying to hit 24 as early as possible. From there, her own actions add more: Basic ATK grants 1 point Enhanced Basic ATK grants 3 points Skill grants 3 points Then comes the mechanic that makes her scale so hard with active teams: Future. When combat begins, or after Cyrene acts, all allies and their memosprites gain Future. When they act, they consume Future and generate more Recollection for Cyrene. In other words, Cyrene rewards teams that are constantly taking actions, constantly refreshing tempo, and constantly cycling through turns. This is why Speed is not a luxury stat on her. It is the foundation of the build. More Speed means: more Cyrene turns more Future application more Recollection income earlier first Ultimate more follow-up Ultimates after the loop starts Her first Ultimate is also uniquely loaded. It can be cast twice under that first major setup and summons Demiurge while granting extra turns and immediately activating ally Ultimates. After that, the later Ultimates are smaller, cheaper, and far easier to cycle—but the first cast is the point where the fight changes. Trace Priority: What to Level First Cyrene is one of those characters whose upgrade order matters more than usual, because not all of her value is packed into one button. Best Trace Priority Memosprite Skill > Skill > Talent / Ultimate > Basic ATK / Memosprite Talent That order matters for a reason. Memosprite Skill This is the first thing you max because it is the most important part of her real combat value. If you are building Cyrene seriously and leaving this behind, the whole build loses shape. Skill Her Skill is next because it directly affects one of the strongest buffs she provides, especially the True DMG support she brings into stronger comps. Talent and Ultimate These come next because they improve her resource flow, utility, and the impact of the Ult cycle itself. Basic ATK and Memosprite Talent These are still useful, but they are cleanup upgrades rather than priority upgrades. You level them because Cyrene does enough incidental damage and utility that the extra stats are welcome, not because they define the build. Material Snapshot: What It Takes to Finish Cyrene Cyrene is not cheap to finish, and like most premium support builds in late Star Rail, she asks for a lot of stamina before she starts feeling “done.” Major materials Daythunder Anamnesis x12 Sea Siren’s Torn Fin x65 Flower of Ālaya x139 Tracks of Destiny x8 Credits x3,888,100 And that is before counting the usual trace material chain and EXP books. The biggest practical takeaway is that Flower of Ālaya is the most stamina-hungry part of the farm, so if you are prefarming Cyrene, that is usually the material to plan around first. Best Relic Build: Stats First, Set Second Cyrene’s relic philosophy is very straightforward: the right stats matter more than the perfect set. That is especially true because Cyrene wants to reach a high Speed threshold, and high-Speed builds are notoriously awkward to finish cleanly. If your best “ideal” set leaves her under the breakpoint, it is not actually your best set. Best-in-Slot Relic Set Deliverer’s Hood 2-Piece: Increases CRIT Rate by 8%4-Piece: After the wearer uses Basic ATK or Skill, if the memosprite is on the field, increases Max HP of the wearer and memosprite by 24%, and increases all allies’ dealt DMG by 15% until after the wearer’s next Basic ATK or Skill This set fits Cyrene’s design beautifully. She wants: HP scaling frequent actions memosprite uptime party-wide damage value Deliverer’s Hood gives all of that in one package. It smooths stat requirements while turning her normal turn flow into a constant team-wide offensive aura. Best Planar Ornament Amphoreus, The Eternal Land 2-Piece: Increases the wearer’s CRIT Rate by 8%. While the wearer’s memosprite is on the field, increases all allies’ SPD by 8%. This is the planar set that makes Cyrene feel the most complete. The CRIT Rate helps support her sub-DPS side, but the real value is the party-wide SPD boost while the memosprite is active. That is exactly the kind of “tempo multiplies tempo” effect her kit wants. This set does not just improve Cyrene. It improves the engine around her. Best Alternative Relic Setup If your Deliverer’s Hood pieces do not give enough Speed, the safer route is often: 2pc Messenger’s Holovisor 2pc Sacerdos’ Relived Ordeal Each gives SPD +6%, and together they make hitting the crucial Speed thresholds much more realistic. This is often the better choice for lower-investment accounts, because Cyrene would rather wear a weaker set at the correct Speed than a stronger set at the wrong Speed. Her third major trace and overall loop care too much about tempo for you to ignore that. Alternative Ornament Options If Amphoreus is unavailable or your substats are much better elsewhere, there are two acceptable alternatives: Bone Collection’s Serene Demesne Gives more HP and, if she reaches 5000 HP, grants strong CRIT DMG to both Cyrene and her memosprite. This is the more offensive alternative. Giant Tree of Rapt Brooding Provides SPD and additional healing-related value at higher Speed thresholds. This is more of a utility fallback and is still usable, but Amphoreus is the cleaner recommendation in most builds. Main Stats and Sub Stats: How to Build Her Properly Cyrene’s stat priorities are more specific than they first appear. Main Stats Body: CRIT DMG / HP% Boots: SPD Sphere: HP% / Ice DMG% Rope: HP% Why CRIT DMG Body? Cyrene already gets 50% CRIT Rate from her Ultimate, which means CRIT DMG Body is usually the stronger value option unless your relic quality forces something awkward. Why HP% Sphere and Rope? Because Cyrene is not just trying to do personal damage. HP scales extremely well with her overall role, especially in teams where the added utility and charge generation matter more than squeezing a slightly prettier damage number from the Sphere slot. Ice DMG Sphere is still fine, but HP% is generally the more practical choice, especially in Castorice-focused setups. Sub Stat Priority SPD > CRIT Rate / CRIT DMG > HP That is the real order. Speed is not “nice to have.” It is the stat you chase first, hardest, and longest. After that, you want enough CRIT support to make her sub-DPS contribution look respectable, then extra HP to strengthen the overall structure of the build. Recommended Endgame Stats The build target that matters most is Speed. Practical target 180 SPD minimum 200 SPD if possible Hitting 180 is important because it unlocks the trace threshold the build is really centered around. Pushing beyond that into 190–200 territory is not mandatory, but it meaningfully improves how often Cyrene gets to refresh the loop and generate more Recollection. Good F2P benchmark stats HP: around 6800+ SPD: around 189+ CRIT Rate: 30%+ CRIT DMG: 160%+ That is a good realistic endpoint for non-whale builds. If you are near that line, the build is already healthy. Best Light Cones: Signature, Herta Option, and Budget Value Cyrene’s Light Cone choices follow the same logic as her relics: team utility beats selfish damage. She wants Speed. She wants team buffs. She wants effects that keep the whole party’s output rising, not just her own. Best-in-Slot Light Cone This Love, Forever Cyrene’s signature Light Cone is easily her best option. It gives: SPD enemy damage vulnerability through Blank teamwide CRIT DMG through Verse stronger combined effects when both are active This is exactly the kind of support cone you want on Cyrene, because it extends what she is already trying to do. It does not change her job. It makes her better at it. If you want the cleanest and strongest version of Cyrene, this is the cone. Strong Alternative: Herta Store Option Memory’s Curtain Never Falls This is one of the best fallback options because it still gives: SPD team-wide DMG buff after Skill use It lacks the layered ceiling of the signature cone, but it remains a very strong and practical choice, especially for players who want a stable 5-star option without pulling extra. Battle Pass Alternative Victory In a Blink This is the cost-effective choice. It gives: CRIT DMG to the wearer team-wide DMG buff whenever the memosprite uses an ability on an ally That aligns very naturally with Cyrene’s flow and keeps her performance relatively close to premium options, especially for players who are not chasing max optimization. Signature Light Cone vs Eidolons: What Is Worth Pulling? Cyrene is one of those characters where the answer depends on how deep you want to go. Signature Light Cone (S1) The main value: 18% SPD enemy vulnerability team CRIT DMG stronger full-kit support once both buff states are active This is immediately valuable and easy to feel. E1 Gives: extra Recollection generation additional bounce damage smoother post-Ult cycling This is good, but it does not solve the most important early problem by itself. E2 This is the real turning point. It gives: 12 Recollection on entering combat stronger Skill True DMG buff dramatically faster first-Ult timing Combined with E1, Cyrene can start absurdly fast and becomes far more comfortable in zero-cycle or speedkill-style setups. If you are investing beyond base Cyrene, E2 is the most important Eidolon. E4 and E6 These are luxury territory. E4 blows up her personal bounce damage E6 turns her into an even more outrageous team accelerator with action advance and DEF shred effects These are powerful, but they are not part of a normal build recommendation. Recommended pull priority E0S0 > E1S0 > E2S0 > E2S1 > E6S1 That is the cleanest investment ladder for practical players. Best Teams: Where Cyrene Actually Shines Cyrene is not locked to one team, but she very clearly prefers lineups that let her Recollection system breathe. The more actions your team takes, and the more memosprites are involved, the faster Cyrene becomes the centerpiece of the battle. Best Team: Cyrene / Castorice / Evernight / Hyacine This is one of the most natural homes for Cyrene. Why it works: strong Remembrance synergy memosprites everywhere fast early Recollection generation Cyrene’s HP-focused gearing translates cleanly here Hyacine accelerates the action economy enough to help Cyrene cross the 24-point line early This is the kind of team where Cyrene feels designed, not borrowed. Phainon Team Cyrene / Phainon / Cerydra / Dan Heng • Permansor Terraewith support alternatives like Sunday, Tribbie, or Robin and sustain options like Huohuo, Hyacine, or Lingsha This lineup leans harder into premium synergy and lets Cyrene operate as a high-end support bridge for a more explosive core. Mydei Team Cyrene / Mydei / Tribbie / Hyacinewith flexible fifth-slot concepts through supports or sustain replacements This is a strong hybrid shell where Cyrene’s tempo value helps Mydei setups feel cleaner and less rigid. Aglaea Team Cyrene / Aglaea / Sunday / Hyacinewith Tribbie, Robin, or Ice Trailblazer as alternatives This is another lineup where her support identity remains intact, but the payoff is more about tempo and layered buffs than about direct memosprite-centric flavor. Anaxa Team Cyrene / Anaxa / Tribbie / Hyacinewith Cerydra, Sunday, Ice Trailblazer, Dan Heng • Permansor Terrae, Lingsha, or Aventurine as flex choices This setup shows Cyrene’s versatility. She is strongest in her natural home, but good enough to support more experimental or premium compositions as well. How Cyrene’s Charge Generation Works in Practice The easiest way to understand Cyrene is to look at a normal opening cycle. At E0, she can start combat with around 6 Recollection from her passive if the team is built correctly. Then: with 180 SPD, Cyrene usually gets 2 turns in the first cycle those actions add 6 more points a very fast ally like Hyacine may act 3 times Hyacine’s memosprite can also contribute the other allies add more through consumed Future By the time the dust settles, Cyrene is often sitting very close to the 24-point threshold, and a few additional ally Ultimates usually finish the job. In full Remembrance teams, it becomes even easier because memosprites keep adding value to the economy. That is why Cyrene often feels merely “solid” outside those teams and incredible inside them. Blueprint: How to Build Cyrene the Right Way Step 1: Fix Speed Before Anything Else Do not chase the prettiest relic set first. Chase 180 SPD first. Step 2: Build Her as a Support First, Sub-DPS Second HP and tempo matter more than forcing flashy personal damage. Step 3: Use Deliverer’s Hood if the Speed Is Good Enough If it is not, fall back to 2pc + 2pc SPD. Step 4: Put Her in Action-Heavy Teams Cyrene gets stronger when allies act often and memosprites are active. Step 5: Prioritize the First Ultimate The whole fight changes once she crosses 24 Recollection. Build around getting there quickly. Trailblazers preparing for Cyrene can start stronger with optimized Accounts, speed up relic and trace farming through expert Hourly Services, or accelerate endgame setup with trusted Boosting to get her battle-ready faster. Cyrene is not a support you finish in one afternoon and forget. She is the kind of character who keeps getting better the more carefully you build around her. And once her first Ultimate starts landing on time, the rest of the team begins to feel like it is moving inside her poem. GameMarket.gg is a trusted digital marketplace for everything gaming-related. We serve the gaming community by providing secure access that enhances every gaming journey.
Honkai Star Rail
Ultimate Huohuo Build Guide | Honkai: Star Rail Sustain & Energy Support
Huohuo Build, Light Cones & Teams | Honkai: Star Rail Huohuo is a 5-star Wind Abundance character in Honkai: Star Rail who plays a unique role compared to traditional healers. Instead of relying solely on direct healing, Huohuo provides Energy regeneration, ATK buffs, automatic healing, and debuff cleansing through her Divine Provision mechanic. Her kit allows allies to heal and cleanse themselves simply by taking turns or using Ultimates, making her one of the strongest sustain characters for Ultimate-focused and high-speed teams. Huohuo Character Overview Huohuo is a team sustain and energy battery who supports aggressive rotations through her Divine Provision state. Her Skill heals a target and nearby allies while granting the Divine Provision state for several turns. While this state is active, each time an ally takes a turn or uses their Ultimate, a stack is consumed to restore HP and cleanse one debuff automatically. This passive healing system makes Huohuo extremely Skill Point efficient, since the team continues healing without requiring constant Skill usage. Her Ultimate defines her role in the meta. Instead of healing, it restores Energy to all allies and grants a team-wide ATK buff, accelerating team rotations and significantly increasing damage output. Because of this, Huohuo works best in teams that rely heavily on Ultimates and frequent action cycles. Huohuo Trace Priority Trace Priority Talent ★★★★★ (Top) Skill ★★★★★ (Top) Ultimate ★★★★ (High) Basic ATK ★ (Low) Huohuo’s Talent and Skill should be upgraded first because they control the Divine Provision healing engine that keeps the team alive during long battles. Her Ultimate is also extremely valuable since it provides both Energy regeneration and an ATK buff, improving team damage cycles. Her Basic Attack has the lowest priority because it is mainly used to generate Skill Points rather than deal damage. Unlocking Bonus Traces such as Fearful to Act, which activates Divine Provision at the start of battle, greatly improves her opening rotation and overall consistency. Best Light Cones for Huohuo When choosing a Light Cone for Huohuo, focus on three priorities: Healing output (Max HP scaling) Energy regeneration for faster Ultimates Additional team support or buffs Best-in-Slot Light Cone Night of Fright (5★) Energy Regeneration Rate +12% When allies use their Ultimate, the wearer heals the ally with the lowest HP Healing also grants stacking ATK buffs This Light Cone perfectly complements Huohuo’s playstyle by improving both healing consistency and offensive support. Strong Alternatives Post-Op Conversation (4★) Energy Regeneration Rate +16% Increased healing after using Ultimate A great option for improving Huohuo’s Ultimate uptime and healing output. Time Waits for No One (5★) Max HP +18% Outgoing Healing +12% Converts healing into additional damage Provides strong healing scaling while adding extra team damage. Hey, Over Here (4★) Max HP increase Outgoing Healing bonus after Skill usage A reliable option for Skill-based healing builds. Shared Feeling (4★) Outgoing Healing +20% Using Skill regenerates Energy for allies Excellent for Energy-focused team compositions. Cornucopia (3★) Increases healing after using Skill or Ultimate A solid early-game option for new players. Best Relics for Huohuo Huohuo benefits heavily from Speed and HP scaling, which allow her to cycle turns faster and maintain consistent healing. Best Relic Set Warrior Goddess of Sun and Thunder (4-Piece) 2-Piece: SPD +6% 4-Piece: Healing grants SPD increase and team CRIT DMG buff This set allows Huohuo to heal more frequently while boosting team damage. Alternative Relic Sets Passerby of Wandering Cloud (4-Piece) Outgoing Healing +10% Start battle with +1 Skill Point Great for teams that spend Skill Points early. Hybrid Build Messenger Traversing Hackerspace (2pc) – SPD +6% Passerby of Wandering Cloud (2pc) – Healing +10% A flexible option that balances speed and healing output. Best Planar Ornaments Fleet of the Ageless Max HP +12% When SPD reaches 120, allies gain +8% ATK The best overall option for teamwide offensive support. Broken Keel Effect RES +10% When reaching 30% Effect RES, allies gain +10% CRIT DMG Useful in crit-based teams. Penacony, Land of the Dreams Energy Regeneration +5% Same-element allies gain +10% DMG Best for Energy-focused setups. Best Stats for Huohuo Main Stats Slot Stat Body HP% Feet SPD Planar Sphere HP% Link Rope Energy Regeneration Rate Substat Priority SPD → HP% → Effect RES → DEF% High Speed and Energy Regeneration allow Huohuo to maintain frequent Ultimates and continuous healing. Best Teams for Huohuo Huohuo excels in teams that rely heavily on Ultimates and fast action cycles. Her ability to provide Energy regeneration and ATK buffs makes her especially powerful in hypercarry, DOT, and follow-up teams. Hypercarry Teams Castorice Hypercarry Castorice Evernight Tribbie Huohuo Yunli Hypercarry Yunli Robin Tingyun Huohuo Jingliu Hypercarry Jingliu Sunday Ruan Mei Huohuo DOT Teams Kafka DOT Core Kafka Black Swan Ruan Mei Huohuo Budget DOT Team Kafka Guinaifen Pela Huohuo Huohuo works well here because Energy regeneration helps DOT teams maintain constant Ultimate rotations. Follow-Up Attack Teams Feixiao Follow-Up Team Feixiao Topaz & Numby Robin Huohuo Dr. Ratio Team Dr. Ratio Moze Pela Huohuo Her buffs improve both damage uptime and team survivability. Huohuo Eidolons Eidolon Rating Explanation E1 ★★★★★ Extends Divine Provision duration and grants team SPD buffs. E2 ★★★★☆ Provides two revives per battle when Divine Provision is active. E4 ★★★☆☆ Increases healing when allies are low HP. E6 ★★★★★ Massive team damage buff when healing allies. E1 and E6 provide the most significant power spikes. Final Thoughts Huohuo is far more than a traditional healer in Honkai: Star Rail. Her ability to provide automatic healing, debuff cleansing, Energy regeneration, and ATK buffs makes her one of the most versatile sustain characters in the game. By prioritizing Speed, HP%, and Energy Regeneration, you can ensure Huohuo continuously fuels your team’s damage rotations while maintaining strong survivability. If you want to optimize your roster or prepare stronger teams for difficult content, you can explore Accounts, Hourly Services, and Boosting for Honkai: Star Rail to enhance your progression and unlock powerful characters faster.GameMarket.gg is a trusted digital marketplace for everything gaming-related. We serve the gaming community by providing secure access that enhances every gaming journey.
Arknights: Endfield
Wulfgard Best Build Guide | Arknights: Endfield Weapons, Gear & Teams
Wulfgard Best Build: Weapons, Gear Sets & Teams | Arknights: Endfield Wulfgard is a 5-star Heat Caster in Arknights: Endfield who specializes in applying Heat Infliction and triggering Combustion reactions. His role focuses on enabling Fire-based elemental reactions while contributing steady burst damage through reaction detonations. This guide covers everything you need to build Wulfgard effectively, including skill priority, best weapons, recommended gear sets, stat priorities, and team compositions that maximize Heat reaction damage. Wulfgard Operator Overview Attribute Details Rarity 5★ Element Heat Weapon Handcannon Class Caster Role Heat Infliction, Combustion Wulfgard operates primarily as a reaction-focused sub-DPS. His gameplay revolves around applying Heat stacks with his skills, then triggering Combustion reactions that deal amplified Fire damage. His strengths include: Reliable Heat Infliction Strong reaction-based burst damage Useful team Fire damage amplification Flexible role in reaction-focused Fire teams He performs best in teams designed to stack and detonate elemental reactions consistently. How Wulfgard’s Kit Works Wulfgard’s gameplay revolves around building and consuming Heat reactions. A typical rotation looks like this: Apply Heat Infliction using Battle Skill. Stack Fire with Combo Skill or additional attacks. Use Ultimate to apply Combustion to enemies. Detonate reactions with Battle Skill follow-ups for burst damage. Because Combustion reactions can amplify damage significantly, Wulfgard becomes a strong enabler for Fire-based reaction teams. Wulfgard Skill Priority Skill Priority Reason Rapid Fire Akimbo (Basic Attack) ★★ Provides minor Fire damage but is not central to his rotation. Thermite Traces (Battle Skill) ★★★★ His most important ability for applying Heat Infliction and enabling reactions. Frag Grenade·β (Combo Skill) ★ Primarily used to apply Fire stacks rather than deal damage. Wolven Fury (Ultimate) ★★★ Applies Combustion to enemies and enables powerful reaction detonations. Recommended upgrade order: Battle Skill → Ultimate → Basic Attack → Combo Skill This improves both reaction consistency and overall burst potential. Best Weapons for Wulfgard Wulfgard scales primarily with Strength, with Agility acting as a secondary stat to increase overall damage output. Weapons that boost Fire damage, skill damage, or reaction damage synergize best with his kit. Best-in-Slot Weapon Clannibal (6★) Base ATK: 490 Main Attribute +132 Arts DMG +43.33% Passive Effect: Arts DMG +19.2% Consuming an Arts reaction causes enemies to take +16% elemental damage for 15 seconds This weapon works perfectly with Wulfgard’s reaction-focused gameplay, allowing him to increase Fire damage taken by enemies after triggering reactions. Alternative Weapons Rational Farewell (5★) Strength +124 Heat DMG +34.67% Passive: Battle Skill damage increased Triggering Combustion grants +44.8% ATK An excellent option for consistent reaction damage builds. Wedge (6★) Critical Rate +19.5% Arts damage bonuses when casting skills and triggering reactions. Works well in burst-oriented builds. Long Road (4★) Strength +93 Arts DMG +26% A solid early-game weapon that provides consistent damage bonuses. Essence Upgrade Priority For optimal performance: Clannibal Main Attribute Boost Arts DMG Boost Infliction Infliction Arts DMG Boost Main Attribute Boost This improves both reaction damage and overall Fire output. Best Gear Sets for Wulfgard Wulfgard’s gear depends on whether he is played as a reaction enabler or a sub-DPS. Early Game Gear Recommended starter setup: Aburrey Heavy Armor Armored MSGR Gloves T1 Aburrey UV Lamp Aburrey UV Lamp These pieces provide balanced stats for reaction damage. End Game Gear – Reaction Sub-DPS Hot Work Set Hot Work Exoskeleton Hot Work Gauntlets Hot Work Pyrometer Bonekrusha Mask This set improves reaction damage and Combustion detonation burst. Support Build – Ultimate Focus If Wulfgard is mainly enabling reactions for Laevatain: Tide Fall Set Tide Fall Light Armor LYNX Gloves Redeemer Seal This setup improves Ultimate uptime, allowing more frequent Combustion applications. Reaction Support Build Frontiers Set Frontiers Armor T1 Frontiers Blight RES Gloves Redeemer Seal Frontiers Comm This build reduces Combo Skill cooldown, allowing more consistent Heat application. Best Stat Priority Recommended stat focus: Strength Heat Damage Agility Attack % Sub-stats should prioritize: Reaction damage bonuses Skill damage scaling Energy generation These stats maximize Wulfgard’s role as a reaction enabler and Fire sub-DPS. Best Team Compositions Wulfgard performs best in Fire reaction teams that rely on stacking Heat Infliction and triggering Combustion. Team Option 1 – Laevatain Fire Core Laevatain (Main DPS) Wulfgard (Reaction Enabler) Akekuri (Support) Ardelia (Utility) This team maximizes Combustion reaction damage. Team Option 2 – Reaction Hybrid Team Wulfgard Perlica Antal Akekuri Combines Fire and Electric reactions for stronger elemental burst damage. Team Option 3 – Reaction Support Composition Wulfgard Perlica Antal Arclight Focuses on consistent elemental reactions and stagger windows. Wulfgard Best Potentials P1 – Lone Wolf (Low) Strength +15 Agility +15 A minor stat increase. P2 – Firearm Mods (Good) Talent improved: returns 10 additional SP Improves skill efficiency and allows more reaction triggers. P3 – Hunting Hour (Very Good) Extends Scorching Fangs and grants teammates partial effects. A major upgrade that improves team Fire damage amplification. P4 – Will of the Pack (Good) Ultimate energy cost reduced by 15% Allows more frequent Combustion setups. P5 – Natural Predator (Very Good) Casting Ultimate resets Combo Skill cooldown. This enables faster Heat Infliction and reaction setups. Final Thoughts Wulfgard is a strong Heat Infliction generator and reaction enabler in Arknights: Endfield. His ability to consistently apply Fire stacks, trigger Combustion reactions, and amplify team damage makes him an excellent choice for reaction-based Fire compositions. If your strategy revolves around elemental reaction damage or supporting characters like Laevatain, Wulfgard offers both flexibility and reliable burst potential. If you’re planning to optimize your Fire reaction teams, you can explore Accounts, Hourly Services, and Boosting for Arknights: Endfield to strengthen your roster and accelerate your progression.Preparing the right operators and builds can make a major difference when tackling difficult missions and high-level content.GameMarket.gg is a trusted digital marketplace for everything gaming-related. We serve the gaming community by providing secure access that enhances every gaming journey.

Mailria
Introducing Mailria: The Premium Solution for Secure Account Management
Introducing Mailria: The Premium Solution for Secure Account Management At GameMarket.gg, we are constantly striving to provide our users with the most efficient, secure, and reliable tools to streamline their digital experience. We understand that in the world of online gaming and account management, the quality of your email provider is just as important as the account itself. That is why we are proud to introduce our partner: Mailria.com What is Mailria? Mailria is an exclusive, high-performance email platform specifically engineered for users who require seamless account verification and robust security. Unlike generic, free email providers that are often plagued by spam, security vulnerabilities, and restrictive registration barriers, Mailria offers a refined alternative built for professionals and power users alike. Why Choose Mailria over Generic Email Providers? Many mainstream email services are frequently targeted by automated registration bots and brute-force attacks, making them unreliable for securing valuable accounts. Mailria takes a different approach by offering a controlled, premium environment that prioritizes your data integrity. Key Advantages of Mailria: Advanced Security Protocols: Security is at the core of Mailria. Unlike standard email applications that are susceptible to brute-force attempts, Mailria features a sophisticated login protection system. If you input an incorrect password five times, the system will automatically lock the account for five minutes to neutralize potential threats. Secure Email Binding: Forget the frustration of being locked out of your accounts. Mailria features an Email Binding function, which acts as a reliable safety net. By linking an additional secondary email address, you can easily recover access or receive confirmation codes should you ever forget your primary login credentials. Unlimited Inbox Capacity: Whether you are managing multiple accounts or handling a high volume of verification traffic, Mailria supports your needs without limitations. Enjoy an unlimited inbox that ensures you never miss a critical notification due to storage constraints. Anti-Spam Exclusivity: Because Mailria is not an open, public-access service, it is not subject to the massive spam-registration waves that disrupt common email providers. This exclusivity ensures high deliverability and a cleaner, more professional experience. How to Get Started Mailria is a specialized service designed for those who value efficiency and security above all else. You can exclusively purchase and access your Mailria account through the official GameMarket marketplace here: 👉 Purchase Mailria at GameMarket.gg For additional information and technical support, we encourage you to review the comprehensive documentation provided by our partner: 👉 Mailria FAQ Section Conclusion Mailria is more than just an email service; it is a premium utility designed to provide a fast, reliable, and secure experience for sending and receiving emails globally. With our commitment to simplicity and effectiveness, we stand by their philosophy: "Nothing Extra. Just What Matters."

Arknights: Endfield
Chen Qianyu Best Build Guide | Arknights: Endfield Weapons, Gear & Teams
Chen Qianyu Best Build: Weapons, Gear Sets & Teams | Arknights: Endfield Chen Qianyu is a 5-star Physical Guard in Arknights: Endfield who excels as a Vulnerability enabler and stagger-focused sub-DPS. Her kit revolves around applying Lift, which generates Vulnerability stacks that Physical teams can consume through Crush or Breach to dramatically increase damage. This guide covers everything you need to optimize Chen Qianyu, including skill priorities, best weapons, recommended gear sets, stat priorities, and the team compositions that maximize her stagger pressure and Physical synergy. Chen Qianyu Operator Overview Attribute Details Rarity 5★ Element Physical Weapon Sword Class Guard Role Lift, Stagger Support Chen Qianyu plays a key role in Physical team rotations, where she quickly applies Lift and generates Vulnerability stacks for teammates to consume. This makes her an excellent support DPS for teams built around consistent burst windows and stagger pressure. Her gameplay focuses on: Applying Lift through her skills Generating Vulnerability stacks Supporting Physical DPS during burst rotations Contributing reliable stagger damage How Chen Qianyu’s Kit Works Chen Qianyu’s strength lies in quick Vulnerability setup. Her rotation typically looks like this: Use Battle Skill to apply Lift. Trigger Combo Skill to add more Lift and damage. Generate Vulnerability stacks for teammates. Use Ultimate during burst windows for high stagger damage. Physical DPS characters can then consume those stacks with Crush or Breach for amplified damage. Because of this, Chen Qianyu fits best in coordinated Physical compositions. Chen Qianyu Skill Priority Skill Priority Reason Soaring Break (Basic Attack) ★★★ Used frequently between skill rotations, improving sustained sub-DPS. Ascending Strike (Battle Skill) ★★ Applies Lift and helps generate Vulnerability stacks. Soar to the Stars (Combo Skill) ★★★ Easy to trigger and provides additional Lift and damage. Blade Gale (Ultimate) ★★★★ Her strongest ability, dealing high burst damage and significant stagger. Recommended upgrade order: Ultimate → Basic Attack → Combo Skill → Battle Skill This maximizes both her burst damage and stagger contribution. Best Weapons for Chen Qianyu Chen Qianyu scales primarily with Strength and Agility, which increase her Physical damage and sub-DPS potential. Weapons that provide Physical Damage bonuses, ATK%, or buffs against Vulnerable enemies work best with her kit. Best-in-Slot Weapon Sundering Steel (5★) Base ATK: 411 Agility +124 Physical DMG +34.67% Passive: ATK +14% Applying Physical status grants +21% ATK for 20 seconds Up to 2 stacks Because Chen Qianyu frequently applies Physical statuses, she can maintain the ATK buff consistently, making this her strongest option. Alternative Weapons Grand Vision (6★) Agility +156 ATK +39% Provides large damage bonuses during skill and Ultimate windows. Aspirant (5★) Physical DMG bonuses Ultimate damage scaling after applying Lift A strong option if your build focuses on Ultimate burst damage. Contingent Measure (4★) Physical DMG +26% ATK bonus after Battle Skill hits A solid budget weapon option. Essence Upgrade Priority For optimal scaling: Sundering Steel Agility Boost Physical DMG Boost Combative Combative Physical DMG Boost Agility Boost This setup increases both personal damage and Vulnerability uptime. Best Gear Sets for Chen Qianyu Early builds should focus on Strength, Agility, and Physical Damage bonuses. Early Game Gear Roving MSGR Jacket Roving MSGR Fists Roving MSGR Flashlight Roving MSGR Gyro These provide balanced offensive stats and help improve early stagger output. End Game Gear – Swordmancer Set Recommended late-game setup: Swordmancer Heavy Armor Swordmancer TAC Fists Swordmancer Flint Swordmancer Flint The Swordmancer set increases stagger efficiency and can trigger additional hits when applying Vulnerability. For specialized builds, Bone Crusher Mask can also be used as an off-piece for extra stagger damage. Best Stat Priority Main stats: Strength Agility Physical Damage Attack % Sub-stats should prioritize: Physical damage scaling Stagger efficiency Skill uptime These stats maximize Chen Qianyu’s role as a Vulnerability enabler and Physical sub-DPS. Best Team Compositions Chen Qianyu works best in Physical teams that rely on Vulnerability stacking. She pairs well with operators capable of consuming Vulnerability stacks through Crush or Breach. Team Option 1 – Balanced Physical Burst Endministrator (Main DPS) Pogranichnik (DPS) Chen Qianyu (Sub DPS) Ardelia (Support) A stable team focused on strong burst rotations. Team Option 2 – High Burst Physical Team Chen Qianyu Pogranichnik Endministrator Lifeng This team focuses on stacking and consuming Vulnerability quickly. Team Option 3 – Aggressive Physical Composition Da Pan Lifeng Chen Qianyu Pogranichnik Combines multiple Physical enablers for consistent burst damage. Chen Qianyu Best Potentials P1 – Shadowless (Low) +20% damage against enemies below 50% HP. Acts as an execute-style damage bonus. P2 – Heirloom Martial Arts (Low) Agility +15 Physical DMG +8% A modest stat increase. P3 – Dual-Wielding Swordmancer (Very Good) Skill multipliers increased by 1.1× Significantly boosts burst and stagger damage. P4 – Improvised Chi Xiao (Low) Ultimate energy cost reduced by 15% Allows more frequent Ultimate usage. P5 – Bonded with the World (Very Good) Combo Skill cooldown reduced by 3 seconds Can enable additional Vulnerability stacks in some team rotations. Final Thoughts Chen Qianyu remains one of the most reliable Vulnerability enablers for Physical teams in Arknights: Endfield. Her ability to apply Lift quickly, generate Vulnerability stacks, and contribute meaningful stagger damage makes her an excellent support DPS for Crush and Breach compositions. If your team focuses on Physical burst rotations, Chen Qianyu provides consistent value through both damage amplification and stagger pressure. If you want to optimize your roster and experiment with powerful Physical team setups, you can explore Accounts, Hourly Services, and Boosting for Arknights: Endfield. Preparing the right operators and builds ahead of challenging content can significantly improve your team’s performance.GameMarket.gg is a trusted digital marketplace for everything gaming-related. We serve the gaming community by providing secure access that enhances every gaming journey.
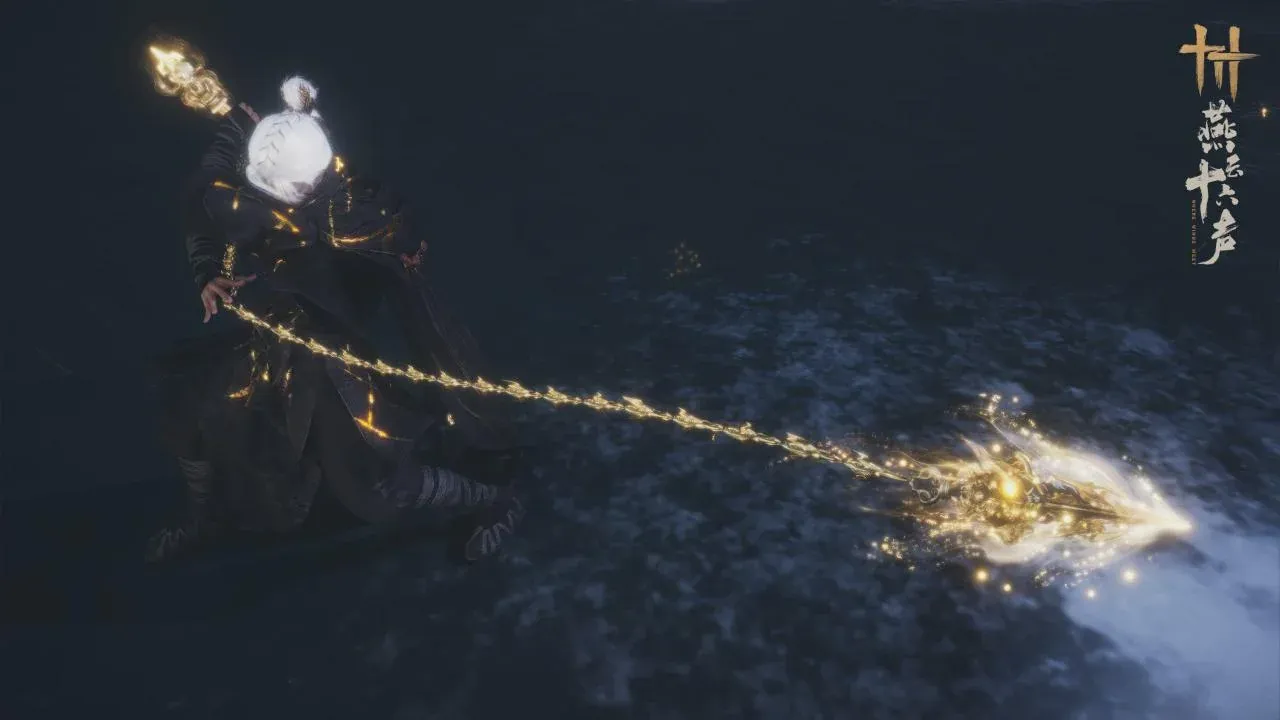
Where Winds Meet
Where Winds Meet Unfettered Build Guide for Hexi Patch DPS
🥷 Unfettered Build Turns Bamboocut - Dust Into a Real Carry The Unfettered Build finally gives Where Winds Meet’s new Bamboocut - Dust path the kind of identity that immediately feels different in combat. Instead of asking you to stand your ground and trade, it rewards a far more predatory rhythm: poke from range, dive in when the window opens, burst hard, then slip back out before the enemy can reset the pace. With the Rope Dart driving close-range pressure and the Everspring Umbrella controlling space from farther out, this setup feels less like a single weapon build and more like a two-part offense constantly handing momentum back and forth. That shift matters more than it first appears. A lot of damage styles in Where Winds Meet still revolve around committing to one lane of pressure and staying there. Unfettered changes that. It turns movement into damage, timing into burst, and weapon switching into the core of your rotation, which is why the build starts to feel stronger the moment you stop treating Rope Dart and Umbrella as separate tools and start playing them as one continuous engine. 🗡️ How to Unlock the Unfettered Rope Dart There are two real paths into the weapon. The first is the more direct and more memorable route: stealing the martial art from the master in the Secret Cellar. That path begins at the Li Zi Xing Yun Secret Cellar in Ghostlight Market, where you pay Tianyan to start the infiltration. It is not just a quick pickup quest either. The route is built around stealth, chest looting, water traversal, and quietly removing guards before reaching the blue-circle objective where the martial art is finally stolen. The catch is that this route expects preparation. You need the Touch of Death Mystic Art to eliminate some of the guards cleanly, which means completing The Realm Endures side story first. The second route is cleaner: join the Nine Mortal Ways Sect and complete its initiation quest. That route is easier to recommend for players who want the weapon without turning the unlock into a full stealth challenge. Either way, the important thing is that Unfettered is not just handed to you. The game treats it like a real acquisition, and that fits the weapon well. 🌪️ Why Rope Dart and Everspring Umbrella Belong Together The core build pairs Unfettered Rope Dart with Everspring Umbrella, and that pairing is the whole reason Bamboocut - Dust feels dangerous in the Hexi patch. The Umbrella handles mid-range harassment, spacing, and setup. It lets you pressure safely, threaten multiple targets, and create awkward movement for opponents before they ever get to punish you. The Rope Dart then cashes that pressure in. Once you move into range, it becomes the burst half of the build—more aggressive, more direct, and far better at finishing a sequence once the enemy has already been destabilized. That split gives the build three strengths that stand out immediately:strong mid-range poke, explosive rotation windows, and wide AoE coverage from both ranges. Its main weakness is just as clear: if you mistime the burst window or force your entry at the wrong moment, the build can feel interruptible and much less forgiving than slower, sturdier paths. 🔥 Best Inner Ways for the Unfettered Build The build’s strongest Inner Way core is built around Morale Chant and Phantom Rally. Morale Chant is the stabilizer. It gives the build a consistent multiplicative damage layer that benefits nearly everything you are doing, whether you are poking with Umbrella, rotating into Rope Dart pressure, or finishing a burst cycle. Phantom Rally is where the build starts to feel uniquely dangerous. It enhances the Umbrella’s natural rhythm by turning Scarlet Spin into a real damage engine. The first umbrella thrown by Scarlet Spin summons a Phantom Umbrella, and additional throws continue feeding that pressure. Once you start landing Perfect Catch, those Phantom Umbrellas resonate and add extra area damage, which is why the Umbrella half of the build stops feeling like “setup” and starts feeling like a second burst source. For the Rope Dart side, Towline Sweep matters because it pushes Soul Sweep further. It grants Tokens of Gratitude after Soul Sweep, strengthens Soulbound pressure, and helps stack Soulbreak faster, which directly improves your burst detonation windows. For PvP, there is one notable swap. If you are not getting reliable value from the usual sustain pattern, Vital Leech becomes a strong alternative because it gives you steadier healing through executions and makes the build less dependent on ideal charged-skill situations. 🎼 Best Mystic Arts for the Unfettered Build The Hexi patch clearly pushes this build toward a very specific Mystic Art package. Flute of Tides is the standout addition. It gives the build a ranged pressure layer that works beautifully in mob-heavy situations, because it follows you and keeps releasing waves of damage while you continue fighting. In practice, that means it is not just utility—it is part of your area-clearing identity. Then there is the Dragon’s Breath and Drunken Poet pairing, which gives the build some of its fastest explosive damage. Dragon’s Breath applies Burn, and Drunken Poet turns that pressure into a fast follow-up burst. Used together, they create the kind of quick punish sequence that fits Unfettered perfectly: fast entry, layered damage, immediate payoff. Cloud Steps rounds the setup out by giving you a clean engage, chase, and reset tool. It helps you stay glued to targets that want to disengage, which is especially valuable once the build starts leaning into rotational pressure instead of stationary trading. 🛡️ Best Gear Sets and Stat Priorities The strongest overall gear core for this build is Stars Align with Calmwaters. Stars Align is the real centerpiece. It rewards exactly the kind of combat this build already wants—multi-hit pressure, boss uptime, and distance-sensitive damage. Since both Umbrella and Rope Dart hit frequently and often catch multiple targets, you can stack it quickly and keep the bonus active through much of a fight. The added damage to enemies farther away also naturally fits the Umbrella’s spacing game before you switch in for Rope Dart burst. Calmwaters works best when your dodging is confident. A Perfect Dodge can restore HP and Endurance, which keeps your mobility alive and helps the build maintain its rhythm instead of running dry mid-rotation. For PvP, that second set becomes more flexible. If you trust your parries more than your dodges, Agile Steps becomes the better defensive pairing because successful deflections reduce incoming damage and make your close-range commitment safer. If your style leans heavily into movement, Jade Embrace is another viable alternative. The stat priority is clean and very telling:Agility first, then Min Physical Attack, Min Bamboocut Attack, Critical Rate, and Max Bamboocut Attack. That order says everything about the build. It is trying to sharpen burst reliability, physical scaling, and rotational consistency all at once. 🎯 How the Rotation Actually Works This is not a build that wins by improvising endlessly. It has a real rhythm, and once you understand that rhythm, the damage starts making sense. The Rope Dart half usually opens with Dart Song Fills the Wild. A brief hold puts you into Charging Stance, gives you Tenacity, and secures the first empowerment for the next charged sequence. From there you flow into the charged heavy action, then cast Soul Sweep to enter Soulbound, apply Soul Loss, and start building toward Soulbreak. Once the target is primed, Burn and Bury becomes the payoff button. It detonates the condition, hits hard, and keeps the pressure moving. That is when the build weapon-switches. You move into the Umbrella side, cast Scarlet Spin to enter Flower Burial, and begin the returning umbrella sequence. If you time Perfect Catch properly, your next umbrella hit gets enhanced and Phantom Rally begins paying off with resonance damage. From there, the build stacks more pressure through Cyclone Waltz, then threads Dragon’s Breath into Drunken Poet for a quick burn-to-burst conversion, before switching back into Rope Dart and restarting the heavier close-range cycle. Once the pattern clicks, the build feels fluid rather than complicated. But there are two habits that separate average use from strong use. The first is learning Perfect Catch with Scarlet Spin. If you can consistently time it—by icon or even by rhythm and sound—you raise both burst and uptime in a big way. The second is understanding when to use Charging Stance defensively. In downtime, it is not wasted time. Holding the stance lets you stabilize HP or Qi and get ready for the next burst window instead of forcing pressure when the fight is not giving it to you. 🧭 Blueprint: How to Make the Build Work in Real Content Start by thinking of Umbrella as the setup weapon and Rope Dart as the finisher, even though both can deal real damage. That mental split makes the rotation easier to read. Build around Morale Chant, Phantom Rally, and Towline Sweep first, because those are the pieces that turn the weapon pairing into a proper damage loop instead of two separate styles. Prioritize Stars Align as your offensive set foundation, then decide whether your defense layer should come from Calmwaters, Agile Steps, or Jade Embrace based on whether your habits lean more toward dodging, parrying, or constant mobility. In combat, do not rush the entry. Use Umbrella pressure to shape the fight, then switch to Rope Dart when the burst window is actually there. And if you want this build to scale, practice Perfect Catch until it stops feeling optional. That one mechanic is the difference between “usable” and “sharp.” If you’re preparing to push Hexi content with the strongest possible Unfettered setup, explore Where Winds Meet Accounts, sharpen your progression with expert Hourly Services, or power up faster through trusted Boosting. As Bamboocut - Dust settles into the Hexi meta, clean rotations and smarter setup windows are starting to matter more than raw aggression. GameMarket.gg is a trusted digital marketplace for everything gaming-related. We serve the gaming community by providing secure access that enhances every gaming journey.
Brawl Stars
Brawl Stars April Fools 2026: Fool Skins, Bruce Nita Mode & Rewards
Brawl Stars Fool Skins: The Best 2026 April Fools Guide Every year, April Fools’ Day in Brawl Stars becomes one of the most entertaining seasonal events. Instead of serious themes or competitive cosmetics, Supercell leans fully into humor with absurd skins, playful designs, and chaotic game modes. The 2026 April Fools event continues that tradition with a lineup of ridiculous cosmetics and a brand-new boss mode that turns the usual gameplay upside down. Between joke skins, crossover rewards, and special challenges, this year’s Fool event brings plenty of reasons to log in around April 1. What Are Brawl Stars Fool Skins? Fool skins are special cosmetics designed specifically for April Fools’ events. Unlike normal skins that follow seasonal themes or serious redesigns, these skins embrace the absurd. Typical Fool skin features include: Comedic character designs Oversized or exaggerated props Meme-inspired references Silly animations and sound effects These skins are meant to make players laugh mid-match while still offering unique cosmetic value. All Brawl Stars 2026 April Fools Skins Here are the major skins expected to appear during the 2026 April Fools event. Bruce Nita (Mythic Skin — 199 Gems) Bruce Nita is easily the headline skin of the event. This skin flips the traditional Nita concept by putting the spotlight on her bear companion, Bruce. The design is inspired by the Bruce Nita Mode boss character, where the giant bear becomes the central theme. Key highlights: Mythic rarity Unique oversized model design Special animation effects tied to the boss event Because of its rarity and visual style, Bruce Nita is expected to be one of the most sought-after cosmetics during the event. Inflatable Melodie (Epic Skin — 149 Gems / Bling) Inflatable Melodie takes the April Fools concept in a completely different direction. Instead of a battle-ready design, Melodie appears as a giant inflatable pool toy, complete with wobbly animations and exaggerated movement effects. Highlights include: Epic rarity Comedic inflatable design Available through Gems or Bling The Bling option makes this skin particularly appealing for free-to-play players. Royale Trunk (Epic Skin — Supercell ID Points) Royale Trunk introduces a Clash Royale crossover skin. Unlike most cosmetics, this skin is not purchased directly with Gems. Instead, players unlock it using Supercell ID points earned through quests and account activity. This reward system makes Royale Trunk feel more like a loyalty reward for active players rather than a standard store purchase. Ywolg (Bertglow) Mythic Skin — 199 Gems One of the strangest skins in the lineup is Ywolg, also referred to as Bertglow. The joke lies in the name itself—“Ywolg” is simply “Glowy” spelled backward, fitting perfectly with the playful theme of the event. Despite the comedic concept, the skin features Mythic rarity with distinctive visual effects and unique animations. Egg Rico, Egg Pam, and Poop Spike Several additional meme-style skins are expected to appear during the event. These include: Egg Rico Egg Pam Poop Spike The designs are intentionally ridiculous, fully embracing the chaotic spirit of April Fools. Characters appear in egg costumes or exaggerated forms that prioritize humor over style. These skins are likely designed more for meme value and community fun rather than prestige cosmetics. How to Get Fool Skins Different Fool skins are unlocked through several methods. Gem Purchases Bruce Nita — 199 Gems Ywolg / Bertglow — 199 Gems Inflatable Melodie — 149 Gems Bling Purchase Inflatable Melodie can also be purchased with Bling. Supercell ID Points Royale Trunk is unlocked through Supercell ID reward points. Event Rewards Some cosmetics or bonuses may appear through April 1 login rewards or event challenges. Bruce Nita Mode: Limited-Time Event The Fool event also introduces a special limited-time mode called Bruce Nita Mode. This mode shifts the game into a boss-style battle. What Is Bruce Nita Mode? Bruce Nita Mode features a 3v1 boss fight format. Three players team up to fight against a giant boss version of Bruce Nita. Interestingly, every player uses the same brawler: Najia This design removes roster advantages and focuses purely on teamwork and strategy. Chaos Mechanics The mode embraces the April Fools theme with exaggerated mechanics. Features include: Oversized weapons Escalating boss aggression Mini-boss summons during battle The chaotic design creates a fun challenge that feels very different from standard Brawl Stars matches. Difficulty Levels Like previous boss-style events, Bruce Nita Mode includes multiple difficulty tiers. Each completed stage unlocks harder versions of the encounter, encouraging players to replay the mode for higher rewards. Are the 2026 Fool Skins Worth It? The 2026 April Fools lineup stands out for its variety. Players can choose between: Premium Mythic cosmetics like Bruce Nita Free-to-play friendly options like Inflatable Melodie with Bling Event-exclusive rewards like Royale Trunk Combined with the new boss mode, the event offers both cosmetic rewards and unique gameplay experiences. Final Thoughts The Brawl Stars April Fools 2026 event delivers one of the most entertaining Fool-themed updates in recent years. With ridiculous skins, a creative boss mode, and multiple ways to unlock cosmetics, the event captures the playful chaos that April Fools is known for. Whether you’re collecting rare skins, grinding event challenges, or just enjoying the absurd designs, the Fool event is worth checking out when it arrives. If you want to prepare for upcoming skins, rewards, and limited-time events, you can explore Accounts, Hourly Services, and Boosting for Brawl Stars. Getting the right resources and progression advantages can make seasonal events even more rewarding.GameMarket.gg is a trusted digital marketplace for everything gaming-related. We serve the gaming community by providing secure access that enhances every gaming journey.
GameMarket
GameMarket Now Officially Supports QRIS Payments!
Level up your checkout experience with Zero Fees and Instant Scanning. Hello, GameMarket Community! We are always looking for new ways to make your gaming experience as smooth, secure, and enjoyable as possible. We know that when a new game drops or a massive sale goes live, the last thing you want to deal with is a slow, complicated checkout process or annoying hidden fees. That is why we are incredibly thrilled to announce a massive upgrade to our platform: GameMarket now officially supports QRIS as a primary payment method! Whether you are grabbing the latest AAA blockbuster, topping up your in-game currency, or hunting for indie gems, completing your purchase has never been faster or more rewarding. Here is why you are going to love using QRIS on GameMarket: 🚫 1. Zero Transaction Fees: Keep Your Money for Games Let’s be honest: nobody likes surprise admin charges or processing fees eating into their gaming budget. We believe that the price you see on the store page should be the exact price you pay. When you choose to pay with QRIS on GameMarket, you will enjoy 0% transaction fees. There are no hidden costs and no extra processing markups. Every single cent of your money goes directly toward exactly what you want—more games, more expansions, and more loot! ⚡ 2. Instant "Scan and Play" Convenience Say goodbye to the hassle of manually typing out long credit card numbers, logging into banking portals, or waiting for virtual account verifications. QRIS is designed for ultimate speed and convenience. Our new checkout process is as simple as point and shoot: Choose your games and head to the checkout page. Select QRIS as your payment method. A unique barcode will instantly appear on your screen. Simply scan the barcode using your preferred banking app or e-wallet on your smartphone. Confirm the payment, and you are done! Your payment is verified in real-time, meaning your games or digital codes are delivered to your library instantly. No waiting, no delays—just straight into the action. 📱 Supported Across All Your Favorite Apps The best part about QRIS is its universal compatibility. You do not need to download a specific new app to use it. You can scan the GameMarket QRIS barcode using almost any major mobile banking application or popular e-wallet (such as GoPay, OVO, Dana, ShopeePay, LinkAja, and more). As long as your app has a QR scanner that supports QRIS, you are good to go! Ready to Try It Out? This feature is officially live today for all users. The next time you find a game you can't wait to play, breeze through checkout by selecting QRIS and experience the seamless, fee-free transaction yourself. Thank you for being a part of the GameMarket family. We are committed to continuously leveling up our platform for you. Happy gaming! — The GameMarket Team

Where Winds Meet
Where Winds Meet Update 1.4 Introduces Hexi Region and New Bosses
🌏 Where Winds Meet Update 1.4 Expands the Jianghu With Hexi The Where Winds Meet Update 1.4: Home Afar arrives as one of the most significant expansions yet, opening the gates to a brand-new region while introducing fresh storylines, martial arts paths, bosses, and seasonal events. Released on March 6, the update pushes the adventure westward toward the deserts of Hexi, beginning at the legendary Jade Gate Pass. Players entering the region quickly discover that Hexi is more than just a new map. The update introduces new exploration mechanics, expanded story arcs, powerful bosses, and additional progression systems that reshape how players advance through the Jianghu. What makes this update especially meaningful is how it pushes exploration and combat progression forward at the same time. Instead of simply adding a new area to traverse, the expansion introduces new combat tools, higher progression caps, and additional challenge modes that extend the endgame experience. 🏜️ New Region: Hexi and Jade Gate Pass The highlight of the update is the introduction of Hexi, a vast desert region that opens with the frontier stronghold of Jade Gate Pass. Players can unlock the area after reaching Level 14 and completing the quest By Lamplight. Once inside Hexi, exploration mechanics begin to evolve with new abilities and environmental interactions. Two notable mechanics appear during exploration: Cosmic Reversal, which allows players to rewind time on damaged objects in the environment. Moonleap Morph, which lets players temporarily transform into a fish to explore waterways. Exploration rewards are also expanded through the Gilt-Fin Collection, where players collect poems scattered across the region. Completing this collection grants valuable rewards such as Mystic Skill upgrade materials, crafting recipes, and various progression items. 📜 Hexi Jianghu Legacies Storyline The Hexi region introduces a new sequence of narrative quests known as Jianghu Legacies, deepening the lore surrounding the desert frontier. Three major storylines are available at launch: In the Quiet of Night Desert Without Sails A Wellspring of Hope Two of these stories are mandatory quests required to fully access the Hexi region. Together, they introduce players to the political tensions and hidden mysteries that define the desert territory. 🏰 Campaign Quest: Whitecrown Fortress The update also introduces a new campaign quest set in Whitecrown Fortress, where players confront the formidable boss Guo Xin. Defeating Guo Xin rewards players with powerful items, including the Iron Domination accessory, which can also be purchased through the Season Shop. The fortress campaign expands the mid-game challenge curve by introducing encounters that require stronger builds and better combat coordination. 🐉 World Boss: Wandering Ark A new world boss, Wandering Ark, now roams the Straying Steed Sands in the Hexi region. This boss encounter offers unique rewards for players who defeat it for the first time, including: Cosmetic accessories Inner Way Notes Medicinal Tales Echo Jades The boss is also integrated into Sword Forge Trials, allowing players to challenge it again through structured combat challenges. 🗡️ New Martial Art Path: Bamboocut – Dust Combat variety expands with the addition of the Bamboocut – Dust Martial Art Path, designed for fast-paced crowd combat. Two new weapons define this path: Everspring Umbrella Unfettered Rope Dart This martial art path emphasizes mobility, wide attack ranges, and rapid strikes that allow players to control large groups of enemies efficiently. The design makes it particularly effective in situations where players face multiple opponents simultaneously. 🎶 Mystic Skill: Flute of Tides The update introduces a new ranged Mystic Skill known as Flute of Tides. Players unlock the skill after completing a quest from a monk in Peaceward Camp. Flute of Tides functions as a hybrid ability that: Deals continuous damage to multiple enemies Provides ranged damage buffs to allies This combination makes the skill valuable for cooperative play and large-scale battles. 👹 Heroes’ Realm: Yama’s Seal The endgame challenge mode Heroes’ Realm expands with the addition of Yama’s Seal, a new boss arena featuring powerful enemies. Two bosses dominate this realm: Dao Lord God of Avarice The first version of the challenge launches at Level 81, with an even stronger variant called Yama’s Seal – Supreme arriving later in the season. Leaderboards are enabled shortly after release, encouraging players to compete for the fastest clears and highest rankings. 📈 Progression Cap Increases Character progression also expands significantly with this update. New progression limits include: Breakthrough Level 13 raising the character cap to Level 90 Gear enhancement extended to Levels 41–45 Gear tier upgrades increasing to Tier 86 Gear tuning and attuning expanded to Tier 86 These changes extend the long-term progression path for players already approaching the previous level limits. ⚔️ New Combat Challenges Two additional combat challenges are arriving during the update cycle. Sword Trial: Abyssal Lament This new Sword Trial features two challenging bosses: Coffin Master River Master The challenge becomes available on March 20. Taiping Mausoleum Path Trial A new Path Trial challenge will also appear in the Taiping Mausoleum, allowing players to continue progressing through dungeon-style combat encounters. 🎉 Seasonal Events in Update 1.4 Several seasonal events accompany the update, offering new activities and rewards. Key events include: Campaign Heroes CompendiumA permanent guide event helping players discover Hexi poems while earning rewards. Dawn to DuskA login event that grants milestone rewards including Resonance Vouchers. Lumina Guide – Jade Gate PassExploration quests encouraging players to investigate the Hexi region. Chorus of LifeA cooperative activity featuring modes such as Heroic Gauntlet and Desert Clash. Traces of SpringA collection event where players gather river items for event rewards. Scratch-and-SeekA mini-game where players unlock layers of rewards by revealing golden leaves. 🧩 Blueprint: Preparing for Where Winds Meet Update 1.4 Step 1 — Reach Level 14 Unlock the Hexi region by progressing through early quests and reaching the required level. Step 2 — Explore Jade Gate Pass Thoroughly Collect Hexi poems and exploration rewards through the Gilt-Fin Collection system. Step 3 — Prepare for New Boss Encounters Build stronger characters to challenge Guo Xin, Wandering Ark, and Yama’s Seal bosses. Step 4 — Upgrade Progression Systems Take advantage of the new Level 90 cap and Tier 86 gear upgrades to strengthen your character. Step 5 — Participate in Seasonal Events Completing event activities grants valuable resources needed for continued progression. Together, these additions make Update 1.4 one of the most expansive patches yet, opening new territories while pushing the limits of combat, exploration, and character progression. If you’re preparing for new adventures in Hexi, you can strengthen your roster with Where Winds Meet Accounts, speed up progression through expert Hourly Services, or improve your character faster using trusted Boosting. As new regions and bosses arrive, many players are preparing their characters for tougher battles across the Jianghu. GameMarket.gg is a trusted digital marketplace for everything gaming-related. We serve the gaming community by providing secure access that enhances every gaming journey.

Genshin Impact
Chiori Best Build in Genshin Impact: Weapons, Artifacts & Teams
Genshin Impact Chiori Build Guide: Talent Priority, Weapons, Artifacts, Team Comps Chiori is a 5-star Geo Sword character who excels as an off-field Sub DPS, especially in Geo-focused teams. Her gameplay revolves around summoning Tamoto, a puppet construct that performs coordinated Geo attacks even while Chiori is off the field. This build guide covers everything you need to maximize Chiori’s damage output, including talent priority, best weapons, artifact builds, stat priorities, and optimal team compositions. Chiori shines when paired with Geo constructs and Geo teammates, allowing her to summon additional Tamoto puppets and significantly increase her off-field damage. Chiori Overview Attribute Details Rarity ★★★★★ Element Geo Weapon Sword Role Sub DPS Chiori’s Elemental Skill summons Tamoto, which performs coordinated attacks dealing Geo damage. When a Geo Construct is present or created nearby, she can summon an additional Tamoto, increasing her damage output. Her Elemental Burst deals AoE Geo damage, while her skill mechanics allow flexible playstyles depending on whether you switch characters or continue attacking with Geo infusion. Because most of her damage comes from Tamoto and Elemental Skill scaling, she functions best as an off-field damage dealer. Talent Priority Chiori’s damage mainly comes from her Elemental Skill, making it the most important talent to level. Recommended upgrade order: Elemental Skill → Elemental Burst → Normal Attack Elemental Skill Highest priority since it summons Tamoto, which deals most of her damage. Elemental Burst Provides additional AoE Geo damage and improves burst windows. Normal Attack Lowest priority because Chiori is primarily played off-field. Best Weapons for Chiori Chiori benefits greatly from CRIT stats and DEF scaling, making weapons that increase these attributes ideal. Best-in-Slot Weapon Uraku Misugiri Base ATK: 542 CRIT DMG: +88.2% Passive Effect: Normal Attack DMG +16–32% Elemental Skill DMG +24–48% Effects double when nearby characters deal Geo damage DEF +20–40% This weapon is perfectly designed for Chiori, boosting both her Elemental Skill damage and DEF scaling. Strong 5★ Alternatives Primordial Jade Cutter CRIT Rate: +44.1% HP increase and ATK scaling from HP Although its passive focuses on ATK, the strong CRIT Rate makes it an excellent general DPS option. Light of Foliar Incision CRIT DMG: +88.2% Provides additional damage scaling based on Elemental Mastery While powerful stat-wise, its EM scaling makes it slightly less optimal for Chiori compared to other options. Best 4★ Weapons Wolf-Fang Battle Pass weapon offering: CRIT Rate Elemental Skill and Burst damage bonuses Additional CRIT stacks when hitting enemies A strong and accessible option for Chiori builds. Cinnabar Spindle DEF sub-stat Elemental Skill DMG scaling from DEF One of the best cost-effective weapons for Chiori if you obtained it during the Version 2.3 event. Best Artifacts for Chiori Chiori benefits greatly from DEF scaling and Geo damage bonuses. Best Artifact Set Husk of Opulent Dreams 2-Piece Bonus DEF +30% 4-Piece Bonus Stacks grant additional DEF and Geo DMG Bonus over time. This set perfectly matches Chiori’s kit, boosting both her Elemental Skill and Burst damage. Alternative Artifact Set Golden Troupe 2-Piece Elemental Skill DMG +20% 4-Piece Elemental Skill DMG +25% Additional +25% when off-field Since Chiori deals most of her damage through off-field Elemental Skill attacks, Golden Troupe is a strong alternative. Beginner Artifact Option A mixed set works well early on: 2 Golden Troupe + 2 Geo DMG set Possible Geo sets include: Husk of Opulent Dreams Archaic Petra Recommended Stats Main Stats Sands: DEF% Goblet: Geo DMG Bonus Circlet: CRIT Rate or CRIT DMG Sub Stats Priority CRIT Rate / CRIT DMG→ DEF%→ ATK%→ other stats Balancing CRIT stats with DEF scaling is key for maximizing Tamoto’s damage. Best Teams for Chiori Chiori works best in Geo teams, where Geo constructs allow her to summon additional Tamoto puppets. Navia Team Main DPS: NaviaSub DPS: Chiori (preferably C1)Support: BennettSub DPS / Support: Furina (C2) or Xiangling Navia benefits greatly from Chiori’s off-field damage. Chiori’s C1 removes the Geo Construct requirement, improving team flexibility. Itto Mono Geo Team Main DPS: Arataki IttoSub DPS: ChioriShield / Survival: ZhongliSupport: Gorou This is one of Chiori’s strongest teams. Zhongli and Itto provide Geo constructs, allowing Chiori to summon an additional Tamoto and significantly increase her damage. Gorou’s DEF buffs also benefit both Itto and Chiori. Final Thoughts Chiori is one of the strongest Geo Sub DPS characters in Genshin Impact, delivering powerful coordinated attacks through her Tamoto puppets. Her kit rewards teams that use Geo constructs and Geo synergy, making her particularly effective in Mono Geo compositions. With the right weapon, artifact build, and team setup, Chiori can provide consistent off-field damage while supporting your main DPS during extended battles. If you want to optimize your roster and experiment with powerful Geo teams, you can explore Accounts, Hourly Services, and Boosting for Genshin Impact. Preparing strong characters and optimized builds can significantly improve your performance across Spiral Abyss and future updates. GameMarket.gg is a trusted digital marketplace for everything gaming-related. We serve the gaming community by providing secure access that enhances every gaming journey.
Showing 316 of 330 from 698 Results