
Wuthering Waves
WuWa 3.3 Leaks: 2nd Anniversary Banners, New Map, and Skins
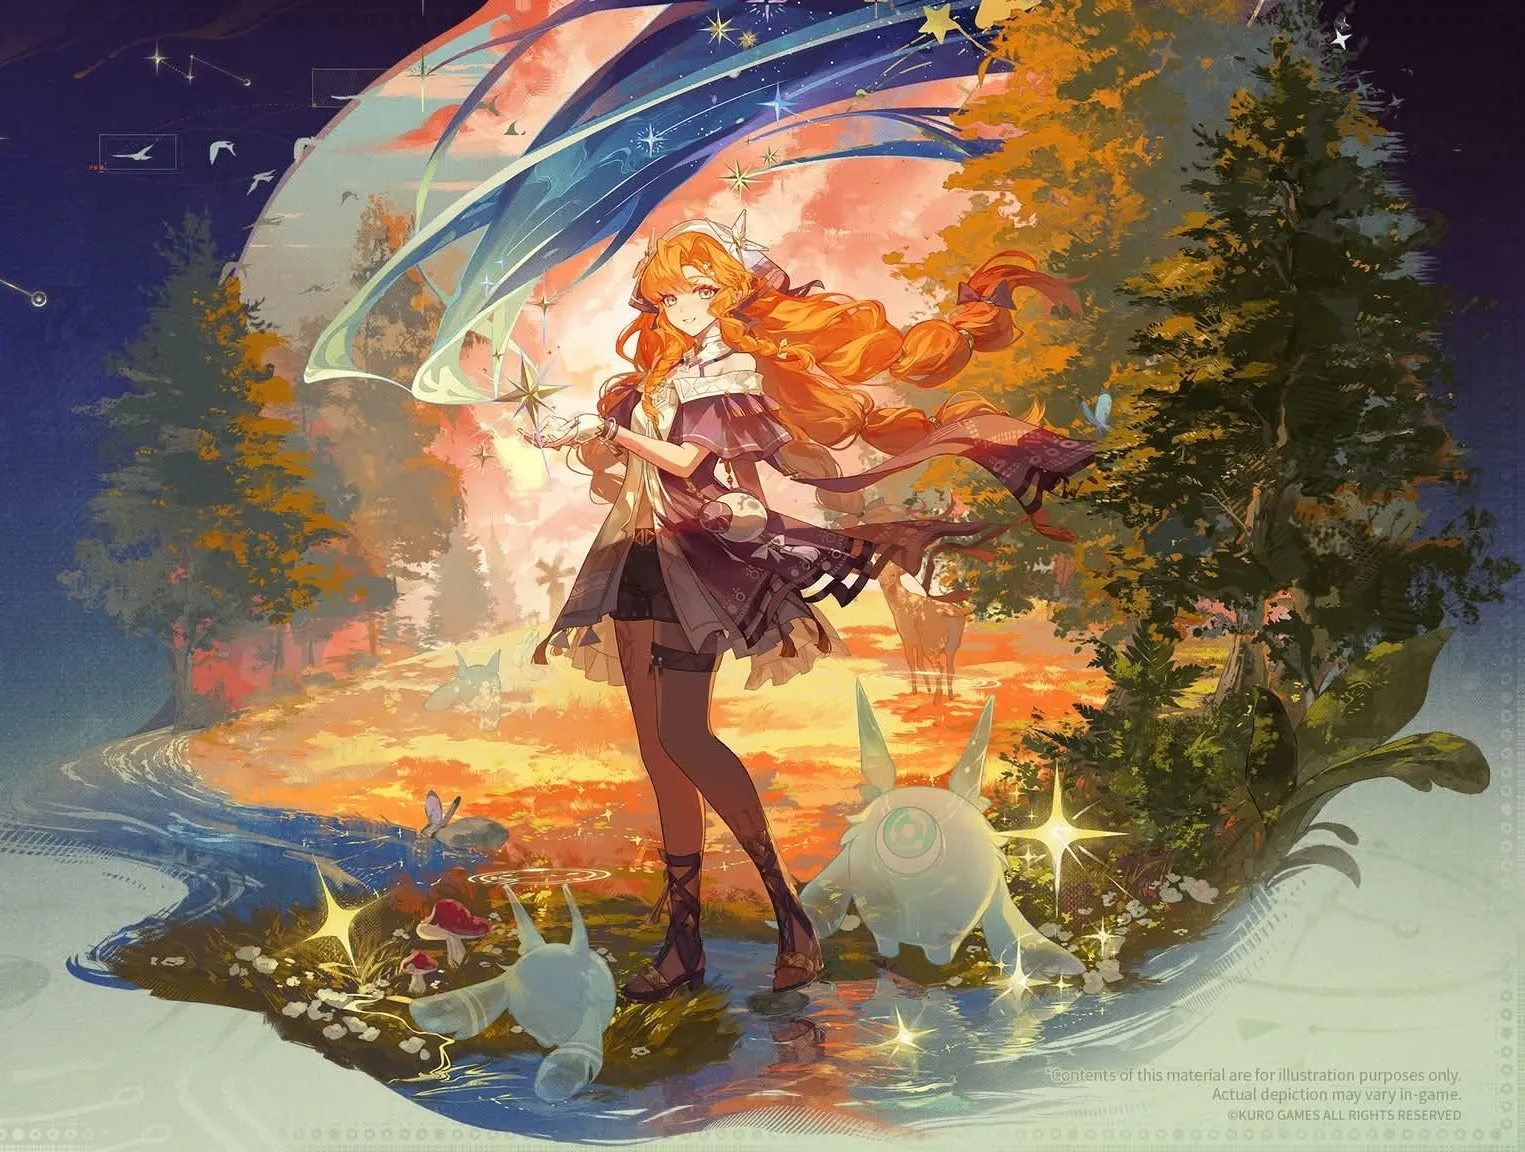
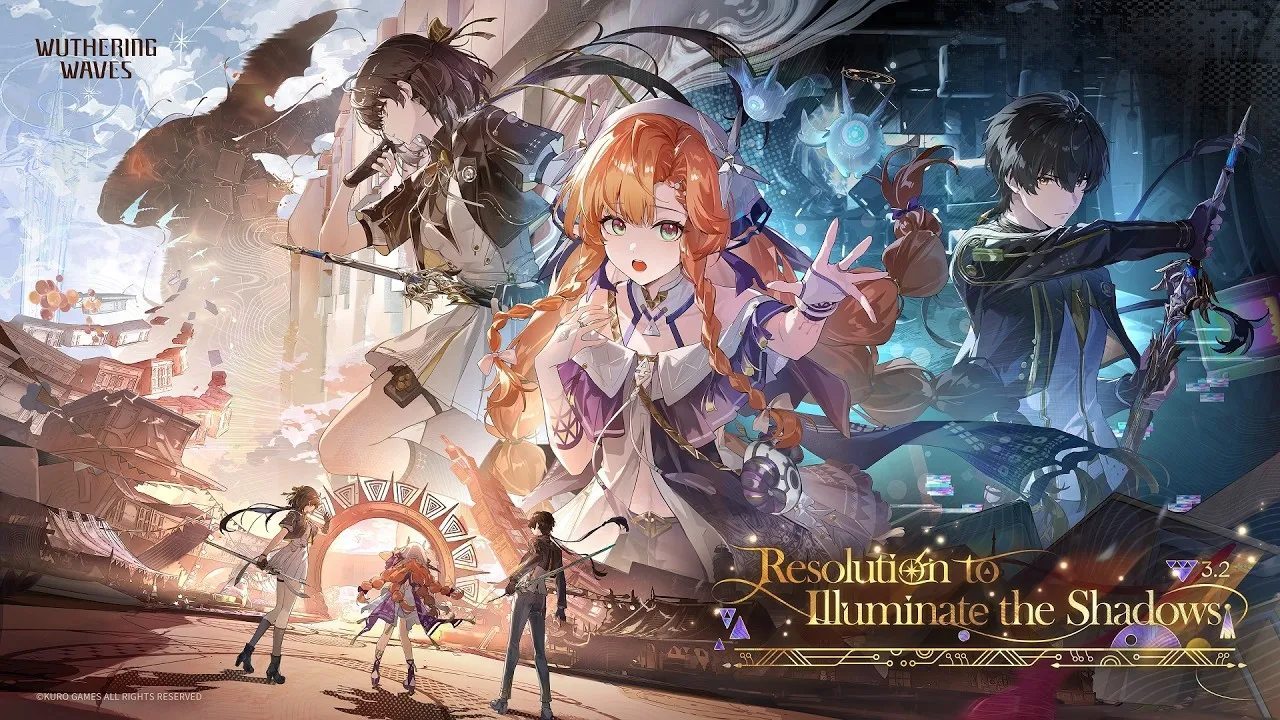
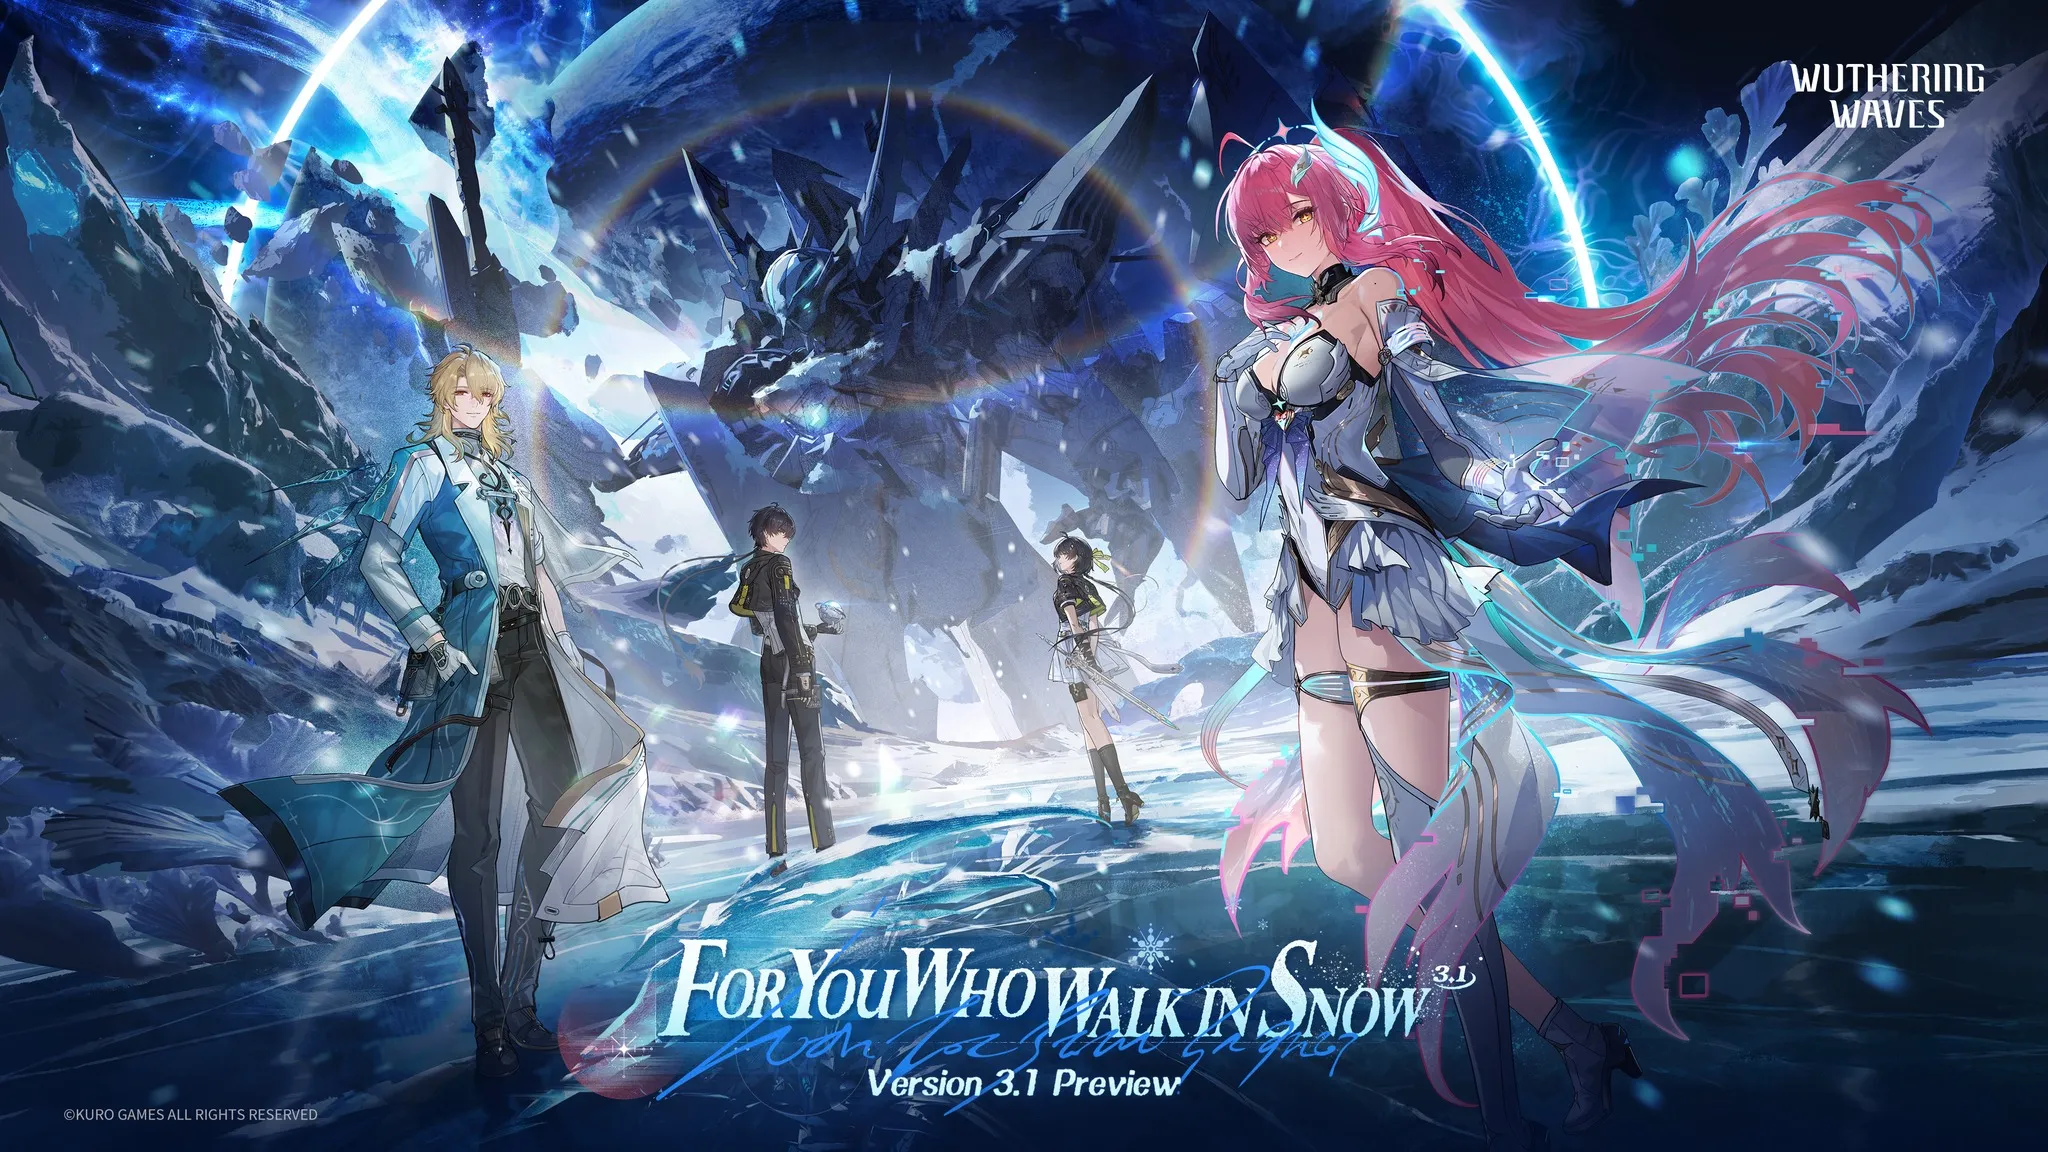
Get the ultimate Wuthering Waves 3.3 Anniversary Guide! Discover the latest drip marketing for new 5-star Resonators Hiyuki and Denia, explore the rumored 10-character rerun banner, and check out Mornye's stunning new winter skin. Prepare for a heart-wrenching story update and the new Lahai-Roi map expansion in this massive WuWa 2nd Anniversary info drop. ❄️ Anniversary Frost: Wuthering Waves 3.3 Hiyuki & Denia Drip Marketing Revealed 🌌 Rovers, prepare your Astrite! As we approach the highly anticipated Wuthering Waves 2nd Anniversary (Version 3.3), the latest Info suggests this could be the most "pull-heavy" update in the game's history. With a release date expected around April 29, 2026, Kuro Games is reportedly gearing up for a massive celebration featuring brand-new Resonators, a somber new story arc, and the expansion of the Lahai-Roi region. 🗡️ Phase I: The Glacio Swordmaster Hiyuki The headline act for the first half of Version 3.3 is Hiyuki, a rumored 5-star Glacio Sword user. While her combat mechanics remain under wraps, the narrative surrounding her is already generating massive hype. According to the latest story Info, Version 3.3 will take a sharp, emotionally impactful turn. Voice directors have hinted at a "heart-wrenching" segment that aligns perfectly with the harsh social stratification of the new Lahai-Roi region. Hiyuki is expected to be the emotional anchor of this patch, potentially serving as a high-tier Glacio DPS that thrives in the wintery setting of the 3.X arc. Phase I Reruns: Joining Hiyuki are the fan-favorites Mornye (Fusion, Broadblade) and Iuno (Aero, Gauntlets), making the first half a dream for players needing elemental variety. 🧪 Phase II: The Energetic Sub-DPS Denia The second half of the anniversary shifts the spotlight to Denia, a character long-rumored through NPC dialogue and Mornye’s voice lines. Background: Denia is a third-year student at Startorch Academy and a member of the Roya race. Known for her boundless energy, she reportedly joined nearly every club on campus. Kit Speculation: Current leaks suggest Denia is a Fusion Rectifier unit. She is rumored to be a small-bodied Burst Sub-DPS, specifically designed to provide high-value support for Aemeath-focused team compositions. 🔄 The Anniversary Mega-Rerun: 10 Returning Legends? Following the precedent set by the 1st Anniversary, rumors are swirling that Version 3.3 will feature a massive "Anniversary-style" rerun banner. This could potentially allow Rovers to choose from up to 10 returning 5-star Resonators. While the exact lineup isn't confirmed, the inclusion of Phrolova and Chisa in Phase II highlights a heavy focus on Havoc-elemental dominance for the patch's conclusion. ❄️ New Map, New Weapons, and Mornye’s Winter Skin The anniversary isn't just about characters; it’s a total world expansion. Lahai-Roi Expansion: Rovers will finally explore a new map area, diving deeper into the mysteries of the 3.X storyline. Signature Gear: Both Hiyuki and Denia will arrive with their respective signature 5-star weapons, essential for maximizing their unique Glacio and Fusion scaling. Winter Couture: Mornye is officially receiving a new skin! This outfit features her iconic transparent leg design, now updated with intricate snowflake details to match the winter-themed aesthetic of Version 3.3. 💎 Master the Anniversary Meta Hiyuki anchors the early progression of the update, especially for players investing in new characters. Travelers aiming to accelerate ascension farming can explore trusted Wuthering Waves Accounts, optimize resin/stamina efficiency with expert Wuthering Waves Hourly Services, or secure consistent boss clears through reliable Wuthering Waves Boosting as farming rotations intensify. GameMarket.gg is a trusted digital marketplace for everything gaming-related. We serve the gaming community by providing secure access that enhances every gaming journey.
Wuthering Waves
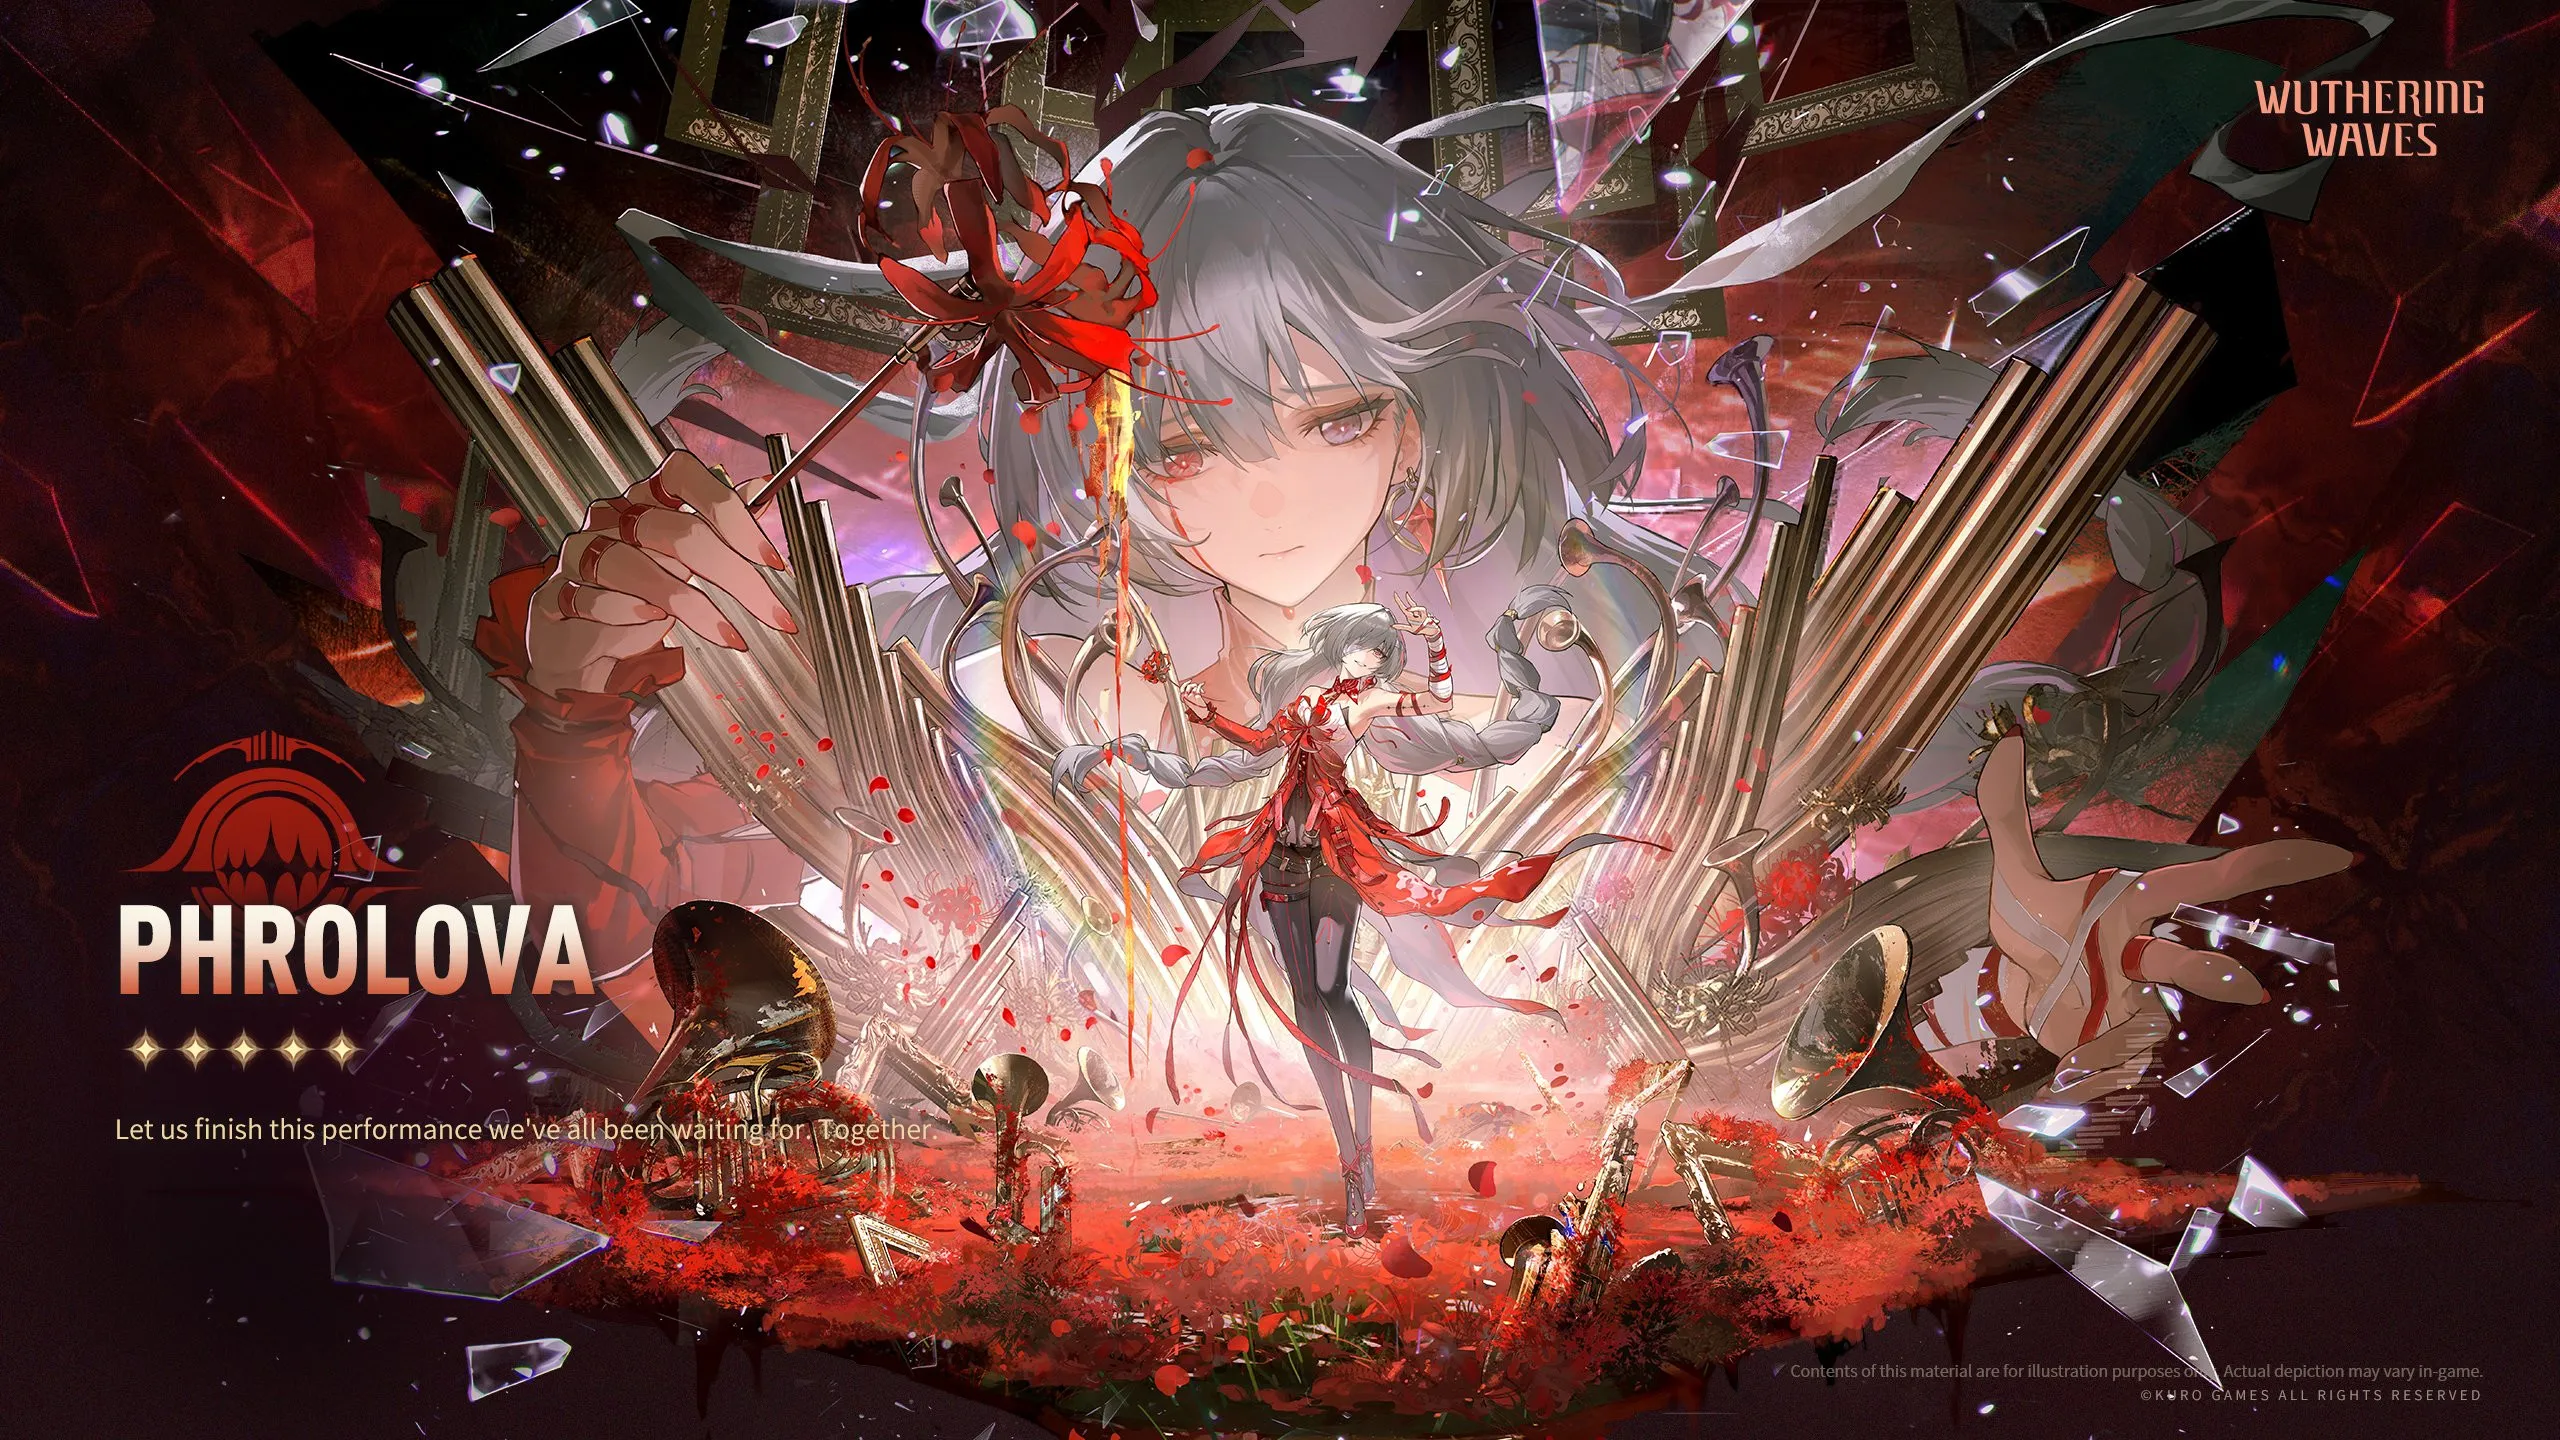
Phrolova Build: Maximize Havoc DPS
Master the ultimate Phrolova Build in Wuthering Waves! Discover her best weapons, optimal echo sets, priority stats, and the most devastating Echo Skill team compositions to maximize her Havoc damage potential in the Whimpering Wastes endgame. Welcome to the definitive guide for crafting the perfect Phrolova Build in Wuthering Waves! As a premium 5-star Havoc Rectifier Resonator, Phrolova introduces a completely unique combat style to the game. She is the very first character whose Resonance Liberation costs zero energy, relying entirely on her intricate Volatile Notes mechanic to summon her terrifying companion, Hecate. Whether you want to run her as an on-field hypercarry or a devastating off-field sub-DPS in the Whimpering Wastes, this comprehensive guide will walk you through everything required to maximize her Echo Skill damage. 💽 Best Echo Sets and Stat Priorities To perfectly optimize your Phrolova Build, you must focus entirely on amplifying her Echo Skill and Resonance Skill damage. Her undisputed best-in-slot Sonata Effect is a hybrid combination of the 3-piece Dream of the Lost set and a 2-piece Havoc Eclipse set. Dream of the Lost provides massive, unconditional Crit Rate and Echo Skill DMG bonuses, which perfectly complements her kit without forcing awkward rotations. For your Main Echo, Nightmare: Hecate is strictly mandatory, as it buffs the exact damage types Phrolova relies on. When tuning your stats, equip a 4-Cost Echo with Crit DMG or Crit Rate. Be careful not to overcap past 100% Crit Rate, since her gear provides a lot intrinsically! Run double Havoc DMG on your 3-Cost Echo slots, and round it out with ATK% on your 1-Cost slots. To achieve the absolute highest damage ceiling, your substat priority should always be: CRIT DMG > CRIT Rate > Resonance Skill DMG > ATK%. ⚔️ Top Weapons for Your Phrolova Build Equipping the correct Rectifier will make or break your overall damage output. Her signature 5-star weapon, Lethean Elegy, is an absolute masterpiece. It is the only weapon in the game that provides Echo Skill DMG Amplification, Resonance Skill DMG, and target DEF ignore all at once. If you miss her signature banner, the standard 5-star Stringmaster is a phenomenal alternative that heavily boosts ATK and Resonance Skill DMG. For free-to-play Rovers or those looking for more accessible options, Whispers of Sirens, Cosmic Ripples, or even the 4-star Augment provide excellent baseline ATK buffs to keep her damage highly competitive in endgame content. 🧠 Skill Priority and Gameplay Loop Understanding her Forte Circuit is critical to mastering her combat loop. Phrolova generates up to six "Volatile Notes" by weaving specific Basic Attacks and Resonance Skills. Once you secure all 6 Notes, you must cast a Heavy Attack to execute "Scarlet Coda." This immediately puts her into the Resolving Chord state, allowing you to cast her zero-energy Resonance Liberation to summon Hecate to the battlefield! When allocating your hard-earned materials, your Skill Priority must be: Resonance Liberation > Forte Circuit > Normal Attack. Her Liberation dictates Hecate's massive damage multipliers, which constitutes the bulk of her DPS even when Phrolova leaves the field. You can safely leave her Intro and Resonance Skill for last. 🤝 Optimal Team Compositions Phrolova is the undisputed queen of the Echo Skill DMG archetype. Because Hecate can launch Enhanced Attacks from off-field whenever an ally casts an Echo Skill, her premier meta team pairs her with Cantarella (Sub-DPS) and Qiuyuan (Sub-DPS). Qiuyuan serves as the ultimate Echo Skill buffer, while Cantarella casts multiple Echo Skills in rapid succession, triggering a relentless barrage of off-field Havoc damage from Hecate. If you prefer a Double DPS setup, pair Phrolova with Augusta or Sigrika, supported by Shorekeeper. Phrolova’s Outro Skill grants massive Havoc and Heavy Attack DMG Amplification, perfectly enabling a main carry like Augusta to sweep the battlefield while Hecate rains down continuous off-field destruction. Mastering Phrolova's Echo Skill rotations anchors the early progression of the update, especially for players investing in new characters. Travelers aiming to accelerate ascension farming can explore trusted Wuthering Waves Accounts, optimize resin/stamina efficiency with expert Wuthering Waves Hourly Services, or secure consistent boss clears through reliable Wuthering Waves Boosting as farming rotations intensify. GameMarket.gg is a trusted digital marketplace for everything gaming-related. We serve the gaming community by providing secure access that enhances every gaming journey.
Wuthering Waves
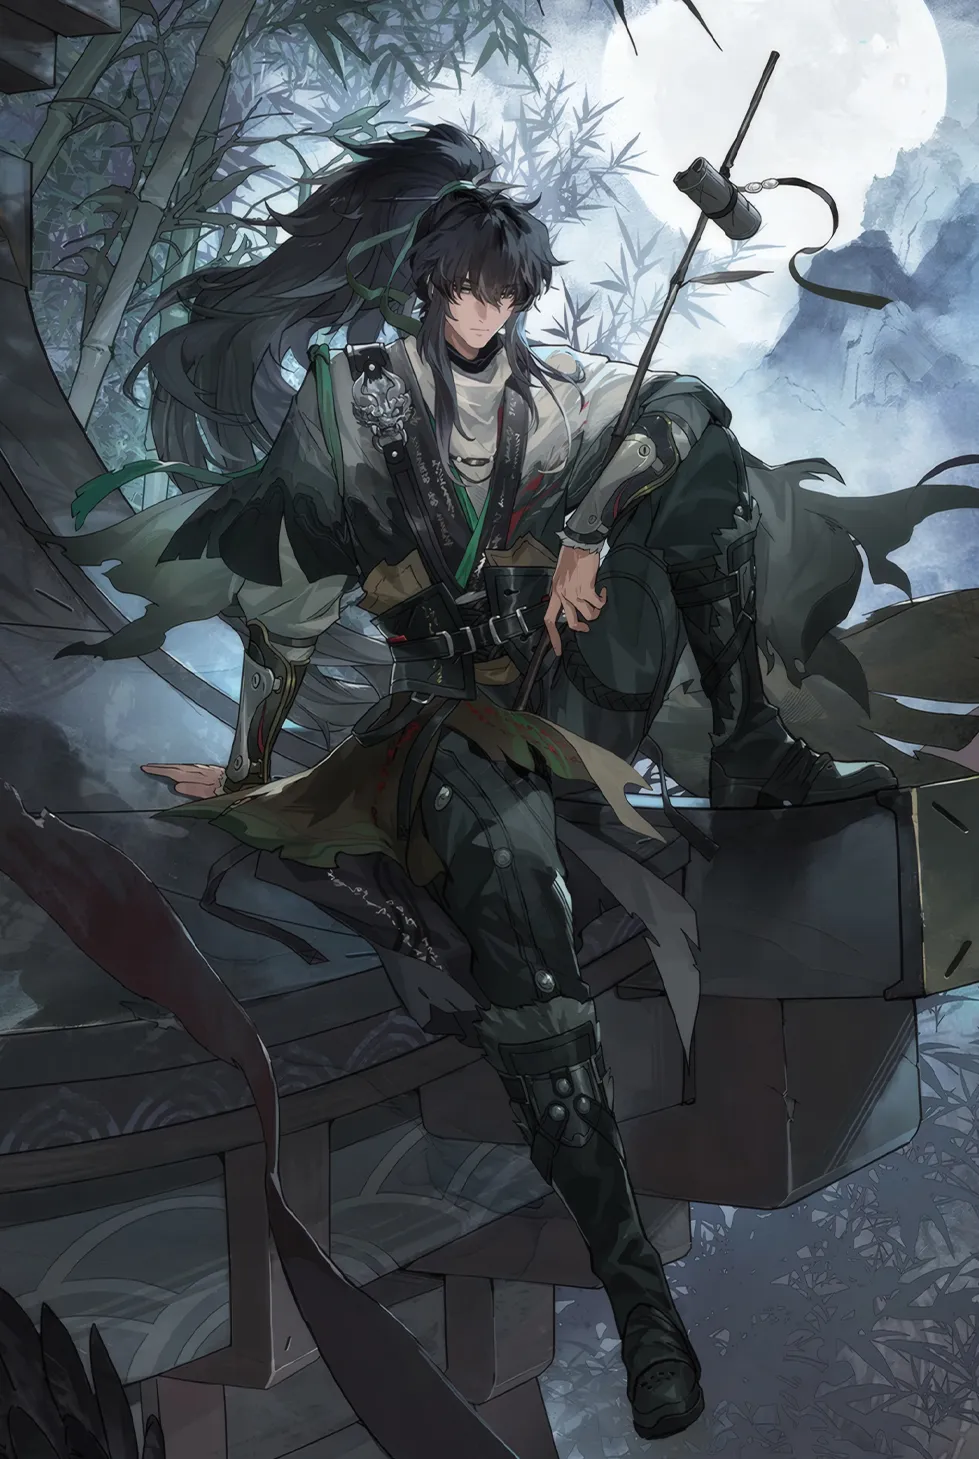
Ultimate Qiuyuan Build Guide for WuWa
Master the battlefield with this comprehensive Wuthering Waves Qiuyuan Builds Guide. Discover the absolute best echoes, weapons, Resonance Chains, team compositions, and skill priorities to unleash this 5-star Aero Sword resonator's unique Echo Skill DMG amplification potential across Solaris. 🌪️ Qiuyuan Character Overview: The Wandering Swordsman Voiced by Jeremy Ang Jones (EN) and Shin-ichiro Miki (JP), Qiuyuan is a 5-star Aero Sword resonator hailing from Huanglong. He is a highly specialized Sub-DPS whose kit is uniquely designed to enable and amplify Echo Skill-centric teams. While his personal damage is relatively lackluster at S0, his incredibly fast internal rotations allow him to rapidly generate Concerto energy and funnel massive Echo Skill DMG and Crit DMG buffs to the main DPS. However, his value plummets outside of his specific archetype, as there are currently very few resonators (like Galbrena, Phrolova, and Cantarella) who primarily scale off Echo Skill DMG. For players willing to invest in his Resonance Chains, particularly reaching S3, Qiuyuan completely transforms into a viable Main DPS capable of unleashing devastating Heavy Attacks. ⚙️ Optimal Gear: Best Echoes, Stats, and Weapons Gearing Qiuyuan depends entirely on his intended role within your party. If you are utilizing him in his primary role as an Aero Echo Skill Sub-DPS, you must maximize his buffing capabilities through specific sets and stat thresholds: Best Sonata Effect: A 3-piece Law of Harmony combined with a 2-piece Sierra Gale is his absolute best-in-slot, perfectly boosting his team-wide Echo Skill DMG buffs while providing necessary Aero DMG. Alternative Sonata Effect: If you need more Energy Regen, a 5-piece Moonlit Clouds set is an excellent secondary option that allows him to function as a general-purpose Crit DMG Sub-DPS. Best Main Echo: Reminiscence: Fenrico. This Law of Harmony Echo synergizes flawlessly with his kit by boosting both his Aero and Heavy Attack DMG. Main Stat Priority: 4-COST (Crit Rate or Crit DMG), 3-COST (Aero DMG), and 1-COST (ATK%). Substat Tuning Priority: CRIT Rate > CRIT DMG > Energy Regen > Heavy Attack DMG > ATK% > Flat ATK. The 65/130 Golden Rule: Qiuyuan’s Resonance Liberation provides the team with 2% Crit DMG for every 1% of his Crit Rate that exceeds 50% (up to a 30% max buff). Therefore, hitting exactly 65% Crit Rate is absolutely mandatory. Furthermore, because his on-field time is so short, securing 130% Energy Regen is required to guarantee his Liberation is available every rotation. When selecting his weapon, his signature 5-star sword, Emerald Sentence, is undeniably his best choice, providing a massive 12% ATK boost and a crucial 30% Heavy ATK DMG Bonus that stacks twice. If his signature is unavailable, the standard 5-star Emerald of Genesis provides excellent Energy Regen and ATK buffs. For 4-star options, Lumingloss excels due to its Heavy Attack DMG buffs, while the event-exclusive Somnoire Anchor serves as a decent alternative. 🤝 Best Team Compositions and Rotation Combos To unleash Qiuyuan's maximum potential, he must be paired with allies who can fully utilize his highly specific buffs. His absolute best team composition is the Fusion Echo Skill Team, featuring Galbrena (Main DPS) and Shorekeeper (Support). Qiuyuan is inarguably Galbrena's best Sub-DPS option, as he is the sole unit in the game capable of directly buffing the Echo Skill DMG that she primarily scales off of. To execute his flawless, fast-paced combo rotation on the battlefield, follow this exact sequence: Enter the field via Intro Skill to instantly generate 400 points of his Swordster's Soliloquy Forte gauge. Quickly perform two Basic Attacks to completely fill his Forte to max stacks (600 points). Cast your Echo Skill followed immediately by his Resonance Liberation to maximize the team-wide Echo Skill DMG and Crit DMG buffs. Hold the Heavy Attack button to perform his 3-attack string. During his Inksplash of Mind state, these attacks are considered Echo Skill casts. Cast his Resonance Skill for extra damage and instant damage negation, then immediately swap out via Outro to grant a massive 50% Echo Skill DMG Amplification to the incoming main DPS. 📚 Skill Priority, Resonance Chains, and Ascension Materials When investing your hard-earned materials into his skill tree, prioritize upgrading his Forte Circuit first, as his transformed Basic and Heavy attacks scale entirely off this node. Follow this by leveling his Resonance Liberation for its instantaneous burst damage, then equally distribute points into his Resonance Skill and Normal Attacks. His Intro Skill should be leveled last. To fully ascend Qiuyuan and max out his Forte, you will need to farm 46 Truth in Lies boss materials, 60 Wintry Bells, 26 Curse of the Abyss weekly boss drops, alongside an abundance of Whisperin Cores and Metallic Drips, totaling over 2.2 million Shell Credits. For players looking to push his combat potential, unlocking his Resonance Chains (Sequence Nodes) provides massive advantages: S1 (Sword Sheathed, Mind Unclouded): Grants interruption immunity during his Forte attacks and a flat 20% Crit Rate increase, making his 65% threshold incredibly easy to reach. S2 (O Blade, I, Who Teach No More): The best stopping point for Sub-DPS builds. It grants an additional 30% Echo Skill DMG Amplification to the entire team. S3 (O Blade, I, Who Save No More): The Main DPS enabler. It increases his Liberation damage multiplier by 500% and completely revamps his Resonance Skill to deal massive Echo Skill DMG while consuming Concerto Energy. S4 (O Blade, I, Who Sacrifice No More): A mediocre node that only provides a flat 20% ATK increase. S5 (O Blade, I, Who Await to be Wielded): Allows all of his damage to ignore 15% of the target's DEF. S6 (Thus I Heard, Thus I Saw, Thus I Spoke): The ultimate capstone. His heavy attacks now stagnate enemies, and casting his S3 Resonance Skill grants him a massive 100% Crit DMG boost for 6 seconds. Mastering Qiuyuan's rapid rotations anchors the early progression of the update, especially for players investing in new characters. Travelers aiming to accelerate ascension farming can explore trusted Wuthering Waves Accounts, optimize resin/stamina efficiency with expert Wuthering Waves Hourly Services, or secure consistent boss clears through reliable Wuthering Waves Boosting as farming rotations intensify. GameMarket.gg is a trusted digital marketplace for everything gaming-related. We serve the gaming community by providing secure access that enhances every gaming journey.
Wuthering Waves
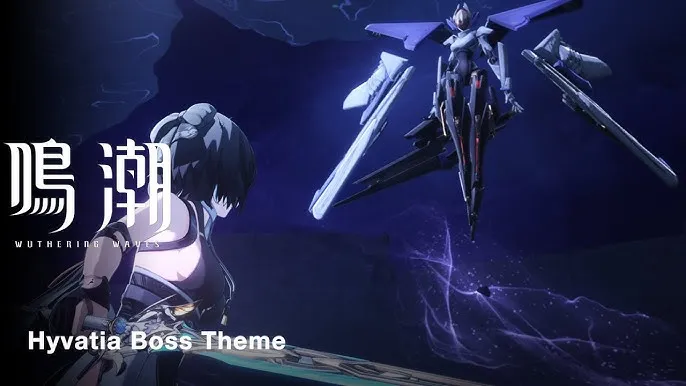
Hyvatia Boss Guide: Wuthering Waves
Before traversing the treacherous terrains of Starward Riseway, every Rover needs a comprehensive Wuthering Waves Guide to survive the encounter with Hyvatia. Mastering this Lahai-Roi boss's deadly mechanics, evasive maneuvers, and unique Tune Break vulnerabilities is essential for farming Suncoveter's Reach. 📍 Locating Hyvatia in the Frostlands Finding this formidable Lahai-Roi boss requires progression through the main storyline, specifically Chapter 3 Act 1: What Burns Beneath Frostlands. Once you successfully unlock the first Lahai-Roi Resonance Nexus, head towards the circular arena located directly below the massive long bridge in Starward Riseway, just north of Startorch Academy. You must be on high alert as you approach the arena; Hyvatia is incredibly aggressive and will instantly initiate the battle in its railgun form the moment you enter its periphery. A crucial tip from this Guide is to utilize your Expedition Motorbike to close the distance rapidly, preventing you from getting caught off guard by a sudden, devastating railgun shot. ⚔️ Mastering Hyvatia's Deadly Mechanics Hyvatia is notoriously slippery, preferring to maintain a safe distance while raining down ranged attacks from above. Instead of wasting your precious stamina endlessly chasing it while it hovers high in the air, simply dodge through its projectile barrages and wait patiently for it to descend. When it finally lands, use your Intro and Outro skills, or deploy resonators with innate aerial mobility like Phoebe or Mornye, to quickly close the gap and stick to the target. To secure a swift victory, you must properly counter its specific attack patterns and exploit its weaknesses: The Eye of Perception: This lethal attack sequence triggers shortly after you break the boss's Vibration Strength for the first time. Hyvatia will launch into the sky, attempting to grab and instantly eliminate your active character. It sweeps in twice; if you dodge the first sweep, you must parry the second. Conversely, if you parry the first sweep, you must dodge the second. Repeating the exact same defensive action guarantees an instant elimination. After surviving the sweeps, be prepared to dodge the resulting ground slam a few seconds later. Tune Break Vulnerability: Hyvatia will glow brightly when its Tune Break meter (located to the left of its HP bar) is completely full. Breaking the boss leaves it stunned and extremely vulnerable to Tune Rupture. Once Tune Broken, it takes 100% more damage initially, and an additional 15% more damage for the following 15 seconds. Bypassing Phase Two: The dangerous second phase activates immediately after the first Vibration Strength break and the subsequent Eye of Perception sequence. It is highly recommended to unleash your strongest burst damage and Echo skills to eliminate the boss before this phase can fully trigger. 💎 Reaping the Rewards: Ascension Material Drops Surviving this intense aerial encounter yields incredibly valuable resources for your roster's progression. The most sought-after drop from this boss is the Suncoveter's Reach, an exclusive Resonator Ascension material absolutely necessary for leveling up newer generation characters like Lynae. Alongside this rare material, your successful hunt will also reward you with a bounty of Union Experience, Advanced Resonance Potions, Advanced Sealed Tubes, Advanced Energy Cores, and a generous amount of Shell Credits to fund your ongoing resonator upgrades. Mastering Hyvatia's mechanics anchors the early progression of the update, especially for players investing in new characters. Travelers aiming to accelerate ascension farming can explore trusted Wuthering Waves Accounts, optimize resin/stamina efficiency with expert Wuthering Waves Hourly Services, or secure consistent boss clears through reliable Wuthering Waves Boosting as farming rotations intensify. GameMarket.gg is a trusted digital marketplace for everything gaming-related. We serve the gaming community by providing secure access that enhances every gaming journey.
Wuthering Waves
Sigrika Best Build and Teams Guide
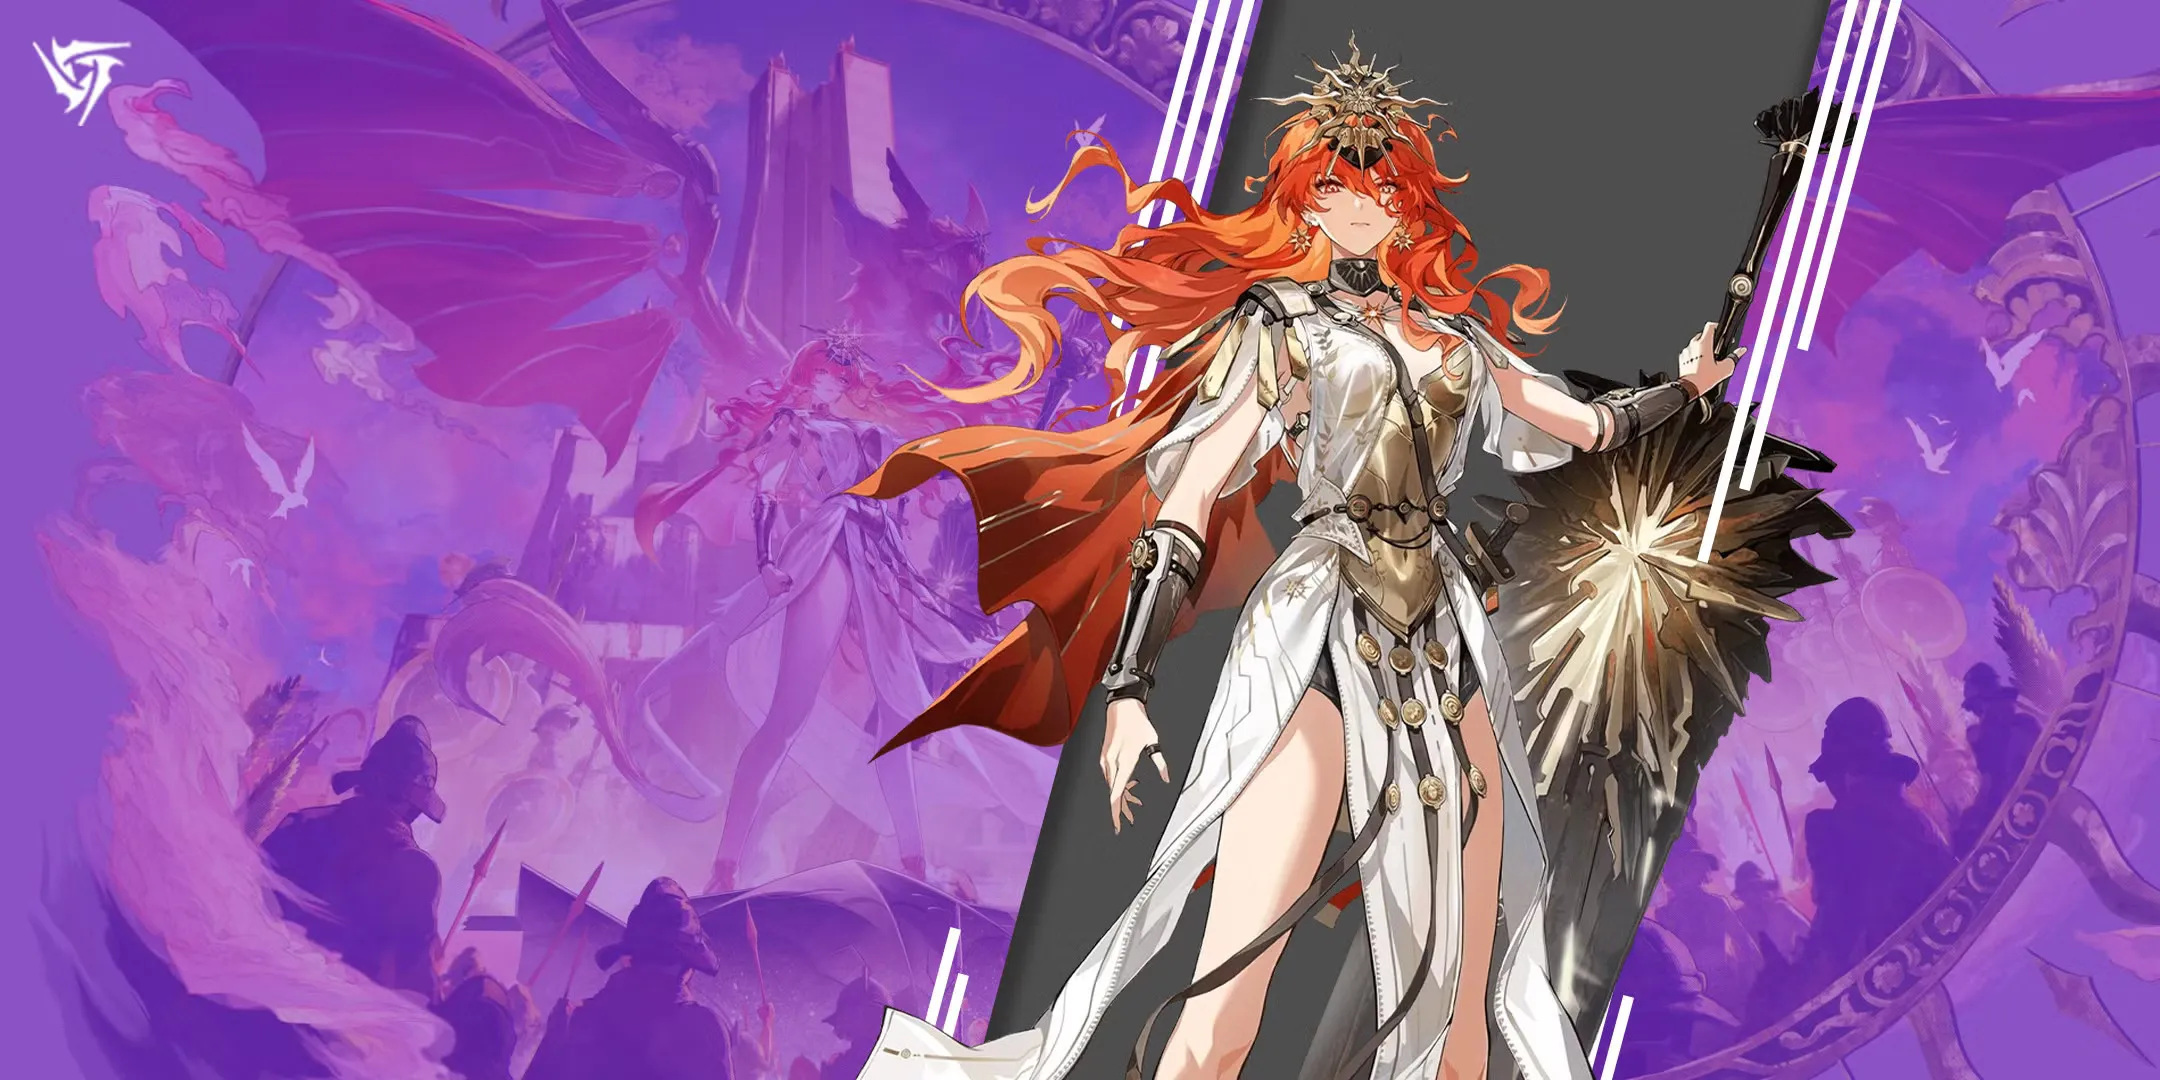
Master the battlefield with this comprehensive Wuthering Waves Sigrika Build Guide. Discover the absolute best echoes, weapons, Resonance Chains, team compositions, and skill priorities to unleash this 5-star Aero Gauntlet resonator's devastating Echo Skill DMG potential across Solaris. 🌪️ Sigrika Character Overview: The Aero Solsworn Voiced by Maya Lindh (EN) and Akasaki Chinatsu (JP), Sigrika is a formidable 5-star Aero Gauntlet resonator hailing from the Startorch Academy. Her kit is uniquely designed around a very specific and powerful archetype: Echo Skill DMG. While she boasts incredibly high damage multipliers, phenomenal self-buffing capabilities, and amazing crowd control utility for endgame content, she comes with a notable caveat. Her true potential is heavily gated behind specific team compositions, making her a high-investment character. She lacks the tune-shifting mechanics common among Version 3.x characters and suffers significantly if placed in general Aero-centric teams. However, for players willing to construct a precise Build around her unique strengths, Sigrika stands as a premier main DPS capable of annihilating foes through complex rune management and explosive heavy attacks. ⚙️ Optimal Gear: Best Echoes, Stats, and Weapons Gearing Sigrika requires a complete shift from standard DPS conventions, as her damage primarily scales off Echo Skill DMG buffs rather than standard attribute damage. Maximizing her potential requires careful attention to her Echo sets, main stats, and substat tuning: Best Sonata Effect: The 5-piece Sound of True Name set is her absolute best-in-slot, optimally boosting both her Aero and Echo Skill DMG. Alternative Sonata Effect: The 5-piece Sierra Gale set provides a generalistic Aero DMG buff, making it a decent placeholder. Best Main Echo: Nameless Explorer. This summon-type Echo seamlessly weaves into her combos while stacking its buffs directly on top of her Sound of True Name Sonata Effect. Main Stat Priority: 4-COST (Crit DMG or CRIT Rate), 3-COST (Energy Regen or ATK%), and 1-COST (ATK%). Actively rolling for Aero DMG bonuses on 3-COST echoes is highly inefficient for her. Substat Tuning Priority: CRIT DMG > CRIT Rate > Energy Regen > ATK% > Flat ATK. The 150% Energy Regen Rule: Sigrika’s passive talent grants her a 2% Echo Skill DMG Bonus for every point of Energy Regen she has above 125%. Therefore, hitting exactly 150% Energy Regen is absolutely mandatory in her Build to secure a massive 50% Echo Skill DMG Bonus. Because of her incredibly niche damage scaling, her weapon options are currently quite limited. Her signature 5-star weapon, Solsworn Ciphers, is undeniably her best choice, providing a massive 12% ATK boost, 32% Echo Skill DMG Amplification, and a crucial 10% DEF ignore when she casts her Intro or Echo Skills. If her signature is out of reach, the battle pass gauntlet Blazing Justice serves as the next best alternative with its innate DEF shred. Standard 5-star options like Abyss Surges can also be used as a solid stat stick thanks to its high base ATK and Energy Regen passive. 🤝 Best Team Compositions and Rotation Combos To unleash Sigrika's maximum damage-per-rotation (DPR), she must be paired with allies who can consistently funnel buffs and trigger her passive abilities. Her ultimate team composition is the Echo Skill Hypercarry Team, featuring Qiuyuan (equipped with the Moonlit Clouds set) and Shorekeeper (equipped with the Rejuvenating Glow set). Qiuyuan is the irreplaceable engine of this composition; his ability to perform multiple Echo Skill casts directly triggers Sigrika’s Blessing of Runes and Soliskin Vitality passive buffs. To execute her flawless full-damage combo rotation on the battlefield, follow this exact sequence: Enter the field via Intro Skill to activate the Convergent state. Quickly cast your Echo Skill followed by three Basic Attacks to enter the Decipher state. Cast Resonance Skill to pull enemies together and generate Runes. Perform an enhanced Heavy Attack, then immediately cast your Resonance Liberation to enter the Divergent state. Execute five more Basic Attacks, followed by another enhanced Heavy Attack. Hold your Resonance Skill to charge and unleash her ultimate Forte finisher, Learn My True Name, before swapping out via Outro. This combo heavily relies on her Rune mechanics. She generates Rune: Trust (Yellow) via Basic Attacks/Dodge Counters, and Rune: Answer (Blue) via her Resonance Skill. Combining these Runes dictates the effect of her Heavy Attack: opposite runes trigger Runic Outburst (massive damage), two yellows trigger Runic Chain Whip (stagnates enemies), and two blues trigger Runic Soliskin (pulls enemies in). 📚 Skill Priority, Resonance Chains, and Ascension Materials When investing your hard-earned materials into her skill tree, prioritize upgrading her Forte Circuit first, as it houses her primary nuke damage. Follow this by leveling her Resonance Liberation, then equally distribute points into her Normal Attacks and Resonance Skill to empower her combo setups. Her Intro Skill should be leveled last. To fully ascend Sigrika and max out her Forte, you will need to farm 46 Our Choice boss materials, 60 Arithmetic Shells, 26 Gold in Memory weekly boss drops, alongside an abundance of Exoswarm Pendants and Waveworn Shards, totaling over 2.2 million Shell Credits. For players looking to push her damage ceiling even higher, unlocking her Resonance Chains (Sequence Nodes) provides massive combat advantages: S1 (The Gleam Meant for Radiance): Grants interruption immunity during key skills, increases base skill DMG multipliers by 70%, and allows her Encapsulated out-skill to stack up to 3 times for more frequent enemy stagnation. S2 (The Bitterness Steeped in Hope): The best stopping point for low spenders. It provides a massive 120% DMG multiplier to her Forte Circuit finisher, Learn My True Name. S3 (I Flee, Yet I Seek): Doubles her DMG Amplification by allowing Innate Gift to stack up to 4 times, persisting even when she swaps off-field. S4 (I Lose, Yet I Gain): Grants the entire team a 20% ATK buff for 20 seconds whenever an Echo Skill is cast. S5 (Until Submerged by the Dark): Increases her Resonance Liberation damage multiplier by 30%. S6 (True Names Resurfaced, Rising in Light): The ultimate capstone. Enemies take 30% more damage from Sigrika, and her Forte skills gain an additional 15% DMG Amplification and 7.5% DEF ignore per stack. Mastering Sigrika's complex rune combos anchors the early progression of the update, especially for players investing in new characters. Travelers aiming to accelerate ascension farming can explore trusted Wuthering Waves Accounts, optimize resin/stamina efficiency with expert Wuthering Waves Hourly Services, or secure consistent boss clears through reliable Wuthering Waves Boosting as farming rotations intensify. GameMarket.gg is a trusted digital marketplace for everything gaming-related. We serve the gaming community by providing secure access that enhances every gaming journey.
Wuthering Waves
Wuthering Waves 3.2 Update: Sigrika & Events
Prepare for an incredible journey across Solaris as the Wuthering Waves Version 3.2 Update drops. From the fierce new aero resonator Sigrika to massive Echo optimizations and challenging Endstate Matrix gameplay, this massive patch redefines the adventure. 🌑 Shadows Illuminated: Maintenance and Story Expansion The highly anticipated Resolution to Illuminate the Shadows patch officially brings a wealth of fresh content and generous compensations for Rovers. Following the maintenance, players who have unlocked the mail feature will receive three hundred Astrite and two Crystal Solvents for the downtime, alongside an additional three hundred Astrite for crucial bug fixes. This major expansion introduces the captivating Chapter III Act IV main quest, Gold Suspended in Shadows, where you will join forces with a new student to investigate mysterious frequencies lurking within the Dark Side of Startorch Academy. Once the festival dust settles, the narrative continues with the Rabbit Reflected in Shades afterstory, challenging players to uncover the Fractsidus's true motives alongside a strange rabbit. Furthermore, the new permanent event, Whispers Between Stars, allows Rovers to delve deeper into resonator side storylines, offering Astrites and the exclusive Memories of the Stars expedition motorbike livery. 🌪️ Sigrika's Arrival: New Resonators, Weapons, and Brutal Foes Combat in Solaris is about to reach exhilarating new heights with the debut of Sigrika, a prestigious five-star Aero gauntlet user hailing from Startorch Academy. Designed as a formidable main damage dealer with exceptional traction and echo skill damage capabilities, she is ready to dominate the battlefield and prove herself as a true Solsworn. To maximize her devastating potential, players can pull for her signature five-star weapon, the Solsworn Ciphers, which perfectly complements her aggressive playstyle. However, this power will be immediately put to the test against a terrifying new roster of enemies, including the chaotic Phagosite variants such as the Bipolarch, Hysterarch, and Miserarch, alongside deadly Fractsidus operatives like the Milliner, Mawdoll, and Ripper. 🎮 Rhythmic Festivals and High-Stakes Academy Events Beyond intense combat and deep storytelling, the academy grounds are bustling with an incredible lineup of special events designed to test a variety of skills. Rovers can unwind, gather rewards, and engage their minds with an array of unique challenges scattered throughout the world: Soar to the Beat: A rhythm challenge at the Mind Dive Arcade where you catch "Stellar Orbit Beats" to earn the Astral Flight Sigil. Lahai-Roi Blocks: A leisure event introduced by Tetoris that tests your spatial awareness with a wondrous new block game. F.U.E.L. Instrumentality Project: A quirky simulation playtest hosted by Van Tassie to revolutionize food optimization. Knights of the Wild: A featured combat challenge where you must assist roaming Mechascouts in peril across Lahai-Roi. The Flaming Red in Memory: A showcase event where you join Platya, a Black Shores Bloom Bearer, to chase the legend of a Ghost Miko. Endstate Matrix: A high-difficulty recurring challenge in Solaris's data space where you battle malice to earn the Matrix Ranger title, Doomsday Cycle Sigil, and Call from Beyond the Stars livery. Gifts of Solsworn: A 7-day login event providing a steady stream of daily rewards. Collab Livery Bundles: Limited-time QUEEN and VIOLET expedition motorbike bundles available in the in-game store. New Hologram Challenge: A brand new Tactical Hologram synchronization fight against the formidable Hyvatia. ⚙️ Echo Management Overhaul and Quality of Life Enhancements Managing your hard-earned loot has never been easier thanks to the massive systematic overhauls implemented in this patch. The development team has completely revolutionized how Rovers handle their gear and traverse the open world, ensuring a much smoother gameplay loop: Echo Filtering & Discarding: Added batch discard, batch lock, and smart discard features directly within the Echo Backpack and Data Bank. Plan Codes & Sharing: You can now import recommended management plans, edit plans based on Sonata Effects, and share your Echo configurations with other Rovers using Plan Codes. Auto-Discard System: A highly requested feature that, when enabled, automatically marks all non-5-Star Echoes for discard upon obtaining them. Enhanced Absorption Fixes: Guaranteed Echo drops from quests and base drop rate successes no longer consume your precious Enhanced Absorption attempts. Material Tracking: Clicking a specific material now opens the map and exclusively tracks Tacet Discords that drop it within your radius. Motorbike Autopilot: Improved obstacle-avoidance logic to prevent wrong turns and temporarily expanded joystick control areas on mobile for effortless reversing. Resonator Trials: Ascendant Aces now allows you to instantly claim rewards for Resonator trials you already completed in previous versions. 💻 Next-Generation Graphics, UI, and Deep Bug Fixes To ensure the visual fidelity matches the thrilling gameplay, Kuro Games has rolled out substantial graphical, performance, and UI upgrades across all platforms. Accompanying these massive upgrades is an extensive list of bug fixes that resolve countless immersion-breaking issues, ensuring your journey remains flawless: PC & Mobile Graphics: Added PC Render Distance settings (Default, Far, Farthest) and a High Quality mobile toggle (supported by Snapdragon 8 Elite/8s Gen 4, Dimensity 9400, or XRing O1). Resource Cleanup (Beta): PC and Mac users can now delete watched cutscenes to save storage space (requires an initial 10GB structural download). UI Polish: Implemented cross-device synchronization for red notification dots, added text and visual previews for graphics settings, and simplified the Weekly Challenge display. Character Bug Fixes: Resolved abnormal model behaviors for Luuk Herssen, fixed camera pulls and SFX issues during Aemeath's Mech form/Dodge Counters, corrected Lynae's Optic Camo interactions with Hoverdroids, and fixed Iuno's Resonance Liberation lighting. Quest & Co-op Fixes: Fixed progression blocks in "The Star That Voyages Far," "What Yesterday Wept," "By Moon's Fated Light," "Treasures in the Painting," and "Moments Captured in Light." Also corrected abnormal Tacet Field co-op countdown timers. System & Environment Fixes: Resolved issues preventing DLSS and 120 FPS from enabling on capable PCs and M5 iPads, fixed iOS crashing instances, and corrected rendering errors for snowfields and skies in the Roya Frostlands and Honami City. Mastering the Endstate Matrix anchors the early progression of the update, especially for players investing in new characters. Travelers aiming to accelerate ascension farming can explore trusted Wuthering Waves Accounts, optimize resin/stamina efficiency with expert Wuthering Waves Hourly Services, or secure consistent boss clears through reliable Wuthering Waves Boosting as farming rotations intensify. GameMarket.gg is a trusted digital marketplace for everything gaming-related. We serve the gaming community by providing secure access that enhances every gaming journey.
Wuthering Waves
Augusta Gameplay, Weapon & Resonance Chains Explained | Wuthering Waves
Augusta Kit, Weapon & Resonance Chains Revealed! | Wuthering Waves Augusta is an upcoming 5-star Electro Resonator expected to debut in Wuthering Waves Version 2.6. She wields a Broadblade and focuses on a hybrid playstyle that blends frontline Electro DPS with team shielding support. Her kit revolves around building special Forte gauges that unlock powerful abilities and enhanced Resonance Liberations. With strong burst damage, defensive utility, and team buffs, Augusta introduces a unique combat style that rewards aggressive rotations while protecting allies. Augusta Basic Information Attribute Details Rarity 5★ Element Electro Weapon Broadblade Role DPS / Shield Support Augusta functions as a frontline Electro damage dealer who builds up multiple gauges to unleash enhanced abilities. Her kit allows her to generate shields for the team while delivering heavy Electro damage through charged attacks and Resonance Liberation. This combination of offense and defense makes her a versatile carry option in Electro compositions. Augusta Signature Weapon Thunderflare Dominion Base ATK: 675Crit Rate: 12.2% Weapon Effect (R1) ATK increases by 12%. Casting Intro Skill or Resonance Skill increases Heavy Attack DMG by 20% for 15 seconds. When obtaining a shield, Heavy Attack damage ignores 7.2% of the enemy’s DEF, stacking up to 5 times. This weapon strongly synergizes with Augusta’s kit since she frequently generates shields and relies heavily on Heavy Attack damage during her rotations. Augusta Combat Mechanics Augusta’s gameplay revolves around managing three core mechanics: Prowess Ascendancy Majesty These gauges determine when she can access enhanced attacks and special abilities. Normal Attack – Hunter’s Path Basic Attack Performs up to four consecutive strikes, dealing Electro damage. Heavy Attack – Steelclash Consumes stamina to unleash a powerful Electro strike. Players can chain this into Basic Attack Stage 2 for smoother attack combos. Mid-Air Attack Consumes stamina to attack enemies from the air. Dodge Counter After a successful dodge, Augusta can counterattack with Electro damage. Heavy Attack – Thunderoar Skills When Prowess reaches maximum, Augusta unlocks powerful enhanced Heavy Attacks. These include: Thunderoar: Backstep Consumes Prowess and deals Electro damage. Thunderoar: Spinslash A spinning Broadblade attack that deals wide-area Electro damage. Thunderoar: Uppercut Launches enemies with a powerful upward slash. These attacks form the core of Augusta’s burst damage rotation. Prowess Mechanic Augusta can hold up to 100 Prowess. Prowess is generated through: Basic Attacks Heavy Attacks Resonance Skill Dodge Counters Mid-air attacks Casting Intro Skill fully restores Prowess, enabling faster access to enhanced Heavy Attacks. Resonance Skill – Warrior’s Blade Augusta leaps into the air and slams her Broadblade onto enemies, dealing Electro damage. This ability helps generate Ascendancy gauge and contributes to her overall burst rotation. Resonance Liberation – Sunward Conquest Augusta’s ultimate ability can transform depending on her Majesty stacks. Sword of Eternal Oath A powerful Electro slash considered Heavy Attack damage. It also restores a portion of Augusta’s Ascendancy gauge. Sublime is the Sun When Augusta reaches 2 Majesty stacks, she can cast this enhanced Liberation. This creates Ruler’s Realm and places Augusta in the Sworn Allegiance state. During this state: Time temporarily stops Character switching is disabled Augusta performs rapid attacks called Sunborne After several attacks, she finishes with: Everbright Protector A devastating Electro strike that ends the Sworn Allegiance state. Ruler’s Realm Ruler’s Realm lasts 30 seconds. While active: When teammates use Intro Skills, they gain a shield based on Augusta’s Max HP. This mechanic allows Augusta to function as both a damage dealer and defensive support. Forte Circuit – Call Me By the Sun Augusta’s Forte Circuit unlocks enhanced Resonance Skills when Ascendancy is full. These enhanced abilities include: Undying Sunlight: Strike Undying Sunlight: Leap Undying Sunlight: Plunge These attacks deal Electro damage and consume Ascendancy to create powerful combo chains. Intro Skill – Stride of Goldenflare Deals Electro damage and restores resources needed for Augusta’s enhanced attacks. Outro Skill – Battlesong of the Unyielding The next character swapped onto the field gains: 15% damage amplification to all attributes Additionally, when teammates trigger their Outro Skills: Augusta gains Majesty stacks and Crown of Wills stacks. Crown of Wills Crown of Wills increases Augusta’s Electro damage by 15%. Stacks are consumed after casting Everbright Protector, making it part of her burst cycle. Inherent Skills Glory’s Favor Whenever Augusta deals damage, she generates a shield based on her Max HP. Blazing Valor When out of combat for several seconds: Augusta restores Majesty stacks Crown of Wills is fully refreshed. Resonance Chains Augusta’s Resonance Chains significantly enhance her damage and utility. Chain 1 – Stained in Scorched Earth Increases Crown of Wills stacks Adds Crit DMG scaling Also grants interruption immunity during certain Resonance Skills. Chain 2 – Cleansed in Crimson War Each Crown of Wills stack now increases Crit Rate by 20%. This dramatically boosts Augusta’s DPS potential. Chain 3 – Forged in Rot and Ruin Multiple skills gain 25% increased damage multipliers, including: Heavy Attack abilities Enhanced Resonance Skills Sublime is the Sun attacks Chain 4 – Ascent in Sun and Glory Using Intro Skill increases team ATK by 20% for 30 seconds. Chain 5 – Unshaken in Wrathful Tides The shield generated by Augusta’s inherent skill becomes 50% stronger. Chain 6 – Engraved in Radiant Light Augusta can hold additional Crown of Wills stacks. Her Heavy Attacks trigger Thunder Rage, dealing extra Electro damage. This greatly increases her burst potential. Final Thoughts Augusta brings a unique mix of Electro DPS power, team shielding, and damage amplification to Wuthering Waves. Her kit revolves around building and consuming multiple gauges to unleash devastating Heavy Attack chains and enhanced Resonance Liberations. With strong offensive pressure and defensive support, Augusta could become a versatile pick for teams that want a frontline Electro carry capable of protecting allies while delivering massive burst damage. If you’re planning to prepare for Version 2.6 and future Electro characters, you can explore Accounts, Hourly Services, and Boosting to strengthen your roster and secure resources for upcoming banners.GameMarket.gg is a trusted digital marketplace for everything gaming-related. We serve the gaming community by providing secure access that enhances every gaming journey.

Wuthering Waves
Changli Build Guide | Wuthering Waves Weapons, Echo Sets & Teams
Wuthering Waves Changli Build Guide: Weapons, Echoes & Teams Changli is a 5-star Fusion Sword Resonator in Wuthering Waves who functions as a powerful DPS and Fusion buffer. Her kit revolves around her Forte Circuit, which enables high burst damage while also supporting teammates through Fusion damage amplification. This guide covers everything you need to optimize Changli, including skill priorities, best weapons, Echo sets, stat priorities, and team compositions. Changli Resonator Overview Attribute Details Rarity 5★ Element Fusion Weapon Sword Role DPS / Sub DPS Changli is a versatile damage dealer capable of both consistent DPS and powerful burst windows. Her Forte Circuit allows her to deal significant Fusion damage while enabling quick swaps with teammates. Additionally, her Outro Skill amplifies Fusion DMG for allies, making her an excellent partner for Fusion-based teams, particularly alongside characters like Encore. Because of this dual role, Changli fits comfortably as either: A Fusion main DPS A quick-swap sub DPS A Fusion support buffer Changli Gameplay and Playstyle Changli’s gameplay revolves around managing her Forte Circuit stacks and timing her Resonance Skill for burst damage. Her rotation typically follows this pattern: Generate Forte stacks through attacks and skills. Use Resonance Skill to trigger enhanced damage. Swap characters to activate Outro buffs for Fusion teammates. Re-enter combat to repeat the damage cycle. Because of this design, Changli excels in quick-swap team compositions where multiple characters rotate through burst windows. Changli Skill Priority Skill Priority Forte Circuit ★★★★★ (Highest) Resonance Skill ★★★★ Resonance Liberation ★★★ Normal Attack ★★ Intro Skill ★ Changli’s Forte Circuit should always be upgraded first since it directly increases her main damage source. Her Resonance Skill comes next because it provides strong burst damage and triggers important weapon and Echo effects. Her Resonance Liberation is useful but less central to her overall DPS rotation. Normal Attacks and Intro Skill have the lowest priority. Best Weapons for Changli Changli performs best with weapons that provide Crit stats, ATK scaling, or Resonance Skill damage bonuses. Best-in-Slot Weapon Blazing Brilliance (5★) Base ATK: 588 Crit DMG +48.6% Passive Effect: ATK +12% Gain Searing Feather stacks when dealing damage Each stack increases Resonance Skill DMG This weapon perfectly matches Changli’s kit by boosting Resonance Skill burst damage, which is a core part of her gameplay. Alternative 5-Star Weapon Emerald of Genesis Base ATK: 588 Crit Rate +24.3% Passive: Energy Regen +12.8% Casting Resonance Skill increases ATK A strong alternative that improves energy generation and consistent damage. 4-Star Alternatives Commando of Conviction ATK +30.4% Casting Intro Skill increases ATK by 30% Good for quick-swap rotations. Lunar Cutter ATK +30.4% Provides stacking ATK buffs when entering battle A reliable option for sustained combat scenarios. Best Echo Sets for Changli Echo builds focus on maximizing Fusion damage and Resonance Skill scaling. Best Echo Set Molten Rift (5-Piece) 2-Piece Effect: Fusion DMG +10% 5-Piece Effect: Fusion DMG +30% after using Resonance Skill This set provides the highest damage output for Changli by enhancing both Fusion damage and skill-based burst. Recommended Main Echo Nightmare: Inferno Rider Effects: Deals high Fusion damage Provides Fusion DMG and Resonance Skill bonuses Can transform into Riding Mode for additional attacks This Echo significantly improves Changli’s burst potential. Beginner Echo Set Molten Rift + Lingering Tunes (2pc + 2pc) Effects: Fusion DMG +10% ATK +10% This hybrid setup works well before completing a full Molten Rift set. Best Echo Stats for Changli Main Stats Echo Cost Main Stat 4-Cost Crit Rate / Crit DMG 3-Cost Fusion DMG% or ATK% 1-Cost ATK% Substat Priority CRIT Rate → CRIT DMG → ATK% → Resonance Skill DMG → Resonance Liberation DMG → Energy Regen High Crit stats and ATK scaling allow Changli to maximize her Fusion damage output. Best Team Compositions Changli can work in both Fusion-focused teams and Quick Swap DPS teams. Fusion Teams Changli + Brant Core Changli Brant Sanhua or Changli Brant Shorekeeper These teams focus on maximizing Fusion damage amplification. Quick Swap Teams Changli + Jinhsi Changli Jinhsi Shorekeeper Changli + Carlotta Changli Carlotta Shorekeeper Changli + Xiangli Yao Changli Xiangli Yao Shorekeeper These compositions rely on fast character swaps and burst damage rotations. Final Thoughts Changli stands out in Wuthering Waves as a powerful Fusion DPS who also enables strong team synergy. Her ability to deal high burst damage while amplifying Fusion damage for allies makes her a valuable addition to many team compositions. By prioritizing Forte Circuit upgrades, Crit-focused builds, and Fusion Echo sets, you can unlock Changli’s full potential in both DPS and quick-swap roles. If you’re planning to build Fusion teams or want a flexible DPS character, Changli is an excellent investment for your roster. If you’re preparing to pull for Changli or improve your Wuthering Waves roster, you can explore Accounts, Hourly Services, and Boosting to strengthen your progression and secure the resources needed for future banners.GameMarket.gg is a trusted digital marketplace for everything gaming-related. We serve the gaming community by providing secure access that enhances every gaming journey.

Wuthering Waves
Blade Runners Arrive! Wuthering Waves x Cyberpunk Event Rewards & Tips Inside
Wuthering Waves x Cyberpunk: Edgerunners Collab Guide The Wuthering Waves × Cyberpunk: Edgerunners collaboration was officially revealed during WuWa’s first anniversary livestream, instantly becoming one of the most anticipated crossovers in the game’s roadmap. While full details remain under wraps, this collab is already shaping up to be a major 2026 milestone. Based on Kuro Games’ event structure and current version pacing, this crossover could introduce limited banners, themed story content, and possibly even a new event map inspired by Night City. Here’s everything we currently know — plus how to prepare early. Expected Release Window & Version Roadmap The exact launch date hasn’t been confirmed, but the collaboration is officially scheduled for 2026. Based on community roadmaps and version pacing, the projected structure looks like this: Version 3.1 – Aemeth & Luuk (confirmed) Version 3.2 – Sigrika & Unknown Character (leaked) Version 3.3 – Lucilla & Unknown Character (leaked) Version 3.4 – Cyberpunk: Edgerunners Collab (confirmed, date TBD) Aemeth and Luuk have already validated the roadmap’s early accuracy. Given current story progression, Sigrika and Lucilla are strongly positioned for upcoming banners before the collab window opens. If this pacing holds, Version 3.4 is the most likely launch patch for the crossover. Why This Collab Matters This crossover marks WuWa’s first large-scale anime partnership. That alone signals something bigger than just cosmetic rewards. If executed properly, this collaboration could: Introduce limited-time collab characters Deliver a cyberpunk-themed event zone Add exclusive weapons or echo-style mechanics Expand aesthetic variety beyond Solaris-3’s current tone This could also test how WuWa handles crossover character integration long-term — especially if limited units do not rerun. Expected Cyberpunk Characters Based on community speculation and prominent leaks, two Cyberpunk: Edgerunners characters are most commonly associated with the collaboration: Lucy A composed and lethal netrunner, Lucy represents calculated precision and controlled chaos. Why Lucy Fits WuWa: Calm, reserved personality aligns well with Resonator archetypes Tech-based combat style could translate into: Hologram mechanics Drone-based attacks Cyber-hacking debuffs Strong thematic contrast to Solaris-3’s natural world Lucy’s survival-driven mentality and tactical intelligence make her an ideal limited banner candidate. Rebecca Rebecca embodies chaos — loud, reckless, and aggressive. Why Rebecca Works: Close-range high-damage potential Dual weapon or explosive playstyle Could introduce: Burst-based DPS kit Mobility-heavy combat High-risk, high-reward mechanics Rebecca would likely lean into WuWa’s faster combat system, potentially becoming a flashy on-field DPS. What the Collaboration Might Include While no official event details have been released, Kuro Games typically structures major events around: 1️⃣ Limited-Time Event Zone A temporary area themed around Night City — neon visuals, cybernetic enemies, and tech-based environments. 2️⃣ Story Event A crossover narrative explaining how Cyberpunk characters enter WuWa’s world. 3️⃣ Event Shop & Cosmetics Expect: Themed nameplates Profile frames Weapon skins Motorcycle-inspired cosmetics 4️⃣ Login Rewards & Campaign Bonuses Common for high-profile collabs: Daily login Astrites Event milestone rewards Social media campaign bonuses If structured like previous WuWa major events, this collab will likely span an entire patch cycle. How to Prepare for the Cyberpunk Collab Since crossover banners are usually limited and potentially non-returning, preparation matters. Even without full banner details, you can start optimizing resources now. Astrite Preparation Strategy ✔️ Complete Daily Missions consistentlySmall gains compound over months. ✔️ Clear Tower of Adversity & Whimpering Wastes on scheduleReliable recurring Astrite income. ✔️ Participate in Web EventsLow-effort Astrite rewards add up over time. ✔️ Redeem Codes immediatelyOfficial channels often release patch codes. ✔️ Monthly Pass InvestmentSteady Astrite income leading up to Version 3.4. ✔️ Avoid Impulse Pulling Before 3.4If Cyberpunk characters are your priority, resource discipline is critical. Banner Risk & Pull Planning Because collab characters sometimes: Do not rerun Have unique licensing restrictions Sit in separate banner structures It’s smart to aim for: At least one hard pity saved Backup Astrite reserves Weapon banner buffer (if applicable) Saving early prevents last-minute spending pressure. The Bigger Meta Shift If Cyberpunk units introduce: Tech-based mechanics Unique energy systems HP-drain or cyber-overclock playstyles They could significantly alter team building and combat tempo. A collaboration like this doesn’t just change visuals — it can shift gameplay direction. Final Thoughts The Wuthering Waves × Cyberpunk: Edgerunners collaboration has the potential to become one of WuWa’s most defining events. With Version 3.4 projected as the collab window, Rovers have time to prepare — but resource planning should start now. Limited banners move fast, and crossover characters may not return once the event ends. If you’re aiming to grab every Cyberpunk reward before the event disappears, the GameMarket.gg community can give you a boost. Explore powerful Accounts ready for endgame challenges, book Hourly Services for fast event farming and optimization help, or use Boosting to secure every limited cosmetic without missing a single milestone. GameMarket.gg is a trusted digital marketplace for everything gaming-related. We serve the gaming community by providing secure access that enhances every gaming journey.

Wuthering Waves
Wuthering Waves Drink Making: Full Recipe Breakdown
🍸 Wuthering Waves Drink Making Guide The Drink Making (Bartending) mini-game in Where Stars Cascade Down looks simple on the surface—pick bases, add flavors, garnish, serve—but it’s actually a controlled flavor-balancing system built around thresholds. Each order is a logic puzzle: you must interpret vague wording (“quite sweet,” “moderately sour,” “less bitter”), lock the required ingredient, and then manipulate intensity using Light/Medium/Extra to push the satisfaction meter into Very Satisfied. What makes this event different from standard WuWa gameplay is that success isn’t about speed or DPS—it’s about precision. Overcorrecting a flavor by one intensity tier can drop you from Very Satisfied to merely Satisfied, and certain ingredients subtly shift multiple flavor axes at once. Mastering the internal flavor logic is what turns this from trial-and-error into consistent clears. 🧪 How Flavor Thresholds Actually Work Before diving deeper into recipes, understanding the hidden logic helps you avoid mistakes: 🔹 Flavor Tiers (Practical Interpretation) Less than 3 → Keep Light or reduce one of the sweet/bitter sources Moderately (Less than 4) → Usually Light + Light or Medium + Light More than 3 / Quite → At least one Medium or two Light pushes More than 4 (Quite Sweet/Bitter) → Requires Medium+ or Extra in base 🔹 Bases Affect Multiple Axes Olive Juice increases sweetness more than sour Sunflare Nectar raises sweetness sharply Espresso raises bitterness significantly Plant Milk reduces bitterness while increasing sweetness Add-ins fine-tune, but bases decide the dominant profile. ⭐ All Favorite Drink Recipes (Expanded Detail) 🫒 Lupa — Olive Iced Tea Lupa’s drink identity is always Olive Iced Tea, but her mood changes the ratio. 🟢 Moderate Olive Iced Tea Target Profile Moderately Sour (>3) Moderately Sweet (<4) Must use Olive Juice Optimal Build Base 1: Iced Tea (Light) Base 2: Olive Juice (Medium) Add-ins: Sour Plum Cubes + Lemon Peel Topping: Orange Slice Why this works:Medium Olive Juice pushes sweetness up without crossing into Quite Sweet. Sour Plum + Lemon Peel collectively push sour above 3 without overshooting. 🟡 Bitter Lemongrass Version Target Profile Quite Sour (>3) Less Sweet (<3) Slightly Bitter (<3) Must use Lemongrass Optimal Build Iced Tea (Light) Olive Juice (Light) Sour Plum Cubes + Lemon Peel Lemongrass topping Reducing Olive Juice prevents sweetness from crossing into moderate. Lemongrass adds bitterness but stays under “quite bitter.” 🔴 Sweet Viscum Version Target Profile Quite Sweet (>4) Less Sour (<3) Must use Viscum Berry Bits Optimal Build Iced Tea (Extra) Olive Juice (Extra) Sour Plum Cubes + Viscum Berry Bits Lemongrass topping The double Extra push is necessary. If either base is reduced, you risk landing in moderate sweet instead of quite sweet. 🍯 Cartethyia — Nectar Black Tea Cartethyia’s drink is more sensitive to sour tuning than Lupa’s. 🟢 Moderate Version Target Moderately Sour (<4) Moderately Sweet (<4) Use Viscum Berry Bits Build Black Tea (Light) Sunflare Nectar (Light) Crushed Nuts + Viscum Berry Bits Laurus Leaf Avoid Medium Nectar—it tips sweetness too high. 🟡 Sour Orange Version Target Quite Sour (>3) Less Sweet (<4) Orange Slice Build Black Tea (Light) Sunflare Nectar (Light) Sour Plum Cubes + Viscum Berry Bits Orange Slice Plum Cubes are the main sour driver here. 🔴 Sweet Red Berries Version Target Quite Sweet (>4) Less Sour (<4) Red small berries Build Black Tea (Medium) Sunflare Nectar (Medium) Red Pearls + Dried Berries Star Fruit Medium bases are required. Light bases will not reach Quite Sweet. ☕ Mornye — Frostland Latte Mornye’s drink revolves around bitterness control. 🟢 Moderate Latte Target Moderately Sweet (<4) Moderately Bitter (<4) Plant-based drink Chocolate marshmallow Build Espresso (Medium) Plant Milk (Medium) Viscum Berry Bits + Crushed Cookies Two-Tone Marshmallow Balanced base intensity keeps both axes under 4. 🟡 Sweet Latte Target Quite Sweet (>4) Slightly Bitter (<3) Crushed Cookies Build Espresso (Light) Plant Milk (Extra) Crushed Cookies + Viscum Berry Bits Two-Tone Marshmallow Extra Plant Milk is the key sweetness driver. 🔴 Bitter Latte Target Quite Bitter (>4) Less Sweet (<4) Slightly bitter nuts Build Espresso (Extra) Plant Milk (Light) Crushed Nuts Two-Tone Marshmallow Do not add extra sweet add-ins—this version is intentionally minimalist. 🎮 Advanced Bartending Strategy 1️⃣ Base First, Always If you misjudge base intensity, add-ins won’t fully compensate. 2️⃣ Required Ingredient Is Non-Negotiable Missing a requested ingredient almost always caps satisfaction. 3️⃣ Watch the Satisfaction Gauge Mid-Build If it shifts left during base selection, undo immediately. 4️⃣ Avoid Flavor Overlap Mistakes Some ingredients stack the same axis: Red Pearls + Nectar = huge sweet spike Espresso + Nuts = heavy bitter spike 5️⃣ Use “Previous” Strategically Undo base mistakes early rather than trying to salvage with toppings. 🎁 Event Rewards Per character completion: Astrite ×20 Advanced Enclosure Tank – Lahai-Roi ×4 Invitation to the Fest ×250 Full completion across all customers yields consistent event currency and premium resources. 🍸 Drink Making (Bartending) Guide Each drink follows a fixed construction flow. Understanding this flow is what separates consistent clears from guesswork. 1️⃣ Listen to Your Customer The first and most important step is reading the order carefully. Customers will describe: Desired sweetness level Desired sourness level Desired bitterness level Required specific ingredients These descriptions use relative thresholds like: Moderately Sweet Quite Sour Less Bitter These are not vague flavor descriptions — they represent mechanical thresholds in the flavor system. Additionally, characters may drop subtle hints in dialogue. For example: Mentioning “fresh citrus” → likely Orange Slice Mentioning “rich aroma” → heavier base like Espresso Mentioning “lighter today” → reduce intensity level Always lock in the required ingredient first before adjusting the flavor balance. 📊 Monitor the Customer Satisfaction Gauge While assembling the drink, the satisfaction gauge shifts left or right depending on your choices. Moving right → closer to Very Satisfied Moving left → flavor imbalance or incorrect ingredient Do not wait until serving to check. Watch the gauge during: Base selection Add-in selection Topping placement If the gauge dips significantly after adding something, undo immediately. 2️⃣ Choose the Bases Bases determine the core flavor profile of the drink. This is where most players overcorrect. Each base ingredient: Affects multiple flavor axes Can be added in Light / Medium / Extra Base Intensity Guide Light → Small push to flavor Medium → Moderate push Extra → Strong push, can overshoot threshold Examples: Extra Sunflare Nectar → pushes sweetness very high Extra Espresso → dramatically increases bitterness Medium Olive Juice → moderate sweetness bump ⚠ Some base combinations clash. If satisfaction drops immediately after selecting a base, the flavors may conflict. Always build toward the required flavor threshold — don’t exceed it unnecessarily. 3️⃣ Choose the Add-ins for Extra Flavor Add-ins fine-tune the flavor profile. They: Adjust specific flavor axes Help meet “Quite” or “Less than” requirements Can push borderline builds into success Examples: Sour Plum Cubes → strong sour boost Red Pearls → sweet enhancer Crushed Nuts → bitterness increase Viscum Berry Bits → flexible sweet/sour adjuster Add-ins are precision tools. If bases overshoot, add-ins cannot fully fix it — so adjust carefully. Watch dialogue hints again here. Customers often indirectly confirm preferred add-ins. 4️⃣ Finish with the Topping The topping serves two purposes: Fulfills explicit ingredient requests Slightly nudges flavor balance Boosts visual satisfaction Examples: Orange Slice Laurus Leaf Two-Tone Marshmallow Lemongrass Some toppings are mandatory for specific orders. Missing the requested topping usually prevents reaching Very Satisfied. Think of the topping as the final polish layer — not the main flavor driver. 🔄 You Can Redo Previous Steps If something feels off: Click Previous to rewind a step Or exit and select Make New Drink Undoing early is always better than trying to salvage a mismatched base. If the satisfaction gauge falls heavily left during base selection, restart immediately. 🧠 Pro-Level Bartending Tips ✔ Build From Requirements Outward Lock required ingredient. Match required flavor threshold. Fine-tune with add-ins. Confirm with topping. ✔ Avoid Overstacking Same Flavor Extra Nectar + Red Pearls = oversweet Extra Espresso + Nuts = extreme bitterness ✔ Understand Threshold Language “Less than 3” → stay Light “Moderate” → Light + Light or Light + Medium “Quite” → must include at least one Medium or Extra push ✔ Gauge First, Serve Second Only serve once the satisfaction bar is fully right. 🎯 Event Completion Strategy Blueprint Step 1 — Interpret the OrderHighlight required ingredient and flavor threshold. Step 2 — Select Core Identity BaseChoose the base drink type first. Step 3 — Adjust IntensityLight/Medium/Extra tuning. Step 4 — Fine-Tune With Add-insCorrect flavor axis without overshooting. Step 5 — Apply Correct ToppingLock required garnish. Step 6 — Confirm Gauge PositionOnly serve when fully satisfied. Players optimizing event completion alongside Version 3.1 exploration can streamline progression with tailored Accounts, efficient event clearing through expert Hourly Services, or structured progression assistance via trusted Boosting to maximize Astrite and event currency gains. Drink Making rewards attention to detail more than experimentation. Once you understand the system’s thresholds and ingredient interactions, every order becomes predictable — and every guest leaves Very Satisfied. GameMarket.gg is a trusted digital marketplace for everything gaming-related. We serve the gaming community by providing secure access that enhances every gaming journey.
Wuthering Waves
Meta Unlocked: Galbrena’s Best Builds and Rotations Revealed for Wuthering Waves
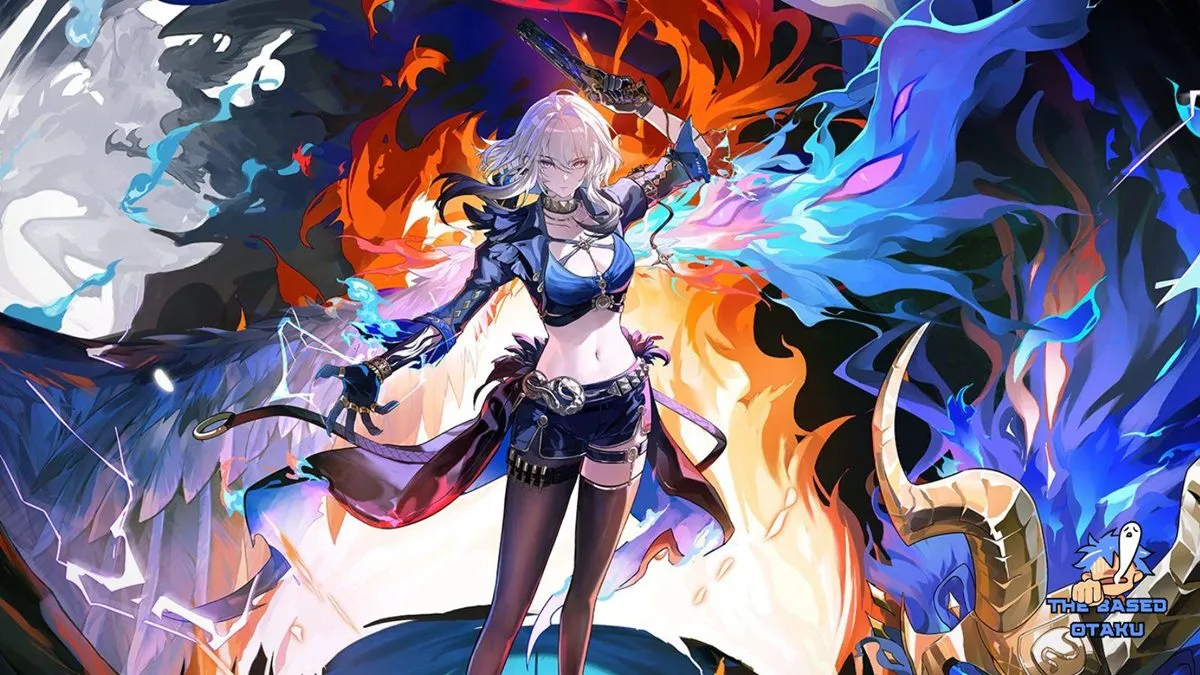
Galbrena Best Build in Wuthering Waves (Echo Skill DPS) Galbrena is a 5★ Fusion Pistol Main DPS who revolves around two power spikes: entering Demon Hypostasis and stacking Afterflame before unleashing amplified Heavy Attacks and Echo Skill damage. If built correctly, she becomes a high-scaling hypercarry that deletes waves once her Sinflame engine is online. If mismanaged, she feels clunky and energy-starved. This guide covers everything you need: weapons, Echo sets, stats, skill priority, and best team comps. Galbrena Resonator Overview Rarity: ★★★★★Element: FusionWeapon: PistolsRole: Main DPSDamage Focus: Heavy Attack DMG + Echo Skill DMG Galbrena Gameplay & Playstyle Explained Galbrena operates in two states: 1️⃣ Threshold State This is her standard stance. Generates Sinflame when hitting enemies Builds toward her transformation Deals baseline Echo Skill and Heavy damage 2️⃣ Demon Hypostasis (Enhanced Form) Activated when reaching 100 Sinflame. Amplifies all damage Boosts Heavy Attack scaling Converts Afterflame into massive burst potential Key Resources Sinflame Generated in Threshold State Required to activate Demon Hypostasis Core transformation mechanic Afterflame Generated by casting Echo Skills Amplifies damage inside Demon Hypostasis Must be pre-built before transforming Pro Tip:Never enter Demon Hypostasis with low Afterflame. That’s wasted burst. Galbrena Skill Priority Skill Priority Inherent Skill ★★★★★ (Max First) Forte Circuit ★★★★★ Resonance Liberation ★★★★ Normal Attack ★★★ Resonance Skill ★ Intro Skill ★ Her damage heavily scales from Forte + Inherent synergy. Upgrade those first. Best Weapons for Galbrena Galbrena wants: CRIT stats ATK% Heavy Attack amplification Echo Skill DMG boosts ⭐ Best-in-Slot – Lux & Umbra (Signature) Base ATK: 588Substat: 48.6% Crit DMG Effect: +12% ATK Echo Skill DMG → +20% Heavy DMG Heavy Attack DMG → +20% Echo Skill DMG When both active → Ignore 8% DEF This weapon perfectly mirrors her kit. It is tailored for her Echo ↔ Heavy cycling. 🔥 5★ Alternatives The Last Dance 72% Crit DMG Burst-heavy builds Less synergistic but strong stat stick Static Mist 24.3% CRIT Rate Good for energy + team ATK support 🔹 4★ Budget Options Solar Flame (Best 4★) CRIT Rate Heavy Attack stacking Strong synergy at R5 Relativistic Jet ATK% Energy injection Pistols#26 ATK% Conditional stacking bonus Best Echo Sets for Galbrena She scales best with Heavy + Echo interaction. 🥇 Best Set – Flamewing’s Shadow (43311) 3-Piece Effect: Echo Skill → +20% Heavy CRIT Rate Heavy → +20% Echo Skill CRIT Rate Both active → +16% Fusion DMG This set directly mirrors her rotation design. Main Echo: Corrosaurus Fusion DMG Bonus Echo Skill DMG Bonus 20s cooldown Best synergy overall. 🥈 Alternative – Molten Rift (43311) +10% Fusion DMG +30% Fusion DMG after Resonance Skill More generic. Easier to farm. Main Echo: Nightmare: Inferno Rider Strong AoE Fusion scaling. Best Echo Stats for Galbrena Main Stats Slot Priority 4-Cost CRIT Rate / CRIT DMG 3-Cost Fusion DMG > ATK% 1-Cost ATK% Substats Priority CRIT Rate CRIT DMG Energy Recharge (aim 120%) ATK% Heavy Attack DMG Best Team Comps for Galbrena Galbrena needs: Heavy Attack boosters Echo Skill synergy Sustain Field time support She performs best as a hypercarry. 🥇 Premium Team Main DPS: GalbrenaSub DPS: QiuyuanSustain: Shorekeeper Balanced burst + sustain + damage amp. 🔥 Fusion Synergy Teams Option 1 GalbrenaLupaBrant Option 2 GalbrenaLupaShorekeeper Fusion stacking + elemental synergy scaling. ⚔ Heavy Attack Focused Teams Variant 1 GalbrenaIunoShorekeeper Variant 2 (F2P Friendly) GalbrenaMortefiVerina Mortefi boosts damage tempo.Verina stabilizes sustain. Rotation Tips (Important) Build Afterflame first. Generate Sinflame. Enter Demon Hypostasis. Burst Heavy + Echo cycles. Exit safely and rebuild. Do NOT: Enter Demon Hypostasis without stacks. Waste Echo Skills outside burst windows. Final Build Summary ✔ Best Weapon: Lux & Umbra✔ Best Echo Set: Flamewing’s Shadow✔ Main Stats: CRIT / Fusion / ATK✔ Role: Hypercarry DPS✔ Team Type: Heavy or Fusion focused Want to skip the grind and unleash Galbrena’s full power right away? The GameMarket.gg community has your back! Grab optimized Accounts with fully built Galbrena, tap Hourly Services for hands-on build help or event clears, or use Boosting to get every resource and echo you need for the perfect run. GameMarket.gg is a trusted digital marketplace for everything gaming-related. We serve the gaming community by providing secure access that enhances every gaming journey.
Wuthering Waves
Aemeath Best Build: Trailblazing Star, Sigillum, and Polestar Priority
🔥 Aemeath Is a Two-Form DPS Built Around “Streak Windows,” Not Spam Aemeath doesn’t play like a standard Fusion Sword who just loops Skill → Liberation on cooldown. Her damage comes from building Forte resources fast through chained basics, then cashing them out into Seraphic Duet and the second Ultimate (Finale) as quickly as possible. The “good Aemeath” difference is less about raw stats and more about whether your rotation reliably reaches Overdrive → Duet(s) → Finale on schedule without dropping form rhythm. 🧾 Character Snapshot and What It Means for Building Profile Rarity: 5★ Element / Weapon: Fusion / Sword How to Get: Limited Convene Role: Main DPS (Liberation-focused), can play Tune Rupture or Fusion Burst modes Utility: Flight / Starflux Thrust (Lahai-Roi exploration value) Strengths that actually matter in gameplay Huge multipliers + self-buffs, especially around Liberation damage windows Two forms that “sync” per rotation, letting you chain actions without dead time Best-in-class Tune Rupture DPS right now when paired with the proper core Enables early groundwork for Negative Status team styles (Fusion Burst) Real weaknesses (why some builds feel worse) Fusion Burst support ecosystem is thin, so that mode can underperform vs Rupture Kit complexity (forms + states + gauges) punishes sloppy sequencing Top teams often lean premium/limited supports 🧠 The Three Mechanics You Must Build Around 1) Two forms, one tempo Form Switch (Resonance Skill) isn’t “mobility flavor”—it’s how you keep damage flowing. Your rotation should feel like: Human basics into a trigger point Swap into Mech, continue chain Use Duet when resources are ready Return, stabilize, push to Finale 2) Synchronization Rate + Resonance Rate are your “Finale keys” Finale wants you to be in Heavenfall Edict: Unbound, then cap both: Synchronization Rate (200 cap) Resonance Rate (4 cap)If you’re missing Finale timing, you’re usually: not chaining enough basics fast enough, or spending the wrong cancels at the wrong time. 3) Liberation damage is the lane you’re optimizing Even when you see Fusion numbers everywhere, your build priorities keep pointing to: Resonance Liberation DMG CRIT consistency enough Energy Regen to Ultimate every rotation 🧰 Best Aemeath Build (Recommended Default) ✅ Best Endgame DPS Build (Tune Rupture Mode Recommended) Sonata: Trailblazing Star (5-pc) Main Echo: Sigillum (best-in-slot for her) Cost Pattern: 4 / 3 / 3 / 1 / 1 4-Cost Main Stat: CRIT Rate or CRIT DMG 3-Cost Main Stats: Fusion DMG (or one ATK% if your rolls demand it) 1-Cost Main Stats: ATK% / ATK% Echo Substat Priority (practical tuning order) CRIT DMG CRIT Rate Energy Regen (until rotation is stable) Resonance Liberation DMG Bonus ATK% Flat ATK (nice, not mandatory) Energy Regen target: Aim 115%–125% as a realistic comfort band for consistent Liberation timing (lower if your team funnels well; higher if you feel Finale drift). 🧿 Best Echo Sets and Main Echo Picks 1) Trailblazing Star (5-pc) — Best Why it wins: It’s tuned for what Aemeath actually does: CRIT + Fusion pressure that stays relevant across her mode choices. Best Main Echo: Sigillum Summon-type (doesn’t derail combos) Gives Aemeath a big Liberation DMG bump Clean to press anytime without breaking rotation tempo 2) Flaming Clawprint (5-pc) — Strong fallback Use if: You don’t have Trailblazing Star pieces yet, or You’re leaning into Fusion teammates and want some team-facing value. 3) Molten Rift (5-pc) — Early/temporary It works, but: the ceiling is lower and it lacks the payoff you want for her Liberation lane. 🗡️ Best Weapons for Aemeath 1) Everbright Polestar — Best-in-slot This is the “it’s made for her” pick because it rewards her exact triggers: All-Attribute DMG Bonus When she inflicts Tune Rupture - Shifting or Fusion Burst, her Liberation gains major DEF/Fusion RES ignore for a window. Translation: it turns your Finale windows into true boss-phase deletions. 2) Emerald of Genesis — Best general 5★ alternative Great base stats + Energy Regen ATK stacking on Skill casts helps keep her damage stable even without Polestar. 3) Feather Edge — Best 4★ (especially at higher refinement) Liberation-focused bonuses fit her lane Lower base ATK keeps it behind 5★ options, but it’s the cleanest budget route. 4) Somnoire Anchor / Commando of Conviction / Endless Collapse Anchor: ramp-up stats, decent feel Commando: best “no gacha” starter direction Endless Collapse: solves ER pain, but lower overall payoff than 5★ 👥 Best Teams (With Mode Notes) ✅ Best Overall: Tune Rupture Core Team Aemeath (Main DPS) — set to Tune Rupture Mode Lynae (Sub DPS / buffer) — must be set correctly to avoid anti-synergy Mornye (Support) — buffs the mechanic and keeps the loop consistent Why it’s best: Lynae + Mornye form the “engine” that makes Tune Rupture feel unfair, and Aemeath is currently the cleanest DPS to exploit it. Fusion Burst Team (Viable, but not fully enabled yet) Aemeath (Fusion Burst Mode) Lynae Chisa (raises Fusion Burst stack ceiling) This can work, but the mode shines more once the roster has more dedicated Fusion Burst enablers. Mono Fusion Team (Strong alternate lane) Aemeath (often better in Rupture mode if Mornye is present) Lupa (Fusion buffs + enabling) Mornye (amp + sustain + consistency)Flex notes: Brant is safer and consistent. Changli can outperform in Quickswap hands, but demands execution. 🧠 Skill Priority (What to Level First) Resonance Liberation (your burst identity) Forte Circuit (kit backbone; scales your core damage mechanics) Resonance Skill Basic Attack Intro Skill Resource tip: Basic Attack + Intro can be delayed if you’re budgeting—Liberation/Forte are the multipliers you feel instantly. 🔁 Rotation Blueprint (Fast Finale, Minimal Drift) Echo Timing Sigillum is summon-type: use it whenever it won’t clip your cancels (it’s very forgiving). Standard Rotation (stable, no swap-cancel requirement) Intro (Aemeath) Basic 3 → Basic 4 (cancel endlag with Ultimate) Ultimate: Overdrive Mech Basic 2 → 3 → 4 (cancel early with Skill) Skill: Duet Encore Basic 2 → 3 → 4 (cancel endlag with Skill) Skill: Duet Overture Heavy: Mech Charged II (cancel endlag with Ultimate) Ultimate: Finale Outro Why this works: It hits her self-buff windows cleanly, builds resources through fast chains, and lands Finale without wasting time on “pretty” actions. Advanced Quickswap Rotation (for short Outro buffers / speed play) Use when: you’re fitting tight buff windows (ex: shorter Outro amplifiers), or you’re playing a swap-heavy Mono Fusion variant. Core idea: build basics in short strings, swap out, then re-enter to compress the “outside Intro” time before Finale. 🧱 Stat Targets (So You Know When You’re “Done”) A reasonable endgame goal line at Level 90: CRIT Rate: 65%+ (before set bonuses) CRIT DMG: 210%–260% Energy Regen: 115%–125% ATK: roughly 2000–2400+ (varies by weapon and rolls) Fusion DMG Bonus: 40%–70%+ (depends on Echo distribution) If your Finale timing is late, fix ER + rotation cleanliness before chasing more CRIT. 🧬 Resonance Chain (Dupes) Priority Snapshot S1: Huge quality-of-life + rotation power (Instant Response improvements) S3: Major spike (bypasses restrictions and expands team flexibility) S6: Massive ceiling (Liberation taken bonus + crit interactions for core procs) If you’re low-spend and want a meaningful stop: S1 for immediate feel, or S3 for real build freedom. 🗓️ How to Get Aemeath (Banner Window) Limited Convene: Take Flight in Spring Availability (Asia): Feb 5, 2026 → Feb 26, 2026 Players looking to fast-track an Aemeath-ready roster can browse trusted Accounts for strong Fusion and Rupture cores, book expert Hourly Services for build tuning and rotation coaching, or use reliable Boosting to accelerate Echo farming and reach the stat breakpoints where Finale windows feel consistent. Aemeath’s ceiling is real—but once your rotation reliably reaches Finale on time, she stops feeling “complicated” and starts feeling inevitable. GameMarket.gg is a trusted digital marketplace for everything gaming-related. We serve the gaming community by providing secure access that enhances every gaming journey.
Wuthering Waves
Wuthering Waves Patch 3.1: Snow Region, Fusion Meta, System Overhauls
❄️ Version 3.1 Pushes Wuthering Waves Toward Build Depth and System Mastery Version 3.1 isn’t just about adding content—it quietly shifts Wuthering Waves toward longer-term build planning and mechanical commitment. With Fusion-focused Resonators, Echo systems that reward deliberate stat targeting, and Data Bank upgrades that reduce RNG frustration, this Patch tightens the loop between exploration, combat optimization, and account progression in a way earlier versions only hinted at. 🧾 Patch Overview and Maintenance Details Version: 3.1 — For You Who Walk in SnowMaintenance Time: Feb 5, 2026 · 04:00–11:00 (UTC+8)Compensation: Astrite ×300 Crystal Solvent ×2 Bug Fix Compensation: Astrite ×300 Compensation is available to all accounts that unlocked Mail before maintenance and remains claimable until the next update. 🌟 New Resonators and Weapons (Patch Defining Additions) New 5★ Resonators Aemeath — Fusion / Sword Role: Main DPS, Resonance Liberation DMG, Tune Rupture Focus: Fusion Burst loops and damage amplification Banner: Take Flight in Spring Luuk Herssen — Spectro / Gauntlets Role: Main DPS, Basic Attack DMG, Tune Strain Focus: Sustained pressure and precision uptime Banner: When Winter Thaws New 5★ Weapons Everbright Polestar (Sword) — Fusion-aligned burst scaling Daybreaker’s Spine (Gauntlets) — sustained frontline DPS option These weapons reinforce Version 3.1’s emphasis on element-specialized carry builds. 🗺️ New Region: Roya Frostlands – Frostlands Surface A major exploration zone unlocked during Main Quest Chapter III Act III. Key Areas Include: Frostlands Transit Port Mount Gjallar Starblind Crashsite Upphaf Forest Ruins Tidelost Forest This region blends vertical traversal, ice traversal mechanics, and lore-heavy encounters tied to the Exostrider and ancient sealed entities. 🧩 New Echoes, Sonata Effects, and Build Direction New Sonata Effects (Highlights) Trailblazing Star (Fusion Core Set)Crit Rate + Fusion DMG after Burst/Rupture triggers Chromatic Foam (Team-Swap Fusion Set)Fusion DMG transfer through Outro Skills Sound of True Name (Aero Echo Skill Set)Echo Skill crit scaling with Aero bonus windows These sets clearly signal stronger elemental specialization and rotation planning, especially for Fusion teams. New Systems: Targeted Progression 🔧 Data Bank Targeted Merge (Lv.15) Merge 5 unused 5★ Echoes into a chosen Sonata type Weekly cap: 10 merges 🔒 Substat Modification (Lv.21) Reroll substats using Transducers Lock desired stats to reduce randomness This is one of the most impactful quality-of-life changes the game has introduced so far. 🧠 Movement, Exploration, and Motorbike Systems Smoother Resonator movement across all actions Expedition Motorbike gains: Glacier Track (water traversal) All-Terrain Tactics Modules (swappable buffs) Expanded cosmetics and HUD Autopilot, Adaptive Hook priority, and material tracking have all been refined to reduce friction during exploration. 🎮 Events, Activities, and Limited-Time Content Version 3.1 is packed with layered activities: Area exploration events in Frostlands Combat card-based Echo challenges Leisure modes (racing, tracking, duels) 7-day login rewards and Web events Permanent story continuations and afterstory chapters This Patch heavily favors consistent daily engagement over burst play. ⚙️ Graphics, Performance, and Platform Upgrades PC Ray Tracing expanded to AMD RX 9000 series Snow and terrain interaction effects Improved default graphics presets Mobile Ultra High Resolution support expanded 90 FPS support added for select devices Optimized loading and streaming performance HDR support is delayed, but overall stability and visual consistency see clear improvements. 🛠️ Bug Fixes and System Stability Hundreds of fixes across: Resonator animations and damage logic Echo skills and enemy behaviors Event UI, tracking, and progression errors Controller, mobile, and platform-specific issues Version 3.1 is one of the most stability-focused patches Wuthering Waves has shipped so far. Players preparing for Version 3.1 can get ahead by starting optimized Accounts with key Resonators unlocked, refining rotations and Echo setups through professional Hourly Services, or accelerating progression with reliable Boosting to access Frostlands systems and endgame Echo tools faster. With Version 3.1, Wuthering Waves rewards planning more than ever—between targeted Echo systems, elemental set depth, and smoother traversal, this Patch marks a clear step toward long-term build mastery. GameMarket.gg is a trusted digital marketplace for everything gaming-related. We serve the gaming community by providing secure access that enhances every gaming journey.
Wuthering Waves
Become the Alpha: Optimize Lupa’s Damage With Expert Build Tips in Wuthering Waves!
Wuthering Waves Lupa Build Guide: Best Weapons, Echo Sets & Teams (2026) Lupa is a 5★ Fusion Broadblade resonator who excels as both support and sub-DPS, buffing her team’s damage while still contributing solid personal output. Her kit revolves around boosting Fusion Damage, shredding Fusion RES, and enabling powerful follow-up damage in Mono-Fusion team compositions. 🔥 Lupa’s Playstyle & Core Strengths Lupa’s Resonance Liberation skill grants two powerful effects: Pack Hunt — increases all teammates’ damage and stacks further when Intro Skills are used. Glory — reduces enemy Fusion RES, scaling with the number of Fusion resonators on the team.Her Outro Skill buffs the next resonator with bonus Fusion and Basic Attack damage, making her ideal for rotation-based bursts and team synergy. ⚔️ Best Weapons for Lupa 🥇 Wildfire Mark (5★ Signature) — Best-in-Slot Base ATK: High Bonus: Crit DMG Effect: Increases ATK and boosts Resonance Liberation damage, and after Heavy Attacks can grant team-wide DMG bonuses — maximizing both her support and damage role. 🛡️ Alternatives Verdant Summit (5★) — boosts Heavy Attack damage and general DMG. Ages of Harvest (5★) — offers Crit Rate and Resonance/Skill DMG bonuses for flexible builds. Lustrous Razor (5★) — increases Energy Regen and scales Resonance Liberation DMG. Autumntrace (4★) — excellent Battle Pass broadblade with stacking ATK on hits. Waning Redshift (4★) — affordable option with resonance energy support. 🎶 Best Echo Sets & Stats ⭐ Flaming Clawprint – Top Echo Set 2-piece: +10% Fusion DMG 5-piece: Casting Resonance Liberation boosts team Fusion DMG and increases Lupa’s Liberation damage for 35s — ideal for her support playstyle. 🪄 Echo Main Stats Priority Crit Rate / Crit DMG (4-cost) Fusion DMG (3-cost) ATK% (1-cost) Energy Regen and Resonance Liberation DMG are key subs — aim for around 120% Energy Regen for consistent uptime. 🔗 Team Compositions Best Premium Mono-Fusion TeamsLupa thrives when paired with other Fusion resonators to maximize her Pack Hunt and Glory effects: Lupa + Brant + Changli — Strong synergy of buffs, healing, and high DPS follow-ups. Lupa + Brant + Galbrena — Balanced mix of support, sustain, and burst. Lupa + Brant + Chixia — Budget/4★ friendly variant. F2P Team Options Lupa + Chixia + Baizhi — Great early-game team with healer support and moderate damage. 🧠 Skill & Build Priorities Focus on leveling up Lupa’s Intro Skill, Resonance Liberation, and Forte Circuit first to maximize team impact and personal damage potential. Normal Attacks and Resonance Skills are lower priority but still useful for building Wolflame and enabling enhanced abilities. 🎯 Why This Guide Matters The right build can be the difference between a solid main and a meta-shattering DPS monster. Whether you’re a new Rover looking for your first carry or a veteran chasing leaderboard clears, Lupa’s potential makes her a must-build for any ambitious player in Wuthering Waves. Ready to build Lupa without the grind? GameMarket.gg has your back. You can grab ready-to-go Accounts with top-tier Lupa setups, book Hourly Services for build advice and farming, or use Boosting to max out Lupa’s power and claim your place at the top of the pack. 💥 GameMarket.gg is a trusted digital marketplace for everything gaming-related. We serve the gaming community by providing secure access that enhances every gaming journey.
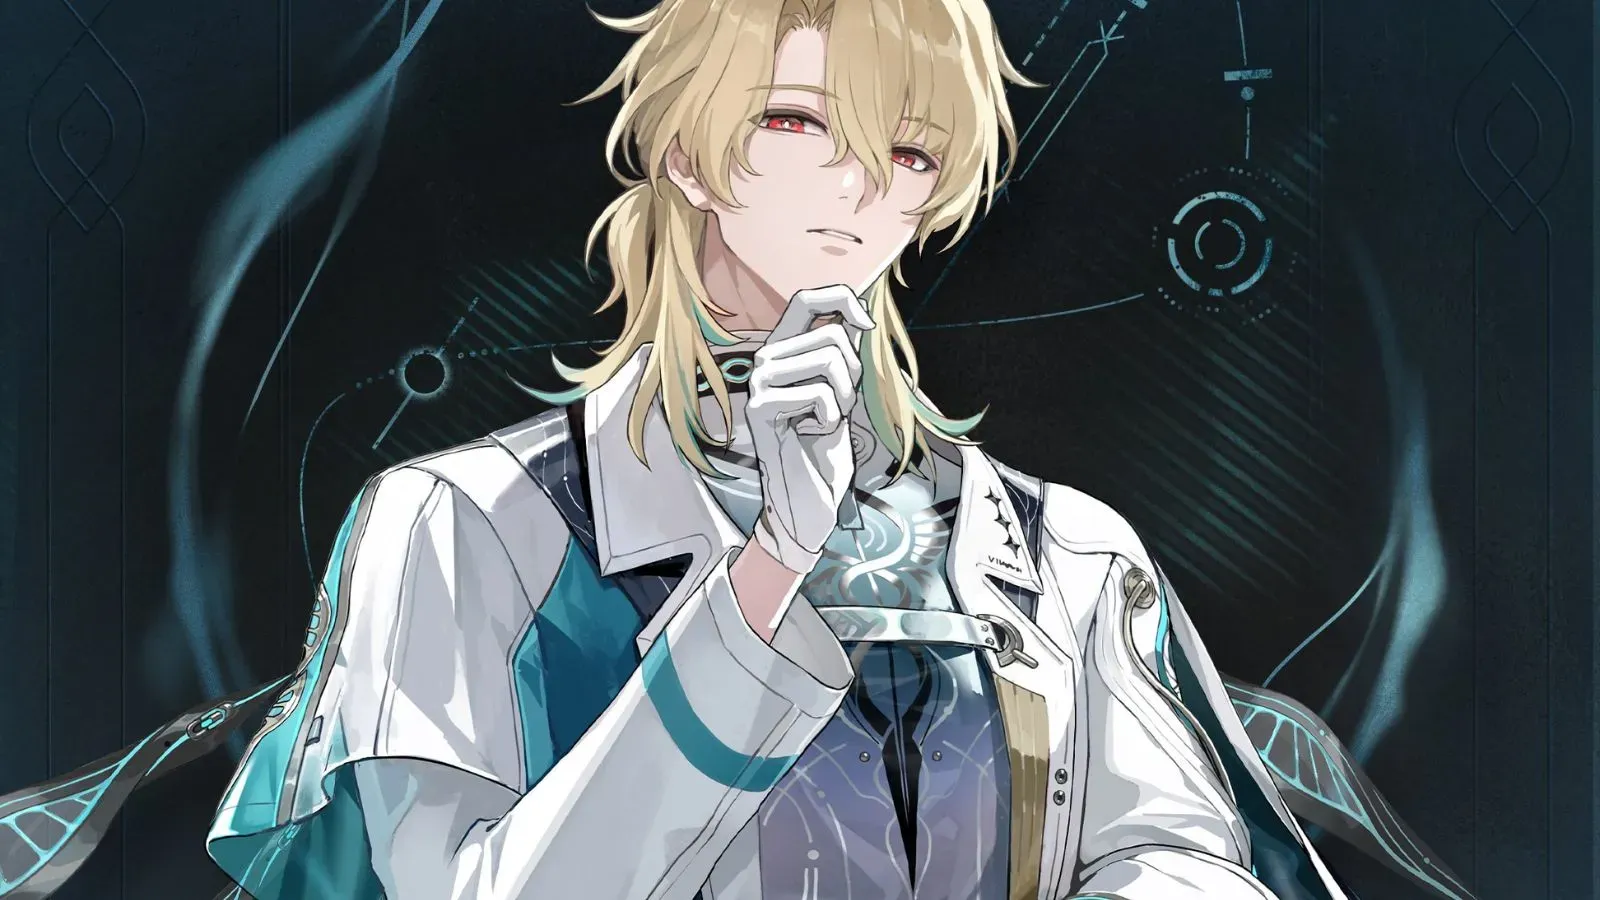
Wuthering Waves
Luuk Kit Breakdown: Teleports, Solar Arrays & Harmony Stacks in Wuthering Waves 3.1
🩺 Who Is Luuk in Wuthering Waves 3.1? According to the latest kit leak, Luuk Herssen is a 5★ Spectro Resonator who fights with Gauntlets and is tied to Startorch Academy’s Resonator Nursing Unit. Lore-wise he’s the calm, professional academy doctor and counselor — in gameplay, he reads like a high-mobility aerial skirmisher who chains teleports, air strings, and detonating ground arrays while juggling a unique Harmony mechanic and a “Golden Judgment” resource window. As with all leaks, exact numbers are missing or marked with “?”, but the mechanics are clear enough to see his intended design: Fast, execution-heavy Spectro DPS/support built around Harmony stacking, aerial dominance, and Tune Break synergy. 🌘 Overview — Spectro Gauntlets With Scythe Styling Rarity: ★★★★★ Attribute: Spectro Weapon: Gauntlets The leak describes Luuk as: A multi-hit, air-focused fighter, With a stamina-based dive, A two-charge teleport skill usable mid-air, A rotating “Slaying Corona” skill chain with three forms, A solar marrow array he can detonate manually or let explode, And a windowed mode (“Golden Judgment”) where his skills hit harder but burn through a special resource. Layered on top of this is a Harmony system (Deflection, Offset, Interference, Displacement, Destruction) that looks designed to plug into Tune Break teams. ⚔️ Normal Attack — Light as It Is Luuk’s basic moveset is already packed with tech: Basic Attack (Ground) Up to 4 consecutive hits, dealing “diffraction” damage (placeholder term in the leak). Standard combo, but it feeds into his resource generation and Forte Circuit later. Heavy Strike Consumes stamina to jump into the air and attack, also dealing diffraction damage. This is likely your main launcher into his aerial kit. Aerial Attack Performs up to 4 aerial hits, with the 4th hit being a stamina-consuming descent. The 3rd aerial hit has two variants based on input: Tap Basic Attack: uses Scythe – Dissection. Tap Jump: uses Scythe – Severance, which additionally inflicts [Harmony – Deflection] on the target for a set duration. While in mid-air he can also hold Basic Attack to perform a stronger aerial descent at the cost of stamina. Dodge Counter Ground: Perfect dodge → tap Basic to counter, dealing diffraction damage, then you can follow with the 3rd Basic Attack. Mid-air: Perfect dodge → tap Basic to instantly teleport to the target and hit them — a built-in gap closer that keeps his aerial pressure going. Overall, his basic kit wants you off the ground as much as possible, weaving in dodges and aerial chains. ✨ Resonance Skill — All Fallen Ones Reunite This is where Luuk’s gameplay really opens up, combining teleports, rotating skill forms, and ground arrays. Golden Tide Quick teleport to target location, dealing diffraction damage. Has 2 charges and can be cast in the air, making it a core mobility + offense tool. Slaying Corona (3-Stage Chain)A Whenever he uses the 3rd hit of his aerial basic, his Resonance Skill temporarily transforms into Slaying Corona instead of Golden Tide. Slaying Corona has three forms that cycle on each cast: Slaying Corona – Ring Deals diffraction damage. The next press of Basic Attack becomes Golden Piercing Strike, a follow-up that counts as basic-attack damage. Slaying Corona – Shatter A spinning charge that deals damage along the path. Resets aerial attack sequence back to stage 1 for fresh strings. Slaying Corona – Radiance Creates a solar marrow array on the ground that deals diffraction damage. While it’s active: Pressing Basic in the air lets you cast Aerial Attack – Judgment of the Earth’s Shatter. Using Resonance Liberation inside a specific state (Everfreeze) works differently and can lock you out of that aerial Judgement follow-up. If left alone, the solar marrow array auto-explodes after a delay, dealing damage flagged as Basic Attack damage. Supporting moves tied to this tree include: Basic Attack – Golden Flow: A high-speed dash to the target that deals diffraction damage and resets aerial attacks to stage 1. Aerial Attack – Judgment of the Earth’s Shatter: A heavy downward slam that detonates the solar marrow array on landing, again counted as Basic Attack damage. On top of that, there’s a passive effect: Final Judgment: Increases Resonance Liberation damage multipliers while in a state referred to as Eternal Freeze, stacking up to a certain number. These stacks are consumed when he actually casts Liberation in that state or swaps out. Put simply: Luuk’s Skill tree is a mini-combo game: juggle aerial hits → rotate Slaying Corona forms → set up solar arrays → detonate them with a dive → all while building towards a stronger Liberation. 🌌 Resonance Liberation The leak keeps this part pretty minimal: His Resonance Liberation is a diffraction-damage attack counted as Normal Attack damage. It can be cast in the air, fitting his sky-focused playstyle. Given how many passives reference boosting its damage during specific states (Golden Judgment, Eternal Freeze), Liberation is clearly meant as a burst finisher within his resource windows. 🔥 Forte Circuit — Fire Born From Frost Luuk’s Forte Circuit is dense and revolves around Sun Essence Energy Flow, Golden Judgment, survivability, and bonus aerial tech. Sun Essence Energy Flow Built up by: Normal Attacks Heavy Attacks Aerial Attacks Resonance Skill Golden Tide A specific Resonance Skill variant (Execute Sun Crown, likely a translated form) Dodge Counterattacks When Sun Essence reaches a certain threshold, he enters Golden Judgment. Golden Judgment While active: Sun Essence can’t be restored, The damage multiplier of certain skills (notably Execute Sun Crown) is increased. Casting that skill consumes Sun Essence. When Sun Essence is drained, Golden Judgment ends. So this is his classic burst stance: Build gauge → enter Golden Judgment → spam empowered skills until the meter burns out. Golden Rhythm Luuk gains Golden Rhythm periodically over time. When he enters the battlefield with his Variation Skill (Before Dawn) and consumes Golden Rhythm, he restores Sun Essence and Concerto Energy. This means smart swaps and Variation timing refuel his burst stance and team rotation. Sunburst Protection While out of combat for some time, he builds stacks of Sunburst Protection. If he takes damage while airborne and has enough stacks: Consumes several stacks Reduces incoming damage Grants interruption immunity for a short period Can only trigger periodically This is essentially a pre-charged air-guard, encouraging him to fight from the air without getting instantly swatted down. Rain of Light While dodging in the air, Luuk can briefly hover and launch a flying blade attack that: Deals fixed diffraction damage Knocks enemies back A well-timed counter can be triggered when the blade is launched. Hovering drains stamina over time. If he’s knocked back and landing, a timed dodge input can trigger Rain of Light mid-fall, with a limited number of uses before a ground/field reset. Taken together, his Forte Circuit screams “advanced technical DPS”: resource stances, pre-emptive defense, and reactive aerial counters all in one. 🧬 Inherent Talents — Harmony Specialist Luuk’s Inherent Talents show why he’s being framed as a Harmony/Tune Break enabler: Pulse Under the Snow Casting a Resonance Skill applies [Harmony·Offset] to enemies for a duration. Using Variation Skill: Before Dawn grants extra stacks of Sunlight Protection (likely tied to his defensive passive). Healing Decree Without Cause When hitting a target with [Harmony·Interference], his damage is increased based on how much Harmony Destruction Amplification he has, up to a cap. If the target has a lot of Interference stacks, the damage boost is further increased. So while he’s a Spectro DPS, he scales heavily off Harmony stats and debuffs, hinting he’ll be a cornerstone in Harmony-focused team archetypes. 🌅 Variation Skill & Tune Break — Before Dawn & A Silent Debate on Light Variation Skill: Before Dawn Deals diffraction damage and restores Sun Essence. Has a delayed follow-up, Answering to the Brink of Death, that also deals damage based on his ATK. This button both refreshes his Forte resources and adds extra damage instances, which can interact with his Harmony kit. Tune Break Skill: A Silent Debate on Light This is where his Harmony/Tune Break support identity really kicks in: Luuk can apply [Harmony Displacement] to targets. He has the ability to respond to [Harmony Interference], gaining increased final damage against targets based on: The number of Interference stacks on them His own Harmony Destruction Amplification When he’s in the squad, he raises the max stack cap of Harmony Interference on targets. Once a target’s Harmony Displacement bar is full, he can unleash Harmony Destruction on them — a major payoff event in the Tune Break system. This strongly suggests: Luuk isn’t just a solo carry; he’s a core node for any team that’s built around Harmony and Tune Break mechanics, amplifying how much punishment your whole squad can dish out. 🔗 Resonance Chain — High-Ceiling Late-Game Scaling While many numbers in his Resonance Chain (constellation equivalents) are still placeholder, the structure is clear: R1 – Gold Burning in Grayish White Buffs the 3rd hit of his aerial basic. Raises max Sunburst Protection stacks and grants more of it when he kills enemies under Golden Judgment. R2 – An Unending Avalanche Remains in the Eyes Further spikes Resonance Liberation damage. Significantly strengthens Healing Decree Without Cause, increasing his damage bonus vs Harmony Interference targets. R3 – Golden Rain Forges Your Spine Big buffs to Slaying Corona and Judgment of Earth’s Shatter during Golden Judgment. Introduces “Continued Daylight”: defeating a Harmony-afflicted enemy stores their Interference stack count; the next skill can immediately apply that stack level to a fresh target. R4 – Beneath the Frozen Ground, New Life Emerges When any party member casts Harmony Destruction, all attributes’ damage bonus for the whole party increases for a short time. R5 – Passing Through the Stillness Constructed by Wind and Snow Buffs Before Dawn and its extension skill. Increases Golden Tide’s damage, reduces cooldown, and gives it an extra charge. R6 – On the Ice Plains, Boundless Dawn Spreads Further boosts his skill damage after Harmony Destruction is triggered. Strengthens his ultimate (Liberation) through a stacking mechanic. Lets him ramp Harmony Interference stacks faster, even ignoring normal maximum limits. In short: at high Resonance Chains, Luuk becomes a Harmony engine and pseudo-support, pushing your entire team’s damage while still being a Spectro DPS menace himself. 🧠 How Will Luuk Play in Practice? If the leak holds, a typical Luuk sequence might look like: Launch with Heavy Attack into aerial combo. Use the 3rd aerial hit to unlock Slaying Corona, rotate through Ring → Shatter → Radiance. Drop a solar marrow array and either: Dive with Judgment of the Earth’s Shatter to detonate it, or Let it auto-explode while you reposition with Golden Tide. Build Sun Essence, then go into Golden Judgment and spam empowered Slaying Corona/Execute skills. Refresh resources and buffs with Before Dawn, Golden Rhythm, and smart swaps. Push Harmony Displacement/Interference stacks, then cash out with Harmony Destruction for huge bursts. He’s clearly aimed at players who enjoy: Aerial, mobile combat Complicated rotations and stance windows Meta teams built around debuff stacking and big payoff moments 💡 Player Prep Tips (Pre-Release) Even while we wait for official numbers, you can start getting ready: Save Spectro & Gauntlet resources: Expect him to want Spectro Echo sets and gauntlet-specific weapons. Think Harmony/Tune Break: Characters, Echoes, and builds that play well with Harmony Interference/Destruction will likely pair nicely with him. Practice aerial combat: If you’re not comfortable juggling enemies in the air and timing counters, now’s the time—the kit is built around it. Remember: this is still a leak-based kit, so exact multipliers and some names may shift by launch—but the core identity looks locked in. Players aiming to build Luuk efficiently in Wuthering Waves can browse verified Accounts, book professional Hourly Services for build planning and rotation coaching, or use trusted Boosting services to clear tougher content and keep up with fast-moving metas. GameMarket.gg is a trusted digital marketplace for everything gaming-related. We serve the gaming community by providing secure access that enhances every gaming journey.
Showing 16 of 30 from 38 Results