Wuthering Waves Team Building Guide: Roles, Elements & Synergy
By John Ganang 9 September 2026, 12:00 WIB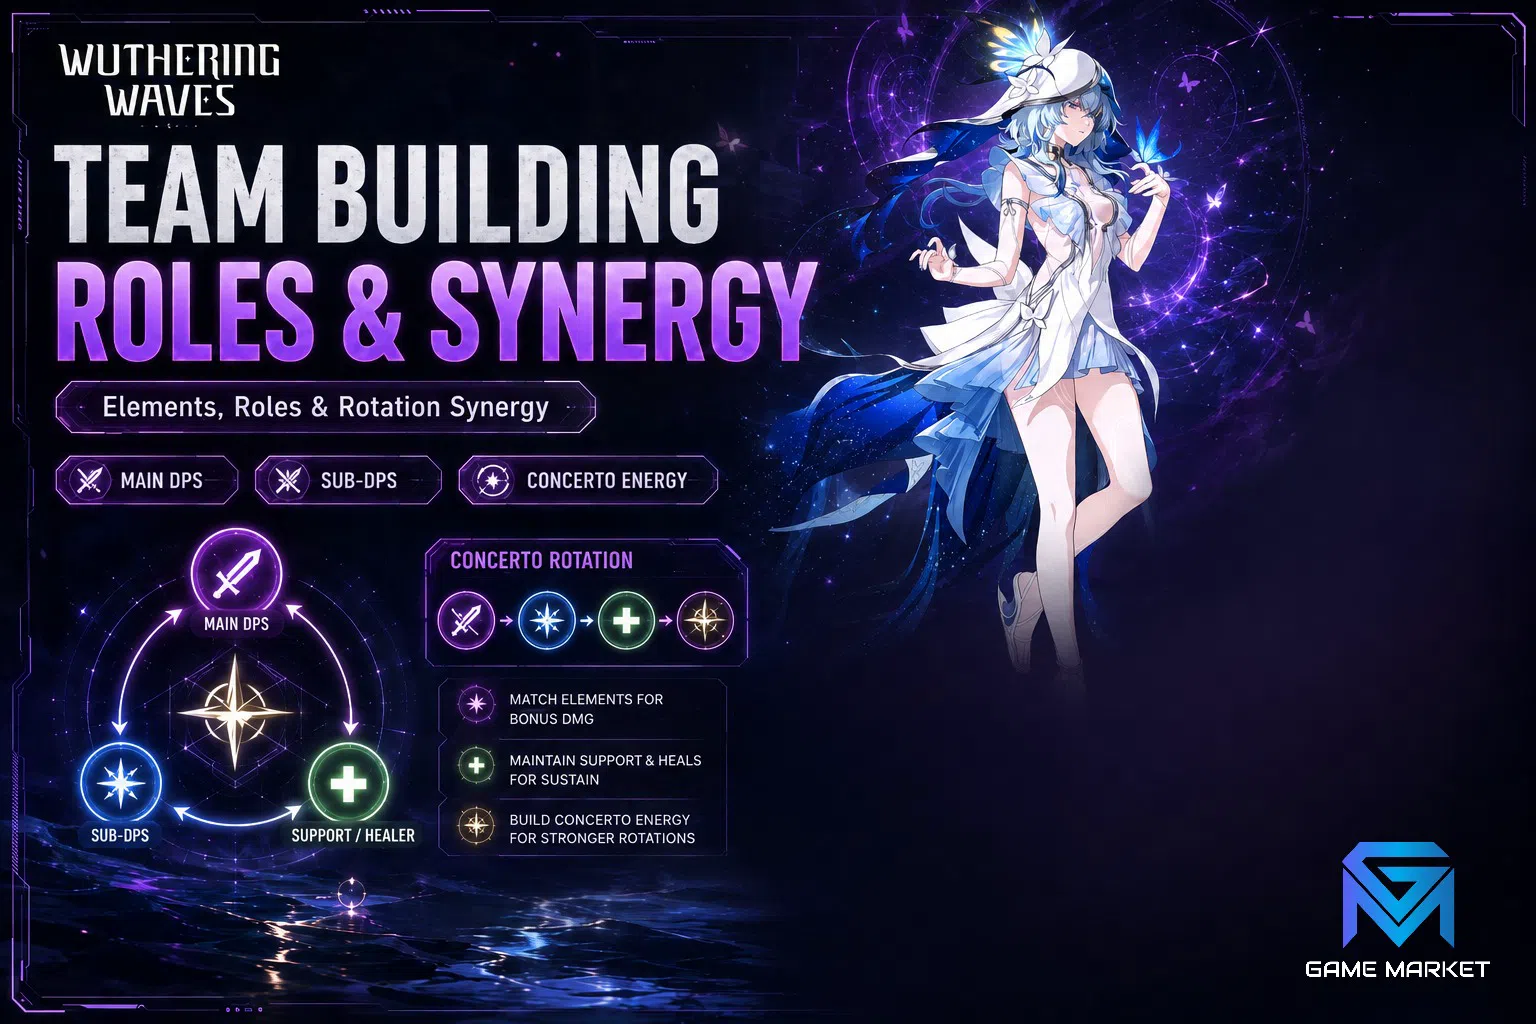
Team building in Wuthering Waves means pairing one main damage dealer with two supports whose Outro Skills amplify that damage, then rotating between them to keep buffs live. Element matters far less than role coverage, Concerto Energy generation, and clean swap timing. Get those three right and almost any trio clears endgame content.
New Rovers often assume the game works like other open-world gacha titles, where you stack an elemental reaction and let the numbers do the work. Wuthering Waves does not reward that instinct. Its combat system is built around the Concerto meter, the Intro and Outro Skill handoff, and the small window in which a buff from one Resonator lands on the next one you send in. This guide breaks down how those systems interact, what each team slot is actually responsible for, and how to assemble a functional squad from the Resonators you already own rather than the ones a tier list says you should chase.
How does the three-slot team structure actually work?
Every team holds three Resonators. Only one is on the field at a time, and swapping is not free movement — it is the core damage mechanic. Filling a character's Concerto Energy unlocks their Outro Skill, which fires as they leave and buffs whoever enters next.
That handoff is the whole engine. When a Resonator builds Concerto Energy to full, swapping them out triggers their Outro Skill; the incoming Resonator simultaneously fires an Intro Skill, which usually carries a short burst of damage and, more importantly, an entry animation with generous invincibility frames. So a swap is offense, defense, and buff delivery in one input.
Concerto Energy is generated by Basic Attacks, Resonance Skills, Resonance Liberations, and Echo Skills. It is a per-character resource that persists between swaps, so a support left on the bench with a half-filled meter keeps that progress. This is why rotations in Wuthering Waves feel cyclical: you spend a few seconds on each support to top up their meter and fire their Outro buff, then dump all of it into your main damage dealer's window.
The second resource, Resonance Energy, funds the Resonance Liberation (the ultimate). It builds from dealing and taking damage. Most well-built rotations produce a Liberation for each character roughly once per cycle, which is the pacing the encounter design assumes.
What roles does a Wuthering Waves team need to cover?
A functional team covers three jobs: a main DPS that spends most of the field time, a sub-DPS or amplifier that buffs the main DPS through its Outro Skill, and a sustain or utility unit providing healing, shielding, or a second layer of amplification.
Main DPS. This Resonator receives the buffs and spends the largest share of on-field time. Their kit usually has a long damage window — an enhanced state, a stance change, or a Liberation-driven burst — and the rest of the team exists to make sure that window is as loaded as possible. Examples across the roster include Havoc Rover, Jinhsi, Changli, and Camellya, each of whom wants a slightly different setup but shares the same structural need: enter last, enter buffed.
Sub-DPS / amplifier. This is the slot people underrate. A good amplifier does modest damage but leaves behind a large Outro buff — a flat damage bonus, an elemental damage increase, or an attack multiplier for the incoming unit. Yinlin and Mortefi are classic examples of units whose value is almost entirely in what they hand off, not what they personally hit for. Their on-field time should be short and purposeful: build Concerto, fire the buff, get out.
Sustain / flex. Healers such as Verina and Baizhi cover the survivability requirement, and both happen to carry some of the strongest team-wide Outro buffs in the game, which is why they appear in so many comps. If your main DPS has strong self-sustain or you are comfortable dodging, this slot can flex into a second amplifier for higher damage ceilings at the cost of safety margin.
Do elements and reactions matter for team building?
Wuthering Waves has six elements — Glacio, Fusion, Electro, Aero, Spectro, and Havoc — but no elemental reaction system that generates damage the way other gacha titles do. Elements matter mainly for resonance set bonuses, enemy resistances, and buff wording on specific Outro Skills.
This is the single biggest adjustment for players arriving from other titles. There is no reaction table to memorise. What elements do affect is narrower and more mechanical. First, Echo set bonuses are element-flavoured, so your build naturally wants matching pieces. Second, some Outro Skills grant an element-specific damage bonus rather than a generic one — a buff that reads "increases Fusion DMG" is doing nothing for a Glacio main DPS, and that is the real constraint on pairing. Third, certain enemies and endgame encounters carry element-specific resistances or shields, which shifts which of your built teams you bring rather than how you build them.
The practical rule: read the Outro Skill text of any support before you slot them. If the buff is generic (attack, all-type damage, healing), they pair with anyone. If it is element-locked, they only belong next to a main DPS of that element.
How should a rotation be sequenced?
The standard rotation is supports first, main DPS last. Build Concerto on your sustain unit, swap to your amplifier to receive that buff and build again, then swap to your main DPS so both buffs stack onto their damage window at once.
Concretely, a cycle usually looks like this: enter on the sustain unit, use their Resonance Skill and a short Basic Attack string to fill Concerto, fire their Liberation if it is up, then swap. The amplifier enters buffed, uses their Skill and Liberation — most amplifiers front-load their entire contribution into these two buttons — fills Concerto quickly, and swaps out. The main DPS now enters with an Intro Skill, two live Outro buffs, and a full Resonance Energy bar, and spends the next several seconds executing their damage sequence uninterrupted.
Two timing details separate a decent rotation from a good one. Outro buffs have durations, typically measured in seconds or in a number of the incoming unit's attacks, so buffing early and then wasting time repositioning burns the window. And Echo Skills — the summon-style ability tied to your equipped main Echo — generate Concerto efficiently and can be used during animation gaps, which is how experienced players compress their support turns down to a couple of seconds each.
How do Echoes and weapons change team decisions?
Echoes are the equipment layer, and their five-piece sonata sets define much of a Resonator's function. A support running a set that boosts team damage on Outro contributes more than one running a personal damage set, even if their own numbers look worse.
Each Resonator equips five Echoes, with a Cost budget rather than a fixed slot type, and the main Echo also supplies an active Echo Skill. That Echo Skill is a real part of the rotation, not a decoration: it generates Concerto Energy, and on support units, healing or buffing Echo Skills can meaningfully change how long you need to stand on that character. Sonata sets such as the healing-bonus and rejuvenating families exist specifically to make supports better at their job, while damage-flavoured sets belong on the unit receiving the buffs.
Weapons follow the same logic. A support wants Energy Regeneration to guarantee their Liberation comes up every cycle; a main DPS wants raw attack and crit scaling. Because Energy Regeneration is a stat you can source from both weapons and Echo substats, budgeting it correctly is often what turns an inconsistent team into a smooth one. If a support's Liberation is missing every other rotation, that is an energy problem, not a damage problem.
Resonance Chains — the duplicate-based upgrade path — can also shift roles. Some Resonators gain a substantially larger Outro buff or a new energy mechanic at a specific chain level, which is worth knowing before you decide a unit is not worth building. Kuro Games documents these effects in the in-game Resonator screen, and the numbers there are the reliable reference.
What team archetypes work without premium units?
The most reliable free-to-play structure is Rover as main DPS, a four-star amplifier, and a healer. Wuthering Waves gives every account a fully viable main damage dealer in Rover and a free healer in Baizhi, which covers two of the three slots immediately.
From there, the archetypes are straightforward. A quickswap team keeps all three Resonators in constant rotation, chaining Intro and Outro Skills for near-continuous buff uptime; it demands more inputs but has excellent damage consistency and defensive coverage. A hypercarry team parks most resources and field time on a single main DPS and uses two dedicated buffers to inflate one long window; it hits harder in burst checks but suffers more when the target moves or phases. A dual-carry setup splits field time between two damage dealers with complementary cooldowns, which is a good fit when you have two strong four-stars but no standout five-star.
Four-star Resonators are genuinely competitive in support slots. Because a support's contribution is largely fixed buff text rather than scaling damage, a well-built four-star amplifier loses far less to a five-star than a four-star main DPS would. If you are deciding where to spend limited Ascension materials, invest in supports first — they carry across every team you build later.
What are the most common team-building mistakes?
The frequent errors are stacking three damage dealers with no buff handoff, ignoring Energy Regeneration on supports, swapping before Concerto Energy is full, and pairing an element-locked Outro buff with a main DPS of a different element.
Swapping early is the most costly of these, because a swap without a full Concerto meter delivers no Outro Skill at all — you have paid the swap and received none of the buff. The interface shows the meter clearly around the character portrait, and learning to read it mid-combat is the highest-value habit a new player can build.
The second most common issue is over-investing in a main DPS while leaving supports at low levels with unfinished Echoes. Buff magnitudes usually scale with the support's own level and stats, so an under-levelled Verina or Mortefi is quietly reducing your entire team's output. Bringing every member of a team to the same Ascension tier before pushing any single one further produces noticeably better results than a single maxed carry flanked by neglected teammates.
Finally, treating tier lists as build orders leads people to shelve perfectly good Resonators. Endgame modes in Wuthering Waves are tuned around well-executed rotations rather than roster rarity, and a coordinated team of units you actually enjoy playing will clear content faster than a theoretically stronger squad you keep misplaying.
If you would rather start from a roster that already has the supports and main DPS units a comp like this needs, browse the available Wuthering Waves accounts and compare what each one brings before you commit to a build path. For the wider systems behind Resonators, Echoes and Astrite, the Wuthering Waves beginner's guide covers the foundations this article builds on.
GameMarket.gg is a trusted digital marketplace for everything gaming-related. We serve the gaming community by providing secure access that enhances every gaming journey.


![Wuthering Waves Accounts Starter EU|UL 49|Rank 5|2 Char Limited [Lucy R6 & Rebecca]+Sign|5k Astrite|Check SS WW251B](https://img.gamemarket.gg/products/k1bgwlaq/wuthering-waves-accounts-eu-ul-49-rank-5-2-char-limited-lucy-r6-rebecca-gbs-thumbnail.webp "EU|UL 49|Rank 5|2 Char Limited [Lucy R6 & Rebecca]+Sign|5k Astrite|Check SS WW251B")