
Genshin Impact
Ultimate Genshin Impact Luna VI Update Guide
Dive into the most comprehensive Genshin Impact Luna VI update breakdown! Explore Linnea's exact skill multipliers, full Spiral Abyss and Imaginarium Theater schedules, TCG balance changes, and Temple of Space mechanics. Master the patch today. The skies above Teyvat have shifted once again! The highly anticipated Version Luna VI Update, officially titled "Song of the Welkin Moon: Rondo — Augured Homecoming," officially launched on April 8, 2026. This colossal patch drastically alters the endgame meta and expands the boundaries of the Mondstadt region. Travelers who reached Adventure Rank 5 prior to the maintenance are eligible for 600 Primogems in compensation. From highly specific Spiral Abyss buffs to the exact hit-counts required to defeat the new overworld bosses, this exhaustively detailed breakdown covers every precise mechanic introduced in this massive patch. 🪨 Linnea's Complete Kit and Signature Weapon The undisputed centerpiece of this update is the arrival of Linnea, a brand-new 5-Star Geo Bow character serving as a Naturalist for the Nod-Krai Branch. She completely revolutionizes Geo team compositions by introducing the exclusive "Lunar-Crystallize" reaction. Linnea’s complex kit revolves entirely around her summon, "Lumi": Elemental Skill: Tapping the skill summons Lumi in "Super Power Form" to continuously deal AoE Geo damage. If "Moondrifts" are nearby, Lumi deals additional Lunar-Crystallize damage. Attacking consecutively after using the skill shifts Lumi into "Ultimate Power Form," delivering one massive instance of AoE Geo Lunar-Crystallize damage before reverting back to Standard Power Form. Elemental Burst: Summons Lumi directly into Super Power Form to continuously restore HP for all on-field party members. Simultaneously, Lumi's presence actively shreds the Geo Resistance of nearby enemies. Her Moonsign passive, "Ascendant Gleam," further amplifies this RES shred. Exploration Utility: Outside of combat, Linnea's Charged Attack transitions into a specialized net to capture wild creatures, and she can command Lumi to instantly shatter forgeable ore deposits. To maximize her potential, the event-exclusive 5-Star Bow, "Golden Frostbound Oath," is now available. At Refinement Rank 1, it increases DEF by 16%. When Elemental Skills or Lunar-Crystallize attacks hit, it grants "Frost Fae's Favor," boosting the wielder's Geo and Lunar-Crystallize DMG by a massive 40% for 6 seconds. If Moondrifts are present, all off-field party members receive the "Frost Fae's Mischief" buff, granting a 20% increase to both damage types. 🗺️ Mondstadt Expansion: Temple of Space Mondstadt finally expands! The update permanently unlocks "Windrest Peak" and the enigmatic "Temple of Space" located northwest of Brightcrown Canyon. To access this, you must be Adventure Rank 20 and have completed the Prologue: Act III Archon Quest. The Temple of Space introduces a complex exploration mechanic: the Memory Core system. As you explore the ruins, you will discover Mnemonic Clusters and Memory Factors scattered in the wild and hidden within chests. Offering these fragments to the Memory Core exchanges them for ancient interstice blessings and unlocks hidden lore. Additionally, you can dive deeper into the story through Linnea's Story Quest ("Alcyon Chapter: Act I") and the new World Quests "A Long Day in the Mountains" and "Winds Beneath the Tower of Silence." ⚔️ Boss Mechanics and Exact Spiral Abyss Changes The newly revealed lands are guarded by exceptionally dangerous adversaries designed to punish careless elemental spam. Watcher: Fallen Vigil: This boss enters a "Supreme Overseer" state and monitors the exact number of Pyro, Hydro, Electro, or Cryo damage instances it takes. After taking exactly 3 hits of a specific element, it summons corresponding "Active Elemental Stars" that must be shattered to prevent its devastating "Phenomena's Delirium" attack. If the element record is empty, it summons highly durable Inert Elemental Stars. Domain Keeper: Enters the "Deluded Eye" state. Upon taking 3 instances of a specific elemental damage, it transforms into that elemental form, applying the element to itself and gaining massive resistance buffs against it. Endgame players face a completely overhauled Spiral Abyss with two distinct phases: April 16 Phase: Floor 11 grants all party members +200 Elemental Mastery. Floor 12 First Half increases Lunar-Crystallize DMG by 75%, while the Second Half buffs Normal and Charged Attack DMG by 75%. The "Rumbling Moon" blessing unleashes True DMG shockwaves every 4 seconds when Moondrift Harmony is triggered. May 16 Phase: Floor 11 grants a universal 75% Pyro DMG Bonus. Floor 12 First Half retains the 75% Pyro DMG Bonus, while the Second Half buffs Lunar-Bloom DMG by 75%. The blessing shifts to "Shield-Shattering Moon." ⚙️ System Optimizations and TCG Balancing Quality of life is heavily prioritized in Luna VI. The "Auto Add" feature for leveling characters and artifacts now actively calculates your current Mora, preventing situations where you run out of funds mid-enhancement. The annoying overflow EXP pop-up has also been removed if the wasted EXP is under 5,000. Additionally, Custom Configurations for Artifact Lock Assistance have increased from 2 to 3. For Imaginarium Theater enthusiasts, a new season begins May 1, requiring Pyro, Hydro, and Dendro characters. The Opening Roster includes Dehya, Yanfei, Ayato, Dahlia, Kinich, and Kirara. Guest Stars feature Varka, Razor, Albedo, and Zibai. Genius Invokation TCG players receive a hefty balance patch alongside new cards for Dahlia, Aino, and the Consecrated Fanged Beast. Barbara's starting Max HP has increased from 10 to 12. Eula's Lightfall Sword summon damage increased from 3 to 4. Freminet's Pers Timer bonus damage increased from 2 to 3. Finally, Arataki Itto's Ushi summon now deals 1 Geo DMG at the end phase and immediately grants him Superlative Superstrength. Mastering Linnea's mechanics anchors the early progression of the update, especially for players investing in new characters. Travelers aiming to accelerate ascension farming can explore trusted Genshin Impact Accounts, optimize resin/stamina efficiency with expert Genshin Impact Hourly Services, or secure consistent boss clears through reliable Genshin Impact Boosting as farming rotations intensify. GameMarket.gg is a trusted digital marketplace for everything gaming-related. We serve the gaming community by providing secure access that enhances every gaming journey.
Genshin Impact
Nicole Kit Reveal: The Hexenzirkel Observer Support Guide
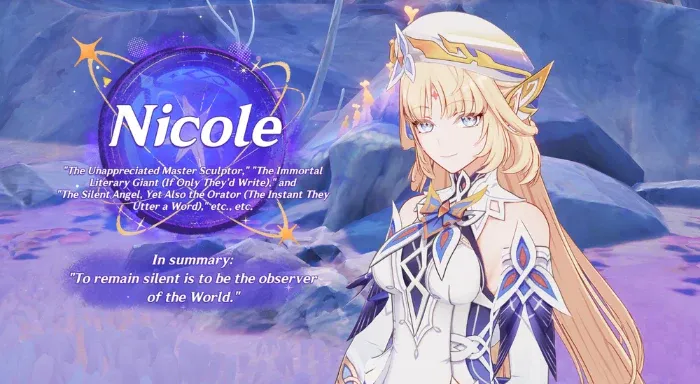
Master the Hexenzirkel’s finest with our definitive Nicole Build Guide! Arriving in Genshin Impact 6.6, Nicole Reeyn brings a game-changing Pyro support kit. Learn how to optimize her "Seven Edicts of Dust and Light" catalyst, farm Pine Amber in Nod-Krai, and unlock the massive 20% RES shred at C2. Dominate the 2026 Hexerei meta with the ultimate guide for the mute prophetess. 🕯️ The Prophetess of the Hexenzirkel: Nicole Reeyn’s Definitive 6.6 Build Guide 📖 The celestial scales have tipped! Debuting in Version 6.6 (May 20, 2026), Nicole Reeyn—codenamed "N" of the Hexenzirkel—arrives as the most significant Pyro support since the dawn of Teyvat. A survivor of the ancient Angel race, Nicole is a "mute prophetess" who speaks directly into the minds of those she guides. In combat, she is a "Bennett-tier" universal buffer who anchors the Hexerei system. Whether you are building her for the legendary Varka or as a standalone shielder, this Info breakdown is your sacred edict for success. 🛡️ Divine Intervention: Nicole’s Kit Deep-Dive Nicole’s kit is designed for 100% off-field efficiency, scaling entirely off her ATK stat to provide both survival and offensive power. Revelation Edict: Unmanifest Light (Skill): Nicole summons a fleeting glimpse of the heavens, granting nearby allies the Grace of Kenosis. This provides a team-wide ATK buff and creates a Shield of Blazing Light. The Shield: Scales with Nicole's ATK and has a massive 250% Pyro Absorption efficiency. Revelation: Ladder of Divine Ascent (Burst): Nicole weaves golden threads to enter Silent Contemplation mode. When your active character hits an opponent, an Arcane Projection triggers a coordinated attack. Coordinated DMG: Deals damage matching the active character's element and scales off their stats, meaning she won't steal your carry's Reactions. Nepsis (Exploration Passive): Outside of combat, Nicole can trigger "Emissarial Guidance," calling upon nearby Seelie to act as a regional Treasure Compass—making her the ultimate "Guide who never gets lost." ⛏️ Material Shopping List: Farming for the Angel To ascend Nicole to Level 90 and max her talents, you'll need to trek through the Nod-Krai region and Mondstadt: Material Type Item Name Total Required Farm Location Local Specialty Pine Amber 168 Found throughout the Nod-Krai region. Boss Material Remnant of the Dreadwing 46 Dropped by the Dreadwing boss in Luna IV. Enemy Drops Warrant Series 36 / 96 / 129 Dropped by regional human enemies. Talent Books Elysium Series 9 / 63 / 114 New 6.6 Domain in Mondstadt. ⚔️ The Seven Edicts: Best Weapons & Artifacts Nicole’s support potency is tied to her raw ATK. Higher ATK equals a stronger shield and a bigger buff. Signature Weapon: Seven Edicts of Dust and Light: A 5-star Catalyst with a massive 741 Base ATK. It increases active party DMG by up to 58% based on Nicole's ATK and restores 17 Energy when opening chests or hitting enemies. BiS Artifact: 4-Piece "Witch's Homework" Set: * 2-Pc: Energy Recharge +20%. 4-Pc: Using a Skill grants a 20% Elemental DMG bonus. In a Hexerei team, this is upgraded to "Mortal Hymn," providing a 40% dual-element DMG bonus. 📈 Pull Strategy: C2 vs. Signature Weapon For the average player, C2 is the priority. C0: Complete kit (Shield, Buff, Coordinated DMG). C2 (The Game-Changer): Decreases enemy Elemental RES by 20%. This mechanical benefit is rarer and more impactful for team DPS than the raw stats of her signature weapon. C6 (Whale Tier): Characters with her buff ignore 40% of enemy DEF, cementing her as the strongest support in the game's history. 👥 The 6.6 Hexerei Meta With the second wave of Hexerei buffs in 6.6, Nicole now supports a roster of over 18 units, including legacy favorites: The Mondstadt Core: Nicole + Varka + Jean + Mika. (Nicole provides the Pyro foundation for Varka's overwhelming physical/elemental hybrid strikes). The Melt Engine: Nicole + Lohen (6.6 Cryo DPS) + Durin + Venti. 💎 Fuel Your Teyvat Journey Nicole anchors the early progression of the update, especially for players investing in new characters. Travelers aiming to accelerate ascension farming can explore trusted Genshin Impact Accounts, optimize resin/stamina efficiency with expert Genshin Impact Hourly Services, or secure consistent boss clears through reliable Genshin Impact Boosting as farming rotations intensify. GameMarket.gg is a trusted digital marketplace for everything gaming-related. We serve the gaming community by providing secure access that enhances every gaming journey.

Genshin Impact
Genshin Impact Imaginarium Theater Ultimate Guide
Unlock the deepest secrets of Imaginarium Theater Season 22 with our comprehensive Genshin Impact Guide! Master the strict Hydro, Cryo, and Geo restrictions, efficiently manage your Vigor economy, and utilize our exclusive bonus tips to conquer the new Lunar Mode Arcana Challenges to claim every Primogem. Welcome to the most exhaustive and meticulously detailed Imaginarium Theater Guide you will ever need for Version 6.5 Luna VI! Running from April 1 to April 30, 2026, Season 22 plunges Travelers back into the secret library of Mondstadt to face an unprecedented gauntlet of highly scaled enemies. This endgame mode completely replaces the Spiral Abyss for the month, forcing you to utilize a highly restricted roster. To secure your 60,000 points, Stella Stars, and exclusive collectibles, we are breaking down every single mathematical nuance, boss level, and strategic checkpoint of this performance. 🌊 Deep Dive: Cast Selection and Stat Bonuses The core restriction of Season 22 is the strict adherence to the Hydro, Cryo, and Geo elements. The Opening Characters of this rotation are blessed with the "Fantastical Blessing," a permanent buff that increases their Max HP, ATK, and DEF by a massive 20% both inside the Theater and across all of Teyvat for the entire month. Drafting your Alternate Cast is where the true strategic depth lies, as the requirements scale aggressively with your chosen difficulty: Easy Mode: Requires exactly 8 Alternate Cast members. Normal Mode: Requires exactly 12 Alternate Cast members. Hard Mode: Requires exactly 16 Alternate Cast members. Visionary Mode: Requires a minimum of 22 members, but you are highly encouraged to bring up to 26. For every single member you add beyond the minimum of 22, your entire squad receives a massive flat bonus: +1600 HP, +100 ATK, +100 DEF, and +40 Elemental Mastery! Lunar Mode: Requires a staggering minimum of 28 members, with a maximum cap of 32, offering even more compounding stat buffs for pushing your roster to the limit. To help you reach these daunting numbers, you can borrow exactly one Supporting Character from a friend's showcase board per challenge. This loaned character can be used up to 15 times a season, making collaboration highly rewarding. ⚔️ Boss Gauntlet: Scaling Encounters Explained The "Villains" of Season 22 scale incredibly hard depending on your difficulty level. Knowing exactly when these bosses appear allows you to save your strongest DPS units for the critical checkpoints. Easy Mode (3 Acts): Culminates in a Level 80 Primo Geovishap in Act 3. Normal Mode (6 Acts): Introduces the Emperor of Fire and Iron (Level 85) at Act 3, and pushes the Primo Geovishap (Level 90) to Act 6. Hard Mode (8 Acts): The Emperor of Fire and Iron (Level 90) appears at Act 3, followed by the Radiant Moongecko (Level 92) at Act 6, and the Primo Geovishap (Level 95) at Act 8. Visionary & Lunar Modes (10 Acts): This is the ultimate endurance test. You will face the Emperor (Level 90) in Act 3, the Moongecko (Level 92) in Act 6, the terrifying Goldflame Qucusaur Tyrant (Level 95) in Act 8, and finally, a devastating Level 100 Primo Geovishap in Act 10. 🌙 Lunar Mode and Arcana Challenges Unlocked exclusively after conquering Visionary Mode, the new Lunar Mode introduces the most grueling side content in the game: Arcana Challenges. These are specialized combat scenarios that, thankfully, do not consume your characters' Vigor stacks, allowing you to attempt them endlessly. Arcana Challenge I: Pits you against a Level 100 swarm of Consecrated Beasts, including the Scorpion, Red Vulture, Horned Crocodile, and Fanged Beast simultaneously. Arcana Challenge II: A brutal showdown against a Level 100 Battle-Hardened Elite Treasure Hoarder. Successfully completing these challenges allows you to draw a highly exclusive Lunar Arcana collectible card. You can only draw one Lunar Arcana per season, but HoYoverse allows you to trade these cards with your friends to complete your collection! 🌸 Advanced Mechanics: Vigor, Flowers, and Boons Success in this Guide completely revolves around the Vigor economy. Every character starts with exactly two Vigor stacks. Each Battle Event permanently consumes one stack. Once depleted, the character is locked out. To survive 10 Acts, you must efficiently farm "Fantasia Flowers" by completing combat stages. Between Acts, you spend these flowers in the lobby. You can trigger Companion Events to draft necessary units from your Alternate Cast, or buy Mystery Caches for random effects. Your primary flower investment should go into Wondrous Boons, which apply massive reaction buffs based on a strict hierarchy: Origin: The foundational event that establishes the baseline damage increase for a specific elemental reaction. Evolution: Randomly appears after an Origin event to heavily increase the overall level and raw stats of the existing buff. Divergence: Randomly appears to completely change the effect of the buff, offering tactical flexibility. If a run goes wrong, use the "Rewind" feature. This completely reverses your performance back to the Act immediately following your last defeated Boss, flawlessly restoring your characters, Vigor, and Fantasia Flowers to that exact checkpoint. Since Version 5.6, you can also seamlessly "Restart" the Last Act if you barely miss a time limit. 💎 Maximizing Rewards: Stellas, Medals, and Gifts The reward structure for Season 22 is massively lucrative. Completing your run yields Performance Tour Rewards (giving up to 120 Primogems for Acts 8 and 10). However, the Debut Performance Gifts for first-time clears are staggering: clearing Act 6 rewards a Midlander Billet Trove, Act 10 grants a Crown of Insight and 250 Primogems, and clearing Arcana Stage 2 yields a highly coveted Borderland Billet Trove. For flawless clears, you earn Stella Stars. Reaching 3 Stars grants 8x Sanctifying Unction, 6 Stars yields a Transient Resin, and achieving 9 or 12 Stars rewards the incredibly rare Sanctifying Elixirs used for custom artifact crafting. Lastly, ensure you trade your Toy Medals with Wolfy to unlock Thespian Tricks—unique character poses designed specifically for the in-game camera. 💡 Bonus Tips for a Flawless Performance Even with a fully optimized roster, completing all 10 Acts in this Guide requires sharp tactical decision-making. Here are a few highly effective bonus tips to ensure a flawless run: Prioritize Cast Expansion Over Boons: In the early Acts, always spend your Fantasia Flowers on Companion Events rather than Wondrous Boons. Having a massive pool of Alternate characters prevents you from getting soft-locked when your Vigor naturally depletes before the final bosses. Save Your Carries for Bosses: Use the provided Trial Characters or your lower-investment Alternate Cast members to clear the standard Battle Events. Strictly reserve your hyper-invested Hydro, Cryo, and Geo DPS units for the grueling Boss encounters in Acts 3, 6, 8, and 10. Capitalize on Freeze and Shatter Synergies: Because Season 22 restricts you to Hydro, Cryo, and Geo, building your teams around the Freeze reaction is incredibly effective for crowd control during standard mob waves. You can then use your Geo characters to trigger Shatter for massive bursts of physical damage against those frozen targets. Mastering the advanced Imaginarium Theater mechanics anchors the early progression of the update, especially for players investing in new characters. Travelers aiming to accelerate ascension farming can explore trusted Genshin Impact Accounts, optimize resin/stamina efficiency with expert Genshin Impact Hourly Services, or secure consistent boss clears through reliable Genshin Impact Boosting as farming rotations intensify. GameMarket.gg is a trusted digital marketplace for everything gaming-related. We serve the gaming community by providing secure access that enhances every gaming journey.
Genshin Impact
Step-by-Step Operation Stronghold Guide
Master the Operation Stronghold Defense event in Genshin Impact Version 6.4! Our ultimate Guide breaks down every single wave, turret placement, and elemental trap upgrade to guarantee a flawless victory and maximum Primogem rewards. Welcome back to the frontlines, Travelers! The highly anticipated tower defense game mode has returned to Teyvat in Version 6.4 Luna V. Running from March 23 to April 2, 2026, this massive tactical event requires Adventure Rank 20 and the completion of "Song of the Dragon and Freedom." To help you claim every single Primogem, Talent Book, and Hero's Wit available, we have crafted the most exhaustive Operation Stronghold Defense Event Guide imaginable. We are leaving no stone unturned—down to the exact placement of every single mechanism. ⚙️ The Mechanics of War: Turrets, Traps, and Skills Before diving into the stages, you must understand the exact tools at your disposal. During the Preparation Phase, you will spend Bolts (earned by defeating enemies) to place mechanisms. During the Challenge Phase, you will unleash devastating Support Skills. Crucially, your Support Skill cooldowns do not reset between waves, so resource management is the key to this Guide. Energy Turrets: Your primary DPS. Place them on blocks and infuse them with Pyro, Electro, or Anemo. You can upgrade them for rapid-fire, AoE splash, or single-target artillery bursts. Trap Mechanisms: Permanent floor panels that activate when stepped on. They can be upgraded to pull enemies inward, continuously lay mines, or periodically unleash elemental shockwaves. Collection Mechanisms: Passive generators that boost Bolt or Energy income for kills within their radius. Their effects do not stack with overlapping fields. Support Skills: You have access to six abilities replacing your normal kit. The Boom-Boom Fireball and Crackle-Crack Thunderstrike offer massive Pyro and Electro nukes. The Rumble-Rumble Rainstorm and Thump-Thump Earthwave deal Hydro/Geo damage while severely slowing enemies. Finally, the Whish-Whish Blizzard provides a global freeze, while the Whoosh-Whoosh Tornado deals sustained Anemo AoE. 🔥 Stage 1: First Battle! Support From a Warmhearted Weasel This introductory stage is designed to teach you the devastating power of Vaporize and Melt reactions. Wave 1: The tutorial forces you to place a Pyro Energy Turret and a Hydro Trap Mechanism next to each other. When the challenge begins, do not panic. Wait for the Hilichurls to group up heavily before using your Fireball or Thunderstrike to relieve the pressure. Always save at least one skill for the next wave. Wave 2: Buy the Fire Intensity upgrade for your first Pyro Turret. This grants it rapid-fire capabilities, instantly vaporizing anything that touches the Hydro Trap. Place a second Pyro Turret on the exact same column to prepare for later. Wave 3: Hasty Hydro Finches will blitz down the second lane. Immediately place a Cryo Trap and a third Pyro Turret on the right side to freeze them. Upgrade this new turret with Fire Intensity. When the multiple waves of Mitachurls and Finches spawn, wait for the second batch of Finches before dropping your Thunderstrike to clear the board. Wave 4: The Eroding Avatar of Lava appears. This boss self-destructs when its Pyro gauge fills up. Simply max out your board with six total Pyro Turrets, ensuring every single one has the Fire Intensity upgrade. They will effortlessly melt the Avatar without you needing to press a single Support Skill. ❄️ Stage 2: Got 'Em! Mechanism Supplies Multi-lane pathing and Bolt Collection mechanics are introduced here. Positioning is everything. Wave 1: Two Bolt Collection Mechanisms are pre-deployed. Surround them with three Pyro Turrets strictly within their radius to rake in massive bonus Bolts. If a few enemies slip past the frontline, let them go—the setup ensures stragglers will die in the bottom-right corner, which is also covered by a Collection Mechanism. Wave 2: Purchase a Cryo Trap and place it directly on the center corner, immediately upgrading it with the Pulling Mechanism. Buy a fourth Pyro Turret. The trap will suck Finches inward, freezing them while your turrets trigger continuous Melt reactions. Wave 3: Healing Samachurls and an Eroding Avatar of Lava will rush you. Upgrade at least two or three of your Pyro Turrets with DMG Range to enable AoE splash damage. When the Samachurls step on the Cryo Trap, drop your Rumble-Rumble Rainstorm skill to perma-freeze them so they cannot heal the Avatar. Wave 4: Cryo-shielded Abyss Mages enter the fray. Upgrade your Cryo Trap with the Fracturing Mechanism to violently shred enemy defenses. Purchase a Bolt Collection Increase buff and add a final Pyro Turret. Your frontloaded Pyro damage will completely block the Abyss Mages. Wave 5: Upgrade all remaining inner turrets to DMG Range and change your Collection Mechanisms from Bolt to Energy generation. Save both of your Support Skills for the final boss. Wave 6: The ultimate test against a massive Cryo Lawachurl. Upgrade your two innermost Pyro turrets with Target Analysis (massive RES shred) and Focused Attack (single-target burst). Ready your Boom-Boom Fireball to instantly crack the Lawachurl's Cryo shield when it spawns. Once the unshielded beast walks over your Cryo Trap, drop your Rainstorm to freeze it in place while your six splash-damage turrets obliterate it. 🌪️ Stage 3: Transformation? A Cunning New Trick This complex three-lane map demands absolute mastery over Anemo Swirls and Electro-Pyro Overload mechanics to break heavy elemental shields. Wave 1: Establish dominance in the middle lane by placing an Anemo Turret beside a Bolt Collection Mechanism. This Anemo Turret will aggressive swirl elements from surrounding traps, dealing enough AoE damage to handle the Hilichurls alone. Wave 2: Geo-shielded Mitachurls and Slimes begin their march. Place an Electro Turret right next to a Pyro Turret, and upgrade the Pyro Turret with Fire Intensity. Add a Geo Trap to the upper-middle lane. This creates an endless Overload reaction loop that shatters Geo shields and violently knocks enemies backward. Wave 3: The Tenebrous Mimiflora and its stubborn Ward Shield appears on the southern lane. Place a new Electro and Pyro Turret combo on the southern boxes, and upgrade your central Anemo Turret with Fire Intensity. Buy an Energy Collection Mechanism. The sheer volume of Swirl and Overload will break the Mimiflora's shield effortlessly. Wave 4: It is time to max out. Ensure all Electro and Pyro Turrets have Fire Intensity. Most importantly, upgrade your Anemo Turret with Suppressing Fire. This makes your Anemo Turret your strongest AoE asset against the incoming Eroding Avatar of Lava. Wave 5: The upper path becomes accessible. Place a Geo Trap there and upgrade it with both the Minelaying and Shackling mechanisms. Upgrade your older Geo Trap with Minelaying as well. Your Anemo setup will handle the middle, while the Shackling trap completely locks down the northern flank. Wave 6: A terrifying Geo Lawachurl charges down the middle path. To counter this, place a brand new Geo Trap right next to your first one in the center lane, and upgrade both with the Shackling Mechanism. As the Lawachurl advances, these paired traps will stun it twice in a row. Your fully upgraded Overload turrets will easily chip away its massive Geo shield and health pool before it ever reaches your base. Mastering Operation Stronghold Defense anchors the early progression of the update, especially for players investing in new characters. Travelers aiming to accelerate ascension farming can explore trusted Genshin Impact Accounts, optimize resin/stamina efficiency with expert Genshin Impact Hourly Services, or secure consistent boss clears through reliable Genshin Impact Boosting as farming rotations intensify. GameMarket.gg is a trusted digital marketplace for everything gaming-related. We serve the gaming community by providing secure access that enhances every gaming journey.

Genshin Impact
Chiori Best Build in Genshin Impact: Weapons, Artifacts & Teams
Genshin Impact Chiori Build Guide: Talent Priority, Weapons, Artifacts, Team Comps Chiori is a 5-star Geo Sword character who excels as an off-field Sub DPS, especially in Geo-focused teams. Her gameplay revolves around summoning Tamoto, a puppet construct that performs coordinated Geo attacks even while Chiori is off the field. This build guide covers everything you need to maximize Chiori’s damage output, including talent priority, best weapons, artifact builds, stat priorities, and optimal team compositions. Chiori shines when paired with Geo constructs and Geo teammates, allowing her to summon additional Tamoto puppets and significantly increase her off-field damage. Chiori Overview Attribute Details Rarity ★★★★★ Element Geo Weapon Sword Role Sub DPS Chiori’s Elemental Skill summons Tamoto, which performs coordinated attacks dealing Geo damage. When a Geo Construct is present or created nearby, she can summon an additional Tamoto, increasing her damage output. Her Elemental Burst deals AoE Geo damage, while her skill mechanics allow flexible playstyles depending on whether you switch characters or continue attacking with Geo infusion. Because most of her damage comes from Tamoto and Elemental Skill scaling, she functions best as an off-field damage dealer. Talent Priority Chiori’s damage mainly comes from her Elemental Skill, making it the most important talent to level. Recommended upgrade order: Elemental Skill → Elemental Burst → Normal Attack Elemental Skill Highest priority since it summons Tamoto, which deals most of her damage. Elemental Burst Provides additional AoE Geo damage and improves burst windows. Normal Attack Lowest priority because Chiori is primarily played off-field. Best Weapons for Chiori Chiori benefits greatly from CRIT stats and DEF scaling, making weapons that increase these attributes ideal. Best-in-Slot Weapon Uraku Misugiri Base ATK: 542 CRIT DMG: +88.2% Passive Effect: Normal Attack DMG +16–32% Elemental Skill DMG +24–48% Effects double when nearby characters deal Geo damage DEF +20–40% This weapon is perfectly designed for Chiori, boosting both her Elemental Skill damage and DEF scaling. Strong 5★ Alternatives Primordial Jade Cutter CRIT Rate: +44.1% HP increase and ATK scaling from HP Although its passive focuses on ATK, the strong CRIT Rate makes it an excellent general DPS option. Light of Foliar Incision CRIT DMG: +88.2% Provides additional damage scaling based on Elemental Mastery While powerful stat-wise, its EM scaling makes it slightly less optimal for Chiori compared to other options. Best 4★ Weapons Wolf-Fang Battle Pass weapon offering: CRIT Rate Elemental Skill and Burst damage bonuses Additional CRIT stacks when hitting enemies A strong and accessible option for Chiori builds. Cinnabar Spindle DEF sub-stat Elemental Skill DMG scaling from DEF One of the best cost-effective weapons for Chiori if you obtained it during the Version 2.3 event. Best Artifacts for Chiori Chiori benefits greatly from DEF scaling and Geo damage bonuses. Best Artifact Set Husk of Opulent Dreams 2-Piece Bonus DEF +30% 4-Piece Bonus Stacks grant additional DEF and Geo DMG Bonus over time. This set perfectly matches Chiori’s kit, boosting both her Elemental Skill and Burst damage. Alternative Artifact Set Golden Troupe 2-Piece Elemental Skill DMG +20% 4-Piece Elemental Skill DMG +25% Additional +25% when off-field Since Chiori deals most of her damage through off-field Elemental Skill attacks, Golden Troupe is a strong alternative. Beginner Artifact Option A mixed set works well early on: 2 Golden Troupe + 2 Geo DMG set Possible Geo sets include: Husk of Opulent Dreams Archaic Petra Recommended Stats Main Stats Sands: DEF% Goblet: Geo DMG Bonus Circlet: CRIT Rate or CRIT DMG Sub Stats Priority CRIT Rate / CRIT DMG→ DEF%→ ATK%→ other stats Balancing CRIT stats with DEF scaling is key for maximizing Tamoto’s damage. Best Teams for Chiori Chiori works best in Geo teams, where Geo constructs allow her to summon additional Tamoto puppets. Navia Team Main DPS: NaviaSub DPS: Chiori (preferably C1)Support: BennettSub DPS / Support: Furina (C2) or Xiangling Navia benefits greatly from Chiori’s off-field damage. Chiori’s C1 removes the Geo Construct requirement, improving team flexibility. Itto Mono Geo Team Main DPS: Arataki IttoSub DPS: ChioriShield / Survival: ZhongliSupport: Gorou This is one of Chiori’s strongest teams. Zhongli and Itto provide Geo constructs, allowing Chiori to summon an additional Tamoto and significantly increase her damage. Gorou’s DEF buffs also benefit both Itto and Chiori. Final Thoughts Chiori is one of the strongest Geo Sub DPS characters in Genshin Impact, delivering powerful coordinated attacks through her Tamoto puppets. Her kit rewards teams that use Geo constructs and Geo synergy, making her particularly effective in Mono Geo compositions. With the right weapon, artifact build, and team setup, Chiori can provide consistent off-field damage while supporting your main DPS during extended battles. If you want to optimize your roster and experiment with powerful Geo teams, you can explore Accounts, Hourly Services, and Boosting for Genshin Impact. Preparing strong characters and optimized builds can significantly improve your performance across Spiral Abyss and future updates. GameMarket.gg is a trusted digital marketplace for everything gaming-related. We serve the gaming community by providing secure access that enhances every gaming journey.

Genshin Impact
Genshin Impact Escoffier Build Guide for Cryo Freeze Compositions
🍽️ Escoffier Build Brings New Stability to Freeze Teams Every new Cryo character in Genshin Impact enters a crowded battlefield of Freeze specialists, but Escoffier approaches the role from a slightly different angle. Instead of overwhelming enemies with explosive bursts of Cryo damage, she quietly establishes a steady rhythm of off-field pressure, letting Freeze reactions lock enemies in place while your main damage dealer controls the fight. The result is a playstyle that feels less frantic and more methodical. Rotations become smoother, crowd control becomes easier to maintain, and Freeze compositions gain a level of reliability that many teams previously struggled to sustain during longer encounters. Freeze teams have often relied on precise timing between Cryo and Hydro abilities to maintain control. Escoffier subtly shifts that dynamic. By delivering consistent Cryo application from off the field, she reduces the pressure on rotations and allows the rest of the squad to focus on damage windows rather than reaction upkeep. 🧊 Best Escoffier Build Escoffier shines as an off-field Cryo Sub-DPS, enabling Freeze reactions while contributing consistent damage throughout combat. Best Artifact Set Golden Troupe (4-Piece) Golden Troupe dramatically increases skill damage when the character is off the field. Because Escoffier spends much of the rotation supporting from the sidelines, this set amplifies the very part of her kit that matters most. Artifact Main Stats Sands: ATK% or Energy Recharge Goblet: Cryo Damage Bonus Circlet: CRIT Rate or CRIT Damage Substat Priority CRIT Rate → CRIT Damage → ATK% → Energy Recharge Balancing CRIT stats ensures Escoffier’s off-field attacks remain impactful while maintaining consistent burst uptime. ⚔️ Best Weapons for Escoffier Escoffier benefits most from polearms that enhance either CRIT consistency or energy flow. Top Weapon Choices Signature Cryo-focused PolearmsThese maximize her damage output and scale efficiently with her off-field abilities. CRIT-focused PolearmsWeapons that increase CRIT Rate or CRIT Damage allow her skill hits to scale significantly. Energy-focused OptionsIf rotations feel slow, Energy Recharge polearms can help maintain burst availability during extended battles. The ideal weapon ultimately depends on how comfortably your team can maintain energy generation. 🧑🤝🧑 Best Escoffier Teams Classic Freeze Composition Escoffier + Hydro DPS + Cryo DPS + Anemo Support This composition focuses on permanent Freeze uptime while boosting damage through Cryo resonance and Anemo swirl amplification. The Hydro character triggers Freeze reactions while Escoffier ensures enemies remain consistently afflicted with Cryo. Cryo Carry Composition Escoffier + Cryo Main DPS + Hydro Support + Flex Slot In this version, Escoffier acts as the Cryo enabler while a stronger Cryo damage dealer takes center stage. The Hydro unit ensures Freeze remains active while the flex slot adds shielding, healing, or additional damage. Reaction-Focused Freeze Team Escoffier + Hydro DPS + Sub-DPS + Anemo Crowd Control This variant prioritizes grouping enemies and stacking reactions quickly, allowing Freeze reactions to trigger repeatedly across multiple targets. 🎮 How to Play Escoffier Open With Cryo Setup Start rotations by deploying Escoffier’s Cryo skill to establish off-field elemental presence. Switch to Hydro Applicator Hydro abilities immediately trigger Freeze reactions, locking enemies in place. Rotate to Main Damage Dealer With enemies immobilized, your primary DPS can unleash sustained damage without interruption. Refresh Cryo Presence Reapply Escoffier’s abilities as soon as they return to maintain Freeze control throughout the fight. The smoother your rotations become, the more oppressive Freeze control feels against large enemy groups. 🧩 Blueprint: Building an Effective Escoffier Team Step 1 — Balance CRIT and Energy Escoffier benefits from strong CRIT scaling, but she also needs enough Energy Recharge to keep bursts available. Step 2 — Pair Her With Reliable Hydro Hydro application is essential for Freeze teams. Consistent Hydro means enemies remain immobilized longer. Step 3 — Add Anemo Crowd Control Anemo units group enemies and amplify Cryo damage through swirl reactions. Step 4 — Build Around Sustained Damage Escoffier thrives in longer encounters where steady Cryo pressure becomes more valuable than short burst windows. Once the rotation clicks, Freeze teams built around Escoffier can control entire battlefields with remarkable consistency. If you're optimizing new Freeze compositions or strengthening your roster, you can explore Genshin Impact Accounts, upgrade your characters with professional Hourly Services, or accelerate Spiral Abyss progress with reliable Boosting. GameMarket.gg is a trusted digital marketplace for everything gaming-related. We serve the gaming community by providing secure access that enhances every gaming journey.

Genshin Impact
From Skill to Burst: Everything We Know About Linnea’s Gameplay in Genshin Impact
Linnea Kit, Weapon & Constellations Leaked! | Genshin Impact Linnea is a 5★ Geo Bow user expected to debut in Genshin Impact Version Luna 6, and her leaked kit suggests she could redefine Geo reaction gameplay. Unlike traditional Geo units, Linnea revolves around a new reaction mechanic called Lunar-Crystallize, scaling heavily from DEF while also offering healing, Geo RES shred, and teamwide buffs. If these leaks hold, she may introduce a fresh DEF-scaling hybrid support-DPS archetype. Here’s a full breakdown of her leaked kit, signature weapon, and constellations. Linnea Character Profile Rarity: ★★★★★Vision: GeoWeapon: BowAscension Stat: CRIT Rate +19.2% Linnea scales primarily with DEF, which directly increases her reaction damage and healing output. Signature Weapon — Golden Frostbound Oath Base ATK: 542Substat: CRIT DMG +88.2% Weapon Effect (R1) Increases DEF by 16% When the wielder deals: Elemental Skill DMG Lunar-Crystallize Reaction DMG They gain Frost Fae’s Favor (6s): Geo DMG +40% Lunar-Crystallize DMG +40% If Moondrift(s) are nearby: Nearby party members gain Frost Fae’s Mischief Geo DMG +20% Lunar-Crystallize DMG +20% Triggers even off-field. Why This Weapon Matters This bow: Double dips into DEF scaling Buffs both personal and team Geo output Functions off-field It strongly suggests Linnea will be viable as both: On-field DEF carry Off-field Geo enabler Linnea Skill Breakdown Normal Attack — Capture Protocol Standard 3-hit bow string. Charged Attack: Fully charged arrow deals Geo DMG Crystalline projectile mechanic Plunging: AoE impact Geo damage Notably, her damage focus is not Normal Attacks — it’s her Skill and reaction scaling. Elemental Skill — Countermeasure: Lumi’s Battle Cry! Summons Lumi, who attacks in different forms depending on input. Tap Lumi enters Super Power Form Continuous AoE Geo DMG If Moondrift exists: Converts into Lunar-Crystallize DMG Continuous Tapping Feeds gemstones to Lumi Triggers Ultimate Power Form Massive AoE Lunar-Crystallize DMG Increases interruption resistance Key Takeaway Her Skill: Enables Lunar-Crystallize Scales from DEF Has strong AoE potential Encourages active field management Elemental Burst — Memo: Survival Guide in Extreme Conditions Lumi strikes in Super Power Form and: Heals party based on Linnea’s DEF Continuously heals active character Resets Lumi’s duration if already active Role Implication Linnea is: Reaction enabler Sub-DPS DEF-scaling healer This makes her a hybrid between Geo buffer and sustain unit. Passive Talents 1️⃣ Moonsign Benediction: Habitat Survey Hydro Crystallize → converts into Lunar-Crystallize For every 100 DEF: Lunar-Crystallize Base DMG +0.7% Max 14% bonus Also increases party Moonsign level. This Is Huge This passive: Converts standard Crystallize into a stronger custom reaction Encourages Hydro + Geo teams Reinforces DEF stacking 2️⃣ Field Observation Notes When Lumi is present: Enemy Geo RES -15% With Moonsign active: Additional -15% Total potential:-30% Geo RES That’s near Zhongli-tier shredding. 3️⃣ Universal Naturalist Archive EM scaling from DEF: 5% of Linnea’s DEF converts to EM Applied differently depending on active character Supports reaction-based team building. 4️⃣ Exploration Passive Faster Charged Shots outside combat Animal capture mechanic Automated ore collection via Lumi Utility-heavy exploration talent. Constellations Overview C1 — Field Catalog Mechanic Gains Field Catalog stacks Lunar-Crystallize DMG increases by 75% of DEF per stack Massive scaling potential Strong early constellation. C2 — CRIT DMG Boost After Moondrift Harmony: Hydro & Geo allies gain +40% CRIT DMG Lumi Ultimate gains +150% CRIT DMG Major team damage spike. C3 / C5 +3 levels to Skill and Burst. C4 — DEF Boost After Moondrift Harmony: Linnea + active character gain 25% DEF Stackable on-field Improves survivability and scaling. C6 — Massive Reaction Amplification Instantly max Field Catalog stacks Consumes extra stacks Reaction DMG scaling boosted to 150% original value Party Lunar-Crystallize DMG +25% C6 turns her into a full reaction hypercarry enabler. What Linnea Changes in the Meta If Lunar-Crystallize is strong: Hydro + Geo becomes viable DPS core DEF stacking becomes offensive Geo gains reaction identity beyond shields She may compete with Albedo/Zhongli in team slot value Linnea appears to function as: DEF-scaling Geo reaction driver Team buffer Reaction amplifier Sustain support Final Thoughts Linnea’s leaked kit suggests one of the most ambitious Geo designs yet. With DEF scaling, reaction conversion, healing, Geo RES shred, and team CRIT buffs, she looks positioned to push Lunar-Crystallize teams into the spotlight. If Version Luna 6 confirms these mechanics, Linnea could become the cornerstone of a new Geo-Hydro archetype. If you’re preparing to pull Linnea or want to optimize her from day one, GameMarket.gg can help streamline your progress. Explore high-value Accounts ready for new banner drops, book Hourly Services for artifact farming and build optimization, or use Boosting to conquer Spiral Abyss with your new 5★ star. GameMarket.gg is a trusted digital marketplace for everything gaming-related. We serve the gaming community by providing secure access that enhances every gaming journey.

Genshin Impact
Genshin Impact Redeem Codes 6.4 Luna V
Genshin Impact Redeem Codes February 2026 The latest Genshin Impact Redeem codes for February 2026 are now available, offering Primogems, Mora, Hero’s Wit, and upgrade materials ahead of Version 6.4 (Luna V). With Nod-Krai meta shifts and new character banners active, every free Primogem matters more than ever. This month’s Redeem lineup reflects a faster cadence of distribution tied to livestreams, global campaigns, and patch cycles. Instead of rare one-off drops, February’s codes reinforce HoYoverse’s event-driven reward model — rewarding players who monitor updates closely and redeem early before expiration windows close. 📜 All Active Genshin Impact Redeem Codes (February 2026) Below are the currently active Redeem codes and their rewards. 🔹 LTT3DVKVLUQZ Date Added: 02/25 Primogem ×30 Mora ×20,000 Broken Drive Shaft ×3 🔹 8BHA0KFRG94K Date Added: 02/16 Primogem ×60 Adventurer’s Experience ×5 🔹 GS64YTW65O Date Added: 02/16 Mora ×30,000 Hero’s Wit ×3 Mystic Enhancement Ore ×5 Vayuda Turquoise Sliver ×3 Teachings of Freedom ×3 🔹 JTSHBHPPKUSV Date Added: 02/09 Primogem ×20 Geode of Replication ×160 🔹 HUEK357YFYN3 Date Added: 02/05 Mora ×10,000 Adventurer’s Experience ×10 Fine Enhancement Ore ×2 Stir-Fried Fish Noodles ×5 Jueyun Chili Chicken ×2 🔹 8X73KH58KDHN Date Added: 01/05 Primogem ×60 Adventurer’s Experience ×5 🔹 TSUKINOARIKAE Date Added: 01/02 Moonfall Silver ×5 Mora ×20,000 Hero’s Wit ×2 Mystic Enhancement Ore ×2 🔹 GENSHINGIFT Primogem ×50 Hero’s Wit ×3 🎥 6.4 Special Program (Luna V) Redeem Codes The Version 6.4 Special Program provided three limited-time Redeem codes totaling: Primogem ×300 These livestream codes expired after February 16, 2026. Always redeem Special Program codes immediately, as they typically expire within 24 hours. 🌍 Global-Exclusive Redeem Codes 🔹 Homeward Primogem ×100 Mystic Enhancement Ore ×10 🔹 VarkaArrives Primogem ×100 Hero’s Wit ×5 🔹 VisitWonderland Primogem ×100 Mora ×50,000 These global Redeem codes are often tied to promotional campaigns and may have shorter availability windows. 🔧 How to Redeem Codes You must reach Adventure Rank 10 to use Redeem codes. 🌐 Method 1: Official Redeem Center (Recommended) Visit the official Genshin Impact redemption site. Log in to your HoYoverse account. Select your server region. Enter the Redeem code. Click “Redeem.” Claim rewards from in-game mail. This is the fastest and most reliable method. 🎮 Method 2: In-Game Redemption Open Paimon Menu. Go to Settings. Select Account. Click “Redeem Code.” Enter code and confirm. ⚠️ Note: This feature is not available on iOS. 📊 Redeem Strategy Blueprint (February 2026) 📌 Prioritize Primogem Codes Use Primogem rewards strategically for: Version 6.4 banners Upcoming character reruns Future Nod-Krai meta shifts 📌 Redeem Immediately Livestream codes expire quickly.Global promo codes may rotate unexpectedly. 📌 Track Version Cycles Codes often align with: Special Program streams Major patch releases Character debut promotions 📌 Stack Resources for Builds Materials like Hero’s Wit, Mystic Enhancement Ore, and Mora are valuable for: Varka builds Skirk builds Flins upgrades Escoffier optimization 🏆 Why Redeem Codes Matter in 6.4 With Luna V introducing new meta shifts and banner rotations, even small Primogem drops contribute toward pity progress. February’s Redeem lineup provides incremental but meaningful gains for both F2P and spend-light players. Staying consistent with code redemption ensures steady resource flow without additional spending. If you’re optimizing your pulls for Version 6.4 or accelerating account progression, you can secure premium Accounts, upgrade efficiently through trusted Hourly Services, or strengthen Spiral Abyss clears via professional Boosting. With banners rotating quickly, preparation and resource efficiency remain key. GameMarket.gg is a trusted digital marketplace for everything gaming-related. We serve the gaming community by providing secure access that enhances every gaming journey.
Genshin Impact
Genshin Impact Guide: Radiant Moongecko Strategy
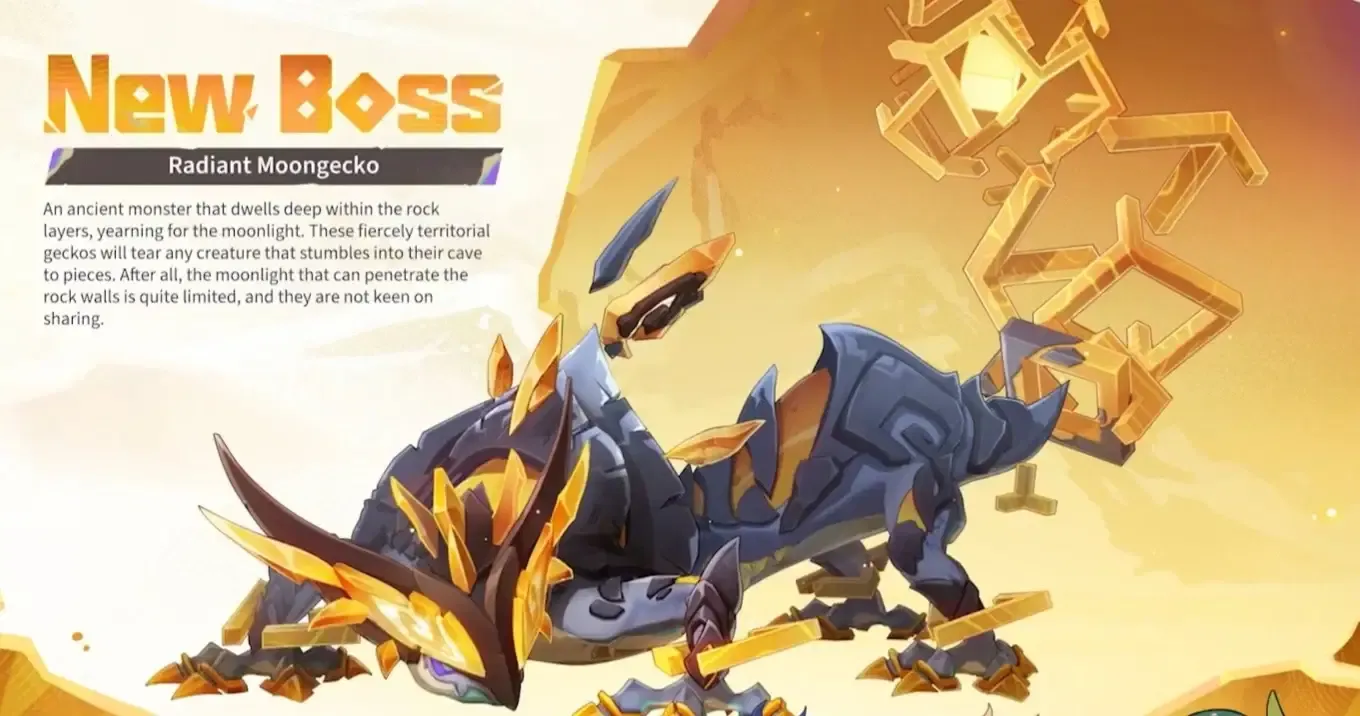
🦎 Genshin Impact Guide – Radiant Moongecko Boss This Guide provides a full encounter breakdown of the Radiant Moongecko in Version 6.4, including precise location routing, shield mechanics, Radiant Cocoon debuff management, optimized team compositions, F2P solutions, drop materials, and efficient farming strategy. Radiant Moongecko doesn’t roar its challenge the way weekly bosses do. Instead, it waits underground in Nod-Krai—silent, crystalline, coiled beneath waterfalls and fractured stone. But once the battle begins, its mechanics quickly reveal why it serves as 6.4’s ascension gatekeeper. Layered Geo shields, anti-CRIT debuffs, and healing suppression force you to approach this fight with structure rather than brute force. If you treat it like a simple DPS check, the Cocoon will punish you. If you understand its rhythm, the fight becomes clean and efficient. 📍 Radiant Moongecko Location – How to Reach It Radiant Moongecko is found in northern Nod-Krai, inside the underground caverns of Wavechaser Plain. Route 1 – Statue of the Seven Path Teleport to the waypoint north of the Statue of the Seven in Wavechaser Plain. Travel southeast toward the waterfalls. Glide carefully down the cliff. Enter the cavern at the base of the falls. Follow the descending tunnel. Unlock the underground waypoint for faster resets. Continue until you reach the boss arena. Route 2 – Favonius Keep Path Teleport to the waypoint on the right side of Favonius Keep. Enter the massive cave along the cliff wall. Follow the internal tunnel system. The Moongecko’s arena lies deeper within. Unlocking the underground teleport drastically improves farming efficiency. ⚔️ Radiant Moongecko Mechanics Explained 🛡 The Multi-Layered Geo Shield Radiant Moongecko’s defining mechanic is its stacked Geo shield, represented by multiple shield bars beneath its HP. Shield Activation Cue Moongecko lifts its tail. Geo energy glows along its crystalline spine. Shield bars appear. While shielded: Front and side damage is heavily reduced. Only effective shield-breaking attacks progress the fight quickly. Best Shield Counters Lunar-Crystallize reactions Direct Geo damage Claymore heavy attacks Plunging attacks Each shield bar destroyed: Deals direct HP damage. Shortens the defensive phase. Prevents prolonged Cocoon stacking. Strong teams can sometimes eliminate the boss before multiple shield cycles occur. ⚠ Radiant Cocoon – The Real Threat Radiant Moongecko applies Radiant Cocoon, a debuff that: Increases damage taken. Prevents CRIT hits. Reduces healing effectiveness. The inability to crit significantly reduces burst consistency. How to Remove Radiant Cocoon You must heal the affected character to 100% HP. Partial healing does not cleanse it. This transforms the fight into a sustain management test rather than pure DPS optimization. 🧪 Optimal Team Archetypes 🐺 Claymore & Geo Core Heavy hitters thrive here. Examples: Varka Diluc Itto Navia Noelle Claymore attacks shred shield layers efficiently without requiring precise elemental setups. ⚡ Lunar-Crystallize Teams Reaction-based teams combining Geo with other elements accelerate shield break. Effective picks: Zibai Columbina Illuga Xilonen These teams turn shield phases into burst windows. 🏛 Shielded Sustain Teams When survivability is prioritized: Navia / Zhongli / Furina / Bennett Diluc / Xianyun / Zhongli / Bennett Zhongli’s shielding prevents unnecessary Cocoon stacking while Claymore damage handles shield bars. 🩺 Healer Priority – Full Restoration Matters Radiant Cocoon forces healer evaluation. Strong Full-Heal Options Kokomi Furina Xilonen Xianyun Bennett provides offensive value but caps healing at 70%, which may delay Cocoon removal. If Cocoon persists: Damage spikes. CRIT suppression stalls burst. Fight duration increases. Healing to full immediately restores combat efficiency. 🆓 Best Free-to-Play Team Noelle / Gorou / Yun Jin / Bennett Why it works: Noelle provides Geo damage and sustain. Gorou boosts Geo synergy. Yun Jin enhances Normal Attack scaling. Bennett offers ATK boost. This team balances shield destruction and survivability without premium pulls. 🎯 Combat Flow – Step-by-Step Strategy Phase 1 – Engage & Build Establish rotation. Generate energy. Watch for tail lift. Avoid overcommitting before shield phase. Phase 2 – Shield Break Once shield activates: Switch to Claymore or Geo. Focus on shield bars immediately. Ignore small damage windows elsewhere. Destroying shield quickly reduces Cocoon pressure. Phase 3 – Debuff Management If Radiant Cocoon triggers: Prioritize healing. Avoid reckless burst attempts. Cleanse before committing to DPS rotation. Phase 4 – Burst Window After shield breaks: Full rotation. Use Ultimates. Maximize CRIT consistency once Cocoon cleared. Repeat until defeated. 🎁 Radiant Moongecko Drops Ascension Materials Prithiva Topaz Sliver Prithiva Topaz Fragment Prithiva Topaz Chunk Prithiva Topaz Gemstone Prismatic Severed Tail Key Use Prismatic Severed Tail is required for Varka ascension. Expect repeated farming if building him. Artifact Drops Traveling Doctor Instructor The Exile Gladiator’s Finale Wanderer’s Troupe Standard overworld boss artifact pools. 🗺 Blueprint: Efficient 6.4 Farming Loop Step 1 Unlock underground waypoint. Step 2 Bring: 1 Geo/Claymore DPS 1 Strong full healer 1 Sub-DPS 1 Flex support Step 3 Break shield immediately. Step 4 Cleanse Cocoon via full heal. Step 5 Burst during exposed window. Repeat using teleport reset. Radiant Moongecko anchors the early progression of 6.4, especially for players investing in Varka. Travelers aiming to accelerate ascension farming can explore trusted Accounts, optimize resin efficiency with expert Hourly Services, or secure consistent boss clears through reliable Boosting as Luna V farming rotations intensify. Radiant Moongecko rewards structure. Break the shield cleanly, cleanse the Cocoon quickly, and the fight becomes predictable. Ignore either mechanic, and Nod-Krai reminds you why it guards its power so fiercely. GameMarket.gg is a trusted digital marketplace for everything gaming-related. We serve the gaming community by providing secure access that enhances every gaming journey.
Genshin Impact
Genshin Impact 6.4 Update: Luna V Full Breakdown
🌙 Genshin Impact 6.4 Update – Luna V Release & Details This Update explores everything arriving in Genshin Impact 6.4, from the Luna V launch schedule and banners to Varka’s debut, the Radiant Moongecko boss, new weapons, events, realm expansions, and system optimizations. Version 6.4 feels less like a geographical expansion and more like a character-era turning point. Instead of opening a new nation, Luna V returns the spotlight to Mondstadt while weaving Nod-Krai deeper into the game’s long-term identity. The patch centers on presence—Varka’s long-awaited debut, a weapon designed to redefine Claymore prestige, and events that reconnect players to the roots of Teyvat while subtly preparing the board for what comes next. 📅 Genshin Impact 6.4 Release Date Version 6.4 – Luna V launches on February 25, 2026. Maintenance Windows North America: Feb 24, 2026 (UTC-5) Europe: Feb 25, 2026 (UTC+1) Asia / TW / HK / MO: Feb 25, 2026 (UTC+8) Servers reopen directly into Phase 1 banners. 🐺 The Arrival of Varka For years, Varka has existed as a legend—Grand Master of the Knights of Favonius, a figure spoken of in passing but never seen. Version 6.4 finally gives him a physical presence through: Lupus Majoris Chapter: Act I (Story Quest) Signature 5★ Claymore Exclusive weapon skin Event tie-ins to Mondstadt’s evolving identity His narrative presence reshapes Mondstadt’s political atmosphere. No longer an off-screen authority, Varka becomes an active force in the story, expanding the Knights’ legacy beyond Jean’s leadership. Mechanically, Varka introduces an aggressive Claymore identity built around sustained frontline pressure and commanding battlefield control. 🎯 6.4 Banners Phase 1 (Feb 25 – Mar 17, 2026) Varka (NEW) Flins (Rerun) Epitome Invocation featuring Gest of the Mighty Wolf This is the headline phase. Varka’s debut, paired with his tailored 5★ Claymore, creates one of the most synergy-driven launches in recent memory. Phase 2 (Mar 17 – Apr 7, 2026) Skirk (Rerun) Escoffier (Rerun) Phase 2 caters to players targeting established meta characters rather than chasing novelty. Mondstadt Chronicled Wish A nostalgia-rich banner including: Jean, Diluc, Klee, Mona, Albedo, Eula Their signature Mondstadt weapons This banner functions as both collector’s value and veteran catch-up opportunity. ⚔️ New Weapons & Prestige Items 🗡 Gest of the Mighty Wolf (5★ Claymore) Released alongside Varka, this weapon reinforces his identity. Designed for aggressive Claymore rotations, it elevates physical frontline play. 🎨 Varka-Exclusive Claymore Skin Unlocked via Local Legend challenges in Nod-Krai. This cosmetic ties mechanical accomplishment to visual prestige. 🎁 Star Omen Catalyst Skin (Free) Earned during the Windblume event, adding aesthetic customization without premium currency. Version 6.4 doubles down on weapon identity as status symbols. 🦎 Radiant Moongecko – New World Boss Hidden beneath Teyvat’s surface, the Radiant Moongecko emerges in 6.4. Ancient subterranean reptile Saturated with Kuuhenki energy Transformed by prolonged exposure Its elemental profile suggests Electric damage will be most efficient. Expect rotational mechanics centered around underground phases and burst windows. This boss likely serves as ascension material gatekeeper for new or future characters. 🌸 Events of Luna V Version 6.4 leans heavily into community and nostalgia. Windblume 2026 – Homeward, He Who Caught the Wind Return to Mondstadt for celebration and reflection. This event emphasizes character interactions and emotional continuity. Sightseeing With Friends A scenic, clue-driven exploration event set in Sumeru. Operation Stronghold Defense Mechanism-based defense gameplay introduces tactical positioning challenges. Travelers’ Tales Update New anecdotes deepen character lore and worldbuilding. Overflowing Abundance Double weapon material drops—ideal for pre-farming Varka builds. 🏡 Nod-Krai Serenitea Pot Layout Nod-Krai gains its own realm layout, complete with: Thematic furnishing sets Gift sets Architectural expansion This cements Nod-Krai as more than narrative background—it becomes a lived-in aesthetic space. 🎭 Miliastra Wonderland The 5★ outfit Cloud Edge’s Glory debuts. High-tier cosmetic releases increasingly shape player identity expression, and 6.4 continues that trend. 🎼 System Optimizations ✨ New Envisaged Echoes Ayato – Pillar of Fortitude Ayaka – Frostflake Heron Available in Imaginarium Theater. 🎹 Harmonic Keys Instrument Purchaseable in Fontaine. Compatible with Repertoire of Myriad Melodies. These updates reinforce customization and musical immersion. 🗺 Blueprint: Planning Version 6.4 If Pulling for Varka Target Phase 1 Consider Gest of the Mighty Wolf Farm Radiant Moongecko early Prepare Claymore materials If Saving for Meta Stability Phase 2 reruns offer safe investments Chronicled Wish provides collector value If Focused on Events Complete Windblume for Catalyst skin Secure double weapon materials Unlock Miliastra outfit before it rotates Version 6.4 introduces characters and gear that may influence account progression for months ahead. Travelers seeking to optimize banner pulls can explore trusted Accounts, accelerate farming efficiency with expert Hourly Services, or secure banner advancement via reliable Boosting as Luna V reshapes roster planning. Version 6.4 doesn’t expand the map—it deepens the stage. Varka steps out of myth, Mondstadt breathes again, and Luna V quietly signals a shift in character-era storytelling. GameMarket.gg is a trusted digital marketplace for everything gaming-related. We serve the gaming community by providing secure access that enhances every gaming journey.
Genshin Impact
How to Max Out Clorinde: Best Gear, Teams, and Skill Rotations in Genshin Impact
Clorinde overview Clorinde is a 5★ Electro Sword hypercarry who plays like a duelist with a hidden “second weapon.” Her damage loop revolves around Bond of Life and her Elemental Skill state, where she alternates rapid shots with lunging strikes to keep Electro flowing nonstop. The twist is that she doesn’t want “normal healing” to babysit her during her Skill window—she wants to convert healing into Bond of Life, then cash it out for big hits and self-sustain. The key behavior shift: Clorinde rewards players who treat fights like tempo duels. You aren’t just rotating skills—you’re managing Bond of Life like ammo, keeping your Skill state clean, and building teams that amplify her damage without interrupting her rhythm. Talent priority 1) Elemental Skill — Hunter’s Vigil (max first) This is your real “Normal Attack” talent while she’s in her Skill state. If you only invest in one thing early, make it this. 2) Elemental Burst — Last Lightfall (high, but not over-obsessed) Big AoE Electro damage + Bond of Life injection for your next window. Great to level, but Skill still comes first. 3) Normal Attack — Oath of Hunting Shadows (leave low) Her main DPS window doesn’t scale off NA talent the way most sword carries do. Best weapons Clorinde’s best swords are the ones that scale CRIT + ATK and/or directly reward Bond of Life fluctuations. 5★ weapons Best-in-slot: Absolution Designed for her kit: stacking damage whenever Bond of Life changes. If you’re building “true hypercarry Clorinde,” this is the easiest path to top-end numbers. Top alternatives Mistsplitter Reforged: pure carry power, consistent elemental scaling, strong in any team. Haran Geppaku Futsu: great CRIT Rate and smooth damage scaling, especially in rotation-heavy comps. Primordial Jade Cutter: huge CRIT Rate value and reliable ATK conversion. 4★ weapons Best practical picks Finale of the Deep: the Bond of Life-friendly 4★ option; strong ATK scaling and great uptime. The Black Sword: comfort + CRIT Rate; helps sustain and makes building stats easy. Calamity of Eshu: excellent if your team can keep a shield up consistently. Lion’s Roar: strong if your enemies are reliably affected by Electro/Pyro. Quick weapon rule If you can reliably play around Bond of Life, prioritize Absolution / Finale of the Deep. If you want “always good, no thinking,” go Mistsplitter / Jade Cutter / Black Sword. Best artifacts and stats Clorinde has two clear artifact lanes depending on how you want your rotations to feel. Best artifact sets 1) Fragment of Harmonic Whimsy (Bond of Life damage lane) Best for peak personal damage if you’re actively fluctuating Bond of Life. Feels strongest when your team helps you maintain clean windows and you’re not forced to reset. 2) Thundering Fury (reaction + cooldown lane) Best if you want a more fluid Skill uptime loop and you’re triggering reactions constantly. Great for Aggravate/Quickbloom-style teams where reactions are happening nonstop. Main stats Sands: ATK% Goblet: Electro DMG Bonus Circlet: CRIT Rate / CRIT DMG (whichever balances better) Substats priority CRIT Rate/DMG > ATK% > Elemental Mastery > Energy Recharge Best team compositions Clorinde teams succeed when they do three things: keep Electro application steady amplify damage through reactions or shredding protect her tempo with buffs/shields/utility instead of “healing spam” 1) Aggravate (most consistent) This is Clorinde’s comfort meta: fast hits = constant Aggravate value. Premium Aggravate Clorinde + Nahida + Fischl + KazuhaHigh uptime, huge off-field damage, and excellent grouping/buffing. More defensive Aggravate Clorinde + Baizhu + Yae Miko + KazuhaSmoother survivability and stable Electro pressure. Budget Aggravate Clorinde + Collei + Fischl + YaoyaoSimple, effective, and surprisingly strong if your rotations are clean. Shield-style Aggravate Clorinde + Kirara + Fischl + SucroseSafer feel, strong swirl value, and good reaction consistency. 2) Overload (Chevreuse lane) Overload became a real damage lane because Chevreuse turns Pyro/Electro teams into resistance-shredding machines. Clorinde + Chevreuse + Xiangling + BennettClassic “damage engine,” heavy pressure, very straightforward. Clorinde + Chevreuse + Fischl + flex Pyro/ElectroIf you want cleaner rotations and steadier Electro. 3) Electro-Charged & Quickbloom (hybrid hypercarry) These builds lean into raw damage amplification and reaction layering. Quickbloom premium Clorinde + Nahida + Furina + BaizhuA “boss-melter” style setup with strong team damage and layered reactions. Taser-style Clorinde + Xingqiu + Beidou + SucroseOld-school, still effective: chain lightning, swirl, and consistent pressure. Constellations (what’s worth it) Clorinde is fully functional at C0, but early cons noticeably improve her flow. C1 (★★★★) Adds coordinated hits during Skill state → more damage + more Electro application without extra field time. C2 (★★★★★) A major spike: bigger scaling from her Bond of Life synergy and interruption resistance at stacks. This is the constellation that makes her feel dramatically smoother in real fights. C4 (★★) Burst damage scaling based on Bond of Life %, but doesn’t change the core gameplay. C6 (★★★★★) True hypercarry ceiling: massive CRIT injection and a huge survivability/damage package during her window. Best stopping points C0 if you just want a strong carry. C2 if you want the biggest “feel + power” upgrade. C6 only if you’re going all-in. Quick build checklist Weapon: Absolution > Mistsplitter/Jade Cutter > Finale of the Deep (best 4★) Artifacts: Harmonic Whimsy (peak) or Thundering Fury (smooth rotations) Stats: ATK% / Electro / CRIT, then stack CRIT + ATK% Teams: Aggravate for consistency, Quickbloom for ceiling, Chevreuse Overload for shred comps Clorinde is at her best when your team lets her stay on-field and keep tempo—once that clicks, she feels like an unstoppable Fontaine duelist. Ready to power up Clorinde fast or want to skip the grind? GameMarket.gg has what you need: find Accounts loaded with top-tier Clorinde, book Hourly Services for live coaching or artifact farming, or use Boosting to smash your next Spiral Abyss run with ease. GameMarket.gg is a trusted digital marketplace for everything gaming-related. We serve the gaming community by providing secure access that enhances every gaming journey.
Genshin Impact
All You Need for Moonlit Patrol — Genshin Impact’s Event Exercise Guide & Reward Breakdown!
Genshin 6.3 Lantern Rite: Free Liyue 4-Star & 1,600 Primogems Lantern Rite returns in Version 6.3 with A Lanternlit Ode to the Silver Moon, bringing back Liyue’s biggest festival alongside a free 4-Star selector, Yaoyao’s new outfit, and over a thousand Primogems across quests and minigames. This year’s structure is more flexible than previous runs: you can earn 1,000 Fortune Coins on Day 1 for either the free character or the skin, but committing early means grinding another 1,000 to fully clear Festive Shopping. The real strategy isn’t whether you can get everything — it’s how efficiently you route your coins and daily unlocks to avoid double farming. Here’s everything that matters. Lantern Rite 2026 Release Date (Genshin 6.3) Event Duration:January 30, 2026 – February 23, 2026(Server time varies by region) Lantern Rite 2026 launched before Phase 2 of Version 6.3 Luna IV and runs until the end of the patch. How to Unlock Lantern Rite 2026 Requirements: Adventure Rank 20+ Complete Archon Quest Prologue Act III — Song of the Dragon and Freedom Optional (for best story experience): Complete Song of the Welkin Moon: Act VIII — True Moon You must complete Act 1: The Realm of Clouds to unlock all minigames. Free Liyue 4-Star Character (1,000 Fortune Coins) Just like previous Lantern Rites, you can select one free Liyue 4-Star character by spending 1,000 Fortune Coins. You can earn 1,000 coins on Day 1 — but remember: Coins are consumed when spent. If you want both the free character and Yaoyao’s outfit, you’ll need 2,000 total coins. Smart Order Unlock all minigames first. Clear Primogem-heavy content. Then commit coins to the selector. Free Yaoyao Outfit – Rainlit Bamboo Reverie (1,000 Coins) Yaoyao’s Lantern Rite outfit is also available for 1,000 Fortune Coins. If you skip it now, it will become purchasable later in the shop. If you’re F2P, prioritize: 4-Star selector (long-term roster value) Then grind coins for the outfit All Lantern Rite 2026 Minigames 1️⃣ Vigorous Brushstrokes (Runner Mode) Side-scrolling event where you: Play as trial characters Collect Jades Avoid lantern hazards Reach score thresholds Rewards include Primogems and elemental fragments. 2️⃣ Wishes Contended, Fortunes Won (Combat) Timed combat challenge: Use trial characters Defeat enemies quickly Earn Charm Coins Best strategy: Bring AoE-focused comps Burst early waves Don’t over-extend rotations 3️⃣ The Moonlit Adeptus’s Trail (Roguelite Shooter) Shoot ‘em up mode featuring the White Horse Adeptus. Defeat waves Upgrade talents Light Xiao Lanterns Highest Primogem payout among minigames. 4️⃣ Bright Moon, Lantern Glow Festival interaction content: Talk to visiting characters Receive commemorative motifs Get special dishes Low effort, free rewards. Fortune Coins – How to Farm Fast You get Fortune Coins from: Minigame clears Daily updates Hitting Auspicious Treasure Trees in Liyue Harbor Event quest completion Coin Efficiency Route Clear Adeptus Trail first (highest payout). Do Wishes combat. Finish runner mode. Hit Treasure Trees daily. Major Rewards Breakdown Total Primogems from Event Content 420+ from minigames 1,600 Primogems via mail (May Fortune Find You login) 10 Intertwined Fates Crown of Insight Hero’s Wit Mystic Enhancement Ore Sanctifying Unction Talent Books Weapon materials Furnishings Zibai Ascension Materials May Fortune Find You (Login Event) Daily login during Lantern Rite grants: 10 Intertwined Fates 1,600 Primogems (via mail) Additional materials This alone makes Lantern Rite one of the most generous events of 6.3. Lantern Rite 2026 Story Acts Act 1 – The Realm of Clouds January 30 Act 2 – The Realm of Rocks February 1 Act 3 – The Realm of People February 3 Afterword – White Horse’s Leisurely Journey Complete all story parts for bonus Primogems and Zibai materials. Co-Op Lantern Feature Returns You can: Send Xiao Lantern messages Receive lanterns from friends Gift Local Specialties Visit Liyue Harbor characters for bonus items It’s mostly flavor — but free rewards are free rewards. Best Lantern Rite Priority Plan (F2P Route) If you want maximum value: Day 1 Unlock all minigames Clear Adeptus Trail Farm 1,000 Coins Claim Free 4-Star Days 2–4 Finish remaining minigames Grind 1,000 more Coins Unlock Yaoyao outfit Daily Login for Intertwined Fates Hit Treasure Trees Is Lantern Rite 2026 Worth Grinding? Absolutely. Between: Free Liyue 4-Star Free Yaoyao Skin 1,600 Primogems 10 Intertwined Fates Crown of Insight This is one of the highest value patch events in Version 6.3. Lantern Rite isn’t just nostalgia — it’s a serious resource injection before future banners. If you’re preparing for upcoming 6.3 Phase 2 pulls or saving for 6.4, this event is your cushion. Want a shortcut to event mastery or looking for a perfect account to breeze through Genshin’s latest content? GameMarket.gg has what you need explore Accounts with top characters, use Hourly Services for event coaching or farming, or try Boosting to claim every Moonlit Patrol prize stress-free. GameMarket.gg is a trusted digital marketplace for everything gaming-related. We serve the gaming community by providing secure access that enhances every gaming journey.
Genshin Impact
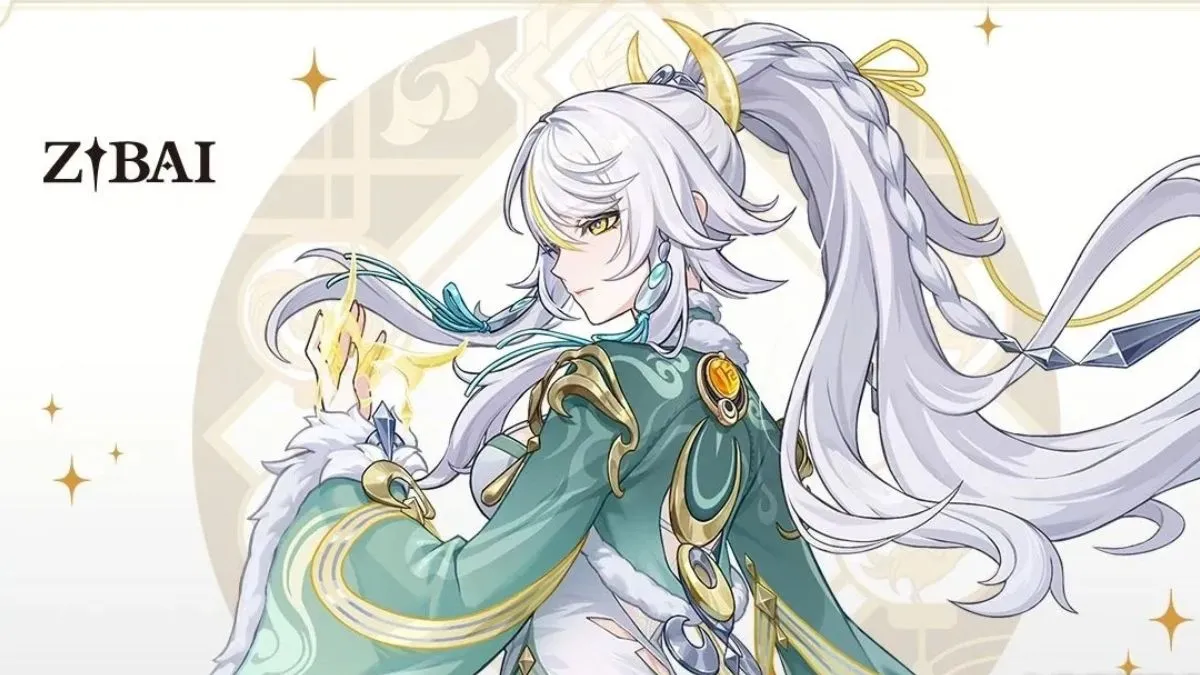
Zibai Spotlight: Optimal Gear, Roles & Synergy in Genshin Impact
🌟 Genshin Impact Introduces Zibai — A Unique Combat Flow With Big Potential Genshin Impact recently unlocked Zibai, a fresh addition whose kit blends multi-phase damage manipulation, team utility, and reactive playstyle. Unlike characters who excel solely through raw numbers, Zibai shines when you leverage her abilities intentionally, timing her bursts and procs around enemy behavior and elemental reactions. Meaning-shift: Zibai isn’t about smashing buttons and watching big damage pop off — she’s a character that rewards thoughtful pacing and rotation awareness, turning careful play into superior DPS and enhanced team utility. 🧠 Combat Identity — Rotation-Focused Burst With Elemental Layers Zibai’s playstyle centers on damage windows and reaction setup. Her kit incentivizes: Timing abilities to maximize synergy Triggering elemental reactions rather than stacking stats Managing cooldowns smartly instead of spamming skills Building around specific thresholds where her kit spikes This makes Zibai great for players who enjoy strategic decision-making as much as raw damage. 🔥 Skill Breakdown — What Makes Zibai Tick Below is a high-level look at Zibai’s core combat tools and how they contribute to her identity: ⚔️ Normal Attacks — Build Momentum Zibai’s standard attack chain isn’t just filler — it builds energy and sets up reactions that make her abilities hit harder when they connect. 🌀 Elemental Skill — Setup & Pressure Her Elemental Skill creates an effect or zone that preconditions the field for reactions or buffs. This ability is key to controlling when and how damage windows open. ✨ Elemental Burst — Burst With Context Her Burst isn’t just a damage button — it’s the payoff for a well-built setup. The more optimal your preconditions (reactions, buffs, positioning), the stronger the Burst becomes. Timing and layering matter more than button order alone. 🛠️ Best Artifact Sets — What to Prioritize Optimizing Zibai isn’t about maxing raw damage — it’s about matching her artifact stats to her playstyle: 🎴 Top Tier Artifact Choices Primary Build Focus Reaction boosting sets that amplify elemental damage Sets that improve energy recharge for consistent Burst uptime Alternate Builds Utility sets when Zibai fills more of a support role Hybrid sets that expand both damage and rotation fluidity Artifact choices should reinforce Zibai’s naturally timing-oriented identity. ⚔️ Weapon Recommendations — Playstyle Meets Tools Zibai benefits most from weapons that either: Increase elemental damage output, or Support her cooldown and energy flow 🥇 Best Fit Weapons Artifacts that scale on ability use or reaction triggers Weapons offering elemental mastery, increasing reaction damage Your focus should be on sustainability and reaction amplification, not pure attack stats. 🤝 Team Synergy — Build Combos That Make Her Shine Because Zibai’s kit leans into reactions and timing, she fits best in teams that can support those aspects: 🌊 Elemental Reaction Partners Pair her with units that reliably trigger Core reactions (e.g., Electro Charged, Overloaded) so her Burst windows hit harder. 🌀 Buff Enhancers Supports that: increase attack or elemental damage provide shields or heals (to keep her safe during setups) help cycle energy These partners make sure Zibai’s rhythm stays smooth and impactful. Possible Team Themes Reaction Spike Focus — Units that generate frequent co-element hits Rotation Efficiency Squad — Characters that help with energy flow and uptime Defense + Burst Comps — Balancing safety with peak moments 🧠 Practical Playstyle Tips — Getting More From Zibai To unlock Zibai’s full potential, try these: 1. Time Your BurstDon’t use her Burst on cooldown — wait for the right setup window. 2. Build Around ReactionsYour damage spikes when you actively trigger reactions, not passively stack stats. 3. Optimize CooldownsUse abilities in a rotation that keeps energy flowing and reactions ready. 4. Position With PurposeCorrect spacing helps ensure her skill triggers matter, especially in AoE moments. Zibai rewards deliberate pacing, not button mashing. 🧠 Why Zibai Is Exciting for the Meta Zibai’s introduction expands Genshin’s identity in a way that encourages: smarter rotation planning deeper reaction interactions team identities built around rhythm and payoff For players who enjoy thinking when to push rather than just pushing harder, Zibai’s arrival adds a new layer of tactical play. Players ready to master Zibai in Genshin Impact can browse verified Accounts to strengthen their roster early, book professional Hourly Services for optimized team building and rotation planning, or use trusted Boosting services to climb content tiers efficiently while mastering her mechanics. With characters that reward timing and synergy over raw damage alone, the smartest Travelers win the most consistently.GameMarket.gg is a trusted digital marketplace for everything gaming-related, providing secure access that enhances every gaming journey.
Genshin Impact
Genshin Impact Varka Kit Leaks Tease a New Anemo Claymore Powerhouse
🌬 Who Is Varka? According to the latest Version 6.4 leaks, Varka — the long-teased Knight of Boreas and Grand Master of the Knights of Favonius — is finally stepping onto the field as a 5★ Anemo claymore character. His leaked design is that of a hypercarry who loves coordinated teams: Element: Anemo Weapon: Claymore (dual-wielded in animations) Core identity: Powerful on-field DPS who copies the elements of your party onto his right-hand sword while keeping Anemo on his left, enabling multi-element damage, Swirls, and big reaction chains. As always, this is leak-based and may change before release—but the kit is detailed enough to see exactly what kind of monster he’s meant to be. 🗡 Normal Attack — Favonius Bladework: Dancing Radiance Varka’s normal attack string is a flashy five-hit dual-claymore dance: Normal Attack: Up to 5 powerful swings, many hits being split into multi-hit strikes (e.g., 2nd–5th hits are double hits). Charged Attack: Consumes stamina to dash forward and deliver a heavy dual slash. Plunge: Standard plunge → AoE impact with solid multipliers. His raw multipliers are very high for a claymore user, clearly positioning him as a main on-field driver whose normals actually matter. 🌪 Elemental Skill — Windbound Execution & Stormward Charge Varka’s Elemental Skill is where he becomes unique. Tap — Enter Stormward Charge Mode Tap E: Varka leaps forward and slashes, dealing AoE Anemo DMG. Enters Stormward Charge stance. While in Stormward Charge: Normal Attack DMG is increased. He cannot Plunge. His dual claymores gain special behavior: Left-hand claymore: always deals Anemo DMG that cannot be overridden by other infusions. Right-hand claymore: deals Pyro / Hydro / Electro / Cryo DMG, depending on who is in your party, following this priority:Pyro → Hydro → Electro → Cryo. It basically means: Slot a Pyro/Hydro/Electro/Cryo unit and Varka turns one of his blades into that element while swirling with Anemo on the other. Even more, if your party includes those elements, his Skill changes form: Four Winds’ Ascension — Special Skill When conditions are met (Pyro/Hydro/Electro/Cryo in party), Windbound Execution becomes Four Winds’ Ascension: Deals AoE Elemental DMG based on the right-hand element plus Anemo DMG. Has 2 charges and starts on cooldown. While in Stormward Charge, every Normal Attack hit reduces its cooldown by 0.5s, up to 15 times per stance. This lets you spam a two-element nuke as you attack, constantly resetting its cooldown through aggressive gameplay. Azure Devour — Special Charged Attack In Stormward Charge, Varka can also spend uses of Four Winds’ Ascension to perform a special Charged Attack: Azure Devour. Does no stamina cost. Deals both the corresponding Elemental DMG and Anemo DMG. Scales with big additional multipliers on top of his usual Charged Attack. So his Skill package is: Go into Stormward Charge → swing both elements → spam Four Winds’ Ascension and Azure Devour for massive hybrid hits while your normals keep reducing cooldown. Hold — Long Leap Hold E: Charges, then performs a longer leap with increased distance the longer you hold. Keeps the same skill identity but with more mobility, useful for repositioning in wide arenas. 🐺 Elemental Burst — Northwind Avatar Varka’s Burst, Northwind Avatar, is a straightforward double slash finisher: Two hits total: Hit 1: can be converted to Pyro / Hydro / Electro / Cryo if those elements are present in the party, respecting the same priority as his Skill. Hit 2: always Anemo DMG. Cooldown: 15s Energy Cost: 60 This gives him burst damage that also mirrors your team’s element, letting him shred with both Anemo and your chosen reaction element in a single animation. 🧠 Talents — ATK Scaling & Mono-Element Synergy 🐺 Dawn Wind’s March This passive makes Varka scale hard off ATK and team element echoing: For every 1,000 ATK, he gains: +10% Anemo DMG Bonus, and +10% Elemental DMG Bonus for one element among Pyro/Hydro/Electro/Cryo. This bonus caps at +25% each. Then comes the big team-composition kicker: If your party has at least 2 Anemo characters or 2 characters of the same element among Pyro/Hydro/Electro/Cryo: Varka’s Normal Attacks, Charged Attacks, Azure Devour, and Four Winds’ Ascension in Stormward Charge deal 140% of their original damage. If you manage 2 Anemo + 2 of the same non-Anemo element in one team: That buff jumps to 220% of original damage. In other words: He’s built to reward mono or dual-element comps—double Anemo plus double Pyro/Hydro/Electro/Cryo can turn him into a stat monster. 🌪 Wind’s Vanguard Swirl synergy time: When nearby party members trigger Swirl, Varka gains a stack of Azure Fang’s Oath. Each stack increases the damage of: Normal Attacks Charged Attacks Azure Devour (special Charged) Four Winds’ Ascension While in Stormward Charge, by 7.5% for 8s, up to 4 stacks. This encourages teams with other Anemo applicators or quick reactions to feed Varka Swirl stacks while he sits on-field shredding. 🏰 Mondstadt & Hexerei Passives Wind Homebound Wind’s Paean: For every Mondstadt character in the party, his Skill Windbound Execution’s cooldown is reduced by 5%. Does not work in Domains, Trounce Domains, or Spiral Abyss—this is mainly an open-world / overworld flavor passive. Witch’s Eve Rite: Dawn’s Return (Hexerei System): After a quest (Witch’s Homework: The Untitled Question), Varka becomes a Hexerei character. With 2+ Hexerei characters in the team, you gain Hexerei: Secret Rite, which enhances Hexerei characters. For Varka specifically: Four Winds’ Ascension is strengthened—every Normal Attack in Stormward Charge cuts its cooldown by 1s instead of 0.5s. This hints at a future Hexerei sub-roster where Varka might be one of the core pillars. 🌟 Constellations — From Strong to Absurd C1 — “Come, Friend, Let Us Dance Beneath the Moon’s Soft Glow” Grants +1 extra use of Four Winds’ Ascension when entering Stormward Charge. Gives Lyrical Libation: When you cast Four Winds’ Ascension or Azure Devour, consuming this buff makes them deal 200% of their original damage. Early takeaway: C1 is already a huge power spike for his burst rotations. C2 — “When Dawn Breaks, Our Journey Shall Take Flight” Every Four Winds’ Ascension or Azure Devour triggers an extra AoE Anemo slash equal to 800% of his ATK. This is monstrous for AoE & bossing alike. C3 & C5 C3: +3 levels to Elemental Skill (Windbound Execution). C5: +3 levels to Elemental Burst (Northwind Avatar). Standard but potent. C4 — “For None May Take From Us Our Freedom of Song” When Varka triggers Swirl, all nearby party members gain: +20% Anemo DMG Bonus, and +20% Elemental DMG Bonus for the swirled element For 10 seconds. This turns him into a teamwide DMG buffer just for doing what he already wants—swirling everything in sight. C6 — “Beloved Mondstadt, Steadfast You Shall Shine” Stormward Charge is overclocked: After using Four Winds’ Ascension, tapping E or holding Normal Attack no longer consumes its uses and instead performs Azure Devour. After using Azure Devour, tapping E casts Four Winds’ Ascension without consuming charges. Azure Fang’s Oath passive gets upgraded: Each stack now also gives +15% Crit DMG. At C6, you’re basically weaving free Four Winds + free Azure Devour spirals with huge Crit DMG stacking—true endgame whale territory. 🐺 Signature Weapon — Ballad of the Mighty Wolf Varka’s leaked signature claymore, Ballad of the Mighty Wolf, pushes him even further: Base ATK: 608 Substat: 33.1% Crit Rate Passive: Indomitable Chivalry +10% ATK SPD Each Normal Attack hit grants a stack of Four Winds’ Hymn: +6% DMG per stack for 4s, up to 5 stacks Can trigger once every 0.1s When the party has Hexerei: Secret Rite, each stack of Four Winds’ Hymn also gives +6% Crit DMG. So with full stacks under Secret Rite, you’re looking at: +30% DMG +30% Crit DMG +10% ATK SPD On top of 608 ATK & 33.1% Crit Rate It’s about as “tailor-made” as signature weapons get. ✅ Why Varka Could Be a Meta-Defining Carry If these leaks hold, Varka brings: Massive personal DPS: high multipliers, multi-hit normals, and special skills that double-dip with Anemo + another element. Flexible team-building: works with mono/dual-element cores, especially 2 Anemo + 2 same element for the 220% talent boost. Swirl & reaction synergy: encourages reaction-heavy squads with constant Swirl and multi-element damage. Team buffs at C4+: turning his Swirls into partywide DMG buffs for both Anemo and reaction elements. Future-proofing with Hexerei: synergy with a new tag system hints he’ll stay relevant as more Hexerei units appear. He’s clearly designed to be more than just another Mondstadt cameo—this is a true flagship Anemo hypercarry. 💡 Player Prep Tips (If You’re Planning to Pull) Start prepping Pyro/Hydro/Electro/Cryo teammates that can fit with 2 Anemo / 2 same element setups. Farm for ATK%, Crit, and Anemo DMG gear—he scales heavily off ATK and gets bonus DMG through his talents. Consider which units can reliably trigger Swirl around him to feed Azure Fang’s Oath stacks. If you’re a whale or collector, Ballad of the Mighty Wolf looks almost mandatory to max his potential. Players preparing for Varka’s potential debut can browse verified Accounts, book professional Hourly Services for pull planning and team-building, or use trusted Boosting services to farm progression efficiently and stay ready for major new releases. If Varka really arrives as an Anemo carry built around burst windows, being prepared ahead of time is what turns hype into an instant power spike.GameMarket.gg is a trusted digital marketplace for everything gaming-related. We serve the gaming community by providing secure access that enhances every gaming journey.
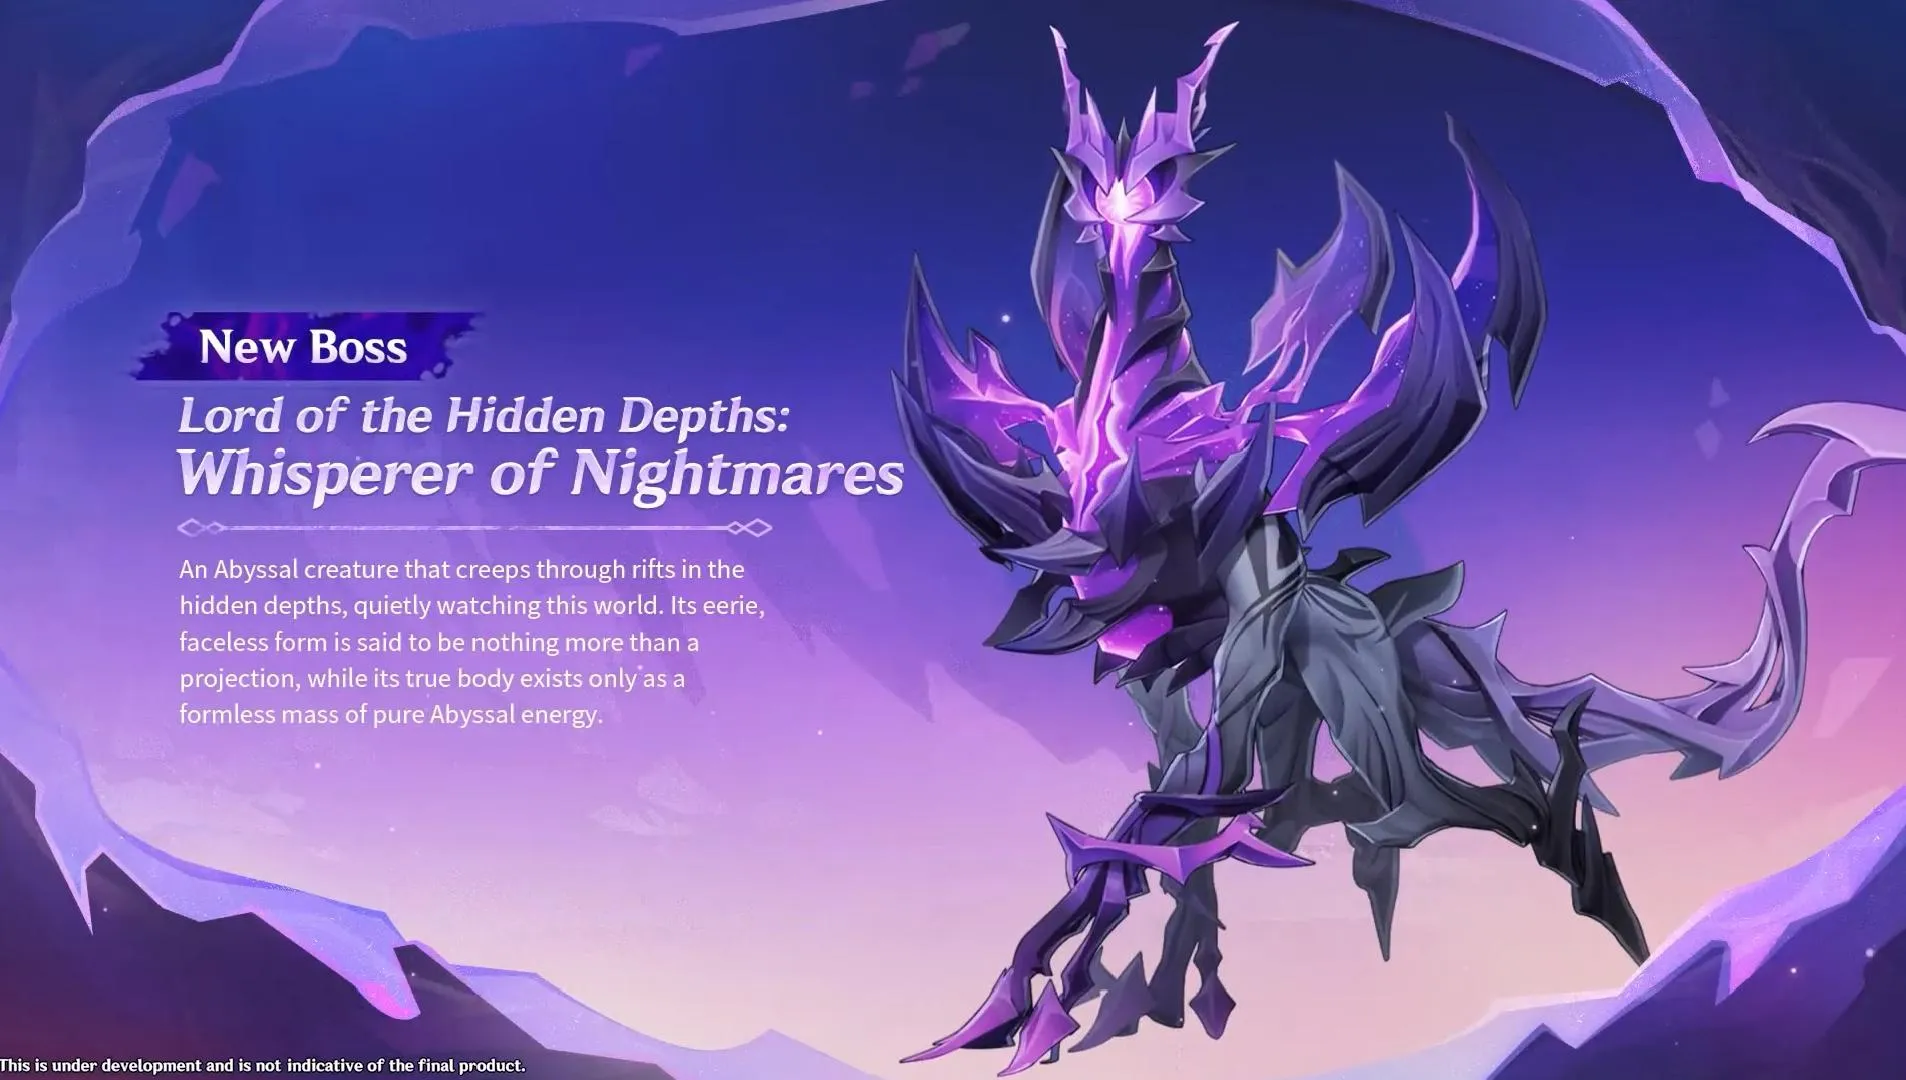
Genshin Impact
How to Beat Whisperer of Nightmares in Nod-Krai (Luna IV)
🌒 Nod-Krai’s Shield Boss Check — Whisperer of Nightmares Joins Luna IV The Whisperer of Nightmares is a new world boss in Nod-Krai’s Ashveil Peak, built around one simple test: can your team break a shield efficiently without getting baited into wasting time on adds? If you can keep elemental pressure high and react fast when the shield phase starts, this boss becomes a quick, repeatable farm — especially important for players preparing ascension paths tied to Luna IV characters. Meaning shift: This fight quietly changes the “best farming team” meta. Instead of bringing your highest single-hit damage dealer, you’re rewarded for elemental application speed and reaction uptime, because shield phases punish slow rotations and teams that can’t keep a steady stream of hits. 📍 Whisperer of Nightmares Location (Ashveil Peak, Nod-Krai) You’ll find the boss on the west side of Kipumaki Cliff in Ashveil Peak. Fast route: Start from the Statue of the New Moon Follow the path toward the cliff until you reach a Waypoint near the boss area Continue along the west-facing cliffside and you’ll hit the arena If you’re building a weekly farming loop, setting that nearby Waypoint makes this one of the easier Nod-Krai bosses to revisit. 🛡️ How to Beat Whisperer of Nightmares 1) Play the fight around the shield — it’s the whole boss At a certain point, Whisperer of Nightmares gains a shield and begins summoning minions that support the shield. The shield is breakable through Elemental Reactions Lunar Reactions are more efficient, so Lunar teams tend to shred the shield faster 2) Don’t chase minions unless you’re forced This is where most players lose time. The minions exist to enable the shield, not to be your primary target Focus the boss to pressure the shield consistently Only cleave minions incidentally (AoE, chain reactions, collateral hits) 3) Keep reactions rolling instead of waiting for “big moments” The shield phase punishes dead time. Use characters with fast application and short cooldown cycles Treat your rotation like a “pressure loop,” not a burst window If you’re using setups like Electro-Charged or Hyperbloom, keep the engine running and the shield will collapse naturally 👥 Best Teams for Whisperer of Nightmares ✅ Best overall approach: Lunar teams or high-application reaction teams Two archetypes perform consistently well here: Lunar teams (best shield break efficiency) High elemental application comps like: Hyperbloom Electro-Charged The common thread is constant hits and constant reactions — the boss doesn’t demand a specific element, but it rewards teams that never “run out of pressure.” 🎯 Best Free-to-Play Team (Reliable Shield Pressure) A strong F2P-friendly reaction loop is: Sucrose (Swirl + grouping support) Fischl (steady Electro application) Beidou (AoE Electro + chain pressure) Xingqiu (consistent Hydro application) This comp keeps reactions active almost nonstop, which is exactly what the shield phase wants. 🧩 Role-Based Picks (What You’re Really Looking For) If you’re building from your roster, prioritize these traits: Main DPS Characters who can stay on-field while maintaining reaction uptime Consistent, repeatable damage beats “one big hit” Sub DPS Off-field applicators that keep elements on the target while you rotate Support Units that increase application speed, grouping, or survivability so you don’t lose rotation tempo 🤝 Co-Op Strategy (If You’re Missing Key Units) Co-Op can make this boss smoother when: One player focuses on staying alive and maintaining aggro Others focus on constant elemental application You chain reactions together naturally without needing perfect solo rotations If your roster lacks strong applicators, Co-Op helps you brute-force shield uptime through combined pressure. 🎁 Item Drops and Why You’re Farming This Boss Ascension Material The key unique drop is: Remnant of the Dreadwing — used for Zibai’s ascension Right now, Zibai is the main reason to lock this boss into your regular farm route. Elemental Gem Drops (Electro) You can also receive Vajrada Amethyst tiers depending on boss level: Sliver (any level) Fragment (45+) Chunk (60+) Gemstone (75+) Artifact Set Drops Possible sets include: Instructor The Exile Gladiator’s Finale Wanderer’s Troupe Prayers for Wisdom 🗓️ Release Timing Whisperer of Nightmares becomes available with Version 6.3 “Luna IV”, with a release date of: January 14, 2026 🧠 Fast Farming Tips Run Lunar or high-application reaction teams to cut shield time down Keep rotations tight — shield phases punish downtime Don’t get baited by minions; let AoE and reactions handle them naturally If you’re farming for Zibai, route this boss into your regular Nod-Krai loop early Players looking to speed up their Nod-Krai progression can browse verified Accounts with Luna IV-ready rosters, book professional Hourly Services for optimized farming routes and team planning, or use trusted Boosting services to secure consistent clears and ascension materials efficiently. If you’re building Zibai, this boss becomes a routine — and the fastest clears come from reaction uptime, not raw burst. GameMarket.gg is a trusted digital marketplace for everything gaming-related. We serve the gaming community by providing secure access that enhances every gaming journey.
Showing 16 of 30 from 38 Results