Blood Strike Ranked Guide 2026: How to Push Legendary Without 1,000 Matches
By GameMarket Team
Reaching Legend in Blood Strike is a points problem, not an endurance problem: the ladder pays for eliminations and placement together, and kill weighting rises with every tier, so a player who consistently banks three or four fights plus a top-five finish climbs in a few hundred matches while a passive survivor grinds thousands. It is worth reading Blood Strike Match Length and Game Modes Explained alongside this.
How does the Blood Strike ranked ladder actually work?
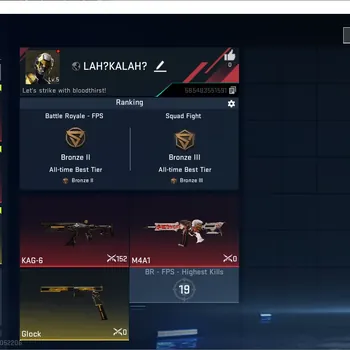
Blood Strike's ranked ladder runs seven ranks — Bronze, Silver, Gold, Platinum, Diamond, Master and Legend — each split into four sub-tiers. You gain tier points for how long you survive and how many opponents you eliminate, and the point threshold to advance grows as you climb. Legend is the terminal rank.
Two details inside that structure decide how fast your account moves. The first is that placement and eliminations are scored separately and then combined, so a match contributes to your rank through two independent channels. The second is that the balance between those channels is not fixed — it shifts as you climb, which is why a routine that worked in Silver quietly stops working in Platinum.
The ladder also carries a floor system. Sub-tiers act as checkpoints, so a bad session inside a rank does not usually erase the whole rank, but the protection thins out at the top of the ladder where point losses on poor finishes are heavier and more frequent. That asymmetry is deliberate: the ladder is trying to separate players who can reproduce a result from players who produced it once.
Blood Strike also runs ranked in more than one format. The battle royale queue and the smaller squad-fight queue keep separate progress and separate thresholds, and the point totals involved are not comparable — battle royale asks for a large accumulation across long matches, while squad fight resolves in far fewer points across far shorter rounds. Choosing which queue you intend to climb, and then actually staying in it, is a decision most players never consciously make, and splitting attention across both is one of the most common reasons a climb stalls without any obvious mistake.
Seasons reset progress on a schedule NetEase publishes in-client. A reset does not send everyone back to Bronze; it applies a soft placement based on where you finished, which means the effort required to regain a rank is a fraction of the effort required to reach it the first time. Season timing therefore matters to planning: a climb started in the opening weeks of a season faces a wider spread of opponents than one started in the final weeks, when the population that remains in ranked skews toward the players who are still trying to move up.
Why do eliminations matter more the higher you climb?
Because the ladder deliberately reweights its two scoring channels. In Bronze and Silver, surviving deep into a match moves your points on its own. By Platinum, eliminations supply the majority of what you earn, so a quiet top-ten finish with no fights can return less than a mid-game death after four kills.
This single mechanic explains most stalled climbs. The habit that carries a new player out of the low ranks — land quietly, avoid contact, rotate late, finish high — is the exact habit that caps them in Platinum. Nothing about the player got worse. The scoring changed underneath them, and the strategy that was efficient became the strategy that generates the least movement per match.
The correct adjustment is not to abandon placement. Both channels still pay, and a player who trades every fight and dies at the halfway mark is throwing away the entire placement component. The adjustment is to stop treating survival as the objective and start treating it as the resource that funds fights. Every extra minute you stay alive is a minute in which you can find another elimination, and the account that climbs fastest is the one taking fights it expects to win while still being alive in the final circles.
There is also a compounding effect worth naming. Eliminations produce loot, and loot in Blood Strike is the difference between a full armour and upgrade state and a half-equipped one. A squad that wins its early engagements arrives at the endgame better equipped than the squad that avoided everything, so kills purchased early tend to make the placement channel easier to satisfy as well. The two channels are not really in tension once you are winning the fights you choose.
What should you actually do differently in each rank band?
Three bands need three approaches. Bronze through Gold rewards fundamentals and survival, so play for information and finishes. Platinum and Diamond reward controlled aggression, so pick fights with a numbers or position advantage. Master and Legend reward consistency, so cut variance and stop forcing engagements you cannot break off.
Bronze to Gold is where mechanical habits are cheap to build and expensive to skip. Opponents at this level tend to misplay openings, over-peek and reposition in the open, which means the band is unusually forgiving of experimentation. Use it to fix the things that will otherwise cost you at every higher rank: a sensitivity configuration you can actually hold aim with, a loadout you know the recoil of, and a landing routine that reliably gets you armour and a primary weapon inside the first ninety seconds. Our Blood Strike sensitivity and settings optimisation guide covers the configuration work that makes everything above this band easier.
Platinum to Diamond is the reweighting band, and it is where most accounts stop. The population here can shoot, but it is inconsistent about positioning and about disengaging. That combination is exploitable: fights initiated from cover, from height, or against a squad already committed to another fight are heavily in your favour, while fights initiated in the open at equal numbers are close to a coin flip. Climbing this band is largely a matter of increasing the ratio between the first kind of fight and the second, not increasing your aim. For the detail behind that, see how weapon mastery unlocks attachments and camos.
Master to Legend is a variance problem. The opponents no longer hand you free openings, point losses on bad finishes bite harder, and the rank threshold is large enough that a single strong session cannot carry a week of poor ones. What moves an account through this band is repeatability: consistent landing spots you know the loot density of, consistent rotation timing, and the discipline to break off an even fight rather than commit to it because you started it. The top of Legend adds a separate leaderboard layer, with an exclusive title for the highest-placed players on each server, but that is a competitive sub-goal rather than part of the climb itself.
Which loadout and Striker decisions save the most matches?
Consistency beats optimisation. Pick one primary weapon you can control at mid range and keep it across the whole climb, pair it with a close-range secondary, and choose a Striker whose ability produces information or repositioning rather than raw damage. Swapping constantly resets your muscle memory every session.
Weapon choice in Blood Strike is less about which gun is statistically strongest in a given season and more about which gun you have fired ten thousand rounds from. Recoil patterns are learnable, and a learned pattern on an average weapon consistently outperforms an unfamiliar pattern on a strong one. The practical rule is to change your primary only when a balance patch genuinely removes its viability, and to check NetEase's official patch notes rather than community tier lists when deciding whether that has actually happened.
Strikers deserve more thought than most players give them, because their abilities change what your squad can do rather than how much damage it deals. Abilities that reveal enemy positions convert directly into the advantaged fights described above, since the whole point is to know about a squad before it knows about you. Abilities that create movement or escape options convert into the disengagement discipline that Master and Legend demand. Damage-oriented abilities are the most satisfying and the least useful, because they only pay off in fights you were already winning.
Attachments follow the same logic as weapons: stability and handling over raw damage numbers, because the ranked climb is decided by how many of your shots land under pressure. A loadout you can fire accurately while moving is worth more tier points than a loadout that looks better on a stat screen and sprays at the moment it matters.
How much does movement actually change your win rate?
More than aim does, above Gold. Blood Strike's movement system lets a player break an opponent's tracking through slides, cancels and directional changes, which turns even engagements into favourable ones. A player who is hard to hit wins fights they should have lost, and that shows up directly in the elimination channel of the ladder.
The mechanism is simple. Most players track a target by predicting where it will be, and every prediction is built on an assumption of continuous movement. Movement techniques break that assumption at the exact moment the opponent commits to a burst, so their shots land where you were rather than where you are. The result is that you take less damage in an exchange you both entered symmetrically, which is the entire definition of winning a fight in a shooter where time-to-kill is short.
This is also the most transferable skill on the list. Weapon balance changes, Striker balance changes, and map rotations change, but the value of being difficult to hit is stable across seasons and across both ranked queues. Our Blood Strike movement tech and slide-cancel guide breaks the individual techniques down and explains when each one is worth using.
Positioning is the slower half of the same idea. Where you choose to fight decides how many of your opponent's options exist before the fight starts — cover, elevation, a wall at your back and a clear retreat path all reduce the number of ways the engagement can go badly. Players who describe themselves as having bad aim frequently have adequate aim and terrible fight selection, and fight selection is far easier to fix.
How should you rotate to protect the placement channel?
Rotate early and along the edge of the safe zone rather than through its centre. Early rotations let you choose your position instead of inheriting one, edge routes reduce the number of angles you can be shot from, and arriving before the crowd means you hold ground that later squads have to attack into.
Late rotation is the most common cause of deaths that feel unlucky. A squad that leaves late is moving through open terrain while every squad already inside the zone is stationary and watching, which inverts every advantage discussed above: they are in cover with information, and you are in the open without it. The tier points lost here are placement points that were essentially free.
Zone control at the endgame is a distinct skill from rotation. Once the playable area is small, the decisive question is which squad is forced to move next, and the answer is usually determined several circles earlier by who claimed the strongest terrain. Holding a compound or high ground with a clear sightline into the remaining space converts the final minutes from a scramble into a series of fights on your terms. Our Blood Strike battle royale survival guide goes deeper on landing spots, rotation timing and endgame zone control.
Landing choice sets up everything downstream. A drop with reliable loot density and a short path to the map's centre gives you both the equipment to take early fights and the option to rotate without crossing the whole map. Contested hot drops produce more eliminations per match but far more early deaths, which is a reasonable trade in the low ranks and a poor one above Diamond, where the placement channel you are gambling away is larger.
Which habits waste the most ranked matches?
Four recur constantly: queueing tired or on autopilot, splitting effort between the battle royale and squad-fight ladders, chasing the current meta weapon every patch, and playing on after a losing streak instead of stopping. All four reduce points per match rather than points per hour, which makes them hard to notice.
Autopilot sessions are the largest hidden cost. Ranked in Blood Strike rewards decisions — when to take a fight, when to rotate, when to disengage — and decision quality falls off well before mechanical skill does. A player three hours into a session is still aiming fine and choosing badly, which produces the frustrating pattern of losing matches without being able to point at a mistake.
Ladder-splitting is a bookkeeping problem. Because the two queues track separately and demand very different point totals, alternating between them means neither total accumulates at a meaningful rate. Committing to one queue for the season is close to free performance.
Meta-chasing is the weapon version of the same error. Every re-learned recoil pattern costs a stretch of matches at reduced accuracy, and the gain from a marginally stronger weapon is almost never larger than that cost. Change weapons when a patch forces you to, not when a video tells you to.
Tilt is the one with a real fix. Point losses accelerate at the top of the ladder, so a bad session at Diamond or above can undo a week, and the ladder does not care whether you were unlucky. Stopping after two or three consecutive poor matches is not a mental-health platitude; it is the single highest-return rule on this list in pure tier-point terms.
How many matches does reaching Legend really take?
Far fewer than the thousand-match figure players quote, if the points per match are high. Legend in battle royale is a large point accumulation, and the arithmetic is dominated by your average yield: a player banking several eliminations plus a strong finish moves several times faster than one finishing quietly, even at the same win rate.
The useful way to think about it is rate, not volume. Take your current rank, your current average placement and your current average eliminations, and the ladder becomes a straightforward division problem. Doubling your average eliminations per match roughly halves the number of matches to the next rank — and doubling your eliminations from one to two is a far smaller ask than playing five hundred more games.
That is also why the advice in this guide is ordered the way it is. Settings and loadout consistency raise the floor on your aim. Movement and fight selection raise the number of fights you win. Rotation and zone control protect the placement half of the score. Session discipline stops you from giving the points back. Each of those changes the rate, and the rate is what the ladder actually measures.
Finally, treat the season calendar as part of the plan. Because a reset places you relative to where you finished rather than at the bottom, the account that reaches a high rank once has a permanently cheaper route back to it. The expensive climb is the first one, and everything above is maintenance.
Where to Find Blood Strike Boosting and Hourly Services
On GameMarket.gg you can see how Blood Strike boosting orders are handled.
If you would rather have experienced players handle part of the climb while you keep your account, compare the current Blood Strike hourly services listings on GameMarket.gg or check what is available under Blood Strike rank boosting before your next season starts.
GameMarket.gg is a trusted digital marketplace for everything gaming-related. We serve the gaming community by providing secure access that enhances every gaming journey.