Lacrimosa Awakening Priority & Arcs: NTE Best Builds
By GameMarket Team 6 May 2026, 21:01 WIB
Embrace the chaos with Lacrimosa, the S-Rank Chaos DPS in Neverness to Everness (NTE)! Our May 2026 Lacrimosa build guide covers her best Arcs, optimal Diabolos console setup, and top team synergies with Mint, Nanally, and Sakiri. Master her Mimic Transformation to dominate the urban battlefield today.
🦇 Symphony of Chaos: The Ultimate Lacrimosa Build Guide for Neverness to Everness (NTE) 🍅
In the supernatural urban landscape of Neverness to Everness, few Espers command the battlefield with as much tactical versatility and sheer destructive force as Lacrimosa. As an S-Rank Chaos element main DPS from the Bureau of Anomaly Control's ETD-4 unit, Lacrimosa has quickly captured the attention of players worldwide.
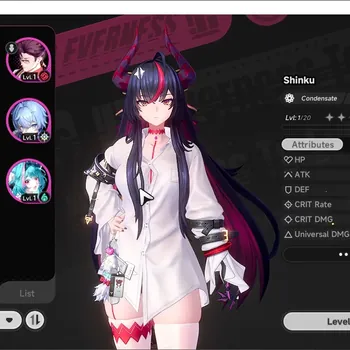
Instantly recognizable by her striking yin-yang hair, bright red coat, and cold demeanor, her combat style is as unique as her appearance. She thrives on stacking debilitating "Nightmare" debuffs, adapting to the flow of combat, and turning her enemies' strengths against them. This Lacrimosa build guide breaks down the optimal way to maximize her potential in the 2026 meta.
🧬 Core Mechanics and Skill Analysis
Lacrimosa’s playstyle requires a blend of fast-paced combo chains and strategic battlefield awareness. Her basic combat loop heavily relies on her Normal Attack sequence, mobility, and unique transformation abilities.
-
Normal & Charged Attack (Ranged Suppression): This sequence consists of five consecutive strikes. The first four strikes unleash fast-firing ranged pigment blasts with excellent splash damage. The fifth strike switches to a shoulder-mounted pigment cannon, delivering a high-damage blast with a notable knockback effect to create a safe operating distance.
-
Dodge & Mobility (Doll Fiend Form): A short press performs a standard evasive dash. Holding the dodge button transforms Lacrimosa into a levitating bat. This form boosts her movement speed and grants flight capabilities, allowing her to traverse complex terrains with ease (consumes stamina).
-
Core Skill (Absorb & Transform): Activating this draws small and medium enemies toward her. Once locked onto a non-BOSS target, she triggers her Mimic Transformation, copying the enemy's attack module. If cast without a target, it triggers a devastating ranged AOE pigment explosion.
🛡️ Optimal Weapons and Consoles Configuration
To maximize Lacrimosa’s continuous damage and Nightmare debuff scaling, Assessors must prioritize her Critical Damage, Attack, and Chaos DMG attributes.
Equipment Type Top Recommendation Strategic Benefit Best Arc (Weapon) The Last Rose Increases ATK by 20%, HP by 15%, and Chaos DMG by 12%. Restores 2 Energy per second after casting Ultimate and increases Nightmare damage by 25%. Alternative Arc Fluff of Fleetness Offers a robust Critical Damage boost and a strong Attack buff while she remains the active character. Console Set Diabolos (4-Piece) Epic (2) grants +10% Chaos DMG. Legendary (4) ignores 12% Chaos RES (doubles to 24% after Nova or Scorch reactions).Drive Block Priority: Critical Damage > ATK > Sink Strength > Energy Regeneration.
🎭 Awakening Priority Milestones
For those investing heavily in Lacrimosa's potential, her Awakening paths offer significant power spikes.
-
Level 3 Awakening (Highest Priority): When the 5th strike of her basic combo hits, all accumulated "Nightmare" effects are settled instantly for massive burst damage.
-
Level 1 Awakening: Increases the damage multiplier of the "Nightmare" debuff by a massive 50%.
-
Level 5 Awakening: Target maximum HP is reduced based on Nightmare damage, and stacks are no longer removed when the target receives healing.
-
Level 4 Awakening: Extends the duration of the "Nightmare" state to 6 seconds.
Note: For Star Soul progression, max out Nightmare Amplification, Mimic Enhancement, and Ultimate Skill Range.
👥 Top-Tier Team Compositions
Lacrimosa shines brightest in team compositions that group enemies together, allowing her to safely apply and detonate her Nightmare debuffs across multiple targets simultaneously.
-
The Chaos Burst Core (Lacrimosa + Mint + Nanally): Nanally provides crucial stun control and pulls enemies into a cluster. Mint utilizes high-speed AoE attacks to rapidly lower health pools. Lacrimosa finishes the survivors with massive AOE bursts.
-
The Execution Chain (Lacrimosa + Sakiri + Mint): Sakiri suppresses and controls the field. Mint applies rapid pressure. Lacrimosa capitalizes on her Level 3 Awakening to instantly detonate all applied Nightmare stacks for a lethal finishing blow.
-
The Survival Squad (Lacrimosa + Adler + Fadia): Adler functions as the ultimate shield tank. Fadia operates as a Sub-DPS and off-field healer. This highly forgiving setup ensures Lacrimosa can remain on the field almost indefinitely.
💎 Master the Urban Adventure
Lacrimosa anchors the early progression of the update, especially for players investing in new characters. Travelers aiming to accelerate ascension farming can explore trusted Neverness to Everness Accounts, optimize resin/stamina efficiency with expert Neverness to Everness Hourly Services, or secure consistent boss clears through reliable Neverness to Everness Boosting as farming rotations intensify.
GameMarket.gg is a trusted digital marketplace for everything gaming-related. We serve the gaming community by providing secure access that enhances every gaming journey.





![Neverness to Everness Accounts Global SEA|HL 49|TL 34|10 S-Class 4 Limited [HotoriA1,Zankou+Skin,Lacrimosa,Nanally]+Sign|4](https://img.gamemarket.gg/products/vo94qpnc/neverness-to-everness-accounts-global-sea-hl-49-tl-34-10-s-class-4-limited-hotor-usj-thumbnail.webp "Global SEA|HL 49|TL 34|10 S-Class 4 Limited [HotoriA1,Zankou+Skin,Lacrimosa,Nanally]+Sign|4 Glider|Male MC|Log Email|NTE1869")