Step-by-Step Operation Stronghold Guide
By GameMarket Team 26 March 2026, 16:20 WIB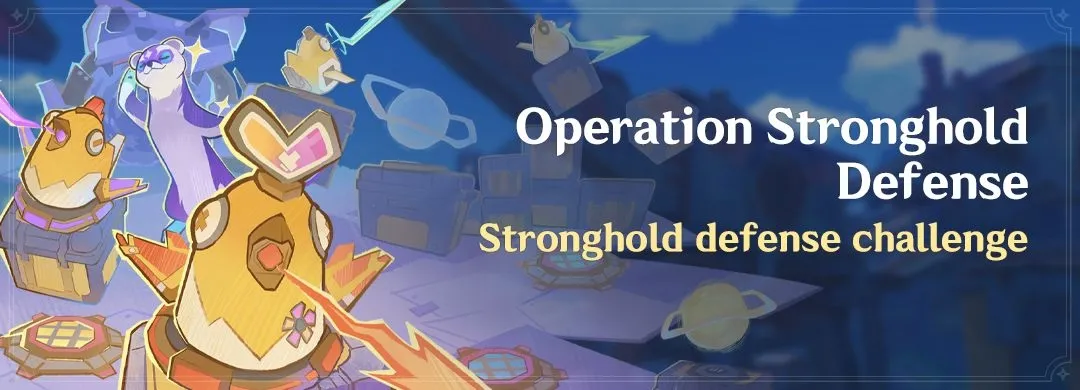
Master the Operation Stronghold Defense event in Genshin Impact Version 6.4! Our ultimate Guide breaks down every single wave, turret placement, and elemental trap upgrade to guarantee a flawless victory and maximum Primogem rewards.
Welcome back to the frontlines, Travelers! The highly anticipated tower defense game mode has returned to Teyvat in Version 6.4 Luna V. Running from March 23 to April 2, 2026, this massive tactical event requires Adventure Rank 20 and the completion of "Song of the Dragon and Freedom." To help you claim every single Primogem, Talent Book, and Hero's Wit available, we have crafted the most exhaustive Operation Stronghold Defense Event Guide imaginable. We are leaving no stone Unturned—down to the exact placement of every single mechanism.
⚙️ The Mechanics of War: Turrets, Traps, and Skills
Before diving into the stages, you must understand the exact tools at your disposal. During the Preparation Phase, you will spend Bolts (earned by defeating enemies) to place mechanisms. During the Challenge Phase, you will unleash devastating Support Skills. Crucially, your Support Skill cooldowns do not reset between waves, so resource management is the key to this Guide.
-
Energy Turrets: Your primary DPS. Place them on blocks and infuse them with Pyro, Electro, or Anemo. You can upgrade them for rapid-fire, AoE splash, or single-target artillery bursts.
-
Trap Mechanisms: Permanent floor panels that activate when stepped on. They can be upgraded to pull enemies inward, continuously lay mines, or periodically unleash elemental shockwaves.
-
Collection Mechanisms: Passive generators that boost Bolt or Energy income for kills within their radius. Their effects do not stack with overlapping fields.
-
Support Skills: You have access to six abilities replacing your normal kit. The Boom-Boom Fireball and Crackle-Crack Thunderstrike offer massive Pyro and Electro nukes. The Rumble-Rumble Rainstorm and Thump-Thump Earthwave deal Hydro/Geo damage while severely slowing enemies. Finally, the Whish-Whish Blizzard provides a global freeze, while the Whoosh-Whoosh Tornado deals sustained Anemo AoE.
🔥 Stage 1: First Battle! Support From a Warmhearted Weasel
This introductory stage is designed to teach you the devastating power of Vaporize and Melt reactions.
-
Wave 1: The tutorial forces you to place a Pyro Energy Turret and a Hydro Trap Mechanism next to each other. When the challenge begins, do not panic. Wait for the Hilichurls to group up heavily before using your Fireball or Thunderstrike to relieve the pressure. Always save at least one skill for the next wave.
-
Wave 2: Buy the Fire Intensity upgrade for your first Pyro Turret. This grants it rapid-fire capabilities, instantly vaporizing anything that touches the Hydro Trap. Place a second Pyro Turret on the exact same column to prepare for later.
-
Wave 3: Hasty Hydro Finches will blitz down the second lane. Immediately place a Cryo Trap and a third Pyro Turret on the right side to freeze them. Upgrade this new turret with Fire Intensity. When the multiple waves of Mitachurls and Finches spawn, wait for the second batch of Finches before dropping your Thunderstrike to clear the board.
-
Wave 4: The Eroding Avatar of Lava appears. This boss self-destructs when its Pyro gauge fills up. Simply max out your board with six total Pyro Turrets, ensuring every single one has the Fire Intensity upgrade. They will effortlessly melt the Avatar without you needing to press a single Support Skill.
❄️ Stage 2: Got 'Em! Mechanism Supplies
Multi-lane pathing and Bolt Collection mechanics are introduced here. Positioning is everything.
-
Wave 1: Two Bolt Collection Mechanisms are pre-deployed. Surround them with three Pyro Turrets strictly within their radius to rake in massive bonus Bolts. If a few enemies slip past the frontline, let them go—the setup ensures stragglers will die in the bottom-right corner, which is also covered by a Collection Mechanism.
-
Wave 2: Purchase a Cryo Trap and place it directly on the center corner, immediately upgrading it with the Pulling Mechanism. Buy a fourth Pyro Turret. The trap will suck Finches inward, freezing them while your turrets trigger continuous Melt reactions.
-
Wave 3: Healing Samachurls and an Eroding Avatar of Lava will rush you. Upgrade at least two or three of your Pyro Turrets with DMG Range to enable AoE splash damage. When the Samachurls step on the Cryo Trap, drop your Rumble-Rumble Rainstorm skill to perma-freeze them so they cannot heal the Avatar.
-
Wave 4: Cryo-shielded Abyss Mages enter the fray. Upgrade your Cryo Trap with the Fracturing Mechanism to violently shred enemy defenses. Purchase a Bolt Collection Increase buff and add a final Pyro Turret. Your frontloaded Pyro damage will completely block the Abyss Mages.
-
Wave 5: Upgrade all remaining inner turrets to DMG Range and change your Collection Mechanisms from Bolt to Energy generation. Save both of your Support Skills for the final boss.
-
Wave 6: The ultimate test against a massive Cryo Lawachurl. Upgrade your two innermost Pyro turrets with Target Analysis (massive RES shred) and Focused Attack (single-target burst). Ready your Boom-Boom Fireball to instantly crack the Lawachurl's Cryo shield when it spawns. Once the unshielded beast walks over your Cryo Trap, drop your Rainstorm to freeze it in place while your six splash-damage turrets obliterate it.
🌪️ Stage 3: Transformation? A Cunning New Trick
This complex three-lane map demands absolute mastery over Anemo Swirls and Electro-Pyro Overload mechanics to break heavy elemental shields.
-
Wave 1: Establish dominance in the middle lane by placing an Anemo Turret beside a Bolt Collection Mechanism. This Anemo Turret will aggressive swirl elements from surrounding traps, dealing enough AoE damage to handle the Hilichurls alone.
-
Wave 2: Geo-shielded Mitachurls and Slimes begin their march. Place an Electro Turret right next to a Pyro Turret, and upgrade the Pyro Turret with Fire Intensity. Add a Geo Trap to the upper-middle lane. This creates an endless Overload reaction loop that shatters Geo shields and violently knocks enemies backward.
-
Wave 3: The Tenebrous Mimiflora and its stubborn Ward Shield appears on the southern lane. Place a new Electro and Pyro Turret combo on the southern boxes, and upgrade your central Anemo Turret with Fire Intensity. Buy an Energy Collection Mechanism. The sheer volume of Swirl and Overload will break the Mimiflora's shield effortlessly.
-
Wave 4: It is time to max out. Ensure all Electro and Pyro Turrets have Fire Intensity. Most importantly, upgrade your Anemo Turret with Suppressing Fire. This makes your Anemo Turret your strongest AoE asset against the incoming Eroding Avatar of Lava.
-
Wave 5: The upper path becomes accessible. Place a Geo Trap there and upgrade it with both the Minelaying and Shackling mechanisms. Upgrade your older Geo Trap with Minelaying as well. Your Anemo setup will handle the middle, while the Shackling trap completely locks down the northern flank.
-
Wave 6: A terrifying Geo Lawachurl charges down the middle path. To counter this, place a brand new Geo Trap right next to your first one in the center lane, and upgrade both with the Shackling Mechanism. As the Lawachurl advances, these paired traps will stun it twice in a row. Your fully upgraded Overload turrets will easily chip away its massive Geo shield and health pool before it ever reaches your base.
Mastering Operation Stronghold Defense anchors the early progression of the update, especially for players investing in new characters. Travelers aiming to accelerate ascension farming can explore trusted Genshin Impact Accounts, optimize resin/stamina efficiency with expert Genshin Impact Hourly Services, or secure consistent boss clears through reliable Genshin Impact Boosting as farming rotations intensify.
GameMarket.gg is a trusted digital marketplace for everything gaming-related. We serve the gaming community by providing secure access that enhances every gaming journey.



![Genshin Impact Accounts Others ASIA|AR 42|2 Limited [Flins,Ineffa]+Mizuki,Mona|QA Liyue|Check SS|TakeMail(GI1391Z)](https://img.gamemarket.gg/products/ie5bprdb/genshin-impact-accounts-asia-ar-42-2-limited-flins-ineffa-mizuki-mona-qa-ysu-thumbnail.webp "ASIA|AR 42|2 Limited [Flins,Ineffa]+Mizuki,Mona|QA Liyue|Check SS|TakeMail(GI1391Z)")